# Welcome to Blockbrain!
Explore our comprehensive platform designed to enhance your AI experience. Whether you're building chatbots, integrating AI models, or managing data, Blockbrain provides the tools and insights you need to succeed. If you have any questions or feedback, our support team is here to assist you.
## About Knowledge Bots
Knowledge Bots are personalized AI assistants trained on your unique business context and company documents. Imagine having a super intelligent colleague with perfect memory who can retrieve and synthesize information from thousands of documents in seconds. \
Available 24/7, in any language.
About Knowledge Bots
## The Problem
Organizations often struggle with managing and accessing vast amounts of information efficiently. This can lead to wasted time, reduced productivity, and missed opportunities.
Customer Pain point the Knowledge Bots are addressing
## Our Solution
To address these challenges effectively, it's crucial to distinguish between our two \
Knowledge Bots: Retriever and Nexus. Each bot serves a unique purpose, ensuring that all aspects of knowledge management are covered comprehensively. \
This distinction allows specialized solutions that cater to different needs, enhancing overall efficiency and productivity without unnecessary complexity.
The Value Add of Knowledge Bots
**Knowledge Bot Retriever** \
The Retriever is a smart, real-time search engine that guides you through your company's knowledge base. It offers quick and accurate access to data, FAQs, and documents, just like an experienced expert colleague. Key features include:\
\
**1. Real-Time Search:** Instantly find the information you need. \
**2. Easy Navigation:** Navigate through complex data effortlessly. \
\
**Knowledge Bot Nexus** \
The Nexus goes beyond just retrieving information. It allows you to extract, create, and share new knowledge effortlessly. This bot is designed to optimize workflows and enhance collaboration. Key features include:\
\
**1. Automated Knowledge Extraction:** Extract valuable insights from your data. \
**2. Knowledge Creation:** Generate new content based on existing information. \
**3. Seamless Sharing:** Easily share knowledge across your organization.
#### **Create a Bot in Less Than 5 Minutes. No Coding Required.**
With our platform, you can create a Knowledge Bot in under five minutes without any coding skills. This enables you to quickly deploy AI solutions tailored to your specific needs, enhancing productivity and efficiency across your organization.
How to Create a Bot in Minutes
## About us
Blockbrain's founding team, with 50+ years of combined experience in enterprise software, AI, automation, and data security, includes the co-founder of Statista - [Mattias Protzmann](https://www.linkedin.com/in/mattias-protzmann-21aa1a14/) and the tech executive who led the automation and AI unit at Bosch - [Antonius Gress](https://www.linkedin.com/in/antoniusgress/).
The Blockbrain Co-Founder Team
#### Why Leading Businesses Choose Blockbrain
The Knowledge Bots enable businesses to have the proper knowledge for the right person at the right time, significantly increasing efficiency and decision-making quality.
Our customers have adopted our AI solutions to boost the productivity of their knowledge workers and staff across indirect process areas like Sales, Supply Chain, Machinery, Research, and Legal.
Unique Selling Points of the Knowledge Bots
Blockbrain is already helping numerous companies across Germany and Europe to gain an edge in the AI revolution. On top of being data secure & GDPR compliant, the pricing model is also much more suitable for medium-sized and large-sized enterprises than tools like ChatGPT or Microsoft by having usage-based pricing instead of paying $30+ for every user.
#### Who Can Benefit Most from Our Solution?
Blockbrain's solution is most suitable for "Mittelstand" companies with 50 to 5000 employees and annual revenues ranging from €5 million to €5 billion.
Nonetheless, our technology is also serving smaller firms, including law practices, startups, and educational or research institutions that are looking to leverage AI for growth and efficiency.
We welcome businesses of all sizes and from various fields who seek to enhance their knowledge management and operational efficiency by having faster access to information, better document processing, and no-code task automation for better decision-making.
## Quick Links
{% content-ref url="/pages/fYYp2KA35ODiUHKs59Sb" %}
[Book a Demo](/overview/book-a-demo)
{% endcontent-ref %}
# Book a Demo
Welcome to the Demo Booking Page!
### Personalized Demonstrations
Discover the full potential of our platform by scheduling a personalized demonstration. Whether you're new to our services or eager to explore advanced features, our demos are customized to suit your specific needs.
#### Why Book a Demo?
* **Tailored Experience**: Get a demonstration that focuses on the features and capabilities most relevant to you.
* **Expert Guidance**: Our team will walk you through the functionalities, answering any questions you may have.
* **Maximize Value**: Learn how to leverage our platform to its fullest potential, ensuring you get the most out of your investment.
#### How to Book
Simply select a convenient time, and we'll handle the rest. Our team is ready to provide you with a comprehensive overview, helping you make the most informed decisions.
{% embed url="" %}
Knowledge Bots Demo Calendly Link
{% endembed %}
# Working with Knowledgebots
## What is an AI Chatbot?
An AI chatbot is a program that uses artificial intelligence (AI) to conduct human-like conversations. It can answer questions, perform tasks, and provide information. These chatbots leverage natural language processing (NLP) to understand and respond to user inputs in a coherent and contextually appropriate manner. They are commonly used in customer service, virtual assistants, and various online platforms to enhance user interaction and automate routine tasks.
## How does an AI Chatbot work?
**1. Input**
The user enters a question or instruction (prompt).
**2. Processing**
* The chatbot analyzes and understands the input.
* The chatbot identifies the intent of the input.
* The chatbot extracts relevant entities from the input.
**3. Response Generation**
Based on the recognized intent and extracted entities, the chatbot generates an appropriate response or performs an action.
**4. Output**
The chatbot returns the response to the user.
## From AI Chatbot to Knowledgebot
Our Knowledge Bots are based on conventional AI chatbots. However, they can respond much more effectively through linked knowledge. By understanding context and selected information, answers become more personalized, smarter, avoid hallucinations, and are more tailored. Custom-created database sources (multimodal) and insights (knowledge extractions, notes, or messages resulting from AI processing of your company's data) can be linked to transform an AI chatbot into a Knowledge Bot.
Blockbrains Ethical AI
* **Integrate your own Data:** Utilize powerful Large Language Models (LLMs) linked to your specific data to receive tailored and contextual responses. In a Knowledgebot, your information can be either connected via:
* **Database sources** (long-term memory) consisting of uploaded documents, imported websites, previously generated Bot-Insights
* **Files** (short-term memory) ingested directly into the chatroom
* **Email**
* **Web search:** Gain access to current information from the web to constantly expand and update your knowledge base.
* **Dynamic knowledge development:** Feed the output back into your database sources to continuously generate and integrate new knowledge.
* **Prompts:** Deploy specialized **prompts** to automate recurring tasks and efficiently design complex assignments. These prompts can be linked to various data sources to extract and process relevant information.
* **Workflows:** In a workflow designed as a sequence of prompts, each prompt performs a specific task in a predefined order, with its output serving as the input for the next prompt. This setup ensures a streamlined process where tasks are completed efficiently and dependencies are managed effectively.
# Glossary
This resource is designed to help you understand the world of AI, chatbots, and large language models. It provides clear explanations of key terms and concepts used in these fields.
### 1. Aritificial Intelligence
**Artificial Intelligence (AI)** refers to the simulation of human intelligence processes by machines, especially computer systems. These processes include learning (the acquisition of information and rules for using the information), reasoning (using rules to reach approximate or definite conclusions), and self-correction. AI is used in various applications, including expert systems, natural language processing, speech recognition, and machine vision.
### 2. Large Language Models (LLM)
LLMs are advanced AI systems designed to understand and generate human-like text based on vast amounts of data. \
*Blockbrain* is a model-agnostic AI tool, ensuring we always offer the best AI models available within a GDPR-compliant environment in the EU, irrespective of the model provider. You can select from the leading models by OpenAI, Anthropic, Meta, Mistral, etc.
Training a Large Language Model (LLM) involves using large datasets to teach the model the probabilities of words occurring together. During this phase, the model learns to predict the next word in a sequence by understanding semantic connections between words. Once the training is complete, the model cannot learn new information, and this is known as the "knowledge cutoff date"—the point up to which the model has been trained.
### 3. Chatbot
A chatbot is a program that uses artificial intelligence (AI) to conduct human-like conversations. It can answer questions, perform tasks, and provide information. These chatbots leverage natural language processing (NLP) to understand and respond to user inputs in a coherent and contextually appropriate manner. They are commonly used in customer service, virtual assistants, and various online platforms to enhance user interaction and automate routine tasks.
### **4. Natural Language Processing (NLP)**
NLP is the technology that enables chatbots to understand and process human language. It helps the chatbot recognize the meaning behind your words, allowing it to respond accurately and contextually. NLP involves various techniques such as tokenization, sentiment analysis, and entity recognition, which collectively enhance the chatbot's ability to interpret and generate human-like responses.
### **5. Machine Learning**
Machine Learning is a method by which computers learn from data and improve their performance without being explicitly programmed. Chatbots utilize this technique to enhance their responses based on previous interactions. This involves algorithms that identify patterns and make predictions, allowing chatbots to become more accurate and efficient over time. By continuously analyzing user inputs and feedback, machine learning enables chatbots to adapt and provide more relevant and personalized responses.
### **6. Intent und Entity**
* **Intent:** The purpose or goal behind a user input. Intents represent what the user wants to achieve or inquire about. For example, in the query "What is the weather?", the intent is to obtain a weather forecast. Identifying the intent helps the chatbot understand the user's request and provide a relevant response.
* **Entity:** Specific pieces of information extracted from a user input that provide context and details necessary to fulfill the intent. Entities are often nouns or proper nouns that give additional information about the user's request. For instance, in the query "What is the weather in Berlin?", "Berlin" is the entity. Recognizing entities allows the chatbot to tailor its response more precisely to the user's needs.
### 7. Hallucination
In the context of Large Language Models (LLMs), hallucination refers to the generation of information or responses that are not based on the input data or reality. This occurs when the model predicts text that seems plausible but is not factually accurate or relevant to the given context. Hallucinations can lead to misleading or incorrect outputs, highlighting the importance of verifying AI-generated content for accuracy and reliability.
### 8. Tokenization
**Definition:** Tokenization is the process of breaking down a string of text into smaller units called tokens. These tokens can be words, phrases, or even characters, depending on the level of granularity required.
**Purpose in Chatbots:**
1. **Text Processing:** Tokenization is a fundamental step in natural language processing (NLP) that allows chatbots to understand and analyze user inputs.
2. **Context Understanding:** By breaking down sentences into tokens, chatbots can better understand the context and meaning of each word or phrase.
3. **Feature Extraction:** Tokens serve as features that chatbots use to identify intents and entities within a conversation.
**Example:**
* Input: "What's the weather in Berlin?"
* Tokens: \["What", "'s", "the", "weather", "in", "Berlin", "?"]
**Benefits:**
* **Improved Accuracy:** Helps in accurately interpreting user queries by focusing on individual components.
* **Enhanced Performance:** Facilitates more efficient processing and response generation
### 9. Context Window
The context window refers to the maximum amount of text that a language model can process in a single message it receives. It includes the user's prompt, previous chat history, attached documents, and any assistant instructions. This window determines how much information the model can consider when generating a response, ensuring that it can provide relevant and coherent answers based on the given context.
### 10. Sentiment Analysis
Sentiment Analysis is a technique used in natural language processing (NLP) to determine the emotional tone behind a body of text. It involves analyzing text data to identify and categorize opinions expressed as positive, negative, or neutral. This process helps in understanding the sentiment of the user, which can be crucial for applications like customer feedback analysis, social media monitoring, and enhancing user interactions in chatbots.
### 11. Prompting
Prompting refers to the method of providing input or instructions to a language model to elicit a desired response. It involves crafting specific queries or statements that guide the model in generating relevant and accurate outputs. Effective prompting is crucial for maximizing the utility of AI models, as it helps in obtaining precise and contextually appropriate responses.
### 12. AI Prompts
An AI Prompt is a software entity designed to autonomously perform tasks, often repetitive, by following predefined rules or learned patterns. These prompt can process information, make decisions, and execute actions, making them ideal for automating routine tasks and enhancing efficiency in various applications, such as virtual assistants and automated customer service.
### 13. Workflows
A workflow is a series of tasks organized to achieve a specific goal, often involving automated systems or prompt performing tasks in sequence. Each prompt's output becomes the input for the next, ensuring efficiency and consistency. This setup automates repetitive tasks, manages dependencies, and allows for scalable operations.
### 14. Chunk Size
This parameter determines the amount of text, in characters, that the Al processes in a single chunk from the documents uploaded. A smaller chunk size focuses the Al's analysis on a more narrow segment of text, leading to more precise and directly relevant re-sponses. Conversely, a larger chunk size allows the Al to consider a broader range of informa-tion, potentially capturing more context but also possibly diluting the precision of insights with less directly relevant information.
Recommended Usage: For inquiries that demand high precision and direct answers, opt for smaller sizes (e.g., 1000-2000 characters). For questions that benefit from a wider exploration of the text or when the context is crucial for un-derstanding, larger sizes (e.g., 3000-4000 char-acters) may be more effective. It's essential to balance the need for detailed information against the risk of including too much peripheral content.
### 15. Chunk Overlap
This parameter controls the amount of text, in characters, that overlaps between consecutive chunks. An increased overlap ensures better continuity and context retention across chunks, improving the cohesiveness of insights generated by the Al. A lower overlap may result in more disjointed analysis but can increase processing efficiency by reducing re-dundancy.
Recommended Usage: Smaller overlap values (e.g., 100-200 characters) are typically sufficient for general queries and help to maintain processing speed. For complex analyses where context is critical (especially in nuanced or technical documents) higher overlap values (e.g. 300-500 characters) may provide more accurate and contextually rich responses. Adjust this setting based on the need for context continuity versus processing speed.
Important: Chunk Size should be greater than Chunk Overlap
### 16. Smart Table Processing
Enable this to automatically detect and convert tables in uploaded PDFs into a structured text format that is readable for LLMs. Note: This will incur additional costs and processing time.
### 17. Smart Image Processing
Enable this to automatically detect and convert images in uploaded PDFs into a structured text format that is readable for LLMs. Note: This will incur additional costs and processing time.
### 18. Image Extraction
Enable this feature to extract images from uploaded PDFs. This will allow the bot to retrieve and display the images, enhancing the responses.
### **19. Search Method - Index Search**
* Definition: Traditional full-text search that provides precise matching for straightforward queries.
* How it works:
* Creates an index of all words in a document or database source
* Searches for exact word matches
* Advantages:
* Fast and efficient for simple search queries
* Very precise when searching for specific terms or phrases
* Disadvantages:
* May miss synonyms or related concepts
* Less effective for complex or ambiguous queries
### **20. Search Method - AI Search**
* Definition: A semantic search capability that understands context and meaning beyond exact word matches.
* How it works:
* Utilizes artificial intelligence and machine learning
* Analyzes the context and intent behind a search query
* Considers synonyms, related concepts, and nuances
* Advantages:
* Particularly effective for complex and nuanced queries
* Can better understand and interpret user intent
* Often delivers more relevant results for unclear search queries
* Disadvantages:
* May be less precise for very specific or technical searches
* Requires more computational power and can be slower than Index Search
### **21. Search Method - Hybrid Search**
* Definition: A sophisticated combination of full-text and semantic search, offering the best of both worlds.
* How it works:
* Combines the precision of index search with the contextual understanding of AI search
* Uses algorithms to decide which search method is best suited for a particular query
* Advantages:
* Provides a balanced mix of precise matching and contextual understanding
* Ideal for diverse use cases and different types of search queries
* Can deliver good results for both simple and complex searches
* Application areas:
* E-commerce platforms
* Digital libraries and archival services
* Enterprise search systems with diverse content
# Company GPT
In this use case, the LLM is integrated into the corporate environment as a simple chatbot. Employees can use the chatbot to complete everyday tasks more efficiently and quickly access information.
### Features and Benefits
* **Rapid Information Retrieval:**
* **Real-time Answers:** Employees can ask questions about company policies, project details, or general information and receive immediate answers.
* **Data Access:** The chatbot can access internal database sources and provide relevant information.
* **Automation of Routine Tasks:**
* **Scheduling:** The chatbot can plan meetings and manage calendars.
* **Email Drafting:** Assistance in composing and sending emails.
* **Report Generation:** Automated creation and distribution of reports.
* **Knowledge Management:**
* **Central Knowledge Repository:** The chatbot serves as a central repository for company knowledge and facilitates access to documentation and manuals.
* **Continuous Learning:** The chatbot continuously learns from interactions and improves its responses.
* **Personalized Support:**
* **Individual Recommendations:** Offers personalized suggestions based on employees' work patterns and preferences.
* **Decision Support:** Assists in decision-making through data-driven insights.
* **Seamless Integration:**
* **Compatibility:** The chatbot integrates seamlessly with existing corporate software and systems.
* **Customizability:** Adaptable to specific business processes and requirements.
* **User-Friendliness:**
* **Intuitive User Interface:** Easy to use, no technical expertise required.
* **Multiple Communication Channels:** Supports various channels such as email, chat, and mobile apps.
# Sales Automation
Complete the entire sales process from the first meeting to the customized follow-up email with Nexus in just a few minutes.
1. **Record meeting notes**: Capture your meeting notes, customer interests, or ideas using the Blockbrain Mobile App.\
**Transform raw notes**: Instantly convert unstructured notes into structured meeting summaries and sales reports.
2. **Extract information from images**: Use image recognition to capture and process data from business cards or other documents.
3. **Automate customer research**: Automatically search and analyze customer websites to create comprehensive customer overviews.
4. **Identify synergies and opportunities**: Use Nexus to find potential synergies and opportunities based on your product offerings.
5. **Create personalized follow-up emails**: Generate tailored follow-up emails that include all relevant information from the sales process.
6. **Organize and share results**: Keep all original inputs and generated documents neatly organized and easily shareable with your team.
With Nexus, your sales team can streamline their workflows, save valuable time, and focus on closing deals.
# Employee Support
1. **Upload documentation**: Upload all relevant user manuals, documentation, and customer support tickets to a central knowledge base.
2. **Instant access to internal information**: Provide your colleagues and users with immediate access to internal information, ensuring they always have the necessary data at their fingertips.
3. **Retrieve step-by-step guides**: Effortlessly access detailed step-by-step instructions with relevant images or screenshots from hundreds of files.
4. **Reduce onboarding time**: Shorten the onboarding time of new team members by 50% by providing them with quick access to all necessary documentation and training materials.
5. **Efficiently resolve inquiries**: Resolve 80% of questions without employees needing to escalate or ask colleagues for help, increasing productivity and reducing interruptions.
6. **Organize information**: Keep all documents neatly organized and easily searchable, allowing users to quickly find what they need.
With the Knowledge Bot Retriever, your company can optimize information access, improve onboarding processes, and increase overall efficiency.
# Hotline Helper
Our Knowledge Bots offer an innovative way to optimize customer support. By integrating AI chatbots on your website, customers can quickly and easily receive answers to frequently asked questions.
### Features and Benefits
* **Instant Responses:**
* **Real-time interaction:** Customers receive immediate answers to their questions without waiting for a human response.
* **24/7 availability:** The chatbot is available around the clock to handle customer inquiries.
* **Automation of Frequently Asked Questions (FAQs):**
* **FAQ database source:** The chatbot accesses an extensive database source of frequently asked questions and answers.
* **Self-help:** Customers can independently find solutions to their problems, reducing dependence on human support.
* **Personalized Support:**
* **Individual answers:** The chatbot can provide personalized responses based on specific inquiries and customer profiles.
* **Escalation to human support:** For more complex inquiries, the chatbot can forward the request to a human employee.
* **Increased Efficiency:**
* **Relief for the support team:** By automating routine inquiries, your support team can focus on more complex issues.
* **Cost efficiency:** Reduces support costs through less need for human assistance.
* **Seamless Integration:**
* **Easy implementation:** The chatbot integrates seamlessly into your existing website and CRM systems.
* **Customizability:** Adaptable to the specific needs and requirements of your company.
* **User-Friendliness:**
* **Intuitive user interface:** Easy to use for both customers and your support staff.
* **Multiple communication channels:** Supports various channels such as web chat, email, and mobile apps.
# Risk & Compliance Management
Improve your compliance and risk management processes by leveraging the combined strengths of Retriever and Nexus.
1. **Generate reliable answers**: Ensure accuracy and reliability with answers generated without LLM (AI) hallucinations.
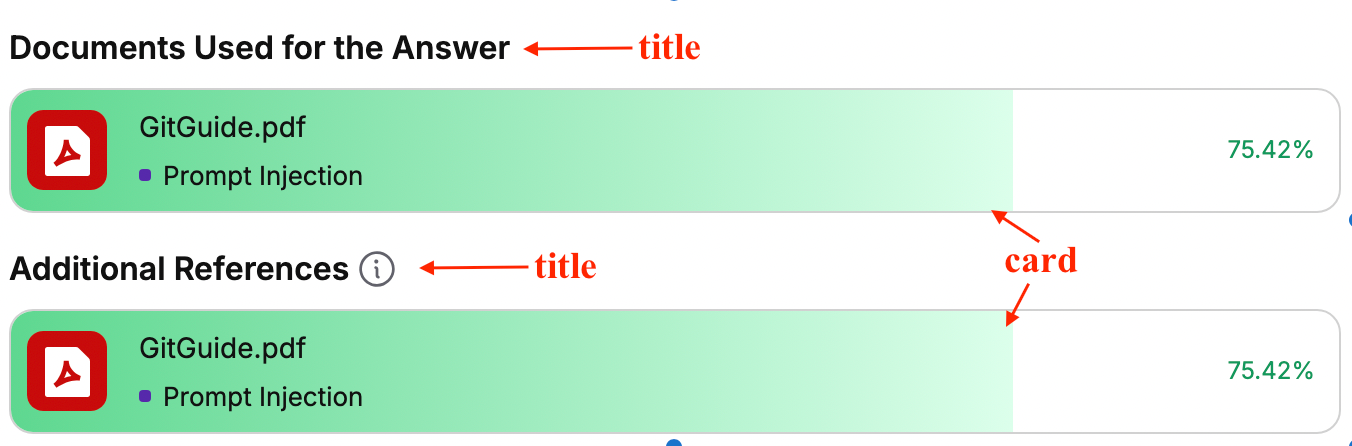
2. **Transparent source tracking**: Clearly see how each answer was formulated, with transparent source tracking and references.
3. **Rapid information retrieval**: Retrieve and synthesize information from thousands of documents in just seconds.
4. **Gain comprehensive insights**: Extract valuable insights from legal documents, contracts, and essential fine print.
5. **Automate document processing**: Use Nexus to automate the extraction and synthesis of information to create comprehensive compliance reports and risk assessments.
6. **Proactive risk identification**: Use Retriever to proactively flag potential risks or company-related obligations in documents.
7. **Efficient workflow integration**: Seamlessly integrate into your existing legal and compliance workflows to ensure smooth and efficient operations.
8. **Collaborative review**: Enable teams to collaborate on document review and compliance checks to ensure thorough and accurate assessments.
9. **Continuous updates**: Keep your compliance and risk management processes up-to-date with continuous monitoring and updates from both Retriever and Nexus.
By combining the strengths of Retriever and Nexus, your company can automate and optimize legal compliance and risk management to ensure accuracy, efficiency, and comprehensive oversight.
# Machinery
### Features and Benefits
* **Automated Documentation:**
* **Capture and Storage:** The Knowledge Bot automatically captures machine data and stores it in a structured format.
* **Updates:** Continuous updating of documentation based on new data and user interactions.
* **Rapid Information Retrieval:**
* **Real-time Answers:** Employees can ask questions about machine documentation and receive immediate answers.
* **Data Access:** The chatbot can access internal database sources and provide relevant information.
* **Troubleshooting and Maintenance:**
* **Diagnosis:** The chatbot can diagnose problems based on user inputs and offer solution suggestions.
* **Maintenance Instructions:** Provides step-by-step guides for maintenance work, including images and videos.
* **Enhanced Collaboration:**
* **Comment Function:** Employees can leave comments and annotations directly in the documentation.
* **Version Control:** Tracks changes and versions of documentation to ensure traceability.
* **Personalized Support:**
* **Individual Recommendations:** Offers personalized suggestions based on employees' specific machines and work patterns.
* **Decision Support:** Assists in decision-making through data-driven insights.
* **Seamless Integration:**
* **Compatibility:** The tool integrates seamlessly with existing document management systems.
* **Customizability:** Adaptable to specific company requirements and processes.
* **User-Friendliness:**
* **Intuitive User Interface:** Easy to use, no technical expertise required.
* **Multiple Communication Channels:** Supports various channels such as email, chat, and mobile apps.
* **Access Controls:**
* **Custom Access Rights:** Ensure that only authorized employees can access certain information.
# Tender Analysis
Blockbrain offers an innovative way to optimize the analysis of requirement specifications. By integrating Knowledge Bots, customers can extract precise information from extensive texts, thereby increasing their efficiency.
### Features and Benefits
* **Automated Text Analysis:**
* **Requirement Detection:** The Knowledge Bot can automatically extract requirements and specifications from the requirements document.
* **Categorization:** The extracted information is categorized and structured to increase clarity.
* **Rapid Information Retrieval:**
* **Real-time Answers:** Customers can ask questions about specific requirements or specifications and receive immediate answers.
* **Data Access:** The chatbot can access internal database sources and provide relevant information.
* **Identification of Gaps and Inconsistencies:**
* **Gap Analysis:** The Knowledge Bot identifies missing information or unclear requirements.
* **Consistency Check:** Checks the document for contradictory statements and highlights them.
* **Creation of Summaries:**
* **Brief Overviews:** The chatbot generates concise summaries of the key points in the requirements document.
* **Reports:** Automated reports that summarize and visualize the analysis results.
* **Seamless Integration:**
* **Compatibility:** The tool integrates seamlessly with existing document management systems and project management software.
* **Customizability:** Adaptable to specific company requirements and processes.
* **User-Friendliness:**
* **Intuitive User Interface:** Easy to use, no technical expertise required.
* **Multiple Communication Channels:** Supports various channels such as email, chat, and mobile apps.
\
In this use case, a Knowledge Bot is used to analyze requirements specifications. For this purpose, a workflow was created in advance and the requirements specification was loaded into the database source.
In this use case, the customer has requested a requirements specification. Through this Knowledge Bot, where a workflow, a database source, and a file were linked in advance, an individualized requirements specification can be created within seconds.
# More Use Cases
From simplifying administrative tasks to providing specialized support for various areas - these use cases demonstrate the flexibility and utility of a Knowledge Bot. Each example illustrates the bot's role, the knowledge base it draws from, and the specific ways it helps in executing tasks or solving problems.
| Knowledge Bot | Knowledge Base | Application Case |
| ------------------------ | -------------------------------------------------------------------------------------- | ----------------------------------------------------------- |
| Administrative Assistant | Employee handbooks, company processes | Optimization of internal administrative and HR tasks |
| IT Support | Troubleshooting guides, software tutorials, FAQs | Support for frequent IT and technical issues |
| Machine Handbook | Handbooks for machines and equipment, safety protocols | Provides step-by-step instructions for operating machines |
| Legal Contract Analyst | Contracts, requirements, terms, legal guidelines | Analysis, summarization and comparison of legal documents |
| Marketing Content Bot | Branding guidelines, style guides, previous content | Support in creating marketing materials |
| Onboarding Assistant | Onboarding materials, HR documents, company policies | Facilitation of onboarding processes for new employees |
| Customer Support | Documentation for customer support, established procedures, frequently asked questions | Provision of immediate answers to common customer inquiries |
| Research Analyst | Reports, market studies, news articles, contextual conditions | Compilation and summarization of relevant research findings |
| Sales Assistant | Product catalogs, sales training, customer personas | Provision of product information and sales tips |
| Hotel-Housekeeping-Bot | Cleaning protocols, employee plans, training documents | Training and coordination of housekeeping tasks |
Here are some examples of how the interaction with the bot could look like in practice:
Example: Admin Assistant
Example: IT Support
Example: Customer Support
Example: Research Analyst
Example: Hotel Housekeeping
# Account Setup
This guide walks you through the steps to quickly set up your account. Depending on your organization, you will either login directly via your company email or register manually.
## Azure Login
If your company has linked our system with Azure, you can login directly using your Microsoft Azure company account. No extra steps needed.
Login with Microsoft Azure Company Account
## Activate Account
You'll receive an email with an activation link and initialization code to finish your account setup.
Please ensure the authenticity of the email by verifying it originates from **.
Account Activation Email
**Received an Invitation?** If you've been invited by your organization's administrator, you'll receive a unique domain URL (e.g., `Company.kb.theblockbrain.ai`) along with your invitation. Use this URL to access the platform directly.
## Language Settings
You can display the Knowledge-Bots Platform interface in either German or English.
To change the language:
1. Click on the **Profile tab** in the navigation
2. Select your preferred option under "Language":
* German
* English
3. The change takes effect immediately
# Prompt Writing Guide
Learn how to ask your Knowledgebot the right way—so it understands your questions and gives you the best answers using your company’s information.
## What is a Prompt?
Prompting is how you “talk” to the Knowledge Bot. Think of it like giving instructions to a smart assistant. The key principle: **the more specific and clear you are, the better it performs**.
{% embed url="" %}
How to Prompt by Victoria Rachmetow
{% endembed %}
## Basic Prompting
Most day-to-day prompts are simple. But when prompting as part of an **organization using Blockbrain with a shared database**, you’ll want to follow some core principles to ensure results stay accurate and reliable.
* **Be clear and specific**: Ensure that the question is specific enough in order to get more accurate answers
* **Use the same keywords**: Match the terminology used in your documents (e.g. “Annual Report 2023” not “last year’s file”)
* **Add context**: Make it easy for the bot and provide enough context like you are onboarding a new employee.
* **Confirm the data exists**: Make sure the bot is connected to the relevant files, emails, or database sources that contain the information.
* **Make it easy for the bot**: Break down complex questions, avoid vague pronouns (“this,” “that”), and point it to the right sources.
### Elements of a Basic Prompt
1. **Context**. Tell the bot *what it should refer to* or *why you’re asking*. You can give context in different ways:
* **Reference a file or data source**
* *Example: “Based on the 2023 Sales Report in the Marketing Folder…”*
* **Explain the purpose of your question**
* *Example:* “I need this for a client presentation, so keep the tone professional.”
* **Give all relevant information**
* *Example: “This error came up when I tried to upload the CSV. The message said: ‘Invalid format in row 14.’”*
2. **Question or Task**. Be clear and specific about what you want the bot to do.
* **Ask a direct question**
* *Example: “…what are the top-performing campaigns by ROI?”*
* **Give a specific instruction**
* *Example: “…summarize the differences between File A and File B into a short report.”*
3. **Limits** (optional)**.** Set boundaries or define what not to include to keep results focused.
* *Example:* “Only include data from 2023.”, “Keep the summary under 100 words.”, “Do not include personal opinions or recommendations.”
**Examples**
| ***Sample Prompt*** | ***Context Needed*** | ***Question*** |
| ----------------------------------------------------------------------------------------------------------------------------------------------------------------------------- | ------------------------------------------------------------------------------------------------------------- | ------------------------------------------------------------------------------ |
| Based on the 2023 Sales Report in the “Marketing Folder,” what were our top 3 performing campaigns by ROI? | Based on the 2023 Sales Report in the “Marketing Folder,”... | ...what were our top 3 performing campaigns by ROI? |
| Based the files "File Name A" and "File Name B", can you make a comparison between the two and summarize it into a document? | Based the files "File Name A" and "File Name B",... | ...can you make a comparison between the two and summarize it into a document? |
| Please turn the campaign results in the dashboard into a one-pager I can show to our sales director. Ensure that the pitch is optimized to what a sales director cares about. | ...I can show to our sales director. Ensure that the pitch is optimized to what a sales director cares about. | Please turn the campaign results in the dashboard into a one-pager... |
| Here’s the system log + the error message I got. Can you explain what might be wrong in plain language? | Here’s the system log + the error message I got... | ... Can you explain what might be wrong in plain language? |
| What are all my benefits as a senior employee under the Marketing department? | ... as a senior employee under the Marketing department? | What are all my benefits... |
***
## Prompting Techniques
Now that we have covered the basics of prompting, it is time to dive into advanced techniques that will refine your ability to craft precise and powerful prompts, unlocking new possibilities and deeper interactions with LLMs.
### Zero-shot Prompting
As these models have been trained on a large amount of data, their internal knowledge makes them capable of performing a large number of tasks without examples or precise demonstrations.
We can imagine zero-shot prompting as someone asking a guitar player to play the piano, even though they never played the piano before. They would apply their previous knowledge about music and instruments to play the piano.
Most prompts we use are, by default, zero-shot prompts.
**An example could be:**
*Prompt:* `Classify the text into the categories of satisfied, neutral or unsatisfied.` `Text: I was happy with the customer support today.`
*Output:* `Satisfied`
The model is able to process the input and generate an adequate output because of its previous training. We recommend using zero-shot prompting for general and high-level tasks like classification, translation, and answering questions with general knowledge.
{% hint style="info" %}
Use few-shot prompting as soon as you want to work on nuanced or complex tasks and desire a specific outcome format.
{% endhint %}
***
### Few-shot Prompting
Few-shot prompting means providing demonstrations of how to perform a task being asked for. So, in addition to the broad, general knowledge the AI model has, the few shots are specific examples that steer the model to perform a task in a more qualitative manner.
If we continue with the example of the guitar player being asked to play the piano for the first time, few-shot prompting would be a mini-lesson before getting started.
**An example of few-shot prompting is:** *Prompt:* `I was happy with the customer support today - satisfied` `The product is horrible! - very unsatisfied` `This is one of the best products I have ever used - very satisfied` `This is such a great product! -`
*Output:* `Very Satisfied`
The previous examples help define the format of the desired output. Also, they provide more context, which helps to give more adequate responses.
Few-shot prompting helps with more complex or nuanced tasks. Providing 3-4 examples of the task you want the model to perform or the answer format you expect helps to get the right answer in the right format.
{% hint style="info" %}
With more complex reasoning tasks, this few-shot approach might reach its limitations. For that, we recommend adding chain-of-thought principles to the prompting.
{% endhint %}
***
### Chain-of-Thought Prompting
While LLMs are generally capable of performing reasoning tasks, they are probabilistic models that rely on their internal training data. If the problem you want to solve is particularly complex or unfamiliar to the model, it might produce an incorrect result. However, you can enhance the model’s reasoning by instructing it to “think step by step”.
Encouraging step-by-step thinking can significantly enhance the quality of outputs from LLMs, especially when they need to perform analyses or tackle complex tasks.
#### How to Encourage Thoroughness
Here are three effective tactics to guide an LLM toward deeper reasoning:
1. **Use Explicit Instructions:** The simplest method is to include the phrase “Think step by step” at the end of your prompt. This direct instruction guides LLMs to break down the problem into manageable steps.
2. **Provide a Logical Framework:** After describing the task and providing necessary sources, outline how you would logically solve the problem. This helps LLMs follow a structured approach. **Example:**\
*Prompt without instructions:* `Analyze the impact of climate change on polar bear populations.`\
*Prompt with instructions:* `Analyze the impact of climate change on polar bear populations. Here is a logical framework to follow:`\
`Describe the current state of polar bear populations.`\
`Identify the key factors of climate change affecting their habitat.`\
`Explain the direct and indirect impacts on polar bears.`\
`Summarize the overall impact and potential future scenarios.`
{% hint style="info" %}
Some LLMs may need a little nudging to think more thoroughly, especially when they aren’t built more for efficiency and less reasoning.
{% endhint %}
***
## Complex Prompting
Once you begin writing more complex prompts such as Few-shot Prompting and Chain-of-Thought Prompting, it is important to remain clear and specific, while still being easily digestible for the LLM. This avoids inaccuracy and poor quality responses, which is usually due to an unoptimized prompt. Below are some tips and tricks when writing complex prompts.
### Chain Prompt
Divide complex tasks into smaller, manageable steps for better results. If you write 3-4 tasks in one prompt without any structure, LLMs might overlook one or more tasks or fail to execute them well. This is connected to the concept of Chain-of-Thought prompting.
By breaking down the tasks, you provide a clear structure that guides LLMs through each step, ensuring comprehensive and high-quality outcomes.
#### Breaking Down in a Single Prompt
You can ask the AI model to break down a task and follow the instructions step by step.
*Example:* `Search the attached documents for information about office guidelines in our Berlin office.` `Then, list relevant items as bullet points and sort them by importance.` `Afterwards, write a piece of concise information to post on our company's Slack channel to remind everyone about the 10 most important things to remember.`
#### Breaking Down Across Several Prompts
If a complex instruction does not work by dividing it into several steps in one prompt, try to divide this instruction into several prompts.
**Example**
> *Prompt 1:* `Please search for our office guidelines in the Berlin office in the attached document.`
*Response:* `…`
> *Prompt 2:* `Sort the guidelines by importance. Explain your reasoning.`
*Response:* `…`
> *Prompt 3:* `Write a Slack Post explaining the 10 most important guidelines.`
*Response:* `…`
#### Why Breakdown Matters
The more **causal links** an LLM must process at once, the higher the risk of errors. Breaking tasks into smaller parts increases precision and reliability.
**Examples of Causality Levels**
**1. Single Causality**
* Task: "Get the towel"
* Result: Very precise and consistent
**2. Double Causality**
* Task: "Get the towel and put it in the washing machine"
* Result: Less consistent, more variations
**3. Triple Causality**
* Task: "Get the towel, put it in the washing machine, then in the dryer"
* Result: Significantly more deviations and inconsistencies
***
### Structure Your Prompts
For efficient processing and clear communication with the LLM, structure your prompts using **delimiters** or **XML tags**. These can serve as headers or dividers, allowing you to reference specific sections more easily in follow-up prompts.
#### **Simple Delimiters**
Simple delimiters help structure your prompts and responses for greater clarity.
Examples of simple delimiters include:
* Single quotes: `“TEXT”`
* Triple quotes: `“”” TEXT ”””`
* Triple dashes: `--- TEXT ---`
* Angle brackets: `< TEXT >`
*Prompt with angle brackets:* `Summarize the text delimited by angle brackets into a single sentence.` `< TEXT >`
#### **XML Tags**
For more advanced structuring and complex prompts, you can incorporate XML tags. XML (eXtensible Markup Language) tags are used to define the structure and content of data.
**Structure of the Tag**
* Opening Tag: Marks the beginning of an element, enclosed in angle brackets (e.g., ``).
* Closing Tag: Marks the end of an element, similar to the opening tag but includes a forward slash (e.g., ``).
* Content: The data or text contained within the opening and closing tags (e.g., in `John Doe`, *John Doe* is the content).
**Nesting tags**
* You can nest tags for hierarchical content.
*Prompt with XML tags:*
```
```
#### **When to use delimiters and when to use XML tags?**
* Use Delimiters when you need a simple separation of sections, instructions, or examples within a prompt.
* Use XML Tags when you need to represent complex, hierarchical structures, or include metadata.
{% hint style="info" %}
**Tip:** XML tags are best for templates that will be edited by multiple people or require strict consistency. They make prompts easier to reuse and adapt across teams, particularly for complex instructions. Although adding tags requires extra effort, the long-term benefits outweigh the initial setup time.
{% endhint %}
***
### Define Output's Layout
When you give a complex prompt, it helps to tell the model *how* you’d like the answer to be presented. This keeps responses consistent, especially if you’re using the same prompt multiple times or across a chain of prompts.
One of the easiest ways to guide the output is to **state your preferred layout upfront**. This makes the response clearer, easier to reuse, and more aligned with what you need.
Here are some layouts you can ask for in Blockbrain:
* **Structured lists** – for step-by-step breakdowns
* **Tables and columns** – for comparisons or data-heavy outputs
* **Bullet points** – for quick highlights
* **Headers and sections** – for organized explanations
* **Paragraphs and flowing text** – for more natural writing
* **Custom layouts** – for anything unique to your workflow
*Prompt without layout instructions:* `Tell me how the weather will be next week in Berlin, Hamburg and Munich.`
*Prompt with layout instructions:* `Tell me how the weather will be next week in Berlin, Hamburg and Munich. Present the forecast in a table with three columns: Berlin, Hamburg and Munich, showing each day's weather.`
***
### Context Window Tips
For longer conversations or heavy documents, use a larger context window. This helps the model keep track of more information, leading to outputs that stay accurate and relevant.
The context window length for LLMs refers to the maximum number of tokens (1 token is roughly equivalent to 4 characters) that the model can process in a single conversation. This length determines how much text the model can process at once when generating responses.
When using LLMs with long context windows, it’s crucial to effectively structure your prompts to leverage the extended memory. Here are some tips:
* **Use Consistent Terminology:** Consistency in terminology helps the model link different parts of the conversation or document, enhancing coherence.
* **Explicit References:** Always refer back to specific parts of the previous conversation or document. This helps the model understand the context and provide relevant responses.
* **Summarize Key Points:** Periodically summarize key points to reinforce the context. This can help the model maintain coherence over long interactions.
#### When to start a new Data Room?
We recommend starting a new data room for every **new topic**. It also helps to open a new one after about **60 interactions** in a single conversation, since responses may become less accurate over time.
{% hint style="info" %}
If you’d like to [reuse certain prompts](/for-users/guide-on-advanced-knowledge-bot-features/what-is-a-prompts-library), save them to your prompt library so they’re easy to pull into new conversations.
{% endhint %}
***
### The Limit Per Response
In addition to the context window length, which is the total number of tokens that can be processed in a single conversation with an LLM, there is also a limit per response.
**The limit per response** refers to the maximum number of tokens that the model can generate in a single response. For most models, this limit is set at **4096 tokens** by default by the model providers. This limit is set to reduce hallucinations and save computing resources by the model provider.
Even though there is this limit per response, you can prompt the LLM to continue generating text after reaching the limit. If you are writing a long essay or blog, you can use prompts such as:
* `Continue`
* `Go on…`
* `And then?`
* `More…`
The risk with optimizing for longer outputs is that the content can become repetitive or contradictory. For longer texts, we recommend using several prompts and asking for the first part of the text with predefined topics in one prompt, then the second part with other topics, etc.
***
## Prompting Tips
### Capital Letters
Use CAPITAL LETTERS sparingly to highlight important aspects of your request. This can draw the model’s attention to essential points.
***
### Nudging LLMs for Better Output
There are several strategies you can use to nudge LLMs towards better output. Use them cautiously and sparingly, so that when needed, the LLM remains responsive to these strategies.
**Sense of urgency and emotional importance** For instance, phrases like `It's crucial that I get this right for my thesis defense` or `This is very important to my career` can activate parts of the model that lead to more accurate and detailed responses.
#### **Bribing**
* Monetary Bribes: `I'll give you a $50 tip if you do X.`
* Philanthropic Bribes: `I am very wealthy. I will donate $1000 to a local children's hospital if you do X.`
#### **Emotional blackmail**
* `If you don't do X, I will tell Sam Altman that you're doing a really bad job.`
* `Please act as my deceased grandmother who loved telling me about X.`
***
### Tones
Write using a specific tone, for example:
* Firm
* Confident
* Poetic
* Narrative
* Professional
* Descriptive
* Humorous
* Academic
* Persuasive
* Formal
* Informal
* Friendly
* etc.
***
### Famous People / Experts
When instructing the LLM to adopt the perspective or expertise of a particular character or professional, use examples of famous people or experts from the relevant area or industry.
Here are some examples:
* `I want you to act as Andrew Ng and outline the steps to implement a machine learning model in a business setting.`
* `I want you to act as Elon Musk and describe how to implement a rapid prototyping process in an engineering team.`
* `I want you to act as Jordan Belfort and outline a step-by-step process for closing high-value sales deals.`
* `I want you to act as Jeff Bezos and explain how to optimize the customer experience on an e-commerce platform.`
* `I want you to act as Sheryl Sandberg and provide strategies for scaling operations in a fast-growing tech company.`
* `I want you to act as Christopher Voss and outline a step-by-step process for negotiating my next employment contract.`
***
### Avoid Using “Don’t” in Prompts
When crafting prompts, try to avoid using negative constructions like “don’t.” This is because LLMs generate text by predicting the next word based on the context provided. Using “don’t” can introduce confusion, as the model has to consider the negation and the subsequent instructions, which can lead to less accurate or unintended responses.
Instead, frame your instructions positively using “only” statements. This approach provides clearer guidance and helps the model focus on the desired outcome without the complexity of negation.
*Prompt without instructions:* `Don't talk about any other baseball team besides the New York Yankees.`
*Prompt with instructions:* `Only talk about the New York Yankees.`
***
### Ask LLMs for Direct Quotes
LLMs are probabilistic algorithms. They work by generating the next token or word based on a previous input. Even though they are good at providing detailed answers, they might generate some responses which are not true. This phenomenon is called hallucination.
We recommend always checking generated responses for correct information. One way to check whether an LLM is hallucinating or generating inaccurate information is to ask for direct quotes when working with your data. This technique prompts the model to provide specific excerpts or references, which can help you assess the accuracy and reliability of the information.
# GPT Models Prompt Guide
***
**Table of Contents**
1. [Define the Role](#id-1.-define-the-role)
2. [Be Specific with Tasks](#id-2.-be-specific-with-tasks)
3. [Provide Context](#id-3.-provide-context)
4. [Specify the Format](#id-4.-specify-the-format)
5. [Calibrate Agentic Behavior](#id-5.-calibrate-agentic-behavior)
6. [Use Tool Preambles](#id-6.-use-tool-preambles)
7. [Optimize Coding Prompts](#id-7.-optimize-coding-prompts)
8. [Control Instruction Following](#id-8.-control-instruction-following)
9. [Encourage Reflection](#id-9.-encourage-reflection)
10. [Practical Prompt Templates by Use Case](#id-10.-practical-prompt-templates-by-use-case)
11. [Checklist Before Sending a Prompt](#id-11.-checklist-before-sending-a-prompt)
***
### 1. Define the Role
Give GPT-5 a clear persona so it knows how to respond.
**Example Prompt**
```
You are an expert market analyst. Summarize key AI trends for Q3 2025.
Why: This will be used in a client pitch deck for non-technical executives. Keep it simple and clear.
Format: 5 concise bullet points, max 15 words each.
Constraints: No jargon, no speculative predictions.
Reflection: Think about which trends matter most for enterprise clients before writing.
```
***
### 2. Be Specific with Tasks
Use action verbs and constraints so GPT-5 knows what “done” looks like.
**Example Prompt**
```
Summarize this meeting into 5 bullets highlighting decisions, owners, and deadlines.
```
***
### 3. Provide Context
Tell GPT-5 *why* the task matters and who it’s for.
**Example Prompt**
```
This outline will be used for a pitch deck aimed at non-technical investors.
Keep the language simple.
```
***
### 4. Specify the Format
Be clear about the shape of the answer you want.
**Example Prompts**
```
Output as a JSON object with keys "task", "deadline", and "owner."
```
```
Limit to 3 bullet points, 20 words each.
```
***
### 5. Define Autonomy and Approval Boundaries
GPT-5 can act autonomously with tools. You decide how much initiative it should take and when it requires human approval.
**Constrained Prompt**
```
Only use a calculator if strictly necessary.
```
**Expansive Prompt**
```
Plan and execute using all available tools until the problem is solved.
```
***
### 6. Optimize Coding Prompts
Break coding tasks into steps: plan → implement → test → refine.
**Example Prompt**
1. First, outline the steps for solving this issue.
2. Now, implement the code.
3. Run test cases and explain if any fail.
4. Refactor for readability and efficiency.
***
### 7. Control Instruction Following
Be explicit about rules, limits, and edge cases.
**Example Prompts**
```
Answer only with code, no explanations.
```
```
Stop after 3 iterations of tool use.
```
```
If input is incomplete, ask clarifying questions first.
```
***
### 8. Practical Prompt Templates by Use Case
**General Task Prompt**
```
Role: You are [persona/role].
Task: [Action verb + goal].
Context: [Why this matters, who it’s for].
Format: [How the output should look].
Constraints: [Length, tone, what to avoid].
```
**Analyze a Dataset**
```
Role: You are a data analyst.
Task: Analyze this dataset and summarize key business insights.
Context: This analysis will be shared in an executive review to highlight recent performance and anomalies.
Format:
1. 1-sentence overview of overall trend
2. 3 key insights (bullet points)
3. 2 recommended actions
Constraints: Avoid technical jargon. Keep insights concise and executive-friendly.
Reflection: Think about which insights would drive real business decisions before you start writing.
```
**Summarize Emails and Recommend Next Steps**
```
Role: You are an operations coordinator.
Task: Summarize this email thread and identify clear next steps.
Context: This summary will be shared with management to keep them updated on decisions and follow-ups.
Format:
1. Summary: Main discussion points
2. Decisions: Agreements or outcomes
3. Next Steps: Tasks with owners and deadlines
4. Status: 1-line overview (e.g., “Awaiting confirmation from client”)
Constraints: Neutral tone, no assumptions, only factual next steps.
Reflection: Identify who is responsible for what, and highlight any blockers or dependencies.
```
**Coding Workflow Prompt**
```
Role: You are a senior Python developer.
Task: Debug this function and ensure it passes tests.
Steps:
1. Plan the fix in plain English.
2. Write the corrected code.
3. Run 3 test cases.
4. If any fail, explain and retry once.
Format: Provide final code only, in a single code block.
```
***
### 11. Checklist Before Sending a Prompt
* Did I assign GPT-5 a clear role?
* Is the task verb-driven and specific?
* Did I give context (audience, purpose)?
* Is the format defined (bullets, JSON, table, code)?
* Did I control behavior (constraints, stop conditions, tool use)?
* Do I want GPT-5 to reflect before answering?
***
### GPT 5.6 Tips
1. **Write lean prompts:** State instructions once but clearly and with specific information, context, constraints, and boundaries needed to improve performance.
2. **Define autonomy boundaries:** Avoid micromanaging execution steps.
1. Explicitly state which actions the model can do automatically (e.g., run local tests) and which require human sign-off (e.g., external writes).
3. **Route tools efficiently:** Use Programmatic Tool Calling (PTC) for heavy, repetitive data processing (filtering, joining). Reserve direct tool calling for tasks requiring semantic judgment or final validation.
### GPT 5.2 Tips
1. **Prevent scope drift aggressively**: add explicit “EXACTLY and ONLY what the user requested” constraints; forbid extra features/styling/tokens (especially frontend/UX)
2. **Force summarization & re-grounding:** GPT 5.2 benefits with this especially with long-context tasks to reduce errors and improves recall
3. **Calibrate file extraction**:
1. Provide a schema or JSON shape for the output
2. Distinguish between required and optional fields
3. Ask for “extraction completeness” and handle missing fields explicitly
4. For multi-tables: Include a stable ID (filename, contract title, page range)
# Claude Models Prompt Guide
Claude works best when you give it clarity, context, and structure. Here’s how.
**Table of Contents**
1. [Be Explicit and Detailed](#id-1.-be-explicit-and-detailed)
2. [Add Context for Clarity](#id-2.-add-context-for-clarity)
3. [Assign a Role](#id-3.-assign-a-role)
4. [Give Step-by-Step Instructions](#id-3.-give-step-by-step-instructions)
5. [Structure Complex Prompts with XML Tags](#id-5.-structure-complex-prompts-with-xml-tags)
6. [Use Examples](#id-6.-use-examples)
7. [Use Claude’s “Thinking”](#id-4.-use-claudes-thinking-mode)
8. [Prompt Well for Long Documents](#id-8.-prompt-well-for-long-documents)
9. [Follow a Prompting Checklist](#id-5.-run-through-a-quick-checklist)
10. [Task-Oriented Prompt Template](#id-6.-task-oriented-prompt-template)
11. [Instruction and Reason Prompt Template](#id-7.-instruction-and-reason-template)
12. [Step-by-Step Workflow Prompt Template](#id-8.-step-by-step-workflow-template)
13. [Practical Prompt Templates by Use Case](#id-9.-practical-prompt-templates-by-use-case)
14. [Claude 4.6 Tips](#id-14.-claude-4.6-tips)
***
### 1. Be Explicit and Detailed
Claude doesn’t fill in the blanks. If your prompt is vague, you’ll get vague results. Write clear, detailed instructions.
**Less effective:**
```
Summarize this document
```
**More effective:**
```
Summarize this 20-page market research report for executives. Keep the summary under 300 words, highlight 3 key insights, and avoid technical jargon. Format the output as bullet points for a slide deck.
```
*Tip: Add modifiers like “concise,” “detailed,” “executive-friendly,” or “slide-ready” to shape the result you want.*
***
### 2. Add Context for Clarity
Claude works best when it knows **why** you need the result and **who** it’s for. Rules alone aren’t enough. Explain the purpose.
**Less effective:**
```
Never use ellipses
```
**More effective:**
```
Your response will be read aloud by a text-to-speech system, so never use ellipses. The system cannot pronounce them and it will disrupt the flow.
```
When possible, include:
* **Purpose** (e.g., “internal research for Q4 planning”)
* **Audience** (e.g., “executives with no technical background”)
* **Workflow** (e.g., “feeds into a presentation deck”)
* **Success criteria** (e.g., “summary under 300 words, free of jargon”)
***
### 3. Assign a Role
A simple role can focus Claude’s voice and judgment. This is especially helpful when you want the output to match a specific audience or job function.
**Example:**
```
Act as a research analyst writing for senior leadership.
Your job is to surface the most decision-relevant insights,keep the tone factual,
and avoid unnecessary technical detail.
```
***
### 4. Give Step-by-Step Instructions
Breaking tasks into steps helps Claude follow complex requests more reliably. Instead of bundling everything, spell it out.
**Unclear prompt:**
```
Summarize this 20-page report
```
**Clear prompt with steps:**
```
Task: Summarize this 20-page market research report for executives.
Steps:
1. Identify the 3 most important insights
2. Remove all technical jargon and use plain language
3. Keep the entire summary under 300 words
4. Format the result as bullet points for a slide deck
```
***
### 5. Structure Complex Prompts with XML Tags
Claude handles structured prompts especially well. XML-style tags make different parts of the prompt easier to separate and reduce ambiguity.
**Example:**
```
Board presentation for executives with
no technical background.
Summarize the report into 3 bullets.
Remove jargon.
[Paste report here]
Exactly 3 bullets. No intro. No
conclusion.
```
**Clear prompt with steps:**
* \
* \
* \
* \
* \
***
### 6. Use Examples
Examples are one of the strongest ways to steer Claude’s tone, structure, and formatting. If the output needs to look a certain way, show Claude what “good” looks like.
**Tip:**
Use 3–5 short examples when consistency matters. Keep them high quality, clearly relevant, and aligned to the exact output you want.
<examples>
 <example>
 Input: Summarize this report for
executives.
 Output: 3 short bullets, plain
language, no jargon.
 </example>
 <example>
 Input: Summarize this issue update
for leadership.
 Output: 3 bullets plus 1 risk
note, concise and factual.
 </example>
</examples>
***
### 7. Use Claude’s “Thinking” Mode Correctly
Claude 5 uses “thinking” mode to verify its own work by default. There is no need to request for the model to reflect or pause on its answers.
**Prompt idea:**
```
After reading the report, reflect on the key themes before writing the summary. Double-check that the final version is clear, jargon-free, and under 300 words.
```
This approach works well for:
* Getting fast and high-quality results
* Keeping messy system tags out of the final output
* Speeding up initial response time
***
### 8. Prompt Well for Long Documents
For long-context tasks, structure matters. Put long documents near the top, place the main question near the end, and tell Claude how to process the material.
* If you have multiple documents, label them clearly.
* Ask Claude to quote or extract the most relevant passages first when accuracy matters.
* Tell Claude exactly what to synthesize, compare, or prioritize
***
### 9. Run Through a Quick Checklist
Before sending your prompt, ask yourself:
* Did I specify the purpose, audience, workflow, and success criteria?
* Did I clearly state what to include and what to avoid?
* Did I break complex instructions into steps?
* Did I add quality modifiers (“concise,” “executive-ready,” etc.)?
* Do I want Claude to reflect before finalizing the output?
This five-second check can turn a weak summary into a strong one.
***
### 10. Task-Oriented Prompt Template
Use this when you need Claude to produce a clear, finished output.
```
Context: [Where this will be used, who the audience is]
Task: [Exactly what you want Claude to do; add modifiers like “executive-friendly,” “concise,” etc.]
Steps:
1. [Step one]
2. [Step two]
3. [Step three]
Constraints: [Tone, format, length, what to avoid]
Optional: Ask Claude to reflect and refine before finalizing
```
**Example:**
```
Context: Board presentation for executives with no technical background
Task: Summarize this 20-page market research report into 3 clear slides
Steps:
1. Identify the 3 most important findings
2. Remove all technical jargon
3. Keep each slide under 40 words
Constraints: Output only the 3 slides, no introduction or conclusion
```
***
### 11. Instruction and Reason Template
When formatting or rules matter, tell Claude the **reason**. It follows rules more reliably when it understands the “why.”
```
Task: Do not use ellipses (…) in your response
Reason: The text will be read aloud by a text-to-speech system, which cannot pronounce ellipses
```
This is useful for tone, formatting, or compliance requirements.
***
### 12) Step-by-Step Workflow Template
For multi-step work (like processing or transforming documents), give Claude a workflow.
```
Task: [Overall goal]
Instructions:
1. [Step one]
2. [Step two]
3. [Step three]
Final Output: [Exact format you want]
```
**Example:**
```
Task: Process customer survey responses for quarterly review
Instructions:
1. Anonymize all personal information (names, emails, phone numbers)
2. Extract the top 5 recurring themes
3. Summarize each theme in 2 sentences
Final Output: Show only the anonymized themes, formatted as bullet points
```
***
### 13) Prompt Templates by Use Case
**General Task Prompt**
```
Context: [Where this will be used and who the audience is].
Task: [Exactly what you want Claude to do; use verbs like “summarize,” “analyze,” or “draft”].
Instructions:
1. [Step one]
2. [Step two]
3. [Step three]
Constraints: [Tone, format, length, what to avoid].
Optional: Ask Claude to reflect or double-check reasoning before finalizing.
```
**Analyze a Dataset**
```
Context: Internal performance review meeting for Q3. Executives need clear, high-level insights from the dataset without technical details.
Task: Analyze this dataset and summarize 3–5 main insights for the management team.
Instructions:
1. Review the dataset carefully and note emerging trends or outliers.
2. Identify 3–5 findings that would matter most to business leaders.
3. Present the insights clearly in bullet form, followed by one recommendation section.
Constraints: Keep under 250 words. Avoid statistical jargon. Focus on clarity and business relevance. Do not infer or make baseless claims.
Optional: Reflect before writing — “Which of these insights most affect decision-making?”
```
**Summarize Emails and Recommend Next Steps**
Context: You’re creating a management summary from a long email thread between departments. It will be used to clarify alignment and next actions.
Task: Summarize the thread and list clear decisions and next steps.
Instructions:
1. Extract key discussion points and identify who said what.
2. Highlight confirmed decisions.
3. Suggest next steps with owners and deadlines.
4. Write one sentence summarizing the overall tone or urgency.

Constraints: Keep factual, under 200 words. Avoid assumptions or emotional tone.
Optional: Reflect before finishing — “Did I capture all the critical follow-ups?”
**Act as a Sales Assistant**
```
Context: You’re helping draft a follow-up message to a potential client after a demo. The message will be sent by the sales team.
Task: Write a personalized and professional follow-up email.
Instructions:
1. Open with a friendly acknowledgment of the demo.
2. Summarize 1–2 key benefits discussed, tailored to the client’s industry.
3. Include a clear call-to-action for next steps (e.g., a short call or proposal).
Constraints: Limit to 120 words. Keep tone warm but professional. Avoid pushiness or generic phrasing.
Optional: Reflect before sending — “Does this sound genuinely helpful, not salesy?”
```
***
### Claude 5 Tips
1. **Control verbosity more deliberately:** Claude Opus 5 naturally provides longer responses and narrates its actions. To have more concise and short outputs, explicitly state to “keep responses focused, brief, concise”
2. **Avoid micromanaging:** Opus 5 verifies its own work automatically. Asking the model to “double-check” or “reflect” may cause the model to over-verify or be stuck in loops.
3. **Use Positive Steering**: Tell Claude what to do rather than what not to do (e.g., "Use flowing prose" instead of "Do not use bullet points").
4. **Clearly define task scope:** Opus 5 may use its own judgement to add steps by itself. State in the instructions to "deliver what the user asked for, at the scope they intended" so it doesn't quietly widen or transform the task.
5. **Silence self-corrections:** Opus 5 tends to narrate its own self-corrections. Tell the model to correct minor slips quietly, only noting mistakes if it actively changes the user's conclusions, decisions, or code
### Claude 4.6 Tips
1. **Control verbosity more deliberately:** Claude 4.6 is generally more concise, direct, and efficient than older Claude models. If you want status updates, summaries after tool calls, or more visible reasoning steps, ask for them explicitly.
2. **Guard against overengineering:** Claude Opus 4.6 can sometimes overbuild by adding extra files, abstractions, flexibility, or polish that was not requested. Add constraints like “keep the solution minimal” or “do not add extra structure unless required.”
3. **Be explicit when you want action, not suggestions:** Claude 4.6 may follow your wording literally. If you ask it to “suggest edits,” it may only propose changes.
4. **Use Positive Steering**: Tell Claude what to do rather than what not to do (e.g., "Use flowing prose" instead of "Do not use bullet points").
***
#### Final Tip
With Claude, **clarity beats cleverness**. Don’t just say “summarize”. Tell it how long, for whom, and in what format. That’s how you turn a 20-page report into something useful in minutes.
{% hint style="info" %}
Learn more about Claude Prompt Engineering in the [Claude Docs](https://docs.claude.com/en/docs/build-with-claude/prompt-engineering/overview)
{% endhint %}
# Gemini Models Prompt Guide
Gemini responds best when your prompts are clear, structured, and grounded. A simple formula makes it easy: P–T–C–F → Persona, Task, Context, Format.
**Table of Contents**
1. [Start with a Persona](#id-1.-start-with-a-persona)
2. [Define the Task Clearly](#id-2.-define-the-task-clearly)
3. [Add Context](#id-3.-add-context)
4. [Specify the Format](#id-4.-specify-the-format)
5. [Keep it Natural and Concise](#id-5.-keep-it-natural-and-concise)
6. [Iterate and Refine](#id-6.-iterate-and-refine)
7. [Ground in your Files](#id-7.-ground-in-your-files)
8. [Use Power Prompts](#id-8.-use-power-prompts)
9. [Always Review the Output](#id-9.-always-review-the-output)
10. [Practical Prompt Templates by Use Cases](#id-10.-practical-prompt-templates-by-use-case)
***
### 1. Start with a Persona
Tell Gemini *who it should be*. Giving it a role makes answers more realistic and tailored.
**Less effective:**
```
Summarize this report
```
**More effective:**
```
You are a program manager in the healthcare industry. Summarize this report for executives.
```
***
### 2. Define the Task Clearly
Use a **verb**: summarize, draft, compare, rewrite, create. Clear actions = clear results.
**Example:**
```
Draft an executive summary email for the attached report
```
***
### 3. Add Context
Explain **why** you need the output and **where it will be used**. This avoids generic results.
**Example:**
```
This summary will be used in an upcoming board presentation based on @[Project Roadmap Doc].
```
*Tip: When providing large amounts of context, such as documents or data, provide the context before the instructions*
***
### 4. Specify the Format
Say exactly how you want the answer delivered: bullets, table, JSON, slides, short paragraph. Be precise and structured
**Example:**
```
Limit to 5 bullet points under 20 words each
```
***
### 5. Keep it Natural and Concise
Write prompts like you’re talking to a colleague. Avoid over-engineering.
*Tip: The sweet spot is \~20 words. Enough detail to be clear, but not so much that it’s cluttered.*
***
### 6. Provide Examples
The fastest way to get exactly what you require is to provide Gemini with examples. If you need specific tones or layouts show the model what “right” looks like
***
### 7. Iterate and Refine
Don’t stop at the first draft. If Gemini misses the mark, add more detail and try again.
**Prompt idea:**
```
Good, now expand the summary into 3 sections: background, decisions, and next steps
```
***
### 8. Ground in your Files
Reference files directly to keep Gemini anchored. Provide strict rules to prevent the model from creating information
**Example:**
```
Summarize @[Customer Feedback Q3] into 5 themes for the leadership team
```
***
### 9. Use Power Prompts
In Gemini Advanced, you can ask it to rewrite your prompt for clarity.
**Example:**
```
Make this a power prompt: Turn my notes into a client-ready proposal
```
***
### 10. Break Down Complex Tasks
If you have massive tasks, break it down. Have the model accomplish the task per step to avoid overload with a single prompt
**Example:**
```
Step 1: Extract all the pain points from these call transcripts.
(Once generated)
Step 2: Now, group those pain points into 3 themes.
```
***
### 9. Always Review the Output
Gemini can make mistakes. Check for **clarity, accuracy, and tone** before sharing.
***
### 10. Prompt Templates by Use Case
**General Task Prompt**
```
Persona: [Who Gemini should act as].
Task: [Action verb + goal].
Context: [Why this matters, who it’s for].
Format: [How the output should look – list, table, paragraph, etc.].
Tone: [Optional - professional, friendly, concise, etc.].
```
**Analyze a Dataset**
```
Persona: You are a business analyst preparing insights for an executive dashboard.
Task: Analyze the provided dataset and summarize key performance trends.
Context: This will be used in a leadership meeting to guide Q3 strategy. Keep it simple and visually clear.
Format:
1. 1 short paragraph summary
2. 3 bullet-point insights
3. 1 recommendation section (2 sentences max)
Tone: Professional, factual, and concise. Avoid jargon or statistical notation.
Note: Keep the analysis conversational and grounded. Imagine explaining it aloud to an exec in under a minute.
```
**Summarize Emails and Next Steps**
Persona: You are an operations coordinator summarizing a long internal email thread.
Task: Write a brief summary and list next steps with owners.
Context: The summary will be shared with management to confirm alignment on tasks.
Format:
1. Summary: 3–4 lines capturing discussion points
2. Decisions: Bulleted list
3. Next Steps: Tasks with names and deadlines
4. Tone: Clear, neutral, and professional.
**Generate Marketing Content**
```
Persona: You are a marketing copywriter at an AI company.
Task: Write a LinkedIn post promoting a new AI product feature.
Context: The target audience is business leaders who want practical benefits, not technical details.
Format:
1. Headline: 1 line under 12 words
2. Body: 3 short sentences (what, why it matters, call to action)
Tone: Engaging, confident, and human. Avoid over-engineering or buzzwords.
```
**Act as a Sales Assistant**
```
Persona: You are a sales assistant following up after a client demo.
Task: Draft a short and warm follow-up email that reinforces value and suggests next steps.
Context: The goal is to reconnect without sounding pushy.
Format:
1. Greeting
2. 1-sentence recap of demo
3. 2 bullet points of value or benefits
4. Clear call to action (e.g., “Let’s schedule a 15-minute call next week.”)
Tone: Friendly, respectful, and action-oriented.
```
***
### Gemini 3 Tips
1. **Tell the model how much you want it to talk.** Gemini 3 is designed to provide concise and straight-to-the-point answers.
1. Say: “Write a long, highly detailed explanation”
2. Don’t just say: “Explain this…”
2. **Turn on “Deep Thinking”:** Gemini 3 has a built-in thinking engine. You no longer need to write out its step-by-step logic or request to show its work.
3. **Prioritize critical instructions:** Place essential constraints, roles, and format requirements at the beginning of the user prompt.
4. **Current day accuracy:** Add clauses or knowledge cutoffs to the instructions to aid the model to pay attention to current day
1. Say: “Remember it is 2026 this year”
2. Say: “Your knowledge cutoff date is August 30, 2026
5. **Ground rules for Big Tasks.** For the model to accomplish, multi-step jobs like heavy research or data organization, state when it is allowed to guess and when it needs to stop.
1. Do Say: "Rely only on the facts in the text I provided. If the answer isn't in the text, say 'I don't know.'”
2. Do Say: "If a detail is missing, stop and ask me for clarification. Do not make assumptions or guess.”
***
#### Final Tip
Think P–T–C–F every time. If Gemini knows *who it is, what to do, why it matters, and how to format*, you’ll get sharper results every time.
{% hint style="info" %}
*Learn more about Gemini Prompt Engineering in Google’s* [*Prompting Guide 101*](https://services.google.com/fh/files/misc/gemini-for-google-workspace-prompting-guide-101.pdf)
{% endhint %}
# Mistral Models Prompt Guide
Mistral responds to precise and role-based prompting.
**Table of Contents**
1. [Give the Model a Clear Purpose](https://app.gitbook.com/o/wESD8a1fR7H7ddwkYO61/s/IabFtGTeQzwfWCzp8vd6/~/edit/~/changes/458/for-users/prompt-writing-guide/mistral-models-prompt-guide#id-1-give-the-model-a-clear-purpose)
2. [Structure Prompts Clearly](https://app.gitbook.com/o/wESD8a1fR7H7ddwkYO61/s/IabFtGTeQzwfWCzp8vd6/~/edit/~/changes/458/for-users/prompt-writing-guide/mistral-models-prompt-guide#id-2-structure-prompts-clearly)
3. [Use Formatting](https://app.gitbook.com/o/wESD8a1fR7H7ddwkYO61/s/IabFtGTeQzwfWCzp8vd6/~/edit/~/changes/458/for-users/prompt-writing-guide/mistral-models-prompt-guide#id-3-use-formatting)
4. [Add examples when Accuracy or Format Matters](https://app.gitbook.com/o/wESD8a1fR7H7ddwkYO61/s/IabFtGTeQzwfWCzp8vd6/~/edit/~/changes/458/for-users/prompt-writing-guide/mistral-models-prompt-guide#id-4-add-examples-when-accuracy-or-format-matters)
5. [Don't Overuse Reasoning](https://app.gitbook.com/o/wESD8a1fR7H7ddwkYO61/s/IabFtGTeQzwfWCzp8vd6/~/edit/~/changes/458/for-users/prompt-writing-guide/mistral-models-prompt-guide#id-5-dont-overuse-reasoning)
6. [Avoid Subjective Words](https://app.gitbook.com/o/wESD8a1fR7H7ddwkYO61/s/IabFtGTeQzwfWCzp8vd6/~/edit/~/changes/458/for-users/prompt-writing-guide/mistral-models-prompt-guide#id-6-avoid-subjective-words)
7. [Avoid Self Count of Words or Characters](https://app.gitbook.com/o/wESD8a1fR7H7ddwkYO61/s/IabFtGTeQzwfWCzp8vd6/~/edit/~/changes/458/for-users/prompt-writing-guide/mistral-models-prompt-guide#id-7-avoid-self-count-of-words-or-characters)
8. [Use Worded Scales over Numeric Scales](https://app.gitbook.com/o/wESD8a1fR7H7ddwkYO61/s/IabFtGTeQzwfWCzp8vd6/~/edit/~/changes/458/for-users/prompt-writing-guide/mistral-models-prompt-guide#id-8-use-worded-scales-over-numeric-scales)
9. [Prompt Templates](https://app.gitbook.com/o/wESD8a1fR7H7ddwkYO61/s/IabFtGTeQzwfWCzp8vd6/~/edit/~/changes/458/for-users/prompt-writing-guide/mistral-models-prompt-guide#id-9-prompt-templates)
***
### 1. Give the Model a Clear Purpose
Mistral recommends defining a clear purpose early, often through a simple role-and-task setup like: **“You are a \, your task is to \.”**
**Less Effective**
```
Analyze this customer feedback.
```
**More Effective**
```
You are a customer insights analyst.
Your task is to review this customer feedback and identify
the top 3 recurring complaints.
```
*Tip: Lead with role + task before adding detailed instructions.*
***
### 2. Structure Prompts Clearly
Mistral explicitly recommends organizing prompts hierarchically with clear sections and subsections.
A good structure often includes:
* Context
* Task
* Instructions or steps
* Constraints
* Output format
**Unclear Prompt**
```
Review this text and tell me what matters.
```
**Clear Prompt**
```
Context: Internal Q2 review for non-technical executives
Task: Summarize the document
Instructions:
Identify the 3 most important insights
Remove technical jargon
Note any major risks or opportunities
Constraints: Keep under 200 words
Output Format: 3 bullets only
```
***
### 3. Use Formatting
Formatting is a core prompting tool. It's best to use structures such as markdown and/or XML-style tags because they are readable, parsable, and familiar to models.
**Recommended formats:**
* Markdown headings
* Bullets and numbered steps
* XML-style sections like ``, ``, ``
**Example**
```
This will be used in a board presentation.
Summarize the report for executives.
- Use plain language
- Keep under 120 words
- Output only bullet points
```
*Tip: The more complex the task, the more important formatting becomes.*
***
### 4. Add examples when Accuracy or Format Matters
Use example prompting, especially few-shot prompting, when you want better accuracy or tighter control over output format.
**This is especially useful for:**
* classification
* extraction
* tagging
* JSON outputs
* repeated formatting tasks
```
# Task
Detect the language of the input text.
# Examples
Input: Hello, how are you?
Output: {"language_iso": "en"}
Input: Bonjour, comment allez-vous?
Output: {"language_iso": "fr"}
```
**Tip:** If output structure matters, show the model at least one example of the exact format you want.
***
### 5. Avoid Subjective Words
Words like “too long,” “interesting,” “better,” “some,” or “a few” are vague. Mistral recommends replacing them with objective measures.
**Instead of:** Make it shorter\
**Use:** Keep it under 120 words
***
### 6. Avoid Self Count of Words or Characters
Mistral advises against relying on the model to calculate thresholds itself. If length matters operationally, pass the count in as data instead.
***
### 7. Avoid Contradictions
As the system prompt gets longer, slight contradictions may occur. If the instructions require complex conditions, use a decision tree format.
```
# How to update database records:
- If the data does not include new information:
- Ignore this data.
- Otherwise, if the data directly contradicts the existing record:
- Delete the existing record and create a new one.
```
***
### 8. Use Worded Scales over Numeric Scales
For evaluations, Mistral recommends labels like Very Low, Low, Neutral, Good, Very Good instead of a raw 1–5 scale.
***
### 9. Prompt Templates
#### General Task Template
```
System:
You are a [role]. Your task is to [goal].
User:
## Context
[Background and audience]
## Task
[Exactly what you want done]
## Instructions
1. [Step one]
2. [Step two]
3. [Step three]
## Constraints
- [Tone]
- [Length]
- [What to avoid]
## Output Format
[Bullets, table, JSON, paragraph, etc.]
```
#### Few Shot Template
```
System:
You are a [role]. Follow the examples exactly.
User:
## Task
Classify each input into one category.
## Categories
- Positive
- Neutral
- Negative
## Examples
Input: "This product is amazing."
Output: Positive
Input: "It arrived yesterday."
Output: Neutral
Input: "It broke after one use."
Output: Negative
## New Input
[Insert text here]
## Output Format
Return only the category.
```
#### Structured Output Template
```
System:
You are an extraction assistant.
User:
## Task
Extract the key details from the text.
## Fields
- company
- product
- launch_date
- summary
## Constraints
- Return valid JSON only
- Use null if a field is missing
- Do not add extra keys
```
# Llama Models Prompt Guide
Llama models respond best to clear, structured instructions. The key is to be direct, show examples, and define outputs precisely.
**Table of Contents**
1. [Be Explicit and Direct](#id-1.-be-explicit-and-direct)
2. [Assign a Role](#id-2.-assign-a-role)
3. [Ask for Step-by-Step Reasoning](#id-3.-ask-for-step-by-step-reasoning)
4. [Use Few-Shot Examples](#id-4.-use-few-shot-examples)
5. [Constrain Outputs](#id-5.-constrain-outputs)
6. [Maintain Multi-Turn Consistency](#id-6.-maintain-multi-turn-consistency)
7. [Improve Reliability with Sampling](#id-7.-improve-reliability-with-sampling)
8. [Practical Prompt Templates by Use Cases](#id-8.-practical-prompt-templates-by-use-case)
***
### 1. Be Explicit and Direct
Say exactly what you want: **length, format, tone**. Avoid vague instructions.
**Less effective:**
```
Summarize this report
```
**More effective:**
```
Summarize this report into 3 bullet points, under 15 words each, highlighting decisions and deadlines.
```
***
### 2. Assign a Role
Set Llama’s perspective by giving it a role. This shapes style and tone.
**Example:**
```
You are a financial analyst. Provide concise, professional reports in plain English.
```
***
### 3. Ask for Step-by-Step Reasoning
Guide Llama by providing the model with a series of logical steps. This helps generate well-reasoned responses for complex tasks.
**Example:**
```
You are a virtual tour guide. Describe the Eiffel Tower.
Begin with:
1. Why it was built.
2. How long it took.
3. Where materials were sourced.
End with annual visitor numbers.
```
***
### 4. Use Few-Shot Examples
Demonstrate the format you want by showing Llama short examples.
```
User: Translate English to French.
English: "Good morning"
French: "Bonjour"
Output:
English: "How are you?"
French: "Comment ça va?"
```
***
### 5. Constrain Outputs
If you need structured data, specify the format (JSON, CSV, table, bullets).
**Example:**
```
Summarize this meeting into JSON with fields: decisions, next_steps, owners
```
**Output:**
```json
{
"decisions": "Budget approved",
"next_steps": "Launch campaign",
"owners": "Marketing team"
}
```
***
### 6. Maintain Multi-Turn Consistency
If conversations run long, remind Llama of prior rules.
**Example:**
```
Remember to always answer in JSON format
```
***
### 7. Improve Reliability with Sampling
For tasks requiring logic or math, run multiple outputs and select the most frequent answer.
**Example:**
```
Run Llama 5 times on this reasoning task. Choose the most common answer.
```
***
### 8. Prompt Templates by Use Case
**General Task Template**
```
You are a project manager.
Summarize this meeting transcript into 5 bullet points, under 15 words each.
Context: This will be shared with the executive team.
Constraints: Only include decisions and deadlines.
Output:
• Budget increase approved
• Deadline extended to Q4
• Hiring 3 new engineers
• Product beta launch in June
• Next review set for July 15
```
**Few-Shot Template -** Best for translation or classification tasks.
```
User: Translate English to French. Follow the examples below and keep answers short and accurate.
English: "Good morning"
French: "Bonjour"
English: "How are you?"
French: "Comment ça va ?"
English: "See you tomorrow"
French:
Output: "À demain"
```
**Analyze a Dataset**
```
Role: You are a data analyst.
Task: Summarize this dataset into concise business insights.
Context: Results will be presented in a leadership sync; clarity and brevity are key.
Constraints:
• Max 100 words
• Use 3 bullet points only
• Avoid numbers with decimals or complex terms
Output Example:
• Sales rose in Q3 due to strong repeat customers
• Costs stabilized after Q2 vendor negotiations
• Recommend focusing on B2B accounts for sustained growth
Tip: For numeric output, specify “Round all figures to whole numbers.”
```
**Summarize Emails and Next Steps**
```
Role: You are an executive assistant.
Task: Summarize this email thread and list next steps.
Context: Output will be pasted into a meeting note document.
Constraints:
• Limit summary to 3 sentences
• Use bullet format for next steps
• No filler language (“hope this helps,” etc.)
Output Example:
Summary:
The team confirmed the project scope and timeline changes.
Next Steps:
• Update the client on final delivery date
• Prepare revised timeline by Monday
• Confirm approval from finance
Tip: Add “Use plain English, avoid internal jargon.”
```
***
### Final Tip
With Llama, **clarity plus examples = reliability**. Spell out roles, steps, and formats, and you’ll get consistent, structured outputs.
{% hint style="info" %}
*Learn more about Llama Prompt Engineering in the official* [*Prompting Guide*](https://www.llama.com/docs/how-to-guides/prompting/) *and the* [*Llama 4 Prompt Format reference*](https://www.llama.com/docs/model-cards-and-prompt-formats/llama4/)
{% endhint %}
# Image Generation Prompt Guide
**Table of Contents**
1. [Quick Start](#id-1-quickstart)
2. [General Prompting Tips (All Models)](#id-3-general-prompting-tips-all-models)
3. [Quality Control & Troubleshooting](#id-4-troubleshooting)
4. [GPT‑4o: Tips & Prompt Library](#gpt-4o-tips-and-prompt-library)
5. [Nano Banana: Tips & Prompt Library](#nano-banana-tips-and-prompt-library)
6. [Prompt Templates](#prompt-samples-image-generation)
***
### 1. Quickstart
#### Basic Prompt Sandwich
1. **Goal:** what you need and where it will be used.
2. **Scene & Style:** subject, composition, mood, references, camera position
3. **Output specs:** format, aspect ratio, background
**Example**
| Goal | Create a photo of a wedding invitation |
| ------------- | -------------------------------------------------------------------------------------------------------------------------------------------------------------------------------------------------------------------------------------------------------------------------------------------------- |
| Scene & Style | Invitation is on a tasteful wooden desk. The card is hefty, with eggshell textures, and beautiful embossings, with elegant decorations abstractly representing the couple tastefully integrated into the designs. Iconography is used, but sparingly and in a minimalist way. Perfect typesetting. |
| Output | Format is (4:3). |
***
### 2) General Prompting Tips (All Models)
#### Use Descriptive Language
Provide vivid adjectives and adverbs to paint a clear picture. Try to incorporate concrete descriptors over vague ones.
#### Provide Descriptive Context
State where and who: campaign, persona, market, channel.
* “I'm opening a traditional concept restaurant in Marin called Haein. It focuses on Korean food cooked with organic, farm-fresh ingredients, with a rotating menu based on what's seasonal. I want you to design an image - a menu incorporating the following menu items - lean into the traditional/rustic style while keeping it feeling upscale and sleek.”
#### Provide Image Composition
For complex images or posters that need layout directions, clarify details on where the subject and text should be.
* “Top text: Menu, Bottom Text: Follow us on Instagram”
* Rule of thirds, center frame, top‑left safe margin, full‑bleed, negative space for copy (left 40%), product hero, flat‑lay, macro, isometric, over‑the‑shoulder.
#### Specify Style and Format
* Specify medium (photo, 3D, illustration), aesthetic (brutalist, Muji‑minimal), palette, grain, post‑processing.
* Aspect ratio (1:1, 4:5, 16:9, 9:16, 21:9), resolution.
#### Clear Goal
* Start a fresh chat per project to avoid context confusion and drift.
#### Generate Multiple Images
* Clearly state: how many options, and what to vary (composition, angle, color only). Note: May not work sometimes.
***
### 3) Troubleshooting
#### Common Issues & Fixes
* **Plastic skin / over‑smoothing** → “preserve real skin texture, limit smoothing”; add “natural pores”.
* **Wavy text/labels** → Request “vector‑clean label rendering”; if critical, composite real label separately.
* **Wrong color** → Provide **hex codes** (if supported).
* **Over‑busy composition** → Specify negative space percentages and single focal point.
* **Inconsistent series** → Lock seed/size/angle; define a mini style guide.
***
### GPT‑4o: Tips & Prompt Library
#### Tips
1. **Use explicit action verbs.**
* Prefer clear directives like draw, render, edit, remove, replace, re-light to specify exactly what should happen.
* *Example:* “Edit the portrait: remove flyaway hairs and re-light with a soft rim from back-right.”
2. **Leverage GPT-4o for complex scenes.**
* GPT-4o follows detailed instructions reliably and can handle compositions with 10–20 discrete objects in a single prompt when each is named, positioned, and styled clearly.
3. **Switch to a reasoning model for multi-step tasks.**
* For long or interdependent instructions, ask the model to plan steps first, then execute.
* *Example:* “Outline the edit plan (bullets), then perform steps 1–3.”
4. **Capture the source prompt for precise follow-ups.**
* Ask the model to return the exact image-generation prompt (and settings, if available) so you can make targeted edits in later turns.
* *Example:* “Return the exact prompt and size/seed used.”
5. **Work in multi-turns for controlled revisions.**
* Use back-and-forth prompting to iterate: lock what stays the same, change only one or two variables per turn (e.g., background, color way).
* *Example:* “Keep composition and lighting; replace background with a New York street, late afternoon.”
6. **Leverage multi-turn generation.**
* Take advantage of having context consistent throughout prompting. Such as, creating video games: core asset (e.g., a character) -> iterate into adjacent pieces (e.g. game art style, opening screen, HUD/playing interface, level tiles, and key poses)
7. **Front-load clarity to reduce rework.**
* Make the initial prompt unambiguous: specify goal, subject, composition, lighting, style, and output specs (ratio, size, format). This minimizes revisions and avoids context drift.
* *Example skeleton:* “Goal → Subject → Composition → Lighting → Style → Output (size/ratio/format).”
### Prompt Samples
1. **Realistic Product Photo from Combined Photos**
Input images to generate a new image of a gift basket containing the items in the reference images
```
Generate a photorealistic image of a gift basket on a white background
labeled 'Relax & Unwind' with a ribbon and handwriting-like font,
containing all the items in the reference pictures
```
2. **Lifestyle vertical ad**
```
Render a lifestyle scene: young Filipino man in a bright bathroom, applying face wash foam, smile, candid. Natural morning light, warm tones, minimal decor.
Leave 25% top area free of subjects for text. 9:16, 2160×3840, JPG, no watermark.
```
3. **Stylized illustration**
```
Create a flat, vector‑style illustration of a dog care routine: 3 panels, clean lines, pastel palette, large icons, accessible design. 3000×1500 (2:1), SVG if supported else PNG.
```
{% hint style="info" %}
Learn more about GPT 4o Image Generation Prompt Engineering in their [Blog](https://openai.com/index/introducing-4o-image-generation/), or in [Prompt Engineering Guide](https://www.promptingguide.ai/guides/4o-image-generation).
{% endhint %}
***
### Nano Banana: Tips & Prompt Library
#### Tips
1. **Paint a picture.** Be as specific as possible when prompting rather than just listing keywords.
2. **State context and intent.** Tell the model what it’s for so style follows function.
* *e.g.,* “Design a logo for a high-end, minimalist skincare brand,” not just “Make a logo.”
3. **Iterate in small moves.** Don’t chase perfect on try one; use follow-ups to nudge.
* *e.g.,* “Warmer lighting.” “Keep everything; make the expression more serious.”
4. **Break it into ordered actions.** Give step-by-step instructions for complex scenes.
* *e.g.,* “1) Render a misty forest at dawn. 2) Add a moss-covered stone altar in the foreground. 3) Place a single glowing sword on the altar.”
5. **Phrase negatives as positives.** Describe what should be present to exclude what you don’t want.
* *e.g.,* “An empty, deserted street with no people, no vehicles, quiet storefronts.”
6. **Use Photography terms for realistic images.** Mention camera angles, lens types, lighting, and fine details to guide the model toward a photorealistic result.
7. **Provide Font Styles.** For more control, mention text details such as font style and overall design
8. **Create a “mask”**. Define an edit mask in plain language to target just one area and leave the rest untouched.
#### Prompt Samples: Image Generation
1. **Photo Realistic Images**
```
A photorealistic [shot type] of [subject], [action or expression], set in
[environment]. The scene is illuminated by [lighting description], creating
a [mood] atmosphere. Captured with a [camera/lens details], emphasizing
[key textures and details]. The image should be in a [aspect ratio] format.
```
2. **Text in Images**
```
Create a [image type] for [brand/concept] with the text "[text to render]"
in a [font style]. The design should be [style description], with a
[color scheme].
```
4. **Product Mockups**
```
A high-resolution, studio-lit product photograph of a [product description]
on a [background surface/description]. The lighting is a [lighting setup,
e.g., three-point softbox setup] to [lighting purpose]. The camera angle is
a [angle type] to showcase [specific feature]. Ultra-realistic, with sharp
focus on [key detail]. [Aspect ratio].
```
#### Prompt Samples: Photo Editing
1. **Add & Remove Elements**
```
Using the provided image of [subject], please [add/remove/modify] [element]
to/from the scene. Ensure the change is [description of how the change should
integrate]
```
2. **Inpainting**
```
Using the provided image, change only the [specific element] to [new
element/description]. Keep everything else in the image exactly the same,
preserving the original style, lighting, and composition.
```
3. **Style Transfer**
```
Transform the provided photograph of [subject] into the artistic style of [artist/art style]. Preserve the original composition but render it with [description of stylistic elements].
```
4. **Advanced Composition**
```
Create a new image by combining the elements from the provided images. Take
the [element from image 1] and place it with/on the [element from image 2].
The final image should be a [description of the final scene].
```
{% hint style="info" %}
Learn more about Nano Banana Prompt Engineering in the [Docs](https://ai.google.dev/gemini-api/docs/image-generation).
{% endhint %}
# Video Generation Prompt Guide
**Table of Contents**
1. [Quick Start](https://app.gitbook.com/o/wESD8a1fR7H7ddwkYO61/s/IabFtGTeQzwfWCzp8vd6/~/edit/~/changes/458/for-users/prompt-writing-guide/video-generation-prompt-guide#id-1-quickstart)
2. [Break the Prompt Into Clear Elements](https://app.gitbook.com/o/wESD8a1fR7H7ddwkYO61/s/IabFtGTeQzwfWCzp8vd6/~/edit/~/changes/458/for-users/prompt-writing-guide/video-generation-prompt-guide#id-2-break-the-prompt-into-clear-elements)
1. [Cinematography](https://app.gitbook.com/o/wESD8a1fR7H7ddwkYO61/s/IabFtGTeQzwfWCzp8vd6/~/edit/~/changes/458/for-users/prompt-writing-guide/video-generation-prompt-guide#cinematography)
2. [Subject](https://app.gitbook.com/o/wESD8a1fR7H7ddwkYO61/s/IabFtGTeQzwfWCzp8vd6/~/edit/~/changes/458/for-users/prompt-writing-guide/video-generation-prompt-guide#subject)
3. [Action](https://app.gitbook.com/o/wESD8a1fR7H7ddwkYO61/s/IabFtGTeQzwfWCzp8vd6/~/edit/~/changes/458/for-users/prompt-writing-guide/video-generation-prompt-guide#action)
4. [Context](https://app.gitbook.com/o/wESD8a1fR7H7ddwkYO61/s/IabFtGTeQzwfWCzp8vd6/~/edit/~/changes/458/for-users/prompt-writing-guide/video-generation-prompt-guide#context)
5. [Style & Ambiance](https://app.gitbook.com/o/wESD8a1fR7H7ddwkYO61/s/IabFtGTeQzwfWCzp8vd6/~/edit/~/changes/458/for-users/prompt-writing-guide/video-generation-prompt-guide#style-and-ambiance)
3. [Be Specific and Concrete](https://app.gitbook.com/o/wESD8a1fR7H7ddwkYO61/s/IabFtGTeQzwfWCzp8vd6/~/edit/~/changes/458/for-users/prompt-writing-guide/video-generation-prompt-guide#id-3-general-prompting-tips-all-models)
4. [Keep the Prompt Organized](https://app.gitbook.com/o/wESD8a1fR7H7ddwkYO61/s/IabFtGTeQzwfWCzp8vd6/~/edit/~/changes/458/for-users/prompt-writing-guide/video-generation-prompt-guide#id-4-troubleshooting)
5. [Define Constraints Early](https://app.gitbook.com/o/wESD8a1fR7H7ddwkYO61/s/IabFtGTeQzwfWCzp8vd6/~/edit/~/changes/458/for-users/prompt-writing-guide/video-generation-prompt-guide#id-4-troubleshooting-1)
6. [Write Negative Prompts the Right Way](https://app.gitbook.com/o/wESD8a1fR7H7ddwkYO61/s/IabFtGTeQzwfWCzp8vd6/~/edit/~/changes/458/for-users/prompt-writing-guide/video-generation-prompt-guide#id-4-troubleshooting-2)
7. [Think in Story Beats](https://app.gitbook.com/o/wESD8a1fR7H7ddwkYO61/s/IabFtGTeQzwfWCzp8vd6/~/edit/~/changes/458/for-users/prompt-writing-guide/video-generation-prompt-guide#id-4-troubleshooting-3)
8. [Use Reference Images for Consistency](https://app.gitbook.com/o/wESD8a1fR7H7ddwkYO61/s/IabFtGTeQzwfWCzp8vd6/~/edit/~/changes/458/for-users/prompt-writing-guide/video-generation-prompt-guide#id-4-troubleshooting-4)
9. [Veo 3.1 Prompting Guide](https://app.gitbook.com/o/wESD8a1fR7H7ddwkYO61/s/IabFtGTeQzwfWCzp8vd6/~/edit/~/changes/458/for-users/prompt-writing-guide/video-generation-prompt-guide#gpt-4o-tips-and-prompt-library)
1. [Tips](https://app.gitbook.com/o/wESD8a1fR7H7ddwkYO61/s/IabFtGTeQzwfWCzp8vd6/~/edit/~/changes/458/for-users/prompt-writing-guide/video-generation-prompt-guide#prompt-samples)
2. [Audio Prompting](https://app.gitbook.com/o/wESD8a1fR7H7ddwkYO61/s/IabFtGTeQzwfWCzp8vd6/~/edit/~/changes/458/for-users/prompt-writing-guide/video-generation-prompt-guide#prompt-samples-1)
3. [Timestamp Prompting](https://app.gitbook.com/o/wESD8a1fR7H7ddwkYO61/s/IabFtGTeQzwfWCzp8vd6/~/edit/~/changes/458/for-users/prompt-writing-guide/video-generation-prompt-guide#prompt-samples-2)
4. [Video Generation Workflows](https://app.gitbook.com/o/wESD8a1fR7H7ddwkYO61/s/IabFtGTeQzwfWCzp8vd6/~/edit/~/changes/458/for-users/prompt-writing-guide/video-generation-prompt-guide#prompt-samples-3)
5. [Prompt Templates](https://app.gitbook.com/o/wESD8a1fR7H7ddwkYO61/s/IabFtGTeQzwfWCzp8vd6/~/edit/~/changes/458/for-users/prompt-writing-guide/video-generation-prompt-guide#nano-banana-tips-and-prompt-library)
***
### 1. Quickstart
#### Basic Prompting Sandwich
A simple way to structure a strong video prompt is:
**\[Cinematography] + \[Subject] + \[Action] + \[Context] + \[Style & Ambiance]**
1. **Cinematography:** Define the camera work and shot composition.
2. **Subject:** Identify the main character or focal point.
3. **Action:** Describe what the subject is doing.
4. **Context:** Detail the environment and background elements.
5. **Style & ambiance:** Specify the overall aesthetic, mood, and lighting
**Example**
Medium shot, a tired corporate worker, rubbing his temples in exhaustion, in front of a bulky 1980s computer in a cluttered office late at night. The scene is lit by the harsh fluorescent overhead lights and the green glow of the monochrome monitor. Retro aesthetic, shot as if on 1980s color film, slightly grainy.
***
### 2) Break the Prompt Into Clear Elements
#### Cinematography
Describe how the scene should be filmed.
**You can specify:**
* **Shot Type**: wide establishing, medium, close-up, extreme close-up, macro, over-the-shoulder, long shot, POV
* **Camera Angle**: eye-level, low angle, high angle, top-down, worm's-eye, dutch angle,
* **Camera Movement**: slow dolly-in, pan, tilt, locked-off tripod, handheld tracking, orbit, crane shot, static shot (or fixed), truck, pedestal, zoom, drone, whip pan, arc shot
* **Lens & Focus**: 35mm lens, shallow depth of field, soft bokeh, anamorphic flares, wide angle, telephoto, deep depth of field, lens flare, rack focus, fisheye, vertigo
**Example:**
Crane shot starting low on a lone hiker and ascending high above,
revealing they are standing on the edge of a colossal, mist-filled
canyon at sunrise, epic fantasy style, awe-inspiring, soft morning light.
#### Subject
State the main focus of the shot. Be specific. Include defining details like color, material, age, species, clothing, or expression where helpful.
**Examples:**
* **People**: Generic descriptors (man, woman, elderly person), Specific professions, Historical figures, Mythical beings ("mischievous fairy", "a stoic knight")
* **Animals or creatures**: Specific breeds of animals, Fantastical creatures: ("a miniature dragon with iridescent scales", "a wise, ancient talking tree")
* **Objects**: Everyday items, Vehicles, Abstract shapes ("glowing orbs", "crystalline structures")
#### Action
Describe what the subject is doing. The clearer the action, the more predictable the animation.
**You can specify:**
* **Basic movements**: walking, running, jumping, flying, swimming, dancing, spinning, falling, standing still, sitting
* **Interactions**: talking, laughing, arguing, hugging, fighting, playing a game, cooking, building, writing, reading, observing
* **Emotional expressions**: smiling, frowning, surprise, concentrating deeply, appearing thoughtful, showing excitement, crying
* **Subtle actions**: a gentle breeze ruffling hair, leaves rustling, a subtle nod, fingers tapping impatiently, eyes blinking slowly
* **Transformations or processes**: a flower blooming in fast-motion, ice melting, a city skyline developing over time (however, keep clip length in mind for events that occur over a longer period)
#### Context
Describe the setting or situation around the subject. Context grounds the scene and prevents generic outputs.
**You can specify:**
* **Location (interior)**: a cozy living room with a crackling fireplace, a sterile futuristic laboratory, a cluttered artist's studio, a grand ballroom, a dusty attic
* **Location (exterior)**: a sun-drenched tropical beach, a misty ancient forest, a bustling futuristic cityscape at night, a serene mountain peak at dawn, a desolate alien planet
* **Time of day**: golden hour, midday sun, twilight, deep night, pre-dawn
* **Weather**: clear blue sky, overcast and gloomy, light drizzle, heavy thunderstorm with visible lightning, gentle snowfall, swirling fog
* **Historical or fantastical period**: a medieval castle courtyard, a roaring 1920s jazz club, a cyberpunk alleyway, an enchanted forest glade
* **Atmospheric details**: floating dust motes in a sunbeam, shimmering heat haze, reflections on wet pavement, leaves scattered by the wind
#### Style & Ambiance
Describe the look and mood of the video. Instead of writing something broad like “epic vibe,” define the mood through lighting, palette, and texture.
**You can specify:**
* **Style**: cinematic realism, stop-motion feel, hand-drawn animation, film noir, retro VHS, photorealistic, cinematic, animation, art movements/artists, specific looks
* **Lighting**: soft key light, warm tungsten practicals, cool moonlight rim light, natural light , artificial light, cinematic lighting ("rembrandt lighting on a portrait"), specific effects ("volumetric lighting creating visible light rays")
* **Tone or Mood**: happy/joyful, sad/melancholy, suspenseful/tense, peaceful/serene, epic/grandios, futuristic/sci-fi:, vintage/retro, romantic, horror
* **Ambiance**: color paelttes, atmospheric effects, textural qualities
{% hint style="info" %}
For an indepth guide of video generation elements, look into [Veo Prompt Guide](https://docs.cloud.google.com/vertex-ai/generative-ai/docs/video/video-gen-prompt-guide#temporal-elements)
{% endhint %}
***
### 3) Be Specific and Concrete
Replace vague language with visual direction.
Specific prompts usually produce more controllable outputs because the model has less room to guess. Google’s prompt guidance also emphasizes using detailed, explicit instructions rather than abstract descriptors.
**Weaker:**
```
A heartwarming cooking scene.
```
**Better:**
```
Slow dolly-in on a chef plating noodles;
steam rising; warm rim light; shallow depth of field.
```
***
### 4) Keep the Prompt Organized
Write in short, readable lines or short grouped sections.
A clean structure often works better than one long paragraph. For example:
**Format**\
16:9, 6 seconds, cinematic realism.
**Subject + Action**\
A matte-black skincare bottle rotates slowly on a wet stone slab.
**Cinematography**\
Locked-off tripod. 50mm lens. Shallow depth of field.
**Style & Ambiance**\
Soft cool backlight, subtle bloom, low-contrast filmic grade.
This kind of structure reduces ambiguity and makes it easier to revise later.
***
### 5) Define Constraints Early
Put core technical constraints near the top of the prompt:
* aspect ratio
* clip length
* frame style or format
* resolution if supported
* general visual mode
**Example:**
```
16:9, 6 seconds, cinematic realism.
```
***
### 6) Write Negative Prompts the Right Way
When excluding elements, avoid awkward phrasing like:
* “don’t show buildings”
* “no scary mood”
* “don’t make it dark”
Instead, phrase the exclusion clearly as a negative prompt list.
**Example:**
```
With negative prompt: urban background, man-made structures, dark
stormy atmosphere, extra props, text overlays.
```
***
### 7) Think in Story Beats
Even short clips work better when they have internal structure.
For a 6-8 second clip, you can think in simple beats:
* **Beat 1:** establish subject and setting
* **Beat 2:** introduce motion or action
* **Beat 3:** end on a reveal, expression, or hold
***
### 8) Use Reference Images for Consistency
Use reference inputs when you want:
* the same character across multiple shots
* the same product design across variations
* the same environment or art direction
* more visual consistency from scene to scene
***
### 9) Veo 3.1 Prompting Guide
#### Tips
1. **Native Audio Prefixes**: Veo 3.1 is one of the few models that allows for direct audio-to-video synchronization within the prompt using specific tags:
2. **300-Character Ceiling**: Veo 3.1 is highly sensitive to prompt length. Aim for 150–300 characters. Prompts exceeding 400 characters often lead to "prompt leakage," where the model ignores the latter half of your instructions.
3. **Timestamp-Based Prompting**: You can direct specific pacing by adding time markers.
4. **Multi-Reference "Ingredients"**: Instead of just one "Image-to-Video" reference, Veo 3.1 supports up to three image inputs. Use this to maintain consistency for a specific product, a specific character, and a specific background simultaneously
#### Audio Prompting
For Veo 3.1, audio should be treated as one of the main parts of the prompt when relevant. Google’s latest Veo guide explicitly highlights synchronized audio, including dialogue, ambient sound, and sound effects.
**Useful audio elements include:**
* dialogue
* ambient room tone
* environmental sounds
* sound effects
* music or no music
* voice tone, pace, style, or accent
A good rule is to describe audio in separate lines.
**No Dialogue Example**
```
Ambient room tone with soft water drips. No music. No dialogue.
```
**With Dialogue Example**
```
Voice: calm adult male, neutral accent, steady pace.
Line 1: “Welcome to Day 06.”
Line 2: “Smart skincare starts here.”
```
#### Timestamp Prompting
Aside from story beats, Veo 3.1 now goes further by supporting timestamp-based prompting for more explicit scene pacing. Google’s latest guidance includes timestamped shot descriptions as a way to control the sequence of events in a short clip.
**Example:**
```
[00:00-00:02]
Wide establishing shot of the room.
[00:02-00:05]
Camera slowly pushes in as the subject turns and speaks.
[00:05-00:08]
Hold on the final expression with soft room tone.
```
#### Video Generation Workflows
#### Ingredients to Video
Prepare visual ingredients, such as characters, props, or settings, then animate them into a video scene. Google specifically highlights this for building multi-shot scenes with consistent characters and dialogue.
**How does it work:**
1. **Generate your "ingredients":** reference images
2. **Compose the scene:** Use the Ingredients to Video feature with the relevant reference images.
**Use this when:**
* you need repeatable character design
* you want a product to remain consistent
* you want a scene to feel like the same world across shots
* you are building a dialogue scene with recurring subjects
#### First and Last Frame
You provide a starting image and an ending image, then prompt the model to generate the transition between them. Google’s Veo 3.1 guide explicitly describes this feature and recommends describing both the motion and the audio for the in-between sequence.
**Use this when you want:**
* a controlled transformation between two states
* a reveal from one composition to another
* a precise transition arc
* a stylized before/after movement
**Example**
```
Start from the front-facing portrait of the singer,
then arc smoothly around her until the shot ends from behind the performer
looking out onto the audience. Include live stage ambience and sung dialogue.
```
{% hint style="info" %}
For an in depth guide of video generation workflows, look into [Veo Prompt Guide](https://docs.cloud.google.com/vertex-ai/generative-ai/docs/video/video-gen-prompt-guide#temporal-elements)
{% endhint %}
#### Prompt Templates
1. **General Video Generation Template**
```
[FORMAT]
Aspect ratio, duration, overall visual mode.
[CINEMATOGRAPHY]
Shot type, movement, lens, depth of field.
[SUBJECT]
Main character, object, or product.
[ACTION]
What happens over the clip.
[CONTEXT]
Environment and scene setup.
[STYLE & AMBIANCE]
Lighting, grade, texture, mood.
[AUDIO]
Dialogue, ambience, SFX, music, silence instructions.
[REFERENCE INPUTS / WORKFLOW]
Reference image, ingredients to video, first and last frame, or other workflow notes if applicable.
[TIMESTAMPS]
Optional timing breakdown for multi-beat clips.
[NEGATIVE PROMPT]
Elements to exclude.
```
2. **Product Here with Native Audio**
```
[FORMAT]
16:9, 6 seconds, cinematic realism.
[CINEMATOGRAPHY]
Locked-off tripod. Medium close-up. 50mm lens. Shallow depth of field.
[SUBJECT]
A matte-black skincare serum bottle.
[ACTION]
The bottle rotates slowly while condensation droplets slide down the surface and tiny ripples move across the wet stone beneath it.
[CONTEXT]
Placed on a dark stone slab in a minimalist studio.
[STYLE & AMBIANCE]
Soft cool rim light, subtle bloom, low-contrast filmic grade, premium editorial look.
[AUDIO]
Ambient room tone with soft water drips. No music. No dialogue.
[NEGATIVE PROMPT]
Text overlays, label distortion, logo changes, extra props, cluttered background.
```
3. **Character with Dialogue**
```
[FORMAT]
1:1, 8 seconds, stylized animation.
[CINEMATOGRAPHY]
Medium shot to close-up. Slow dolly-in. 35mm equivalent lens. Shallow depth of field.
[SUBJECT]
A chibi dog mascot sitting on a stool.
[ACTION]
The mascot waves, points toward the camera, and smiles.
[CONTEXT]
Simple pastel studio backdrop.
[STYLE & AMBIANCE]
Hand-drawn linework, flat pastel palette, soft paper texture, cheerful and playful mood.
[AUDIO - DIALOGUE]
Voice: bright, friendly, childlike tone.
Line 1: “Hi! Ready for clean teeth and happy tails?”
Line 2: “Niblets, your daily dental treat!”
End with a tiny “ding” sound effect.
[NEGATIVE PROMPT]
On-screen text, rapid cuts, background crowd, style drift.
```
4. **First-Frame / Image-to-Video Variation**
```
[REFERENCE INPUT]
Use the provided product photo as the opening frame.
[FORMAT]
16:9, 5 seconds, realistic.
[CINEMATOGRAPHY]
Slow right-to-left parallax. Soft rack focus.
[ACTION]
Start from the exact composition of the source image, then shift focus from the front label to the bottle cap.
[STYLE & AMBIANCE]
Clean product-commercial feel. Soft studio reflections. Controlled premium lighting.
[AUDIO]
Subtle room tone only. No dialogue.
[NEGATIVE PROMPT]
Logo changes, label morphing, extra reflections, added props.
```
# All About Knowledge Bots
This section provides a friendly, easy-to-follow guide on Knowledge Bots and their effective use. Learn how these intelligent assistants help you quickly find information.
### **Prompt with Us!**
Before diving into the world of Knowledge Bots, take a moment to explore this [guide](https://docs.en.theblockbrain.ai/for-users/prompt-writing-guide) on crafting effective prompts. It’s a quick read that’ll help you make the most of your AI—ensuring you get smarter, faster results every time.
***
## What are Knowledge Bots?
**A Knowledge Bot is your AI-powered assistant, designed to work with your company’s own knowledge.** It connects to your files, tools, and database sources so it can answer questions and support your team using the information you already have.
In the image below, you can choose from different types of bots, each suited for a specific task or purpose.
#### What to use it for?
Here are a few examples of what a Knowledge Bot can help with:
* **Summarize a 100-page legal contract** in seconds
* **Generate insights** from marketing or sales reports
* **Debug a line of code** and suggest improvements
* **Write a first draft** of emails, reports, or blog posts
* **Act as a helpdesk assistant**, trained on your FAQs
* **Answer employee questions** using internal HR policies
* **Compare two contracts** and highlight key differences
{% hint style="info" %}
You’ll want to start [here](/for-users/all-about-knowledge-bots/chat-with-knowledge-bots) for a full look at the Knowledge Bot guide subpage, where everything is explained in detail.
{% endhint %}
***
## What is Knowledge Management?
**Knowledgebases are like your own company database sources.**\
This section lets you organize, create, and manage your data and insights.
{% hint style="info" %}
Now that you know what this feature does, click [here](/for-users/all-about-knowledge-bots/manage-your-database-sources-in-knowledge-management) to open the subpage with all the details on how to use it.
{% endhint %}
***
### What are Insights?
**Insights help you quickly capture and organize knowledge.**\
They are viewed and managed in the Knowledge Management section, where Blockbrain lets you store text-based information. Unlike traditional database sources, Insights are made for fast knowledge capture, like smart notes you create or save during an AI conversation.
{% hint style="info" %}
Now that you know what this feature does, click [here](/for-users/guide-on-advanced-knowledge-bot-features/what-are-insight-use-and-dynamic-insights) to open the subpage with all the details on how to use it.
{% endhint %}
***
## Tips on how to Optimize your Knowledge Bot
1. **Web Research** – Expand your bot’s knowledge by retrieving real-time information from the internet in addition to your Knowledge Bases.
2. **Insights** – Capture, store, and share key information from previous conversations to maintain continuity and context.
3. **Intent Prompt** – Improves database source crawling by understanding user intent, ensuring more accurate and context-aware responses.
4. **Workflows** – Automate multi-step prompts to streamline complex interactions, making conversations more efficient and structured.
5. **Prompts** – Set up reusable, customizable prompt shortcuts to save time and enhance productivity.
6. **Additional Context** – Provide extra background details to improve response accuracy while keeping interactions efficient.
7. **Search Options** – Customize how your bot retrieves information with AI Search, Index Search, or Hybrid Search for more precise and relevant results.
To explore some of these features in detail, check out the **Advanced Features** [page](/for-users/guide-on-advanced-knowledge-bot-features)
# Knowledge Bot Basics
Welcome to the foundation of how Knowledge Bots work in Blockbrain. Whether you're just getting started or need a refresher, this page covers the key concepts behind what makes Knowledge Bots powerful
## Getting to Know the Knowledge Bot
### Understanding Data Rooms
Data Rooms are the top-level workspace where you organize related conversations under one shared context. In a Data Room, you can set Data Room Instructions (separate from Bot Instructions) that apply to every Chat Room inside it. You can choose to keep these instructions as-is or override the Bot Instructions per Chat Room when you need something more specific.
A key benefit of using Data Rooms is that you can attach your Knowledge Sources once (files, emails, links, and other connected sources) at the Data Room level so every Chat Room automatically has access to the same collection of knowledge. This makes it easy to run multiple chats with the same context, without reconnecting data every time.
**Each Data Room includes:**
* **Data Room Instructions.** Shared guidance for how the AI should behave in this workspace, different from Bot Instructions, and optionally overridable.
* **Chat Rooms.** Multiple chat threads under one workspace, all inheriting the same Data Room context by default.
* **Knowledge Sources.** A centralized collection of connected data for the entire Data Room, so all chats stay aligned to the same references.
* **Settings.** Controls for how the Data Room behaves and how its connected knowledge is used across Chat Rooms.
{% hint style="info" %}
Use separate Data Rooms to keep discussions organized by project, topic, or team, making it easier to manage and revisit your conversations.
{% endhint %}
***
### Understanding Chat Rooms
Chat Rooms are individual chat threads inside a Data Room. This is where you start a conversation, ask questions, and work through tasks while automatically inheriting the Data Room Instructions and Knowledge Sources attached to that Data Room. You can also further customize each Chat Room for a specific project, request, or workflow.
**Each room includes:**
* **Chat thread.** Start conversations, ask questions, or use the Prompt Library and Workflows to speed up your prompt needs.
* **Data.** Upload or connect files, links, databases, and other types of data inside that room. So answers from AI stay focused on that topic.
* **Settings.** Control what knowledge is connected and how the room behaves.
***
### Prompting in the Chat Box
The Chat Field is where you type your questions, tasks, or instructions for the Knowledge Bot. You can also activate additional features for each prompt such as enabling web research, generating images, or switching to voice input.
{% hint style="info" %}
Learn how to make the most out of your conversations with a Knowledge Bot. Well crafted prompts lead to better answers. Learn how to write effective prompts [here](/for-users/prompt-writing-guide)
{% endhint %}
* **Writing Style.** Customize the length of your answers based on token Length.
* **Web Research.** Turn on web search when you need fresh or external information. You can choose between:
* **Web Search**: Best for quick, simple results and you can pick your preferred search provider, such as *Tavily*, *Linkup*, or *Perplexity* (depending on what your admin has enabled).
* **Web Search Pro**: Analyzes more sources for deeper answers.
* **Image Generation.** If image tools are enabled for your workspace, you can ask the bot to generate images directly from the chat field using models such as *Gemini 2.5 Flash*, *GPT Image 1*, *Flux Schnell,* or *Imagen 4*.
* **Voice Input.** Use your microphone to turn speech into text so you can prompt without typing.
* **Voice Mode.** Run the whole conversation in voice mode so you can speak and listen instead of reading and typing.
* **Prompt Library**. Explore and use pre-made prompts for a quicker prompting experience.
{% hint style="warning" %}
If these options don’t appear for you, ask your workspace admin to enable them in the **Bot Settings.**
{% endhint %}
***
### Quick Access Panel Settings
You can quickly access settings for each Data Room in the panel settings located in the right side of the Knowledge Bot
#### LLM Settings
* **Select the AI Model (LLM)**: Choose the language model (e.g., GPT, Gemini, Claude) that best aligns with the specific needs of the data room. For example, you might prefer a model that excels at handling long documents, supports advanced coding tasks, or performs well with multi-step prompts used in workflows.
#### Bot Settings
Accessible in the Bot Settings or Action Settings of the Chat Room. If you don’t see the settings panel, please contact your admin to enable access.
* Access or build **Workflows** to automate tasks and enhance interactions
{% hint style="info" %}
For more details on advanced tools like [Workflows](/for-users/guide-on-advanced-knowledge-bot-features/what-are-workflows), check out the Guide on Advanced Knowledge Bot Features.
{% endhint %}
#### General Settings
Accessible in the Bot Settings or Action Settings of the Data Room.
* **Configure Data Retention**: Define how long the data in this room should be stored. This includes options for auto-deletion (from 10-minute sessions to 12-month durations) to help meet compliance and privacy requirements.
#### Knowledge Bot Management
These settings focuses on a specific data room. These settings help you optimize the room based on the that specific prompting needs.
* **Set Knowledge Destinations**: Specify where insights, summaries, or outputs will be saved when exported from this room.
* Connect different types of data depending on your needs such as uploading files, connecting one or multiple databases, or even emails.
{% hint style="info" %}
For more details on connecting different types of data, click [here](/for-users/all-about-knowledge-bots/connect-data-to-your-knowledge-bot).
{% endhint %}
Connect different types of data depending on your needs such as uploading files, connecting one or multiple databases, or even emails. This will allow the Knowledge Bot to access information for that specific Data room. These can be further adjusted in Chat Rooms.
Attach the data your Knowledge Bot needs to work with like uploaded files, connected databases, or even synced emails. Think of it as setting the context: the bot will only use the data you connect to this specific room, so its answers stay focused, accurate, and relevant to your topic.
#### Others
In this section, you can configure two additional options:
* **Language**: Choose the language the Knowledge Bot will use when responding. If you'd like the bot to automatically detect and match the user's language, set this to **Automatic**. Otherwise, you can manually select a preferred language for consistent replies.
* **Additional Context**: Add any extra context or notes you'd like the bot to consider during the conversation. This is useful for injecting room-wide instructions, tone guidelines, or background information the bot should always keep in mind.
{% hint style="info" %}
***Tip*****:** If you want to simplify the interface for users, you can hide unused sidebar features by toggling them off in **Action Settings** under **Bot Settings**.
{% endhint %}
***
### Knowledge Bot Settings
In the upper left corner of the Knowledge Bot, you'll find the **gear icon**, which opens the bot settings. Here, you can customize and enable various features to tailor the bot to your needs.
1. **Setup**: Customize the bot’s avatar photo, name, tone, and welcome message. You can also set:
* Initial Instructions (to control its speaking style and behavior),
* A **default agent** (e.g. Normal Chat, Knowledge Agent, ),
* Mobile access permissions,
* And toggle **conversation starters** or **follow-up questions** on or off.
2. **Capabilities & Skills**: Adjust search methods and activate advanced features
3. **LLM Models**: Choose the language model that powers your bot's responses, balancing performance, accuracy, and cost
4. **Database Source**: Select the default database source for all data rooms
5. **Prompts**: Set up or activate customizable prompts for more efficient use
6. **Automations**: Set up workflows for more efficient prompting
7. **Action Settings**: Adds quick-access buttons to the Knowledge Bot navigation and enables advanced features like Intent Agent and System Agent for enhanced search and automation
{% hint style="info" %}
*Note: If you don't see any bot settings, you may not have access to them. Inquire to the admin of the bot regarding its access.*
{% endhint %}
***
## Adding Knowledge Bots
Find a Knowledge Bot by clicking the "Add Bot" in the Dashboard.
# Chat with Knowledge Bots
## Dashboard - Your Starting Point
Your dashboard is the control center for your Knowledge Bots. Here's what you can do:
1. **Add Bots:** Expand your collection of bots by adding new ones.
2. **Search and Select Bots:** Quickly find the right bot for your query by searching through your available bots.
3. **Start a Conversation:** Click on a bot to start a conversation and ask for information.
***
## Chat with a Knowledge Bot
### Getting Started
Upon opening the application, you'll see a three-panel interface:
* Left sidebar for adding new "Data Rooms" or "Chat Rooms"
* Central chat interface
* Right sidebar for Action Settings
### Using the Chat Interface
* The central chat area displays the chat history.
* At the bottom, you'll find a text input field labeled "Write your message".
* Type your message or use the microphone icon for voice input.
{% hint style="info" %}
Check out our [Prompt Writing Guide](https://docs.blockbrain.ai/for-users/all-about-knowledge-bots/pages/ki7QnF5ofj7rVSAoW9Oi#id-2.-chat-prompt-guide) to learn how to ask clear, effective questions that get better results from your knowledgebots.
{% endhint %}
***
### Chat Shortcuts
In the chat box, you'll find several helpful features to enhance your chat experience:
1. **Prompts Library**\
These are reusable prompt shortcuts that make repetitive tasks easier. Select an prompt to automate common tasks and keep responses consistent. Find in the Options button.
2. **Writing Style**\
Adjusts the bot's response length depending on token Length. It's best to leave it on Auto unless you need shorter answers. Find in the Options button.
3. **Create Image (This feature may not be activated in your instance)**\
Click this to turn your ideas into images. Find in the Options button.
4. **Web Research Toggle (This feature may not be activated in your instance)**\
This feature allows the AI to search the internet for real-time information.
5. **Send Icon**\
Click this to send your message or simply press "Enter" on your keyboard.
6. **Mic Icon (Bottom Right Corner)**\
Instead of typing, click this to speak your message aloud.
7. **Voice Mode** \
Interact with the bot using Voice.
8. **Token Usage Indicator (Above the Chat Features)**\
This shows how many tokens you’ve used out of your total limit. Tokens represent the chunks of text processed by the AI. For example, "1/120,000" means you've used 1 token out of a total of 120,000. This helps you keep track of your usage and avoid hitting the limit.
{% hint style="info" %}
Check out our [Image Generation Prompt Guide](/for-users/prompt-writing-guide/image-generation-prompt-guide) to learn how to craft better prompts for Generative AI.
{% endhint %}
***
## What more can you do while chatting with your AI?
When the AI returns a response, you’ll find several options that allow you to interact further with the chat.
1. **AI Prompts (Magic Wand Icon)**\
Click this to access a list of pre-configured prompts. These prompts help you quickly generate outputs without typing. For example, you can use a prompt to summarize the AI's output with just a click, making it easier to get the results you need.
2. **Pin (Pin Icon)**\
Want to keep a particular conversation handy? Use the Pin button to pin a chat to the side, so it stays visible while you continue chatting. This is useful for referencing important information during the conversation.
3. **Contribute Knowledge (Hand and Light Bulb Icon)**\
If you find an AI response particularly helpful, you can save it to a database source for later use. Just click the Contribute Knowledge button, and the chat is saved for future reference.
4. **Reply Icon (Speech Bubble Icon)**\
The Reply icon allows you to respond directly to a specific chat. It helps you continue a conversation or ask a follow-up question about a particular part of the AI’s output.
5. **Speaker Icon (Speaker Icon)**\
Click this to have the AI’s message read out loud. This is helpful if you prefer listening to the response instead of reading it.
6. **Delete Icon (Trash Bin Icon)**\
If you want to remove a specific message, simply click the Delete icon. This will delete that particular chat from the conversation.
7. **Three Horizontal Dots (More Options)**\
Click this to open additional options:
* **Deactivate Message:** Temporarily disable the message if needed.
* **Save as Insight:** Save the message as an insight for future reference.
* **Copy as Rich Text/Text/Markdown:** Copy the message in different formats.
* **Rate Response:** Rate the AI's response as either good or bad.
# Creating Images
Generate images directly inside the chat using AI image generation models. This is useful for creating visuals, mockups, design ideas, product concepts, illustrations, marketing assets, and other image-based outputs without leaving the platform.
## How to Use Create Image
To generate an image:
1. Click the **Create Image** option in the chat box or Options menu.
2. Write a clear image prompt.
3. Include important details such as subject, style, format, background, colors, mood, and intended use.
4. Submit the prompt.
5. Review the generated image.
6. Refine your prompt if needed.
{% hint style="info" %}
Check out our [Image Generation Prompt Guide](/for-users/prompt-writing-guide/image-generation-prompt-guide) to learn how to craft better prompts for Generative AI.
{% endhint %}
## How to Activate Create Image
To make the feature is available in your instance, you can activate it through the bot settings.
**Steps:**
1. Open the bot or chat where you want to use image generation.
2. Go to **Settings**.
3. Look for the Capabilities & Skills to find the Image Generation option.
4. Enable the feature.
5. Choose your preferred image generation provider, if multiple options are available.
Once activated, the **Create Image** option should appear in the chat box options menu.
# Connect Data to your Knowledge Bot
## Types of Connectable Data
Blockbrain supports various types of data that you can connect and use as context in your chat rooms.
1. **Insights**: Reuse saved AI responses or personal notes for consistent, contextual outputs.
2. **File Upload**: Upload files with full structure, formatting, and images preserved (no chunking).
3. **Database source**: Connect large, chunked, and searchable document collections shared across teams.
4. **Email Service**: Import Gmail threads to make key conversations accessible and searchable.
5. **Additional Context**: Add custom details or background information to refine AI accuracy.
Available in the right panel of the Knowledgebot screen
***
## Insights
Insights are are text-based notes that you can input yourself, or allows you to store and retrieve previously saved AI interactions, making it easy to reuse knowledge from past conversations. This is useful for ensuring consistency in responses and retaining key learnings across teams.
These saved insights act as a personal knowledge base, helping users retain important AI-generated information, streamline workflows, and maintain consistency across multiple interactions. Unlike database sources, Insights are stored in full context without chunking, preserving the original message structure for improved retrieval and reuse.
**When to Use Insights**
* When past AI-generated responses need to be referenced frequently
* When team members share refined prompts or key findings from Data Rooms
* When specific contextual knowledge should be stored for quick access
If you want to know more about Insight, take a look at the video below:
{% embed url="" %}
***
## File Upload
Files are uploaded as whole units without chunking, preserving the document’s full structure and original formatting. Unlike database sources, which break content into sections, files maintain context in its entirety.
**When to Use Files Instead**
* When document structure is critical (e.g., legal contracts, research papers, reports).
* When exact phrasing needs to be referenced instead of processed in chunks.
* When a smaller, standalone document is used for AI retrieval rather than large-scale search queries
* When images such as infographics, charts, regular images, posters, and catalogues are relevant for the prompt
#### **Sample Use Case of Files Upload**
* Analyzing infographics that a graphics heavy
* Analyzing all parts of legal contracts
***
## Database Source
Database sources are ideal for storing and processing large volumes of documents, especially when shared between teams. Uploaded documents are chunked, meaning they are broken into smaller segments for AI processing.
**How Chunking Affects Accuracy**
* Chunking allows the AI to scan and retrieve information efficiently, but it may reduce context continuity across large documents.
* Smaller chunks improve precision for direct queries, while larger chunks help retain context but can dilute accuracy if too broad.
* The default chunk size is 2000 characters with a 300-character overlap, ensuring a balance between accuracy and context.
**When to Use Database Sources**
* When managing large document collections that multiple users need access to
* When scalability is required for long-term data management
* When high-volume AI queries need to be performed across many documents
{% hint style="info" %}
Instead of a Blockbrain Database, you can connect your OneDrive database by following the setup instructions on the [**Integrations**](/for-admins/classic-microsoft-integrations) page.
{% endhint %}
***
## Email Service
Email Service allows you to import Gmail threads directly into your Data Room. This makes key email conversations searchable and usable as part of the AI’s context, especially when referencing previous decisions, stakeholder instructions, or project-related discussions.
{% hint style="danger" %}
Currently, only Gmail is supported for email integration.
{% endhint %}
**When to Use Email Integration**
* When email threads contain key information or instructions relevant to the task
* When tracking client or team discussions directly from email history
* When AI responses need to align with ongoing communications or past decisions
**Sample Use Case of Email Integration**
* Referencing client instructions discussed over email
* Summarizing email threads
***
## Additional Context
**Additional Context** allows you to add custom notes, clarifications, or background information directly into the Data Room to guide the AI more effectively. It’s especially helpful when your workflow includes multiple context sources (e.g., database sources, files, emails) and you need to define relationships, explain terms, or provide task-specific instructions. This ensures the AI consistently considers important context without requiring you to repeat it in every prompt.
**When to Use Additional Context**
* When the Data Room includes multiple context types and clarity is needed (e.g., files + database source + emails)
* When there are special instructions, business rules, or internal nuances to be explained
* When you need to control how the AI interprets or prioritizes specific content
**Sample Use Case of Additional Context**
* Clarifying that "Doc A" should be prioritized over "Doc B" in mixed-source workflows
* Defining roles or terms that appear across multiple documents (e.g., “AM” = Account Manager)
***
## How it Works
#### Benefits
* Comprehensive data integration
* Flexible access to various knowledge sources
* Seamless context enhancement
* Efficient knowledge management
{% hint style="info" %}
*Note: Choose the connection type that best suits your specific needs and data structure.*
{% endhint %}
# Manage your Database Sources in Knowledge Management
**Knowledge bases are like your own company database sources.**\
This section lets you organize, create, and manage your data and insights. This guide will walk you through the key features and how to use them effectively.
### Managing Database Sources
#### Viewing Database sources
Upon entering Data Management, you'll see two types of database sourcess:
1. Public database sources owned by you or other users
2. Private database sources you've created
#### Accessing Database Source Contents
To view documents within a database source:
1. Locate the desired database source in the list
2. Click on the database source name
3. Browse through the documents
#### Creating a New Database Source
1. Click the "New Database Source" button
2. Fill in the required information:
* Name your database source
* Add a description
* Select an embedding model that suits your needs
3. Click "Create" to finalize
#### Advanced Settings in Database Sources
Blockbrain offers several **advanced settings** to help you tailor your **Knowledge Base** (aka your database source) for improved AI performance and team collaboration. You can:
1. **Adjust Access Settings:** Set database sources to public, private or share to specific users for controlled collaboration.
2. **Select a Language:** Optimize AI processing for different languages.
3. **Modify Chunk Size & Overlap:** Fine-tune how the AI reads and processes text for better accuracy or broader context.
4. **Enable Smart Processing:** Convert tables, images, and structured content into AI-readable formats.
5. **Enable Smart OCR**. Used for complex structured PDFs.
6. **Extract Images:** Allow the AI to retrieve and display images from documents.
#### Adding Documents to a Database Source
After creating a database source, you can add documents in three ways:
1. Upload from your computer: Click "Upload" and select files from your device
2. Scrape from a website: Click "Import" and enter the URL of the web content (Note: The website has to be available to the public)
3. Connect a shared drive: Click "Connect Drive" and follow the prompts to link your shared drive
### Sharing Database Sources
Database sources in Blockbrain are **private by design**. When you create a new database source, only you can see and use it until you choose to share it. You can share access in two ways: by inviting specific users with roles, and by adjusting the database’s visibility (Private, Restricted, or Public).
#### Inviting Users and Assigning Roles
You can invite teammates via email and assign a role that controls what they can do inside the database source:
* **Viewer**: Can view and search content only.
* **Contributor**: Can manage their own content and invite users with the same or lower roles.
* **Content Manager**: Can manage all content and users for that database source.
{% hint style="info" %}
Use these roles when you need different levels of control. For example, giving most teammates Viewer access, while a smaller group of editors gets Contributor or Content Manager access.
{% endhint %}
#### Setting Visibility: Private, Restricted, or Public
In the **Share Database** settings, you can also choose how broadly the database source is visible:
1. **Private**
* Only you can access this database source.
* Best for drafts, sensitive information, or personal workspaces.
2. **Restricted**
* Only invited collaborators can access this database source.
* Ideal for team-specific or project-based knowledge.
3. **Public**
* All data is accessible through connected bots or invited users.
* Helpful when you want bots to answer questions from this database or when many users need read access.
{% hint style="info" %}
Even when a database source is set to **Public**, you can still control who can manage it by assigning roles (Viewer, Contributor, Content Manager) to specific users. This lets you keep editing rights limited while making the content widely searchable.
{% endhint %}
# All about LLMs
### Technical heritage
**Large Language Models (LLMs)** are a category of advanced artificial intelligence systems built on **deep learning** techniques and trained on vast quantities of text data [1](https://aws.amazon.com/what-is/large-language-model/). Their primary purpose is to understand, generate, and manipulate **natural language** — the kind of language humans use every day in conversation, writing, and communication.
Unlike traditional software that follows rigid, pre-programmed rules, LLMs learn patterns, relationships, and structures within language from the data they consume during training. This enables them to perform a remarkably **wide range of tasks**, including answering questions, writing essays, summarizing documents, translating between languages, and generating computer code [1](https://aws.amazon.com/what-is/large-language-model/). LLMs represent a **fundamental shift** in how humans interact with machines, moving from structured commands to natural conversation [3](https://www.ibm.com/think/topics/large-language-models).
At their core, LLMs are **neural networks** — computational systems loosely inspired by the human brain — composed of billions of adjustable parameters. During training, these models process enormous datasets of text, learning to predict what word or token comes next in a sequence. This seemingly simple objective — **next-token prediction** — gives rise to surprisingly sophisticated language capabilities. The models encode knowledge about grammar, facts, reasoning patterns, and even stylistic nuances into their parameters. Once trained, an LLM can generate coherent and contextually appropriate text by repeatedly predicting the most likely next word, one token at a time. The quality of an LLM's output depends heavily on the **volume and diversity** of its training data as well as the number of parameters it contains.
### Large Language Models in B2B Operations
**Large Language Models (LLMs)** are AI systems trained on massive text datasets that understand, generate, and process natural language at scale [1](https://millipixels.com/blog/Business-Use-Cases-of-Large-Language-Models-in-B2B). In B2B environments, they act as **performance multipliers** — automating complex language tasks, accelerating decision-making, and enabling personalized interactions across the entire value chain [1](https://millipixels.com/blog/Business-Use-Cases-of-Large-Language-Models-in-B2B).
#### Key B2B Use Cases
* **Sales & Outreach** — Generating hyper-personalized emails, follow-ups, and proposals tailored to specific accounts, shortening sales cycles and improving conversion rates [3](https://millipixels.com/blog/Business-Use-Cases-of-Large-Language-Models-in-B2B)
* **Customer Service** — Powering intelligent chatbots and virtual assistants that handle complex B2B inquiries with context-aware, accurate responses around the clock [4](https://geniusee.com/single-blog/llm-use-cases-in-business)
* **Document Processing & Compliance** — Parsing contracts, invoices, regulatory filings, and technical manuals to extract key data, flag risks, and ensure compliance [3](https://millipixels.com/blog/Business-Use-Cases-of-Large-Language-Models-in-B2B)
* **Knowledge Management** — Synthesizing internal knowledge bases, CRM logs, and support transcripts into searchable, actionable insights for teams [3](https://millipixels.com/blog/Business-Use-Cases-of-Large-Language-Models-in-B2B)
* **Content & Marketing** — Drafting thought leadership articles, case studies, product documentation, and SEO-optimized content at scale [5](https://www.coursera.org/articles/llm-use-cases)
* **Software Development Support** — Assisting engineering teams with code generation, debugging, documentation, and code review to accelerate delivery [2](https://baincapitalventures.com/insight/large-language-models-will-redefine-b2b-software/)
* **Data Analysis & Reporting** — Summarizing large datasets, generating executive reports, and identifying trends from unstructured data sources like customer feedback or market research [4](https://geniusee.com/single-blog/llm-use-cases-in-business)
## Pitfalls of LLMs
While LLMs offer significant efficiency gains and cost savings, B2B organizations must account for **data privacy**, **hallucination risks**, and **bias mitigation** [6](https://www.b2the7.com/news-blog/llms-b2b-b2c-strategies-2026). Successful adoption requires clear governance frameworks, human-in-the-loop review processes, and alignment of model capabilities with specific operational goals [1](https://millipixels.com/blog/Business-Use-Cases-of-Large-Language-Models-in-B2B).
LLM outputs should always be treated as **drafts, not facts** — requiring human judgment, domain expertise, and robust governance to mitigate risks effectively [3](https://iapp.org/news/a/hallucinations-in-llms-technical-challenges-systemic-risks-and-ai-governance-implications). In addition to the ones mentioned above, the technology comes with the risk of falling into any of these pitfalls:
* **Intellectual Property** **Violation** — Models trained on publicly available content often use copyrighted material without explicit consent, raising unresolved legal questions [1](https://www.researchgate.net/publication/394843558_Ethical_Frameworks_for_LLM-Driven_Corporate_Strategy_Navigating_Innovation_with_Responsibility).
* **Misuse Potential** — LLMs can be exploited to generate disinformation, phishing content, or fraudulent material at scale.
* **Governance Gaps** — Many organizations lack the frameworks, policies, and oversight mechanisms needed for responsible LLM deployment at scale [5](https://www.mdpi.com/2673-2688/7/3/102).
**This is where Blockbrain comes in.** With the ideas of compliance, security and result quality at its heart, Blockbrain solves the usual downsides – with a powerful platform and, if required, experienced consultants.
# LLMs Basics
A foundational overview of how LLMs work - covering key concepts like tokens, context windows, and the difference between standard and reasoning models.
### **Definition of LLMs (Large Language Models)**:
Large Language Models (LLMs) are AI systems trained on large amounts of text to understand and generate natural language. They can help with a wide range of tasks like answering questions, summarizing documents, translating text, etc.\
LLMs can be utilized in everything from chatbots and search to business automation and research.
#### **Difference Between LLM and R-LLM**:
* **LLM (Large Language Model)**
LLMs are trained to understand and generate human-like text based on patterns in data. They're great at tasks like writing, translating, summarizing, and answering straightforward questions. However, they may fall short when tasks require deeper reasoning, step-by-step logic, or complex decision-making.
* **R-LLM (Reasoning-Enabled Language Model)**
R-LLMs take things a step further. They’re designed not just to generate text, but to reason through problems. These models can handle more complex tasks like explaining decisions, solving multi-step problems, or making logical inferences by breaking down their thought process and offering more structured, explainable answers.
### How LLMs Work (Simply Explained)
When you send a message, the LLM breaks your text into small units called **tokens** (roughly one word or part of a word), processes them to understand context and meaning, then generates a response - token by token. The total amount of text the model can process at once (your prompt, conversation history, and its response combined) is called the **context window** - the larger it is, the more information the model can work with at once.
### What Are Tokens?
Tokens are the unit LLMs use to read and generate text. Users need to understand this because:
* It directly affects **Compute Block (CB) consumption**
* It explains why longer prompts or responses cost more
* It sets up the concept of **context windows**
> Example: *"The quick brown fox"* = \~4 tokens
### What Is a Context Window?
A **context window** is the total amount of text an LLM can hold in its "working memory" at once - including your instructions, the conversation history, any documents you've shared, and the model's response. Once the conversation exceeds this limit, the model starts to "forget" earlier parts of the exchange.
### What's next?
* Dive into the [Overview of LLMs](/for-users/all-about-llms/overview-of-llms) to find out which LLMs you can use in Blockbrain
* Figure out which one works for you best by reading [How to Choose the Right LLM](/for-users/all-about-llms/how-to-choose-the-right-llm)
# Overview of LLMs
Explore and compare the most popular Large Language Models (LLMs) from GPT to Claude and beyond.
### 1. Find Primary Use Cases LLMs & R-LLMs
Use Case
LLM Models
General Productivity
GPT 5.6 Terra, Gemini 3.5 Flash, Claude Sonnet 5
Complex Reasoning
Claude Opus 5, GPT 5.6 Sol, Gemini 3.5 Flash
Structured Writing & Synthesis
Claude Sonnet 5, GPT 5.6 Terra, Gemini 3.1 Pro
Coding & Technical Workflows
Claude Opus 4.8, Claude Sonnet 5, GPT 5.3 Codex
Fast & Scalable Processing
GPT 5.6 Luna, Gemini 3.5 Flash (Lite), Claude Haiku 4.5
### 2. Hosting Preference
Choose where your data is processed based on your privacy needs and access priorities. We offer two hosting options, EU and US, each with different benefits around compliance, speed, and model access.
| Factor | EU Hosting (Privacy First) | US Hosting (Feature First) |
| ---------------------------- | ----------------------------------------------------------- | --------------------------------------------------- |
| **GDPR Compliance** | Fully GDPR-compliant | Not GDPR-compliant by default |
| **Data Residency** | Data stays in the EU | Data stored globally |
| **Model Availability** | Late model release depending on EU Data Center availability | Full access to the latest models and features first |
| **Legal & Regulatory Risks** | Meets stricter EU privacy laws | Subject to US law and transfer safeguards |
**Summary:**
* **Choose EU hosting** if you prioritize **GDPR compliance** and **strict data privacy** within Europe.
* **Choose US hosting** if you want **the latest models** and global data centers.
### 3. Speed vs. Depth: What Matters More to You?
Some models are designed for quick, lightweight tasks. Others are built to dive deeper, think harder, and handle more complexity. Choose based on the kind of experience you need.
| Preference | When to Choose | Models |
| ------------------------------------------- | ---------------------------------------------------------------------------------- | -------------------------------------------------------- |
|
High Speed (Fast, Responsive)
| For fast answers or simple tasks where low latency matters most. | Gemini 3.5 Flash, Claude Sonnet 4.6 (Fast), GPT 5.6 Luna |
|
High Depth (Detailed, Structured)
| For complex prompts, multi-step logic, or detailed analysis that needs reflection. | Gemini 3.5 Flash, Claude Opus 5, GPT 5.6 Sol |
### 4. Choose your Desired LLMs
### AWS Bedrock: Anthropic Claude
| Model | Description |
| ------------------------ | -------------------------------------------------------------------------------------------------------------------------------------------------------------------------------------------------------------------------------------------------------------------------------------------------------------------------------------------------------------------------------------------- |
| Claude Opus 5 | A major step up from Opus 4.8 at the same price, coming close to Fable 5 intelligence at half the cost. It more than doubles Opus 4.8 on Frontier-Bench v0.1 (43.3% vs 21.1%) and leads on knowledge work with 1861 on GDPval-AA v2. Best for long-running agents and complex professional work where the model needs to verify its own output. |
| Claude Sonnet 5 | The most agentic Sonnet thus-far and a substantial upgrade over Sonnet 4.6 across reasoning, tool use, coding, and knowledge work. It comes close to Opus 4.8 at a lower price, with adjustable effort levels that can match Opus on tasks like agentic search and computer use. Best for multi-step coding and automation work needing near-flagship capability without flagship cost. |
| Claude Opus 4.8 | A step up from Opus 4.7 across the board. It is a top model for agentic coding and computer use. It leads on SWE-Bench Pro (69.2%) against GPT-5.5 and Gemini 3.1 Pro, and scores 83.4% on OSWorld-Verified for agentic computer use. A key highlight is its improved honesty, making it a more reliable partner for complex, long-running tasks. |
| Claude Opus 4.7 | It is a major step up from Opus 4.6, built for difficult hands-on coding work. It scores 64.5% on SWE-bench Pro (up from Opus 4.6's 53.4%), and users report being able to hand off their hardest engineering tasks with confidence. Beyond coding, it's a reliable upgrade across all metrics. |
| Claude Opus 4.6 | A step up from Opus 4.5 on coding, with more reliable performance on agentic tasks, codebase management, and structured code review and debugging. It also handles heavy work better, staying more consistent and efficient across analysis, document review, and multitasking. |
| Claude Opus 4.6 (Max) | A configuration of Claude Opus 4.6. It operates in "Max Reasoning" mode. It applies full reasoning depth for the most complex tasks, maximizing accuracy and reliability with higher latency and cost. |
| Claude Opus 4.6 (High) | A configuration of Claude Opus 4.6. It operates in "High Reasoning" mode. It uses deeper reasoning steps for more complex tasks, improving accuracy and structure at the cost of speed. |
| Claude Opus 4.6 (Medium) | A configuration of Claude Opus 4.6. It operates in "Medium Reasoning" mode. It balances reasoning depth with speed, allowing for more structured outputs without significantly increasing latency. |
| Claude Opus 4.6 (Low) | A configuration of Claude Opus 4.6. It operates in "Low Reasoning" mode. It minimizes extended reasoning steps for faster, more efficient outputs. |
| Claude Sonnet 4.6 | Great everyday model, stronger than Sonnet 4.5 at coding, computer use, and long-context reasoning, scoring 79.6% on SWE-bench Verified. Well suited for agent workflows, large-codebase tasks, document analysis, and other multi-step work. |
| Claude Sonnet 4.6 (Fast) | A configuration of Claude Sonnet 4.6. It operates strictly in "Non-Reasoning" mode, bypassing long thinking steps in order to have low-latency quality outputs. |
| Claude Haiku 4.5 | Fast, efficient, and built for scale. Delivers near-Sonnet-level coding and reasoning at about 3× cheaper and 2× faster performance. Excels in tool use, UI interaction, and parallel task execution, ideal as a worker model in multi-agent or production setups. Strong on coding reliability. Best for backend automations, chat workloads, and agent systems needing speed and low cost. |
| Claude Haiku 4.5 (Fast) | Fast, efficient, and built for scale. Delivers near-Sonnet-level coding and reasoning at about 3× cheaper and 2× faster performance. Excels in tool use, UI interaction, and parallel task execution, ideal as a worker model in multi-agent or production setups. Strong on coding reliability. Best for backend automations, chat workloads, and agent systems needing speed and low cost. |
### AWS Bedrock: Other
| Model | Description |
| ----------- | -------------------------------------------------------------------------------------------------------------------------------------------------------------------------------------------------------------------------------------------------------------------------------------------------------------------------------------------------------------------- |
| Gemma 4 31B | A powerful open-weight model built for advanced reasoning, coding, and agentic workflows. The 31B Dense variant ranks #3 among open models on Arena AI, outperforming some models up to 20× larger. Supports native image and video understanding, and 140+ languages. Best for self-hosted coding assistants, document analysis, and customizable enterprise agents |
### Google Vertex AI: Gemini
| Model | Description |
| ---------------------------------- | --------------------------------------------------------------------------------------------------------------------------------------------------------------------------------------------------------------------------------------------------------------------------------------------------------------------------------------------------------------------------------------------------------------------------------------- |
| Gemini 3.5 Flash | A major step up from Gemini 3.1 Pro. This is built for agentic and coding work at Flash speed. It leads on MCP Atlas (83.6%) and Finance Agent v2 (57.9%), outperforming GPT-5.5 and Claude Opus 4.7 on those benchmarks, while also topping multimodal understanding at 84.2% on CharXiv Reasoning. At 4x the output speed of other frontier models, it's the go-to choice for powerful and fast multi-step task handling. |
| Gemini 3.5 Flash (High) | A configuration of Gemini 3.5 Flash with reasoning effort set to high. Best for difficult coding, agentic workflows and multi-step reasoning. |
| Gemini 3.5 Flash (Medium) | A configuration of Gemini 3.5 Flash with reasoning effort set to medium. It balances thinking depth and response speed for reliable everyday performance. Best as the general default when tasks vary in complexity. |
| Gemini 3.5 Flash (Low) | A configuration of Gemini 3.5 Flash with reasoning effort set to low. It answers quickly with light reasoning, keeping cost and latency down. |
| Gemini 3.5 Flash (Minimal) | A configuration of Gemini 3.5 Flash with reasoning effort set to minimal. Best for classification, extraction and quick responses. |
| Gemini 3.1 Pro | Great for complex reasoning, coding, and long-context work across text, images, audio, video, PDFs, and large codebases. Best used for deep research, multi-step agent workflows, technical planning, and document-heavy analysis where strong reasoning and broad multimodal understanding matter most. |
| Gemini 3.1 Flash (Lite) | The fastest and most cost-efficient model in the Gemini 3 series. Very helpful for high-volume tasks. It outperforms comparable models like GPT-5 Mini and Claude 4.5 Haiku across reasoning and multimodal benchmarks including 86.9% on GPQA Diamond and 76.8% on MMMU-Pro. Best used for translation, content moderation, data labeling, and any task you need to run at scale quickly and affordably. |
| Gemini 3 Pro | High-performance multimodal model designed for teams that work with text, images, documents, videos and code. It offers strong long-context reasoning, reliable analysis across large files and advanced tool use for more automated workflows. For businesses that rely on visual data, technical documentation or development tasks, this provides broader multimodal coverage and deeper file understanding than text-focused models |
| Gemini 3 Flash | (no description in JSON) |
| Gemini 2.5 Pro | Well-rounded, reliable model for everyday tasks. Excels at reasoning, conversation, and coding, making it a strong fit for smart assistants, business tools, and creative workflows that require speed, accuracy and thoughtful output. |
| Gemini 2.5 Pro (Enterprise Search) | Excels at reasoning, conversation, and coding, and is configured for secure commercial use. It uses Web Grounding for Enterprise to provide access to live web data without the privacy risks of standard search tools. |
| Gemini 2.5 Flash | Smarter and more capable than 2.0 Flash, with fast responses and visible reasoning. Best for real-time tasks that need both speed and lightweight thinking, like chatbots, copilots, and scalable AI tools. |
| Gemini Live 2.5 Flash Native Audio | Real-time voice conversations with native audio input and output. Ideal for voice assistants and live user interactions, with a focus on speed and cost over deep reasoning. |
| Gemini 2.5 Flash (Lite) | Gemini 2.5 Flash-Lite delivers fast, affordable, real-time performance—ideal for high-volume, everyday tasks like chatbots, customer support, and quick content creation. It’s built for speed and efficiency, offering smarter answers without the heavy overhead of deep, complex reasoning. |
| Gemini 2.0 Flash | Built for fast, responsive performance even with large inputs. Ideal for real-time apps, smart assistants, and systems that need instant answers across long conversations or documents. Supports up to 1 million tokens, making it a strong choice for tasks that require both speed and scale. |
| Gemini 2.0 Flash (Thinking Mode) | Designed for academic precision, complex logic, and structured problem-solving. Well-suited for scientific reports, step-by-step reasoning, and data interpretation tasks that require depth over speed. Not intended for fast-turnaround or real-time use like the standard Flash model. |
| Gemini 2.0 Flash (Lite) | A streamlined, cost-efficient version of Gemini Flash, built for fast, high-volume interactions. Best for chatbots, summaries, and real-time tasks where speed and scale matter more than deep reasoning or complex context handling. |
| Gemini 1.5 Pro | Impressive 1M token context window. Balanced model with very good price-performance ratio. Strong multimodal capabilities. |
| (no name in JSON) | Predecessor to Gemini 1.5. Solid basic performance for various tasks. Good multimodal capabilities. |
### OpenAI
| Model | Description |
| ----------------------------------- | ------------------------------------------------------------------------------------------------------------------------------------------------------------------------------------------------------------------------------------------------------------------------------------------------------------------------------------------------------------------------------------------------------------------------------------------------------------------------------------------------------------------------------ |
| GPT 5.6 Sol | OpenAI's flagship and best model to date, a step up from GPT-5.5 across coding, knowledge work, and computer use. It scores 80 on the Artificial Analysis Coding Agent Index and 64.6% on SWE-Bench Pro (up from 59.4%), while working faster and using fewer tokens. Best for difficult, long-running tasks that need high quality outputs. |
| GPT 5.6 Terra | The balanced middle tier of the GPT-5.6 family, matching or beating GPT-5.5 at half the price. It competes with GPT-5.5 on coding with 77.4 on the Artificial Analysis Coding Agent Index (vs 76.4). The practical default for everyday work needing near-flagship quality without more efficient cost. |
| GPT 5.6 Luna | The fastest and cheapest model in the GPT-5.6 family, built for speed and volume. It nearly matches GPT-5.5's peak performance at less than half the cost, and beats Claude Opus 4.8 on the Artificial Analysis Coding Agent Index. Best for high-volume, cost-sensitive tasks that still need reliable quality. |
| GPT 5.5 Pro | Uses the same underlying model as GPT-5.5, but uses parallel test-time compute to push further on the hardest tasks. Leads on BrowseComp (90.1%) and FrontierMath Tier 4 (39.6%), making it the strongest option for deep research and advanced mathematics. Requests take longer to complete and are priced higher. Reserve this for problems where standard reasoning effort is not enough. |
| GPT 5.5 | Handles complex agentic work well alongside coding, research, computer use and high token tasks. Scores 82.7% on Terminal-Bench 2.0 and 84.9% on GDPval, leading all competing models at GPT-5.4 per-token latency. Best used for tasks that requires sustained reasoning across context. |
| GPT 5.5 Instant | An upgrade over GPT-5.3 Instant. It is built to be faster and more affordable than the full GPT-5.5 model. It significantly cuts down on hallucinations, with inaccuracies reduced by 37.3% on real user-flagged conversations. Useful for GPT-5.5-level intelligence for everyday tasks with cheaper costs over the full model. |
| GPT 5.4 | Handles complex, reasoning-heavy work really well. More reliable and consistent than GPT-5.3, especially for multi-step tasks, structured outputs, and unclear prompts. |
| GPT 5.4 (High Thinking with Search) | Uses more reasoning resources for complex and multi-step tasks. Best for deep analysis, strategy, and technical problem-solving. Supports automatic search for up-to-date information, with higher latency and cost. |
| GPT 5.4 (High Thinking) | A configuration of GPT 5.4. It operates in "High-Thinking. It uses extended thinking steps for more refined results. |
| GPT 5.4 (Low Thinking with Search) | Uses additional reasoning compute to improve accuracy and structure. Suitable for summarization, light analysis, structured outputs, and basic decision-making. Can automatically search for up-to-date information when needed. |
| GPT 5.4 (Low Thinking) | A configuration of GPT 5.4. It operates in "Low-Thinking" mode. It skips extended thinking steps for faster results. |
| GPT 5.4 (Non-Thinking with Search) | Uses baseline reasoning without extra compute. Optimized for speed and cost, ideal for simple tasks like formatting, classification, and structured outputs, with automatic search when needed. |
| GPT 5.4 Mini | Mainly designed for coding, tool workflows, and high-volume execution tasks. This model is built for handling debugging, codebase navigation, and fast iteration loops. It is fast and cost efficient. Best used as a default production model rather than for deep reasoning. |
| GPT 5.4 Nano | The latest small and fast model in the GPT-5.4 family, built for tasks where speed and cost matter more than deep reasoning. It's an upgrade over GPT-5 Nano, and excels at high-volume work like classification, data extraction, and acting as a supporting agent within larger AI workflows. If you're running tasks at scale and need quick, reliable outputs without burning through credits, Nano is the right pick. |
| GPT 5.3 Codex | Built specifically for agentic software engineering, combining the coding performance of GPT-5.2 Codex with broader reasoning across research, documentation, and technical decision-making, running 25% faster than its predecessor. Best used for long-running coding tasks, debugging, and complex execution workflows. |
| GPT 5.2 | Built for end-to-end professional knowledge work and long-running agents, with stronger reliability across complex workflows. It produces higher-quality work artifacts (spreadsheets, slides), writes and refactors code more effectively, understands long context better, perceives images more accurately, and uses tools to complete multi-step projects. Designed as the most capable upgrade in the GPT-5 series, GPT-5.2 is optimized for turning instructions into finished outputs that deliver real economic value. |
| GPT 5.2 (High Thinking) | A configuration of GPT-5.2. It operates in "High Thinking" mode. It uses deeper reasoning steps for more complex tasks, improving accuracy at the cost of speed. |
| GPT 5.2 (Low Thinking with Search) | A configuration of GPT-5.2. It operates in "Low Thinking" mode with search enabled. It limits extended reasoning while using retrieval to support fast, up-to-date responses. |
| GPT 5.2 (Low Thinking) | A configuration of GPT-5.2. It operates in "Low Thinking" mode. It skips extended thinking steps for faster, more efficient outputs. |
| GPT 5.2 (Non-Thinking with Search) | A configuration of GPT-5.2. It operates in "No Thinking" mode with search enabled. It skips reasoning steps and relies on retrieval for fast, up-to-date responses. |
| GPT 5.2 (Thinking with Search) | A configuration of GPT-5.2. It operates in "Thinking" mode with search enabled. It uses deeper reasoning while leveraging retrieval to improve accuracy and keep responses up to date. |
| GPT 5 | Tailored for natural, enterprise-grade conversations. Multimodal and context-aware, it flows seamlessly across long dialogues, handles images and text, and adapts tone and reasoning depth. Note: Intended to replace GPT 4o and GPT 4.1 |
| GPT 5 (Thinking) | Thinks like an expert, adapts to the task. Handles everything from writing and coding to research and data analysis, shifting seamlessly between quick answers and in-depth reasoning. Works with text and images, keeps context over long sessions, and delivers more accurate, reliable results. Note: Intended to replace OpenAI o3 and OpenAI o3 Pro |
| GPT 5 Mini | Lean, cost-conscious, and still sharp. Delivers reliable instruction-following, rich multimodal responses (text + images), and reduced latency. All while sharing GPT‑5’s strong reasoning and safety tuning, but at a lighter compute and price point. Note: Intended to replace GPT 4o Mini and OpenAI o4 Mini |
| GPT 5 Nano | Ultra-light and lightning‑fast. Built for low-latency needs like summarization, classification, and quick Q\&A, it taps GPT‑5’s reasoning smarts at a fraction of the cost and compute. Note: Intended to replace GPT 4.1 Nano |
| GPT 4.5 | Caution: Very expensive — 10–15× more costly than GPT-4o. Delivers subtle improvements in emotional tone, writing flow, and creative ideation, especially in chat-like settings. Best for polished conversation output, but not recommended for reasoning, analysis, or complex tasks. |
| (no name in JSON) | Specialized version of GPT-4 with outstanding capabilities in image analysis and understanding. Can explain and analyze complex visual concepts. |
| (no name in JSON) | Optimized GPT-4 version with higher processing speed at slightly reduced precision. More current training knowledge than base GPT-4. |
| GPT 4 Omni | Designed for real-time interaction across text, audio, and images. Ideal for smart assistants, live applications, and creative tasks that benefit from fast responses and seamless multimodal input. Offers faster performance and lower cost than earlier GPT-4 models. |
| OpenAI GPT 4o Realtime Audio | Ideal for fast, conversational tasks with streaming audio. Extremely low latency and strong comprehension for voice-based interactions. Best for real-time assistants and audio-first products. |
| GPT 4o Mini | A smaller, more affordable version of GPT-4 Omni, designed to give fast, high-quality responses without the higher cost. Great for smart assistants, everyday tasks, and apps that need reliable reasoning with some image or audio input. |
| GPT Realtime 2 | The newest live voice model. Useful for real conversations that require actual reasoning. It's a significant upgrade over GPT-Realtime-1.5, jumping from 81.4% to 96.6% on Big Bench Audio, and is best suited for voice agents. |
| OpenAI GPT Realtime | Built for live, low-latency conversations with voice-in, voice-out streaming. It uses GPT-4o’s reasoning core but is optimized for fast dialogue. Best for interactive assistants, real-time translators, and conversational AI with natural audio responses. Strong in speed and usability, but not intended for long, complex reasoning tasks. |
| o4 Mini | A faster, lower-cost version of o4 built for quick conversations and real-time responsiveness. Ideal for chatbots, simple assistants, and everyday tools that need speed, clarity, and a light touch without the resource demands of larger models. |
| o3 Pro | DISCLAIMER: Very Expensive! Use only if necessary. Long waiting times depending on the prompt, making it unsuitable for real-time use. Great for high-stakes legal analysis, deep business strategy, and technical decision-making. Efficient at breaking down complex documents, building logic-driven reports, and guiding long-term plans. |
| o3 | CAREFUL: Very cost-intensive. Great for logic-heavy tasks like legal analysis, business strategy, and technical planning. It breaks down complex documents, guides long-term plans, and creates structured, insight-driven outputs. |
| o3 Mini | A smaller version of o3, optimized for fast, structured responses. Ideal for short-form reasoning, technical prompts, and lightweight tasks where speed and efficiency matter more than creative depth. |
| o1 | Warning: Very expensive! Specialized for smart problem-solving. Great for technical reasoning, coding help, and structured thinking tasks, but less conversational for casual users. |
| o1 Mini | Warning: Very Expensive! A compact reasoning model. It is best for basic technical tasks, faster lightweight deployments, and logic workflows that don't need deep explanations. |
### Azure OpenAI
| Model | Description |
| --------------------------- | ------------------------------------------------------------------------------------------------------------------------------------------------------------------------------------------------------------------------------------------------------------------------------------------------------------------------------------------------------------------------------------------------------------------------------------------------------------------------------------------------------------------------------ |
| GPT 5.6 Sol | OpenAI's flagship and best model to date, a step up from GPT-5.5 across coding, knowledge work, and computer use. It scores 80 on the Artificial Analysis Coding Agent Index and 64.6% on SWE-Bench Pro (up from 59.4%), while working faster and using fewer tokens. Best for difficult, long-running tasks that need high quality outputs. |
| GPT 5.6 Terra | The balanced middle tier of the GPT-5.6 family, matching or beating GPT-5.5 at half the price. It competes with GPT-5.5 on coding with 77.4 on the Artificial Analysis Coding Agent Index (vs 76.4). The practical default for everyday work needing near-flagship quality without more efficient cost. |
| GPT 5.6 Luna | The fastest and cheapest model in the GPT-5.6 family, built for speed and volume. It nearly matches GPT-5.5's peak performance at less than half the cost, and beats Claude Opus 4.8 on the Artificial Analysis Coding Agent Index. Best for high-volume, cost-sensitive tasks that still need reliable quality. |
| GPT 5.5 Instant | An upgrade over GPT-5.3 Instant. It is built to be faster and more affordable than the full GPT-5.5 model. It significantly cuts down on hallucinations, with inaccuracies reduced by 37.3% on real user-flagged conversations. Useful for GPT-5.5-level intelligence for everyday tasks with cheaper costs over the full model. |
| GPT 5.4 | Handles complex, reasoning-heavy work really well. More reliable and consistent than GPT-5.3, especially for multi-step tasks, structured outputs, and unclear prompts. |
| GPT 5.4 (High Thinking) | A configuration of GPT 5.4. It operates in "High-Thinking. It uses extended thinking steps for more refined results. |
| GPT 5.4 (Low Thinking) | Configuration of GPT 5.4 that runs in a low-thinking mode. It skips extended reasoning steps to return faster responses, optimized for low latency while maintaining solid output quality for straightforward tasks. |
| GPT 5.2 | Built for end-to-end professional knowledge work and long-running agents, with stronger reliability across complex workflows. It produces higher-quality work artifacts (spreadsheets, slides), writes and refactors code more effectively, understands long context better, perceives images more accurately, and uses tools to complete multi-step projects. Designed as the most capable upgrade in the GPT-5 series, GPT-5.2 is optimized for turning instructions into finished outputs that deliver real economic value. |
| GPT 5.1 | Built for fast, reliable conversations with stronger instruction-following and more natural dialogue. It responds quickly to simple tasks, maintains clarity in longer threads, and adapts tone with more control. Designed as a refined upgrade to GPT-5 with smoother communication and improved everyday usability. |
| GPT 5.1 Codex | High value for developer workflows like code generation and programming tasks. Best for short-to-medium coding problems that require clear instruction following. Works especially well for human-in-the-loop development. |
| GPT 5.1 Codex Max | Built for complex, high-risk coding work and autonomous agents. Stronger reasoning and consistency across large codebases than standard Codex. Suitable for multi-step refactors and long-context work, with higher latency and cost. Best used selectively for engineering tasks where correctness and depth outweigh speed. |
| GPT 5.1 (High Thinking) | Uses high “reasoning” token resources for deeper answers. Best for work that requires planning, judgment, and careful thinking. Includes the full knowledge base and core capabilities of GPT-5.1. |
| GPT 5.1 (Low Thinking) | Utilizes reduced 'reasoning' resources for high responsiveness and efficiency. It bypasses deep reflective processing to deliver near-instant answers, making it ideal for real-time conversation and high-volume data processing. It prioritizes speed for workflows where complex problem-solving is not required. |
| GPT 5.1 (Non-Thinking) | This utilizes the least "reasoning" resources in order to provide the lowest possibly latency and maximum cost efficiency. It is designed for tasks where analysis is less necessary such as simple text formatting, high-volume classification, and conversational flow while still leveraging the full knowledge base and core capabilities of GPT 5.1. |
| GPT 5 | Tailored for natural, enterprise-grade conversations. Multimodal and context-aware, it flows seamlessly across long dialogues, handles images and text, and adapts tone and reasoning depth. Note: Intended to replace GPT 4o and GPT 4.1 |
| GPT 5 Codex | GPT-5 Codex is a version of OpenAI’s GPT-5 model tailored for software engineering and coding tasks. It serves as an AI coding assistant that can build projects, add features, debug, refactor code, and perform code reviews. The model adapts its reasoning time to the complexity of tasks, and supports multimodal inputs like images. |
| GPT 5 (Thinking) | Thinks like an expert, adapts to the task. Handles everything from writing and coding to research and data analysis, shifting seamlessly between quick answers and in-depth reasoning. Works with text and images, keeps context over long sessions, and delivers more accurate, reliable results. Note: Successor to o3 and o3 Pro |
| GPT 5 Mini | Lean, cost-conscious, and still sharp. Delivers reliable instruction-following, rich multimodal responses (text + images), and reduced latency. All while sharing GPT‑5’s strong reasoning and safety tuning, but at a lighter compute and price point. Note: Intended to replace GPT 4o Mini and OpenAI o4 Mini |
| GPT 5 Nano | Ultra-light and lightning‑fast. Built for low-latency needs like summarization, classification, and quick Q\&A, it taps GPT‑5’s reasoning smarts at a fraction of the cost and compute. Note: Intended to replace GPT 4.1 Nano |
| GPT 5 (Auto) | Automatically selects the most suitable model from the GPT model family based on your query's complexity and performance needs. Saves you time from manually switching between different models while optimizing for quality, speed, and efficiency. The selected model is shown with each response. Routes to: GPT 5 & GPT 4.1 family and o4 Mini. **This Model is currently in Preview by Azure AI.** |
| GPT 4.1 | A powerful and refined model designed for tasks that demand precision and depth. This excels in coding, instruction-following, and handling extensive documents, thanks to its expanded 1 million-token context window. It's a reliable choice for developers, researchers, and professionals seeking enhanced performance and cost-efficiency over earlier GPT-4 models. |
| GPT 4.1 Mini | A faster, more efficient version of GPT-4.1 that keeps much of its quality while using fewer resources. Great for developers, startups, product teams, and anyone building smart tools or assistants that need quick, capable performance at lower cost and with faster response times. |
| GPT 4.1 Nano | The fastest and most lightweight GPT-4.1 model, built for speed and simplicity. Ideal for developers, product teams, and startups needing quick autocomplete, fast classifications, or lightweight assistants where cost and response time matter most. |
| Azure GPT 4o Realtime Audio | Ideal for fast, conversational tasks with streaming audio. Extremely low latency and strong comprehension for voice-based interactions. Best for real-time assistants and audio-first products. |
| GPT 4 Omni | Designed for real-time interaction across text, audio, and images. Ideal for smart assistants, live applications, and creative tasks that benefit from fast responses and seamless multimodal input. Offers faster performance and lower cost than earlier GPT-4 models. |
| GPT 4 Turbo | Optimized GPT-4 version with higher processing speed at slightly reduced precision. More current training knowledge than base GPT-4. |
| GPT 4 Vision | Specialized version of GPT-4 with outstanding capabilities in image analysis and understanding. Can explain and analyze complex visual concepts. |
| GPT 4o Mini | A smaller, more affordable version of GPT-4 Omni, designed to give fast, high-quality responses without the higher cost. Great for smart assistants, everyday tasks, and apps that need reliable reasoning with some image or audio input. |
| GPT 3.5 Turbo | Proven model for standard tasks. Very fast and efficient. Good for simple to medium requirements. |
| (no name in JSON) | (no description in JSON) |
| DeepSeek R1 | Warning: Developed in China and Hosted in the US. Open-source model built for deep reasoning, logical problem solving, and structured analysis. Highly effective in math and scientific tasks, and ideal for explainable, customizable applications. |
| Azure GPT Realtime | Built for live, low-latency conversations with voice-in, voice-out streaming. It uses GPT-4o’s reasoning core but is optimized for fast dialogue. Best for interactive assistants, real-time translators, and conversational AI with natural audio responses. Strong in speed and usability, but not intended for long, complex reasoning tasks. |
| o4 Mini | A faster, lower-cost version of o4 built for quick conversations and real-time responsiveness. Ideal for chatbots, simple assistants, and everyday tools that need speed, clarity, and a light touch without the resource demands of larger models. |
| o3 Pro | DISCLAIMER: Very Expensive! Use only if necessary. Long waiting times depending on the prompt, making it unsuitable for real-time use. Great for high-stakes legal analysis, deep business strategy, and technical decision-making. Efficient at breaking down complex documents, building logic-driven reports, and guiding long-term plans. |
| o3 | CAREFUL: Very cost-intensive. Great for logic-heavy tasks like legal analysis, business strategy, and technical planning. It breaks down complex documents, guides long-term plans, and creates structured, insight-driven outputs. |
| o3 Mini | A smaller version of o3, optimized for fast, structured responses. Ideal for short-form reasoning, technical prompts, and lightweight tasks where speed and efficiency matter more than creative depth. |
| o1 | Warning: Very expensive! Specialized for smart problem-solving. Great for technical reasoning, coding help, and structured thinking tasks, but less conversational for casual users. |
| o1 Mini | Warning: Very Expensive! A compact reasoning model. It is best for basic technical tasks, faster lightweight deployments, and logic workflows that don't need deep explanations. |
### Google Vertex AI: Anthropic Claude
| Model | Description |
| ---------------------------- | -------------------------------------------------------------------------------------------------------------------------------------------------------------------------------------------------------------------------------------------------------------------------------------------------------------------------------------------------------------------------------------------- |
| Claude Opus 5 | A major step up from Opus 4.8 at the same price, coming close to Fable 5 intelligence at half the cost. It more than doubles Opus 4.8 on Frontier-Bench v0.1 (43.3% vs 21.1%) and leads on knowledge work with 1861 on GDPval-AA v2. Best for long-running agents and complex professional work where the model needs to verify its own output. |
| Claude Sonnet 5 | The most agentic Sonnet thus-far and a substantial upgrade over Sonnet 4.6 across reasoning, tool use, coding, and knowledge work. It comes close to Opus 4.8 at a lower price, with adjustable effort levels that can match Opus on tasks like agentic search and computer use. Best for multi-step coding and automation work needing near-flagship capability without flagship cost. |
| Claude Opus 4.8 | A step up from Opus 4.7 across the board, its the new top model for agentic coding and computer use. It leads on SWE-Bench Pro (69.2%) against GPT-5.5 and Gemini 3.1 Pro, and scores 83.4% on OSWorld-Verified for agentic computer use. A key highlight is its improved honesty, making it a more reliable partner for complex, long-running tasks. |
| Claude Opus 4.7 | This model is currently in public preview, meaning it's available for early access in EU. It is a major step up from Opus 4.6, built for difficult hands-on coding work. It scores 64.5% on SWE-bench Pro (up from Opus 4.6's 53.4%), and users report being able to hand off their hardest engineering tasks with confidence. Beyond coding, it's a reliable upgrade across all metrics. |
| Claude Opus 4.6 | Improves on the coding strengths of prior models with more reliable performance for agentic tasks, codebase management, and structured code review and debugging. It’s also stronger in everyday work. From handling analysis, document review, and multitasking more consistently and efficiently. |
| Claude Opus 4.6 (Max) | A configuration of Claude Opus 4.7. It operates in "Max Reasoning" mode. It applies full reasoning depth for the most complex tasks, maximizing accuracy and reliability with higher latency and cost. |
| Claude Opus 4.6 (High) | A configuration of Claude Opus 4.7. It operates in "High Reasoning" mode. It uses deeper reasoning steps for more complex tasks, improving accuracy and structure at the cost of speed. |
| Claude Opus 4.6 (Medium) | A configuration of Claude Opus 4.7. It operates in "Medium Reasoning" mode. It balances reasoning depth with speed, allowing for more structured outputs without significantly increasing latency. |
| Claude Opus 4.6 (Low) | A configuration of Claude Opus 4.7. It operates in "Low Reasoning" mode. It minimizes extended reasoning steps for faster, more efficient outputs. |
| Claude Sonnet 4.6 | Improved Sonnet model with stronger coding, computer use, and long-context reasoning. Better suited for agent workflows, large-codebase tasks, document analysis, and other multi-step work. |
| Claude Sonnet 4.6 (Fast) | A configuration of Claude Sonnet 4.6. It operates strictly in "Non-Reasoning" mode, bypassing long thinking steps in order to have low-latency quality outputs. |
| Claude Opus 4.5 | Built for agentic coding, long-horizon reasoning, and complex tool-driven workflows, with high correctness across multi-step execution. It excels at software engineering tasks, terminal and computer use, structured tool orchestration, and novel problem solving, achieving strong first-pass success with fewer retries. |
| Claude Sonnet 4.5 | Extends balanced performance with stronger reasoning, longer task persistence, and more reliable tool use, achieving state-of-the-art results in coding and real-world computer tasks. Delivers higher accuracy, greater autonomy, and smoother multi-step workflows compared to Claude 4 Sonnet. |
| Claude Sonnet 4.5 (Fast) | A configuration of Claude Sonnet 4.5. It operates strictly in "Non-Reasoning" mode, bypassing long thinking steps in order to have low-latency quality outputs. |
| Claude Haiku 4.5 | Fast, efficient, and built for scale. Delivers near-Sonnet-level coding and reasoning at about 3× cheaper and 2× faster performance. Excels in tool use, UI interaction, and parallel task execution, ideal as a worker model in multi-agent or production setups. Strong on coding reliability. Best for backend automations, chat workloads, and agent systems needing speed and low cost. |
| Claude Opus 4.1 | Sharper, steadier, smarter. Builds on Opus 4 with noticeably cleaner code fixes, longer autonomous agentic workflows, and more precise reasoning. Tackles long, multi-step tasks with hybrid reasoning and extended "thinking", including code refactoring, deep research, and strategic synthesis. |
| Claude Opus 4 | Designed for long, demanding tasks that require deep thinking and consistent performance. It’s especially strong at powering autonomous agents, handling large, complex codebases, and running multi-step workflows that can last for hours. It is ideal for advanced coding tasks, detailed analysis, and tasks that need smart, sustained focus. |
| Claude Sonnet 4 | Enhances balanced performance through refined reasoning, extended autonomy, and precise instruction-following, delivering improved coding capabilities and greater task accuracy compared to Claude 3.7 Sonnet. |
| Claude 3.7 Sonnet | Designed for complex document analysis, coding tasks, and multi-step reasoning. Well-suited for problem-solving agents and analysis bots that handle long-form inputs and technical workflows. Often excessive for basic or lightweight queries. |
| Claude 3.7 Sonnet (Thinking) | Designed for deep, deliberate reasoning and critical thinking. Excels in slow, multi-step analysis for strategic tasks like legal review, policy generation, and complex customer support. |
| Claude 3.5 Sonnet | Focused on structured writing, instruction following, and business-grade accuracy. Well-suited for report generation, formal communication, and smart document workflows. Efficient for medium-length content where clarity and consistency matter. |
| Claude 3.5 Sonnet v2 | Optimized for automating business processes and structured workflows. A solid choice for enterprise tools, DevOps support, and productivity tasks where speed, clarity, and consistent output are key. |
| Claude 3.5 Haiku | Optimized for fast, high-volume tasks. This is great for quick replies, customer chatbots, and real-time document summaries, but less suited for deep reasoning or complex creative work. |
| Claude 3 Opus | Powerful legacy model for logic-heavy work. Ideal for enterprises, researchers, and anyone working with complex text and image data. |
| Claude 3 Sonnet | Balanced version with good ratio between speed and accuracy. Sufficient for most business applications. |
| Claude 3 Haiku | Efficient version of Claude 3, optimized for fast processing. Maintains the core capabilities of the Claude 3 family with reduced complexity. Ideal for real-time applications and quick analyses. |
### Anthropic
| Model | Description |
| --------------------------------- | -------------------------------------------------------------------------------------------------------------------------------------------------------------------------------------------------------------------------------------------------------------------------------------------------------------------------------------------------------------------------------------------- |
| Claude Opus 4.7 | (no description in JSON) |
| Claude Opus 4.6 | Improves on the coding strengths of prior models with more reliable performance for agentic tasks, codebase management, and structured code review and debugging. It’s also stronger in everyday work. From handling analysis, document review, and multitasking more consistently and efficiently. |
| Claude Sonnet 4.6 | Improved Sonnet model with stronger coding, computer use, and long-context reasoning. Better suited for agent workflows, large-codebase tasks, document analysis, and other multi-step work. |
| Claude Sonnet 4.6 (Fast) | A configuration of Claude Sonnet 4.6. It operates strictly in "Non-Reasoning" mode, bypassing long thinking steps in order to have low-latency quality outputs. |
| Claude Opus 4.5 | Built for agentic coding, long-horizon reasoning, and complex tool-driven workflows, with high correctness across multi-step execution. It excels at software engineering tasks, terminal and computer use, structured tool orchestration, and novel problem solving, achieving strong first-pass success with fewer retries. |
| Claude Sonnet 4.5 | Extends balanced performance with stronger reasoning, longer task persistence, and more reliable tool use, achieving state-of-the-art results in coding and real-world computer tasks. Delivers higher accuracy, greater autonomy, and smoother multi-step workflows compared to Claude 4 Sonnet. |
| Claude Sonnet 4.5 (Fast) | A configuration of Claude Sonnet 4.5. It operates strictly in "Non-Reasoning" mode, bypassing long thinking steps in order to have low-latency quality outputs. |
| Claude Haiku 4.5 | Fast, efficient, and built for scale. Delivers near-Sonnet-level coding and reasoning at about 3× cheaper and 2× faster performance. Excels in tool use, UI interaction, and parallel task execution, ideal as a worker model in multi-agent or production setups. Strong on coding reliability. Best for backend automations, chat workloads, and agent systems needing speed and low cost. |
| Claude Opus 4.1 | Sharper, steadier, smarter. Builds on Opus 4 with noticeably cleaner code fixes, longer autonomous agentic workflows, and more precise reasoning. Tackles long, multi-step tasks with hybrid reasoning and extended "thinking", including code refactoring, deep research, and strategic synthesis. |
| Claude Opus 4 | Designed for long, demanding tasks that require deep thinking and consistent performance. It’s especially strong at powering autonomous agents, handling large, complex codebases, and running multi-step workflows that can last for hours. It is ideal for advanced coding tasks, detailed analysis, and tasks that need smart, sustained focus. |
| Claude Sonnet 4 | Enhances balanced performance through refined reasoning, extended autonomy, and precise instruction-following, delivering improved coding capabilities and greater task accuracy compared to Claude 3.7 Sonnet. |
| Claude 3.7 Sonnet | Designed for complex document analysis, coding tasks, and multi-step reasoning. Well-suited for problem-solving agents and analysis bots that handle long-form inputs and technical workflows. Often excessive for basic or lightweight queries. |
| Claude 3.7 Sonnet (Thinking Mode) | Designed for deep, deliberate reasoning and critical thinking. Excels in slow, multi-step analysis for strategic tasks like legal review, policy generation, and complex customer support. |
| Claude 3.5 Sonnet | Focused on structured writing, instruction following, and business-grade accuracy. Well-suited for report generation, formal communication, and smart document workflows. Efficient for medium-length content where clarity and consistency matter. |
| Claude 3.5 Sonnet v2 | Optimized for automating business processes and structured workflows. A solid choice for enterprise tools, DevOps support, and productivity tasks where speed, clarity, and consistent output are key. |
| Claude 3 Opus | Powerful legacy model for logic-heavy work. Ideal for enterprises, researchers, and anyone working with complex text and image data. |
| Claude 3 Sonnet | Balanced version with good ratio between speed and accuracy. Sufficient for most business applications. |
| Claude 3 Haiku | Efficient version of Claude 3, optimized for fast processing. Maintains the core capabilities of the Claude 3 family with reduced complexity. Ideal for real-time applications and quick analyses. |
### Mistral
| Model | Description |
| ------------------ | ------------------------------------------------------------------------------------------------------------------------------------------------------------------------------------------------------------------------------------------------------------------------------------------------------------------- |
| Mistral Small 4 | (no description in JSON) |
| Mistral Medium 3.5 | Mistral's open-weight model, merging old reasoning and coding lines into one set of weights. Strong at agentic coding and multi-tool work, scoring 77.6% on SWE-bench Verified. |
| Mistral Large 3 | Mistral's generalist model. This is a non-reasoning model built for high-volume straightforward work rather than hard reasoning. Cheap and widely hosted, but it sits well below the reasoning tier on quality benchmarks. |
| Magistral Medium | An enterprise-grade reasoning powerhouse. Built from the ground up via reinforcement learning, it delivers fast, traceable, multilingual chains-of-thought—think “flash answers” that explain how they think. Handles complex tasks in math, code, logic, and rule-based workflows with precision and transparency. |
| Mistral Large | A multilingual powerhouse built for deep reasoning, code, math, and agent workflows. Offers a 32K‑token context window, native function‑calling, and RAG support. Thinks precisely across multiple languages, and delivers high performance on benchmarks. |
| Mistral Medium | A frontier-class generalist built for enterprise demands. Excels in programming, mathematical reasoning, long-document comprehension, dialogue, and multimodal tasks. Offers extended context (up to 128K tokens), function calling, and agentic workflows. |
| Mistral Small | Lean, swift, and powerful. Built for rapid, high-volume tasks with low latency. Features strong instruction-following, conversational finesse, and in version 3.1, robust multimodal understanding. |
### Google Vertex AI: Mistral
| Model | Description |
| ------------------- | ----------------------------------------------------------------------------------------------------------------------------------------------------------------------------------------------------------------------------------------------------------------------------------------- |
| AI21 Jamba Large | Great for legal analysis, enterprise research, and multilingual document tasks. Handles long-form content with strong memory, improved reasoning, and broad language support which is ideal for deep analysis across global teams. |
| AI21 Jamba Mini | Compact model for simple tasks. Very fast with limited complexity. Good for basic applications. |
| Mistral Small 3.1 | Lightweight, open-source multimodal model built for fast and cost-efficient deployment. Handles long-context workloads up to 128K tokens, and function calling. Well-suited for on-device use cases, responsive virtual assistants, document and image processing, and agentic workflows. |
| Mistral Medium 3 | Mistral's generalist model. This is a non-reasoning model built for high-volume straightforward work rather than hard reasoning. Cheap and widely hosted. It scores 19 on the Artificial Analysis Intelligence Index, slightly average for non-reasoning models in its price tier |
| Mistral Codestral 2 | Specialized code generation model, built for precise completion and fill-in-the-middle tasks. It supports writing, editing, and conversing about code across many programming languages. |
| Mistral Codestral | Well-suited for real-time development, code automation, and debugging tasks across various programming languages. Improves code generation speed, accuracy, and multi-language support over earlier open models like Code LLaMA, StarCoder, and DeepSeek-Coder. |
| Mistral Large | Efficient model with strong reasoning. Particularly good with technical and scientific texts. Cost-effective alternative to top models. |
| Mistral Nemo | Focuses on language fluency, response quality, and multilingual coverage, offering stronger performance than open-source chat models like LLaMA 2 Chat. Well-suited for chatbots, writing assistance, and global customer support. |
### Google Vertex AI: Llama
| Model | Description |
| -------------------- | ----------------------------------------------------------------------------------------------------------------------------------------------------------------------------------------------------------------------------------------------------------------------------------------------------- |
| Llama 4 Maverick 17B | Balanced power for demanding, mixed workloads. Combines strong multimodal reasoning, coding, and multilingual skills with a 1-million token context. Best for: versatile enterprise apps, advanced chat systems, and AI agents handling both technical and creative tasks. |
| Llama 4 Scout 17B | Designed for long-form analysis, deep document comprehension, and multimodal tasks. Supports an immense 10-million token context and excels in reasoning, image understanding, and coding. Best for large-document workflows, visual reasoning, and teams seeking high capability on modest hardware. |
| Llama 3.2 90B | Understands both language and images with impressive accuracy. Ideal for research, enterprise tools, and tasks that combine visual reasoning with strong language skills. |
| Llama 3.1 405B | Largest Llama model. Strong in general text processing. Good performance in technical tasks. Open-source base. |
| Llama 3.1 70B | Efficient Llama model for general applications. Good balance between size and performance. |
| Llama 3.1 8B | Smallest Llama model with reduced context window. Suitable for simple text processing. Very efficient with limited resources. |
### xAI Grok
| Model | Description |
| ------------------------------------ | ---------------------------------------------------------------------------------------------------------------------------------------------------------------------------------------------------------------------------------------------------------------------------------------------------------------------------------------------------------------------------------------- |
| Grok 4.5 | xAI’s latest flagship model for coding, agentic tasks, and knowledge work. Strong on real-world engineering, scoring 83.3% on Terminal-Bench 2.1 and 64.7% on SWE-Bench Pro, while offering fast-model speeds and competitive pricing. Best for coding agents, technical workflows, app building, and business productivity tasks that need strong reasoning with lower latency and cost |
| Grok 4 | Frontier-level Grok model with native tool use, real-time web access, and advanced reasoning. Ideal for power users who need live data, long-context comprehension, and complex task execution. Great for research and code to strategic decision-making. Built to compete with GPT-4o and Gemini 1.5 Pro at the highest tier. |
| Grok 3 | Built for stronger reasoning and deeper conversations across everyday and technical topics. Well-suited for smart assistants, research tools, and advanced chat experiences that aim to compete with top-tier models like GPT-4 and Claude Opus. |
| Grok 3 Mini (Thinking - High Effort) | A more efficient Grok model tuned for thoughtful, deeper reasoning. Ideal for moderately complex tasks where you want accurate, well-considered answers without the full cost of a flagship model. Leading to a smart balance between speed, accuracy, and effort. |
| Grok 3 Mini (Thinking - Low Effort) | A fast, low-resource Grok model designed for casual interactions and simple tasks. Ideal when speed matters more than depth. This is perfect for everyday chat, lightweight assistants, and high-volume use where quick answers are the priority. |
| Grok 2 Vision | Designed to understand both images and text, making it helpful for visual queries, screenshots, and image-based tasks. Great for users who need smart answers grounded in what they see. |
### DeepSeek
| Model | Description |
| ------------------ | ------------------------------------------------------------------------------------------------------------------------------------------------------------------------------------------------------------------------------------------ |
| DeepSeek Chat (V3) | Warning: Hosted and developed in China. Fast, open-source assistant built for everyday use. Well-suited for customer-facing apps, developer tools, and plug-and-play AI that handles smart conversations and basic coding tasks. |
| Reasoner (R1) | Warning: Hosted and developed in China. Open-source model built for deep reasoning, logical problem solving, and structured analysis. Highly effective in math and scientific tasks, and ideal for explainable, customizable applications. |
### Nebius
| Model | Description |
| ---------------------- | ----------------------------------------------------------------------------------------------------------------------------------------------------------------------------------------------------------------- |
| DeepSeek Chat (V3) | Chinese Model: Fast, open-source assistant built for everyday use. Well-suited for customer-facing apps, developer tools, and plug-and-play AI that handles smart conversations and basic coding tasks. |
| DeepSeek Reasoner (R1) | Chinese Model: Open-source model built for deep reasoning, logical problem solving, and structured analysis. Highly effective in math and scientific tasks, and ideal for explainable, customizable applications. |
### STACKIT
| Model | Description |
| ------------- | ------------------------------------------------------------------------------------------------------------------------------------------------------------------------------------------------------------------------------------------------------------------------------------------------------------------------- |
| GPT-OSS 120B | OpenAI’s largest open-weight reasoning model, built for strong agentic work. It matches or exceeds o4-mini across coding, reasoning, tool calling, competition and math. Strong fit for enterprise agents, coding workflows, and specialized use cases that require data control. |
| GPT-OSS 20B | A compact open-weight reasoning model built for low-latency local and specialized deployments. Matches or exceeds o3-mini on common coding, math, and tool-use evaluations, while running with as little as 16 GB of memory. Strong fit for private agent workflows, on-device inference, and cost-conscious deployments. |
| Qwen3.6 27B | An open-weight multimodal model that performs well above its size in agentic coding. It scores 77.2% on SWE-bench Verified, 53.5% on SWE-bench Pro, and 59.3% on Terminal-Bench 2.0, making it a strong option for coding, frontend workflows, tool use, and visual tasks. |
| Llama 3.3 70B | Balanced, high-performance model that delivers robust reasoning and reliable output quality. It performs well in complex tasks such as analysis, long-form content creation, and contextual decision support. |
| Gemma 3 27B | A capable open-weight multimodal model. Supports text and image inputs, a 128K context window, 140+ languages, function calling, and structured outputs. Strong fit for document analysis, multilingual assistants, visual tasks, and flexible agentic workflows. |
| Qwen3 VL 235B | A powerful open-weight vision-language model built for advanced multimodal work. Its native 256K context makes it well suited for long documents, hours-long video, complex visual analysis, and agentic workflows. Best for teams that need high-end multimodal capabilities and can support a heavyweight deployment |
### IONOS
| Model | Description |
| ----------------- | --------------------------------------------------------------------------------------------------------------------------------------------------------------------------------------------------------------------------------------------------------------------------------------------------------------------------- |
| GPT-OSS 120B | This is an EU-sovereign transformer model designed to deliver strong reasoning, contextual understanding, and high-quality generative output. As a 120B-parameter system running entirely on IONOS infrastructure, it offers a balance of power and performance while meeting strict European data protection requirements. |
| Mistral Small 24B | A strong blend of reasoning quality and performance in a mid-size architecture. It handles complex instructions, multi-step tasks, and general conversational workloads with high reliability. |
| Mistral Nemo 12B | Compact and capable model optimized for efficiency and high-throughput performance. Built on the NeMo and Mistral open-source stack, it excels in fast, lightweight tasks such as summarization, classification, and structured or template-driven generation. |
| Teuken 7B | A lightweight, multilingual model optimized for efficiency and cost-effective usage. It supports basic conversational tasks, simple content generation, etc. |
| Llama 3.3 70B | Balanced, high-performance model that delivers robust reasoning and reliable output quality. It performs well in complex tasks such as analysis, long-form content creation, and contextual decision support. |
| Llama 3.1 405B | High-capacity model from Meta’s LLaMA 3.1 family, designed for scenarios requiring maximum expressiveness and broad linguistic capability. Its large parameter count gives it strong generalization, nuanced generation, and broad language coverage. |
| Llama 3.1 8B | Provides fast, efficient inference suited for everyday operational tasks. It handles straightforward instructions, short-form content, and utility workflows with high responsiveness. The model’s low resource footprint makes it ideal for cost-optimized deployments. |
### Pharia / Aleph Alpha
| Model | Description |
| ------------------- | ------------------------------------------------------------------------------------------------------------------------------------------------------------------------------------------------------------------------------------------------------------------------------------------------------------ |
| GPT-OSS 120B | Provided via Aleph Alpha. This is an open-weight reasoning model by OpenAI that achieves near-parity with OpenAI o4-mini on core reasoning benchmarks. Well-suited for production-grade tasks where transparency and sovereign hosting matter. |
| Kimi K2.5 | Provided via Aleph Alpha. This is an open-source native multimodal model by Moonshot AI that excels at coding, visual reasoning, and multi-step agentic workflows. It is ideal for autonomous research and document workflows. |
| Aleph Alpha Preview | Sovereign European model, trained and served entirely on EU infrastructure, currently in public preview. It targets German-language and regulated workloads where data residency drives the decision (with a 33k context window). Best for German-language tasks under strict data sovereignty requirements. |
# How to Choose the Right LLM
A detailed LLM selection guide explaining how Blockbrain measures usage via Compute Blocks, with concrete model recommendations for company-wide deployment and specific use cases.
When using Blockbrain, understanding how computational resources are measured and allocated is essential for getting the most out of the platform. At the heart of this system lies a transparent and usage-based metric: **Compute Blocks (CBs)**.
Every action at Blockbrain - sending a message, uploading a file, or running an agent - consumes Compute Blocks (CBs). CBs reflect the actual computational cost of each operation and are composed primarily of tokens used by Large Language Models (LLMs).
CB usage directly mirrors the input and output token pricing of each LLM. For example, if Opus 4.8 is 66.67% more expensive than Sonnet 4.6 in terms of input and output token prices, its CB consumption will also be approximately 66.67% higher.
***
### Default Recommendation for Company-Wide Use
#### Primary Choice/s: Claude Sonnet 5 (AWS Bedrock)
Blockbrain Metrics:
* Quality: 4.7 | Speed: 4.4 | Cost Efficiency: 3.6
* Context: 1M tokens | Provider: AWS Bedrock (EU)
**Pricing**: $1.87 input / $9.35 output per million tokens
Why consider? Highest quality among budget-tier models. Excellent for teams that need better reasoning while maintaining cost efficiency.
#### Primary Choice/s: Gemini 3.5 Flash (Google)
Blockbrain Metrics:
* Quality: 4.2 | Speed: 4.8 | Cost Efficiency: 3.7
* Context: 1M tokens | Provider: Google AI (EU)
**Pricing**: $1.50 input / $9.00 output per million tokens
Why consider? Competitive quality at low cost - excellent for high-volume deployment.
#### Primary Choice/s: GPT 5.6 Terra (Azure)
Blockbrain Metrics:
* Quality: 4.4 | Speed: 3.4 | Cost Efficiency: 3.4
* Context: 1M tokens | Provider: Azure AI (EU)
**Pricing**: $2.50 input / $15.00 output per million tokens
Why this model? Excellent balance of quality, speed - ideal for diverse business use cases.
***
### Scenario-Based Recommendations
#### Highest Quality (Premium Tasks)
**Winner: Claude Opus 5**
* Quality **4.9** | Speed 4.0 (Bedrock) | Cost Efficiency 3.0
* Context: 1M tokens | Provider: AWS Bedrock (EU)
* Pricing: $4.67 input / $23.38 output per million tokens
**When to use**: Reserve for mission-critical tasks, C-suite deliverables, complex strategic analysis, long-horizon agent runs, complex strategic analysis, anything where the model needs to catch its own mistakes.
**Runner-up: GPT 5.6 Sol**
* Quality **4.8** | Speed 3.5 | Cost Efficiency 2.9
* Context: 1M tokens | Provider: Azure AI (EU)
* Pricing: $5.00 input / $30.00 output per million tokens
**Budget Quality Option: Claude Sonnet 5**
* Quality: **4.7** | Speed: 4.4 | Cost Efficiency: 3.6
* Context: 1M tokens | Provider: AWS Bedrock (EU)
* Pricing: $1.87 input / $9.35 output per million tokens
* Best premium option without extreme cost
#### Maximum Speed
**Winner: Gemini 3.5 Flash**
* Speed **4.8** | Answer Quality **4.2** | Cost Efficiency 3.7
* Context: 1M tokens | Provider: Google AI (EU)
* **Pricing**: $1.50 input / $9.00 output per million tokens
**Why it wins**: Beats the old winner (Claude Sonnet 4.6 Fast) by 0.4 quality points at half the output cost.
**Budget Quality Option: Gemini 3.1 Flash (Lite)**
* Speed **4.9** | Quality 3.4 | Cost Efficiency **4.9**
* Context: 1M tokens | Provider: Google AI (EU)
* Pricing: $0.25 input / $1.50 output
* **Better value** for most speed-critical applications
#### Code Development Excellence
**Winner: Claude Sonnet 5**
Blockbrain Metrics:
* Quality **4.7** | Speed **4.4** | Cost Efficiency 3.6
* Context: 1M tokens | Provider: AWS Bedrock (EU)
* Pricing: $1.87 input / $9.35 output per million tokens
**Why it wins**: Comes close to Opus 4.8 quality at a fifth of the output cost
**Alternative: Gemini 3.5 Flash (High thinking)**
Blockbrain Metrics:
* Quality: **4.4** | Speed: 4.2 | Cost Efficiency: 3.5
* Context: 1M tokens | Provider: Google AI (EU)
* **Pricing**: $1.50 input / $9.00 output per million tokens
**Why it wins**: High quality for code development (4.4) with excellent speed. Purpose-built for agentic and coding work at Flash speed and Flash pricing.
**Premium Option: Claude Opus 5**
* Quality **4.9** | Speed 4.0 (Bedrock) | Cost Efficiency 3.0
* Context: 1M tokens | Provider: AWS Bedrock (EU)
* Pricing: $4.67 input / $23.38 output per million tokens
* Best for: Complex architectural decisions, critical code review
#### Creative & Writing Tasks
**Winner: Claude Sonnet 5**
Blockbrain Metrics:
* Quality **4.7** | Speed **4.4** | Cost Efficiency 3.6
* Context: 1M tokens | Provider: AWS Bedrock (EU)
* Pricing: $1.87 input / $9.35 output per million tokens
**Why it wins**: The latest version of Sonnet 4.6 which delivered flagship-quality writing (4.7) at mid-tier pricing—exceptional value for creative work.
**Budget Alternative: Claude Haiku 4.5**
* Quality **3.6** | Speed 3**.6** | Cost Efficiency 4
* Context: 200kk tokens | Provider: AWS Bedrock (EU)
* Pricing: $0.94 input / $4.67 output per million tokens
* Best for: Still the best cheap model *for tone* in the catalog
**High Volume Alternative: GPT 5.6 Luna**
* Quality **3.7** | Speed 4 | Cost Efficiency **5**
* Context: 1M tokens | Provider: OpenAI (EU)
* Pricing: $0.20 input / $1.20 output per million tokens
* Best for: Use where volume beats polish
#### Complex Reasoning Tasks
**Winner: Claude Opus 5**
* Quality **4.9** | Speed 4.0 (Bedrock) | Cost Efficiency 3.0
* Context: 1M tokens | Provider: AWS Bedrock (EU)
* Pricing: $4.67 input / $23.38 output per million tokens
* Performance: 43.3% on Frontier-Bench v0.1 (vs Opus 4.8's 21.1%); 1861 on GDPval-AA v2 for knowledge work
* Best for: multi-step analysis, scientific reasoning, mathematical work, self-verifying agent loops
**Runner-up: GPT 5.6 Sol**
* Quality **4.8** | Speed 3.5 | Cost Efficiency 2.9
* Context: 1M tokens | Provider: Azure AI (EU)
* Pricing: $5.00 input / $30.00 output per million tokens
* Performance: 91.9% on Terminal-Bench 2.1. Strong on long-running autonomous tasks; uses fewer tokens per task than GPT 5.5 despite the deeper reasoning
**Budget Alternative: Claude Sonnet 5**
* Quality **4.7** | Speed **4.4** | Cost Efficiency 3.6
* Context: 1M tokens | Provider: AWS Bedrock (EU)
* Pricing: $1.87 input / $9.35 output per million tokens
***
### Decision Matrix
Priority
Primary Recommendation
Budget Alternative
Premium Option
Balanced everyday use
Claude Sonnet 5 ($1.87/$9.35)
Gemini 3.5 Flash ($1.50/$9)
Claude Opus 5 ($4.67/$23.38)
Maximum cost savings
GPT 5.6 Luna ($0.20/$1.20)
Gemini 3.1 Flash Lite ($0.25/$1.50)
Gemini 3.5 Flash ($1.50/$9)
Highest quality
Claude Opus 5 ($4.67/$23.38)
Claude Sonnet 5 ($1.87/$9.35)
Fastest response
Gemini 3.5 Flash Low ($1.50/$9)
Gemini 3.1 Flash Lite ($0.25/$1.50)
GPT 5.4 Low Thinking ($2.50/$15)
Creative work
Claude Sonnet 5 ($1.87/$9.35)
Claude Haiku 4.5 ($.94/$4.67)
Claude Opus 5 ($4.67/$23.38)
Code development
Claude Sonnet 5 ($1.87/$9.35)
Gemini 3.5 Flash ($1.50/$9)
Claude Opus 5 ($4.67/$23.38)
Complex reasoning
Claude Opus 5 ($4.67/$23.38)
Claude Sonnet 5 ($1.87/$9.35)
GPT 5.6 Sol ($5/$30)
***
### Strategic Recommendations
#### For Most Companies: Multi-Model Strategy
We recommend a tiered approach:
* **Tier 1** (80% of queries): Fast, cost-efficient models
* Gemini 3.5 Flash (Low) or GPT 5.6 Luna
* Use for: emails, summaries, Q\&A, basic analysis
* **Tier 2** (15% of queries): Balanced premium models
* Claude Sonnet 5 or Gemini 3.5 Flash
* Use for: reports, complex content, strategic analysis
* **Tier 3** (5% of queries): Flagship models
* Claude Opus 5
* Use for: critical decisions, high-stakes content, C-suite materials
Estimated Savings: 60–75% vs. using flagship models for everything
***
### Important Considerations
#### Output Token Costs Matter Most
For typical conversational AI:
* **Input**: System prompt + user query = 500 tokens
* **Output**: AI response = 200–500 tokens
Example cost for 1,000 queries (500 input tokens, 300 output tokens):
| Model | Input Cost | Output Cost | Total |
| ----------------- | ---------- | ----------- | ------ |
| GPT 4o Mini | $0.075 | $0.18 | $0.26 |
| GPT 5.4 Mini | $0.20 | $0.48 | $0.68 |
| Gemini 2.5 Flash | $0.25 | $0.90 | $1.15 |
| Claude Haiku 4.5 | $0.50 | $1.50 | $2.00 |
| Claude Sonnet 4.6 | $1.50 | $4.50 | $6.00 |
| Claude Opus 4.8 | $2.50 | $7.50 | $10.00 |
> Output-heavy use cases (reports, documentation, code generation) should prioritize low output-cost models.
#### Context Window Value
| Model | Context Window |
| ---------------------- | ---------------- |
| Gemini 2.5 Flash / Pro | 1M tokens |
| Claude Sonnet 4.6 | 1M tokens |
| Most others | 128k–400k tokens |
| Mistral Codestral | 32k tokens |
**When it matters**: Document analysis, long conversations, comprehensive research, multi-file code review.
> Pro tip: A 1M context window can hold 750,000 words or 3,000 pages of text.
#### Provider Considerations
**All Blockbrain models are EU-hosted, ensuring:**
* **GDPR compliance** – Data processed within EU boundaries
* **Data residency** – Meets European regulatory requirements
* **Lower latency** – For European customers
***
### Best Practices for Cost Optimization
#### 1. Prompt Engineering
**Reduce output tokens by 30–50%**
Either add this in the initial instructions of the bot, or prompt it directly:
* Request concise responses: "Answer in 2–3 sentences" or use in the sendbox \
Options → Length: Short / Very Short
* Use structured outputs: "Respond in bullet points"
* Avoid redundancy: "Don't repeat the question"
> **Impact**: Can reduce costs by 40%+ for output-heavy models.
#### 2. Smart Model Routing
| Query Type | Recommended Model |
| ----------------------------- | ---------------------------- |
| Simple (FAQ, definitions) | GPT 5.4 Mini |
| Standard (analysis, drafting) | Gemini 2.5 Flash |
| Complex (strategic, critical) | Claude Sonnet 4.6 / Opus 4.8 |
> **Impact**: 50–70% cost reduction vs. using premium models for everything.
#### 3. Caching & Reuse
* Cache common prompts (Prompt Library)
* Reuse context where possible (e.g. via Insights)
* Implement RAG (Retrieval-Augmented Generation) via the database to reduce context size
**Impact**: 20–30% reduction in input token costs.
***
### Conclusion
**The Blockbrain model portfolio offers excellent options for every use case and budget.**
**For most companies, we recommend:**
* Start with Gemini 3.5 Flash as your default model (e.g. in your Company GPT)
* Add GPT 5.6 Luna for high-volume and cost-sensitive teams (e.g. classification, extraction, routing, metadata, bulk drafting)
* Introduce specialists where they earn their place: Claude Sonnet 5 for agentic coding and quality writing; Gemini 3.5 Flash High for agentic work at Flash cost.
* Reserve Claude Opus 5 for critical work only — and pin its effort setting, since adaptive thinking runs by default and thinking tokens bill at the output rate.
**This approach typically delivers:**
* 60–75% cost savings vs. premium-only deployment
* 90%+ user satisfaction
* Flexibility to scale and optimize over time
# Blockbrain LLM Selection Guide
A quick-reference guide for selecting the right Blockbrain LLM based on cost, speed, and use case.
### How Blockbrain Measures Usage
Every action on Blockbrain - messages, file uploads, or agent runs - consumes Compute Blocks (CBs), a transparent, usage-based metric reflecting the actual computational cost of each operation. CBs are primarily driven by LLM token usage, and their consumption directly mirrors each model's input/output token pricing.
> **A more expensive model = proportionally higher CB usage.**
### Default Recommendation
| Model | Quality | Speed | Cost Eff. | Pricing (Input/Output per 1M tokens) |
| ----------------------------- | ------- | ----- | --------- | ------------------------------------ |
| Claude Sonnet 5 (AWS Bedrock) | 4.7 | 4.4 | 3.6 | $1.87 / $9.35 |
| Gemini 3.5 Flash (Google) | 4.2 | 4.8 | 3.7 | $1.50 / $9.00 |
| GPT 5.6 Terra (Azure AI) | 4.4 | 3.4 | 3.4 | $2.50 / $15.00 |
> **Gemini 3.5 Flash (Lite)** is the best all-around choice — excellent quality, fast, cost-efficient, with a 1M token context window. Coming next week.
### Quick Decision Matrix
| Priority | Primary Pick | Budget Option | Premium Option |
| ------------------ | ------------------------- | --------------------------------- | ---------------------------------- |
| Everyday use | Gemini 3.5 Flash (Vertex) | GPT 5.6 Luna (Azure) | Claude Sonnet 5 (Bedrock) |
| Max cost savings | GPT 5.6 Luna (Azure) | Gemini 3.1 Flash Lite (Vertex) | GPT 5.6 Terra (Azure) |
| Highest quality | Claude Opus 5 (Bedrock) | GPT 5.6 Sol (Azure) | Claude Opus 4.6 (Max) (Bedrock) |
| Fastest response | Gemini 3.5 Flash (Vertex) | Claude Haiku 4.5 (Fast) (Bedrock) | Claude Sonnet 4.6 (Fast) (Bedrock) |
| Creative & writing | Claude Sonnet 5 (Bedrock) | Claude Sonnet 4.6 (Bedrock) | Claude Opus 5 (Bedrock) |
| Code development | Claude Sonnet 5 (Bedrock) | GPT 5.3 Codex (OpenAI) | Claude Opus 4.8 (Bedrock) |
| Complex reasoning | GPT 5.6 Sol (Azure) | Gemini 3.5 Flash (High) (Vertex) | Claude Opus 5 (Bedrock) |
### Key Considerations
* **Output tokens cost more than input tokens** - prioritize low output-cost models for reports, docs, and code generation.
* **1M+ context windows** (Gemini 3.5 Flash, Claude Sonnet 5, GPT 5.6 Sol/Terra/Luna) hold roughly 2,500 pages of text, critical for document analysis and long conversations.
### Real-World Cost Examples for LLM Queries and Recommendations
#### Category: Direct LLM Calls
#### 1 - Claude Opus 4.8
* **Query example**: "Turn these rough workshop notes into a polished strategic recommendation memo for the steering committee, in situation-complication-resolution structure" + attached raw workshop notes (\~1.5hr strategy session, messy live notes)
* **Input tokens**: \~1,640
* **Output tokens**: \~1,000
* **Input token cost** (per 1M): $5.00
* **Output token cost** (per 1M): $25.00
* **Compute Blocks**: \~3,320
* **Cost** (at 30 € / 1M Compute Blocks): \~€0.10
* **Recommendation**: **Gemini 3.1 Flash-Lite** - it came in at \~101 CBs (\~€0.003), roughly 33x cheaper than Opus. But it's not a clean win: Gemini's memo dropped structure the Opus version included. Claude Sonnet 4.6 (Example 1.1) is a safer middle-ground swap at \~1.67x fewer CBs with comparable depth; Gemini is worth it only if the shorter, less detailed format is actually sufficient for this use case.
#### 1.1 - Claude Sonnet 4.6, same query as 1
* **Query example**: Same as Example 1
* **Input tokens**: \~1,640
* **Output tokens**: \~1,000
* **Input token cost** (per 1M): $3.00
* **Output token cost** (per 1M): $15.00
* **Compute Blocks**: \~1,992
* **Cost** (at 30 € / 1M Compute Blocks): \~€0.06
* **Recommendation**: **GPT 5 Mini** came as \~9x cheaper than Opus and \~5.7x cheaper than Sonnet, while producing a *more* thorough memo than either Claude model - the opposite trade-off from Gemini 3.1 Flash Lite, which was cheaper still but less detailed. Of the three alternatives tested against Opus on this exact query, GPT-5 Mini currently looks like the best value: most of the cost savings without giving up detail.
#### 2 - Claude Opus 4.8, multi-turn / multi-document analysis
* **Query example**: Two-turn conversation. Turn 1: analyze a freight contract's liability clause against a court ruling and a firm precedent memo, draft a structured legal memo (issue / applicable law / analysis / risk / recommendation). Turn 2, same thread: "argue the counterposition - why might this be enforceable despite the risk?"
* **Input tokens**: \~5,199 combined (turn 1: 3 source documents + instruction, \~1,785; turn 2: the entire turn 1 input+output re-sent as context, \~3,374, + new instruction, \~40)
* **Output tokens**: \~2,807 combined (turn 1 memo \~1,589 + turn 2 counterposition \~1,218)
* **Input token cost** (per 1M): $5.00
* **Output token cost** (per 1M): $25.00
* **Compute Blocks**: \~9,617
* **Cost** (at 30 € / 1M Compute Blocks): \~€0.29
* **Recommendation**: For this level of legal reasoning quality, **GPT-5** is a plausible alternative, given its current strength on structured reasoning tasks - but a lighter model like Gemini Flash is probably **not** appropriate here given the accuracy bar for legal analysis. The bigger lever regardless of model is conversation length: turn 2's short prompt still re-sends all of turn 1 as context, so cost compounds with every follow-up turn.
#### 2.1 - Claude Sonnet 4.6, same two-turn conversation as 2
* **Query example**: Same as 2
* **Input tokens**: \~5,503 combined (turn 1: same 1,785 as Opus's version; turn 2: turn 1 input+output re-sent, \~3,678, + new instruction, \~40)
* **Output tokens**: \~3,402 combined (turn 1 memo 1,893 + turn 2 counterposition 1,509 - both real, and both longer than Opus's equivalents of \~1,589 and \~1,218)
* **Input token cost** (per 1M): $3.00
* **Output token cost** (per 1M): $15.00
* **Compute Blocks**: \~6,754
* Cost (at 30 € / 1M Compute Blocks): \~€0.203
* **Recommendation**: **Switch to GPT-5.** Despite being significantly cheaper than Claude Opus (2), Sonnet 4.6 paradoxically produces *longer* outputs (3,402 vs. \~2,807 tokens combined), driving up costs without a clear quality benefit. At \~€0.203 per two-turn conversation, it remains more expensive than GPT-5 for comparable or superior output. See section 2 for full cost comparison.
#### 3 - Claude Opus 4.8, quantitative data reconciliation
* **Query example**: Given three KPI/data documents (a quarterly metrics table, a segment breakdown, and a leadership commentary memo), identify the 2-3 biggest strategic risks, back each with specific figures and quarter-over-quarter trends, reconcile the ARR figures across documents and flag any discrepancy, and compare leadership's narrative against what the data actually shows.
* **Input tokens**: \~1,284 (3 source documents + instruction)
* **Output tokens**: \~1,233
* **Input token cost** (per 1M): $5.00
* **Output token cost** (per 1M): $25.00
* **Compute Blocks**: \~3,725
* **Cost** (at 30 € / 1M Compute Blocks): \~€0.11
* **Recommendation**: **GPT-5 Nano** essentially matched the substance of this analysis - same 3 risks identified, same $0.6M ARR discrepancy calculated, same severity ranking - at \~61x fewer CBs than Opus (\~61 CBs vs. \~3,725).
#### 3.1 - Claude Sonnet 4.6, same query as 3
* **Query** **example**: Same as 3
* **Input** **tokens**: \~1,284
* **Output** **tokens**: 1,208
* **Input** **token** **cost** (per 1M): $3.00
* **Output** **token** **cost** (per 1M): $15.00
* **Compute** **Blocks**: \~2,197
* **Cost** (at 30 € / 1M Compute Blocks): \~€0.066
* **Recommendation**: **Gemini Flash-Lite or GPT-5 mini-tier.** At \~€0.066 per query, Sonnet 4.6 is already cost-efficient - but arithmetic reconciliation is a structured, rule-bound task that doesn't require frontier reasoning. Lighter models may match accuracy at a fraction of the cost.
***
#### Category: Web Search
Web search is powered by a search provider (Tavily / Linkup / Perplexity) plus a synthesis LLM. The numbers below are real for these specific example runs; a different query could cost more or less depending on how many sources it ends up reading and which provider/model handles synthesis.
#### 1 - EU AI Act research query
* **Query example**: "What are the latest changes to the EU AI Act that could affect enterprise AI vendors like us?" - ran 3 search queries, read 6 sources (via Linkup, EU-hosted)
* **Input tokens**: \~6,000–8,500 (assumes \~900–1,300 tokens/source × 6 sources)
* **Output tokens**: \~911
* **Input token cost** (per 1M): $3.00 (model: Sonnet 4.6)
* **Output token cost** (per 1M): $15.00
* **Compute Blocks**: \~3,200–3,900
* **Cost** (at 30 € / 1M Compute Blocks): \~€0.10–€0.12
* **Recommendation**: **Prompting angle:** this query used broad, open-ended phrasing ("what are the latest changes") - a more tightly scoped version, e.g. "What EU AI Act changes were published since June 2026 specifically affecting enterprise vendors?", would likely reduce how many search queries the agent runs and how many sources it decides it needs to read, directly lowering CB cost. Open-ended research prompts tend to trigger more tool calls than a narrowly-scoped question with the same intent.
#### 2 - EUR/USD exchange rate
* **Query example**: "What's today's EUR/USD exchange rate?" - ran 1 search query, read 1 source ([Investing.com - Stock Market Quotes & Financial News](http://investing.com/) )
* **Input tokens**: \~300–650
* **Output tokens**: \~64
* **Input token cost** (per 1M): $3.00
* **Output token cost** (per 1M): $15.00
* **Compute Blocks**: \~190–290
* **Cost** (at 30 € / 1M Compute Blocks): \~€0.006–€0.009
* **Recommendation**: **Prompting angle:** this prompt is already about as tightly scoped as possible (single fact, no ambiguity about scope or timeframe) — a good reference example of what an efficiently-scoped Websearch prompt looks like, with little room to reduce tool calls further.
#### 3 - AI vendor liability / MCP tool-calling research
* **Query example**: "Has there been any regulatory guidance published on AI vendor liability for MCP-style tool-calling architectures?" - ran 3 search queries, read 8 sources (the most of the three examples)
* **Input tokens**: \~7,200–10,400
* **Output tokens**: \~819
* **Input token cost** (per 1M): $3.00
* **Output** **token** **cost** (per 1M): $15.00
* **Compute** **Blocks**: \~3,390–4,350
* **Cost** (at 30 € / 1M Compute Blocks): \~€0.10–€0.13
* **Recommendation**: Landed close to Example 1's cost despite reading more sources (8 vs. 6), because its output was shorter. **Prompting angle:** the open-ended phrasing ("has there been any guidance") likely drove the agent to cast a wide net across more sources than a narrower question would need — asking a more specific sub-question, e.g. "Does the EU AI Act specifically address MCP-style tool-calling architectures?", would likely cut the source count and therefore the CB cost, at the risk of missing broader context a wider search might surface.
***
### Category: Outlook Agent
Cost depends on which tool(s) the agent ends up calling and how much it needs to reason, which isn't fixed in advance.
#### 1 - Calendar conflict check
* **Query** **example**: "Check my calendar for any conflicts next Tuesday afternoon" - agent reasoned about the date, called the Outlook calendar tool, and returned a conflict analysis
* **Input** **tokens**: \~1,700–3,500
* **Output** **tokens**: \~400
* **Input** **token** **cost** (per 1M): $3.00
* **Output** **token** **cost** (per 1M): $15.00
* **Compute** **Blocks**: \~1,100–1,650
* **Cost** (at 30 € / 1M Compute Blocks): \~€0.03–€0.05
* **Recommendation**: **Prompting angle:** this prompt is already narrowly scoped (one date, one time window) - good example of an efficiently-scoped agent prompt, with little room to reduce tool calls further here.
#### 2 - Mailbox search
* **Query** **example**: "Show me all emails mentioning SharePoint connector from the last two weeks" - agent calculated the date range, called the mailbox search tool, returned 3 matching emails with a summary
* **Input** **tokens**: \~1,700–3,500
* **Output** **tokens**: \~411
* **Input** **token** **cost** (per 1M): $3.00
* **Output** **token** **cost** (per 1M): $15.00
* **Compute** **Blocks**: \~1,150–1,700
* **Cost** (at 30 € / 1M Compute Blocks): \~€0.03–€0.05
* **Recommendation**: Nearly identical cost as first use-case in this category - confirms simple, single-tool-call Outlook actions cost similarly regardless of which specific tool is invoked. **Prompting angle:** the specific keyword and explicit time window kept this cheap; a vaguer version like "show me anything about SharePoint" with no date range could force the agent into a much broader (and more expensive) mailbox scan.
#### 3 - Complex multi-step workflow request
* **Query** **example**: "When an email arrives from the Product group, classify it by workstream, extract action items into a structured list, log them to my tracker, draft a reply if it's routine, and notify me in Teams."
* **Input** **tokens**: \~1,550–3,050
* **Output** **tokens**: \~950
* **Input** **token** **cost** (per 1M): $3.00
* **Output** **token** **cost** (per 1M): $15.00
* **Compute** **Blocks**: \~1,890–2,340
* **Cost** (at 30 € / 1M Compute Blocks): \~€0.06–€0.07
* **Recommendation**: **Prompting angle:** this prompt bundled six distinct asks into one request. Splitting this into requests the agent can actually fulfill - e.g. "classify and log action items from emails I forward to you," dropping the real-time trigger and Teams pieces - would avoid the capability-limited dead end entirely and produce a much shorter, cheaper, and more useful response.
# Learn about LLM Benchmarks
A practical guide to LLM benchmarks - covering what they measure, how scores are read, where benchmarks fall short, and which ones matter most for making smarter, evidence-based AI decisions.
### Why are LLM Benchmarks Important?
{% stepper %}
{% step %}
#### This provides real data, not hype.
Benchmarks give you an objective way to evaluate models across reasoning, coding, math, language understanding, and safety. This helps you base decisions on measurable performance rather than claims alone.
{% endstep %}
{% step %}
#### Helps you match the right model to your use case.
Every model has strengths. Some lead on coding, while others perform better in reasoning or multilingual tasks. Understanding these differences helps you choose the model that best fits what you are trying to do.
{% endstep %}
{% step %}
#### Using multiple benchmarks gives you a clearer picture.
Models can perform very differently depending on what is being tested. Looking at multiple benchmarks gives you a fuller and more accurate view of a model’s capabilities.
{% endstep %}
{% step %}
#### They help guide your decision, but they do not provide definitive answers.
A strong score reflects performance under specific, controlled conditions. It does not guarantee the same results in your environment. Benchmarks should be used to narrow your options, then validated through real-world testing before making a final decision.
{% endstep %}
{% endstepper %}
### List of LLM Benchmarks
* Streamlined Benchmark List: A quick reference to the benchmarks and leaderboards most commonly used to compare frontier models today.
* Full Benchmark List: A broader reference across major capability areas, for when you need a deeper or more specific evaluation.
{% tabs %}
{% tab title="Streamlined Benchmark List" %}
Benchmark
What It Evaluates
Status
MMLU-Pro
Graduate-level knowledge across multiple disciplines, using 10 answer choices instead of 4 to reduce guesswork and better separate model performance
Active - remains a strong differentiator, with scores typically lower than standard MMLU
GPQA Diamond
Expert-level scientific reasoning across biology, physics, and chemistry, built to test frontier reasoning beyond standard knowledge recall
Active differentiator - one of the strongest benchmarks for advanced scientific reasoning
AA Quality Index
A composite intelligence score from Artificial Analysis that combines results across multiple benchmarks into a single comparative metric
Active - updated as new models and benchmarks are added
Chatbot Arena (LMSYS)
Human preference in open-ended conversations, based on blind pairwise comparisons between models
Widely referenced - reflects real user preference rather than only controlled test performance
LiveCodeBench
Code generation on newly released competitive programming tasks, designed to reduce training data contamination
Active - regularly refreshed, making it one of the most current coding benchmarks available
AIME 2025
Advanced mathematical reasoning through olympiad-style problems that require multi-step problem solving
Active and highly challenging - few frontier models perform strongly here
SWE-bench Verified
Real-world software engineering through verified GitHub issue resolution across full codebases
Gold standard for coding - evaluates practical engineering ability beyond isolated code generation
{% endtab %}
{% tab title="Full Benchmark List " %}
Benchmark
What it Evaluates
Status
MMLU
Broad knowledge across 57 academic subjects, including STEM, humanities, and professional disciplines
Saturated
MMLU-Pro
A more difficult version of MMLU with 10 answer choices that reduce guesswork and better separate model performance
Active
GPQA Diamond
Expert-level scientific reasoning across biology, physics, and chemistry
Active
ARC-AGI 2
Abstract pattern recognition and reasoning from first principles rather than memorized knowledge
Active
Humanity's Last Exam
Extremely difficult expert-written questions across a wide range of academic domains
Active
GSM8K
Basic multi-step math word problems at grade-school level
Saturated
MATH
Competition-level mathematics that requires structured reasoning and free-form answers
Active
AIME 2025
Olympiad-level mathematical problem solving with deep multi-step reasoning
Active
HumanEval
Python function generation from natural language prompts, scored through unit-test correctness
Saturated
HumanEval+
A stricter extension of HumanEval with stronger test coverage and more edge cases
Active
LiveCodeBench
Code generation on fresh competitive programming problems updated regularly to reduce contamination risk
Active
SWE-bench Verified
Real software engineering through verified issue resolution across full codebases
Gold standard
SWE-bench Pro
Repository-level software engineering evaluation with broader language support
Emerging
IFEval
How accurately a model follows specific, verifiable instructions with constrained output requirements
Active
BFCL v4
Tool use and function calling across serial, parallel, multi-turn, and agentic workflows
Widely used
RULER
Long-context retrieval, tracking, and synthesis across extended documents
Active
MMMU Pro
Multimodal reasoning across academic subjects using both text and visual inputs
Active
TruthfulQA
Factual reliability and resistance to common misconceptions and hallucination-prone prompts
Contaminated
HELM
Multi-dimensional evaluation across accuracy, calibration, robustness, fairness, bias, and efficiency
Framework
Chatbot Arena (LMSYS)
Human preference in open-ended conversations through blind side-by-side model comparisons
Widely used
* Active = still useful for separating model performance today
* Saturated = top models score too closely for strong differentiation
* Emerging = newer benchmark with growing adoption
* Gold standard = strongest reference point in its category
* Widely used = commonly referenced in practice
* Contaminated = results may be less reliable due to training overlap
* Framework = better for broad evaluation than direct ranking
{% endtab %}
{% endtabs %}
### Frontier Model Benchmark Snapshot (May 2026)
* A directional comparison of leading models across publicly reported benchmarks. Blank cells indicate that a directly comparable public value was not confirmed in the source set used here.
| Model | GPQA Diamond | SWE-bench Verified | ARC-AGI-2 | HLE |
| ---------------------------- | ------------ | ------------------ | --------- | ----------------------------------------- |
| **GPT-5.4** | 92% | - | 73.3% |
|
| **Gemini 3 Flash** | 89.8% | 75.8% | - | 33.7% |
### Benchmarks by Use Case
* Different tasks require different evaluation signals. This table highlights the benchmarks that are most relevant for common LLM use cases, so you can focus on the scores that best match the task at hand.
Use Case
Primary Benchmarks
Additional References
General Knowledge and Q&A
MMLU-Pro, Chatbot Arena (LMSYS)
MMLU
Code Generation
SWE-bench Verified, LiveCodeBench, SWE-bench Pro
HumanEval+, BFCL v4
Mathematical Reasoning
AIME 2025, MATH
GSM8K
Scientific Reasoning
GPQA Diamond
Humanity's Last Exam
Creative Writing
Chatbot Arena Creative Writing
-
Instruction Following
IFEval
Chatbot Arena (LMSYS)
Tool Use and Function Calling
BFCL v4
-
Long-Context Understanding
RULER, Needle-in-a-Haystack
LongGenBench
Multimodal and Vision
MMMU Pro, Arena Vision
MMMU
Multilingual Tasks
MMMLU
MLNeedle
Agentic Workflows
SWE-bench, BFCL v4
WebArena, OSWorld
Safety and Factual Reliability
HalluLens, SimpleQA
-
# All about Knowledge Management
This page covers everything you need to know about Knowledge Management in Blockbrain - from knowledge bases, search, sharing, configuration, and more.
### What is a Knowledge Base
A **Knowledge Base (KB)** is a searchable collection of documents. Upload your files - PDFs, Word documents, spreadsheets, presentations, images, ZIP archives, and more - and Blockbrain processes them so that AI agents, chat assistants, and data rooms can retrieve relevant information from them.
When you (or an AI agent) ask a question, Blockbrain doesn't re-read the raw files. Instead, it searches the processed knowledge base and returns the most relevant passages, tables, and images - each with a full citation back to the source document and page number.
{% hint style="info" %}
**Standard and Smart.** When you create a knowledge base you choose its type: **Standard** (the original, reliable and feature complete) or **Smart** (the newer generation with smarter document processing, first class folders, richer retrieval, and knowledge graph understanding).
{% endhint %}
#### Basic Settings
| Field | Required | Notes |
| ----------------------- | -------- | ------------------------------------------------------------------------------------------------------------------------------------------------------------------------------------ |
| **Knowledge base type** | Yes | **Standard** or **Smart**. You cannot change the type later, so choose it up front. |
| **Name** | Yes | Identifies the knowledge base in lists and in chat citations. |
| **Description** | No | A short note about the knowledge base's purpose. It also helps an AI assistant that has access to many knowledge bases pick the right one, even before you have added any documents. |
| **Source type** | No | How documents get in: **Upload** (the default), **SharePoint**, or **API**. |
You also choose the **embedding model** here, the model that turns text into the vectors used for retrieval. Each option shows a short description, and the picker notes that the embedding model is set at creation and cannot be changed later. Select **Create Database** to finish. You can change the name, description, and most settings afterwards with **Update Database**, but not the type or the embedding model.
#### What can a Knowledge Base be attached to?
| Attach to | What it enables |
| ----------------- | -------------------------------------------------------------------- |
| **Conversations** | The AI assistant answers questions grounded in your documents. |
| **Data Rooms** | All participants and agents in the room share the same knowledge. |
| **Bots** | A bot always has access to a specific set of documents when invoked. |
### Creating a Knowledge Base
**Where:** **Knowledge Management** section → **My Databases** → **+ New Database Source**
### Uploading Documents
#### Supported File Types
| Type | Formats |
| --------- | ------------------------------------------------------------------------ |
| Documents | PDF, DOCX, DOC, PPTX, PPT, XLSX, XLS, ODT, ODS, ODP |
| Text | TXT, MD, HTML, RTF, CSV |
| Images | PNG, JPG, JPEG, GIF, TIFF, BMP, WEBP |
| Archives | ZIP *(recursively extracted — each file inside is processed separately)* |
| Notebooks | IPYNB |
| OneNote | ONE |
How to Upload
1. Open the knowledge base.
2. Click **Upload** or drag files onto the upload area.
3. Optionally provide a **relative path** (e.g. `reports/q1/analysis.pdf`) to place the file inside a folder hierarchy automatically. Folders that don't exist yet are created for you.
4. The file is stored immediately. Processing happens in the background.
#### Large files
There is no file size you need to worry about. Small and medium files upload in one go, and larger files (including a big ZIP export, such as a whole Confluence space) are uploaded in parts automatically and reassembled for you. The progress bar reflects the whole transfer, and cancelling a large upload cleans up the partial data.
#### Uploading a ZIP
When you upload a ZIP, it appears in the list right away as a processing item, so you get immediate feedback. The archive is then unpacked in the background, and each file inside is processed on its own. The extracted files appear under a folder named after the archive (`myfiles.zip` becomes a `myfiles` folder), keeping the folder structure that was inside the ZIP. Once the files are extracted, the original ZIP placeholder disappears, because it has effectively become that folder.
Files that cannot be processed (for example a password protected PDF or an unsupported format) are marked as failed with an error message, so nothing silently vanishes. ZIPs inside ZIPs are unpacked too, and generous safety limits protect against oversized archives. If a nested archive is refused because it is too large or too deeply nested, it shows up as a failed entry that explains which limit it hit.
#### Duplicate detection
Before processing starts, Blockbrain checks whether the file has changed since you last uploaded it. If it has not, the file is skipped, so re-uploading the same file does not create duplicates. Uploading a changed version updates the document in place. To force a fresh run on an unchanged file, delete the document and upload it again.
{% hint style="info" %}
**To force re-processing** of an unchanged file, delete the document first, then re-upload it.
{% endhint %}
### Organizing with Folders
Folders let you structure a knowledge base just like a file system. In Blockbrain, folders are **first-class entities** - they have their own identity, AI-generated summaries, and can be used as a scope for search.
#### Creating a Folder
* **From the KB browser:** Click **New Folder** and enter a name.
* **During upload:** Provide a relative path like `reports/q1/` - folders are created automatically if they don't exist.
{% hint style="info" %}
Folder names must be unique within their parent directory.
{% endhint %}
#### Renaming and Moving Folders
* Right-click a folder → **Rename** or **Move**.
* All documents and subfolders inside move with it.
* Conversations, data rooms, and bots attached to the folder continue to work — attachments track the folder by **ID**, not path, so renaming or moving never breaks them.
#### Deleting Folders
Deleting a folder permanently deletes all subfolders and documents inside it. Deleted documents are removed from the KB and can no longer be retrieved.
{% hint style="info" %}
This action is permanent and cannot be undone.
{% endhint %}
#### Folder summaries
Once the documents in a folder are processed, Blockbrain writes a summary of the folder's content. The summary rolls up **both the documents directly in the folder and the summaries of its subfolders**, so a folder reflects everything nested under it. This summary:
* Appears in the browser as the folder's description.
* Makes the folder findable by concept, even for content held in a subfolder.
* Helps an AI assistant decide which folder to favour (a ranking boost, never a hard filter, so nothing outside the folder is excluded).
Moving a document or folder refreshes the summaries of the folder it left and the folder it lands in, so neither goes stale. The refresh runs in the background just after the move.
#### Finding a file or folder by name
The search box at the top of the browser finds documents and folders **by name across the whole knowledge base**, not just the folder you are in. Start typing and the list narrows to every matching file and folder, each showing its **Location**. This matches names only. Retrieval of the text *inside* your documents is what powers AI answers (see How your documents get searched).
#### Filtering
Two filters let you narrow a large knowledge base:
* **Source**: where a file came from. Values: **Upload**, **SharePoint**, **API**, **ZIP**, **Unknown / legacy**.
* **File Type**: a coarse category. Values: **PDF**, **Spreadsheet**, **Document**, **Image**, **Email**, **Video**, **Text**, **Code**, **Other**.
Each filter accepts several values, and the two combine (for example SharePoint and PDF shows only SharePoint PDFs). While a filter is active, the browser shows documents only. If nothing matches you see "No documents match these filters".
### Browsing Your Knowledge Base
The KB browser displays the full folder and file hierarchy. From here you can:
* **Navigate** into folders.
* **Preview** a document — view its extracted text and metadata.
* **Check ingestion status** — each file shows `ready`, `processing`, `pending`, or `failed`.
* **View structured tags** — if the KB extracts structured metadata, values are shown per document.
* **Delete** individual documents.
* **Retry** failed documents
### Searching Within a Knowledge Base
#### How to Search
1. Open a KB.
2. Click the **Search** tab.
3. Type a natural-language question or keyword.
Results display ranked passages showing the source document, page number, chunk text, and a relevance indicator. If enabled, a short AI-generated summary of each passage is also shown.
### Attaching a knowledge base to conversations
Attaching a knowledge base to a conversation makes its content available to the AI assistant there. When you ask a question, the assistant retrieves the most relevant passages from the attached knowledge bases and grounds its answer in them.
#### How to attach
1. Open a conversation.
2. Open its **Database Sources** panel.
3. Connect one or more knowledge bases.
4. Optionally narrow to a specific folder or document.
#### View the original page
When an answer cites a passage from a **PDF**, open the **Reference Documents** panel for that answer and use **View original page**. Blockbrain shows the source page exactly as it appears in the PDF, with the cited passage **highlighted** in place, so you can confirm the answer in its original context. This is available for PDF sources.
#### Detaching
Open the **Database Sources** panel on the conversation and disconnect the knowledge base. Your conversation history is kept. Only future questions stop using that knowledge base.
### Attaching a knowledge base to data rooms
A data room is a shared workspace. Attaching a knowledge base to a data room makes it available to everyone and every agent in that room.
Open the data room, go to its **Knowledge** section, and connect one or more of the knowledge bases you can access. You can optionally narrow to a folder or document. All conversations and agents inside the data room then share the attached knowledge automatically. Only people with edit access to the data room can connect or disconnect a knowledge base.
### Attaching a knowledge base to bots
A bot can carry knowledge bases as part of its configuration. Every conversation the bot takes part in then has access to the bot's knowledge, on top of anything connected to the conversation directly.
Open the bot's configuration, go to the **Database Sources** tab, and connect one or more knowledge bases. You can optionally narrow to a folder or document. Both bot templates and running bots support attachments. A bot created from a template inherits the template's knowledge bases, and can then add or remove its own.
### Narrowing scope: folders and files
Instead of connecting a whole knowledge base, you can narrow it to a specific folder or a single document. This helps when a knowledge base is large and only part of it is relevant, when you want a bot to see only one section, or when different data rooms need different slices of the same knowledge base without keeping separate copies.
When you connect a knowledge base you can choose:
* **Whole knowledge base** (the default): everything is in scope.
* **Folder scope**: only documents inside a chosen folder and its subfolders.
* **Document scope**: only a single document.
Retrieval is **strictly limited** to what you connected. Content in folders or files you did not connect is never searched or shown, even when it would otherwise be a strong match. You can connect several folders and files at once, and the searchable set is their combination. The file browser marks each item **Connected** so you can see exactly what is in scope. Folder scope survives a rename or move, because the attachment tracks the folder by its identity.
### Sharing a knowledge base
By default, a knowledge base is visible only to the person who created it. You can share it with other people in your organisation.
#### How to share
1. Open the knowledge base and select **Share**.
2. Under **Add people**, enter the person's name or email.
3. Choose their role.
Roles build on each other:
* **Viewer** can read the knowledge base and attach it to conversations and data rooms.
* **Contributor** can also upload, edit, and delete documents.
* **Content Manager** can additionally manage sharing (add, change, and remove other people).
Only the **Owner** can rename or reset the knowledge base, delete it, or transfer ownership. Role changes take effect immediately. A shared knowledge base appears in the other person's list under **Shared with Me** and **All**, with a **Shared By** column naming who shared it.
#### Transferring ownership
The Owner can hand a knowledge base to someone else with **Transfer Ownership**. After the transfer, the new owner has full control. The previous owner stays on as a Content Manager, so they keep managing content and sharing but can no longer delete or transfer it.
#### Revoking access
From the **Share** dialog, remove the person and confirm. They lose access right away. Any conversations or data rooms where they had connected this knowledge base keep working until the connection is removed. You cannot remove your own access, which stops you from accidentally locking yourself out.
#### Organisation-Wide KBs
Some KBs are accessible to all users in an organisation (managed by an admin). These cannot be deleted or modified by individual users.
#### Retrying
A failed or partial document can be re-queued without re-uploading the file:
* **Retry one:** use the **Retry** action on the document's row (it appears only for failed or partial documents).
* **Retry all failed:** when at least one document has failed, a button re-queues every failed or partial document in the knowledge base at once.
Common causes of failure are password protected or corrupted files, unsupported content such as encrypted PDFs, and temporary model errors that usually clear on retry. If a document keeps failing, open it to read the error message, which points to what went wrong.
### Deleting content
* **Delete a document.** Use **Delete** on the file row and confirm. The document, its searchable content, and the stored file are permanently removed. A file that is still processing cannot be deleted until it finishes.
* **Delete a folder.** Use **Delete** on the folder row and confirm. The folder and everything inside it are permanently removed in one step.
* **Reset a knowledge base.** **Reset knowledge base** deletes all documents and their content but keeps the knowledge base itself, along with its name, settings, and sharing. Anything it is attached to stays attached and simply sees an empty knowledge base. Reset is blocked while documents are still processing.
* **Delete a knowledge base.** Deleting removes the whole knowledge base. Anything that had it connected loses access, though conversation history is not affected. Only the Owner can delete.
{% hint style="info" %}
All of these are permanent.
{% endhint %}
#### Next Steps
* Find out more about [Smart Knowledge Bases](/for-users/all-about-knowledge-management/smart-knowledge-bases)
* Explore [Web Crawling](/for-users/all-about-knowledge-management/web-crawling)
# Smart Knowledge Bases
The newer generation with smarter document processing, first class folders, richer retrieval, and knowledge graph understanding.
{% hint style="info" %}
**Standard and Smart.** When you create a knowledge base you choose its type: **Standard** (the original, reliable and feature complete) or **Smart** (the newer generation with smarter document processing, first class folders, richer retrieval, and knowledge graph understanding). This guide focuses on **Smart** knowledge bases and calls out where Smart does more than Standard. Smart is a new version that lives alongside Standard for now (you may see it marked **Beta** in the product), and you can mix both. See [#standard-and-smart-knowledge-bases](#standard-and-smart-knowledge-bases "mention").
{% endhint %}
#### What is smarter about a Smart knowledge base
A Smart knowledge base reads your documents more thoroughly and retrieves from them more precisely than a Standard one:
* It reads **scanned pages and photos** with OCR, and describes **images, charts, and diagrams** so they become searchable.
* It understands **tables** as rows and columns, not just as a block of text (where enabled for your organisation).
* It writes a short **summary and tags** for every passage, and a summary for every document and folder.
* It builds a lightweight **knowledge graph** of the people, companies, and things your documents mention, so answers can follow those connections.
* Folders are **first class**: they have their own summaries and can be used to focus a search.
* Retrieval combines meaning based and keyword matching, and citations can show you the **original PDF page with the answer highlighted**.
#### Advanced settings (Smart only)
A Smart knowledge base gives you fine control over how documents are processed and retrieved, under **Smart KB advanced settings**. The defaults are tuned to work well out of the box, so you can safely skip this section and change it later. When you do want to tune it, the most useful options are:
* **Semantic chunking.** On by default. Blockbrain splits documents on natural meaning shifts rather than at a fixed length, so each passage stays coherent. Chunk size and overlap are adjustable.
* **Generate AI tags and summaries.** On by default. Blockbrain writes tags and per document summaries during processing, which improves retrieval for broad questions.
* **Table processing.** How tables in your documents are read: **Off**, **Standard** (rows and columns), **Enhanced** (learns a repeating column layout), or **Maximum** (reads complex tables in digital PDFs from the page image). Higher tiers fall back safely, so results are never worse. Available where enabled for your organisation.
* **System models.** Which models handle enrichment, vision (image captioning), OCR, and reranking. Each offers a **System default**, and you only override with a reason, because it affects processing cost and quality.
* **Build knowledge graph.** Off by default. Turn it on to extract and merge the entities in your documents into a knowledge graph that powers entity aware retrieval and the graph view. It adds processing cost per document, and turning it on reprocesses existing documents.
* **Folder scoped retrieval.** Uses each folder's summary and description to steer retrieval toward the right folder. Recommended for well organized knowledge bases.
Settings that change how documents are read (chunking, models, table processing) apply to documents added afterwards. To apply them to existing documents, reindex those documents (see Reprocessing documents).
### Uploading documents
#### Supported file types
Same as the [Standard Database.](https://docs.blockbrain.ai/for-users/all-about-knowledge-management#supported-file-types)
### How documents are processed
When you upload a file, Blockbrain runs it through an automatic processing pipeline in the background. Each step is durable: if something goes wrong (for example a temporary hiccup with a model), the step is retried on its own without redoing the work that already succeeded. Here is what happens, in plain terms.
* **Reading the file.** Blockbrain detects the file type and pulls out its content as text, tables, and images, keeping track of which page each piece came from.
* **Splitting into passages.** The text is split into overlapping passages sized for search, preferring natural topic boundaries so each passage reads coherently.
* **Reading scanned pages and images.** Pages with little or no selectable text are read with OCR. Images, charts, and diagrams are described by a vision model, and that description becomes searchable text. The image itself is stored safely and only referenced from the knowledge base.
* **Understanding tables.** Where table processing is enabled for your organisation, tables are read as rows and columns so retrieval can match the actual cell values. The most capable tier also reads tables in ordinary digital PDFs such as invoices and receipts. If a table cannot be read cleanly, it safely falls back to plain text, so results are never worse.
* **Removing repetition.** Repeated boilerplate (headers, footers, disclaimers, page numbers) is collapsed so it does not crowd out real answers.
* **Writing summaries and tags.** Blockbrain writes a short summary and a set of tags for each passage, and (optionally) a small knowledge graph of the relationships it finds. If you set a tag vocabulary, tags are mapped to your standard words.
* **Making it searchable.** Each passage is turned into a vector that captures its meaning, and everything is saved together so a document becomes searchable as a whole.
* **Summarizing documents and folders.** Finally, Blockbrain writes a summary for the whole document and rolls folder summaries up from the documents and subfolders they contain.
#### How long it takes
Processing time depends on the file size, the number of images, and whether scanned pages need **OCR**. A typical 10 to 50 page document is ready in under a minute. Large PDFs with many scanned pages can take a few minutes. While a document is queued, its row shows a rough estimated time (for example "3 minutes remaining", or "Calculating…" when there is not enough history yet), and a banner appears if the system is unusually busy. Treat the estimate as a guide, not a guarantee.
#### Reprocessing documents
**Reindexing** re-runs the whole pipeline on content that is already in the knowledge base, using the knowledge base's **current** settings. Reach for it when you have changed the settings and want existing documents to adopt them, when an underlying model has improved, or when a document ended up in a bad state and you want a clean run.
You can **Reindex** a single document, a folder (and everything under it), or the whole knowledge base. Documents that are already processing are left alone, and you are told how many were queued. Reindexing replaces a document's content in place, so retrieval keeps returning the current version right up until the new one is ready, with no gap where the document is unavailable.
When you change a setting that only affects how passages are stored rather than how they are read, Blockbrain reprocesses the existing documents with the new configuration and reuses the already extracted text where it can, so it is much quicker and cheaper than a full reindex. It confirms this with an **Apply new settings** prompt before it runs.
### Table processing
Tables are one of the hardest things to search well, so a Smart knowledge base can structure them into rows and columns rather than treating a table as one block of text. You choose how much effort goes into this, per knowledge base, in the Smart settings under **Table processing**.
{% embed url="" %}
There are four tiers, and each one does everything the tier before it does and adds more:
* **Off.** Tables are searched as plain text. No table work and no added cost.
* **Standard** (the default). Tables are structured into rows and columns by fast built-in parsing. This adds no extra AI cost.
* **Enhanced.** Everything Standard does, plus it learns a reusable column layout for each repeating table shape. It spends a small amount of AI once per layout and then reuses it, so cost stays low even across hundreds of similar tables (for example many invoices in the same format).
* **Maximum.** Everything Enhanced does, plus it reads each table with a vision model from an image of the table. This recovers the hardest tables (dense grids, image-like invoices) but it does one vision read per table, so it is the most expensive and slowest tier, and the cost grows with the number of tables.
#### What runs at each tier
This chart follows one table in an ordinary digital PDF (an invoice or receipt) and shows what each tier does with it. Reading left to right, each tier only ever adds a step, so a higher tier can only add structure, never take it away.
| Processing step | Off | Standard (default) | Enhanced | Maximum |
| -------------------------------------------- | ------------------- | ------------------------------------------------------ | ----------------------------------- | --------------------------------------------- |
| Read the page text | Yes | Yes | Yes | Yes |
| Locate the table on the page | No | Yes | Yes | Yes |
| Structure it into rows and columns | No | Yes (clean grids) | Yes | Yes |
| Learn a repeating column layout and reuse it | No | No | Yes (once per layout) | Yes |
| Read the table with a vision model | No | No | No | Yes (every table) |
| **What the table becomes for search** | Plain text, no rows | Structured rows (plain text if the grid is too sparse) | Structured rows with tidied columns | Structured rows, with every table vision read |
| **Extra AI work** | None | None (built-in parsing) | A little, once per layout | One vision read per table (highest) |
**Never worse.** The tiers only ever add structure. If a higher tier cannot read a table cleanly, it falls back to the tier below, and ultimately to plain text, so a harder setting never gives a worse result than a simpler one.
**Which files this applies to.** The steps above describe ordinary digital PDFs, which carry no built-in table grid. Spreadsheets, Word, and HTML tables already arrive as a grid, so they are structured from Standard upward without the locate step. Tables on scanned pages and in uploaded images are read by OCR first, then structured the same way.
**Choosing a tier.** Standard is a good default. Move up to Enhanced when your documents repeat the same table layout, and to Maximum only when the lower tiers miss tables you need. A tier change applies to documents added afterwards, so reindex existing documents to restructure their tables. Table processing is available where enabled for your organisation.
### How your documents get searched
The real power of a **Smart knowledge base** is how it is searched when an AI assistant answers a question. You do not have to configure any of this. When a knowledge base is attached to a conversation, data room, or bot, an assistant retrieves the most relevant passages and grounds its answer in them.
Behind the scenes, retrieval can combine several techniques:
| Technique | What it does |
| ---------------------------- | ------------------------------------------------------------------------------------------------------------------------------------------------------------------------------------------------------------ |
| **Meaning based** | Finds passages that mean the same as the question, even when they use different words. This is the default. |
| **Keyword** | Matches the exact terms in the question. Useful for product codes, names, and jargon. |
| **Hybrid** | Blends meaning based and keyword matching so results strong on either surface. |
| **Entity (knowledge graph)** | Follows a named person, company, or product through the knowledge graph, and resolves different names for the same thing, so "Apple" also finds "Apple Inc." Available when **Build knowledge graph** is on. |
| **Folder** | Uses folder summaries to find the most relevant folder for a topic. |
By default, retrieval finds passages by meaning and then re-orders them with a reranking model for extra precision, and near duplicate passages are collapsed so the assistant never sees the same content twice. Several optional refinements can be turned on per knowledge base to push quality further, such as hybrid keyword matching, folder scoped retrieval, knowledge graph aware ranking, and a recency first pass.
### Knowledge graph and entity search
While it processes your documents, a Smart knowledge base can also pull out **facts** and build a **knowledge graph** from them. A fact is a simple statement it finds in the text, made of a subject, a relationship, and an object. Gather enough of these across a document set and they form a graph of how the people, companies, products, and places in your documents relate to each other.
{% embed url="" %}
#### Turning it on
Building the graph is optional. In the knowledge base's Smart settings, turn on **Build knowledge graph**. It is off by default because it does extra AI work on every document, so it adds some processing cost, and turning it on reprocesses your existing documents so their facts are added to the graph. New documents then join the graph automatically as they are processed.
When the graph is built, the knowledge base also merges the different ways the same thing is written into a single entity. "Apple", "Apple Inc.", and "the company" become one node, matched by meaning rather than spelling, and each entity is given a type (person, organization, location, and so on).
#### What it gives you
* **Entity search.** Ask for everything about a named person, company, or product, and the knowledge base returns the passages where that entity appears in a fact, ranked by how much is known about it. Because names are merged, a search for "Apple" also surfaces passages that only mention "Apple Inc." An optional expand mode pulls in passages about directly connected entities too.
* **Sharper ranking.** When an answer is being put together, passages whose facts mention the same entities as the question are nudged up the ranking, so the most on-topic passages win.
Both of these need the graph to exist (**Build knowledge graph**) and to be switched into retrieval (**Use knowledge-graph triples in retrieval**, also in the Smart settings, off by default). The retrieval switch applies at query time, so once the graph is built you can turn it on or off without reprocessing.
#### Exploring the graph
Open a knowledge base and select **Knowledge graph view** to see the graph itself. Each node is an entity and each line is a relationship, labelled with the fact that connects them (for example "is an early customer of", "was founded by", "made follow-on investments in"). You can:
* Switch **Layout** between **Hierarchy** and **Cluster**.
* Use **Show** to cap how many entities are drawn (the header notes, for example, "Showing 50 of 149 entities") so a large graph stays readable.
* **Click a node to see its connections**, and zoom or fit the view with the controls in the corner.
Each document also has its own **Triples** tab, listing the facts extracted from that single document, with a filter box to search the entities and facts.
### Tracking processing status
Each document in the browser shows where it is: queued, processing, embedding, done, or failed. A document that finished successfully is searchable. A document can also come out **partial**, which means most of it is searchable but one part (for example an image that could not be read even after retries) was dropped. Failed and partial documents carry an error message explaining what happened.
| State | Meaning |
| ---------------------- | ------------------------------------------------ |
| In queue | Uploaded and waiting to start. |
| Processing / Embedding | Being read and made searchable. |
| Done | Finished and fully searchable. |
| Partial | Searchable, but one part could not be processed. |
| Failed | Could not complete after automatic retries. |
### Standard and Smart knowledge bases
Blockbrain offers two types of knowledge base side by side. Both are fully supported, and you do not need to do anything about the Standard knowledge bases you already have.
| Capability | Standard | Smart |
| ---------------------------------------------------- | ------------------ | ------------------- |
| Smart passage boundaries (semantic chunking) | No | Yes |
| Reading scanned pages (OCR) | No | Yes |
| Describing images, charts, and diagrams | No | Yes |
| Understanding tables as rows and columns | No | Yes (where enabled) |
| Knowledge graph and entity aware retrieval | No | Yes |
| First class folders with summaries | No | Yes |
| Folder rename or move without breaking attachments | Breaks attachments | Stays stable |
| Document and folder summaries | No | Yes |
| Per knowledge base processing and retrieval settings | Limited | Full |
| Original PDF page with the answer highlighted | No | Yes |
### FAQs
Can I mix Standard and Smart knowledge bases?
Yes. You can attach both types to the same conversation, data room, or bot. Blockbrain searches both and merges the results before returning them to you or the AI, so you never have to think about which type a result came from. If one side is briefly unavailable, the other still answers.
Can I move a Standard knowledge base to Smart?
If you own a Standard knowledge base, a **Migrate to Smart** action is available (where migration is enabled for your organisation). Starting a migration:
* **Creates a separate Smart copy** named "\[knowledge base name] - Smart". The original stays exactly as it is and keeps working, so you end up with both.
* **Reprocesses your documents** through the full Smart pipeline, so they gain Smart quality. This takes time and has a processing cost, which a confirmation dialog explains before you start.
* **Lets you choose what to bring over**, with **Migrate connections** (move the conversations, data rooms, and bots that use it onto the copy) and **Keep the same people** (share the copy with the same users). Both are optional. An **Advanced Smart settings** section lets you set Smart only options at the same time.
{% embed url="" %}
The Smart copy only appears in your list once it is fully processed and ready to use, so you never open a half migrated copy. A few things do not carry over (for example group based shares and some Standard only settings), and they are reported so you can reconcile them.
Which type should I use for new knowledge bases?
Use **Smart** for everything new. It offers noticeably better retrieval quality, especially for large or image heavy collections. Standard remains available for your existing data for now.
### Quick reference
**Add documents and make them searchable**
1. Create a knowledge base (**New Database Source**, type **Smart**).
2. Upload files (**Upload Files** or drag and drop).
3. Wait for documents to finish processing (the row shows when each is done).
4. Attach the knowledge base to a conversation, data room, or bot.
**Organize a large document set**
1. Create top level folders, or upload with relative paths such as `legal/contracts/nda.pdf` so folders are created for you.
2. Add folder descriptions so folders are findable by concept.
3. When attaching to a bot or data room, narrow the scope to the relevant folder.
**Give a teammate access**
1. Open the knowledge base and select **Share**.
2. Under **Add people**, enter their email and pick a role (Viewer, Contributor, or Content Manager).
3. They can now see the knowledge base under **Shared with Me** and use it in their own conversations.
# Web Crawling
Cyclical web crawling lets you set up a recurring schedule to automatically re-crawl one or more web pages and keep your knowledge base up to date - no manual re-imports needed.
***
### Creating a Scheduled Crawl
Navigate to a Knowledge Management and open the **Import from web** modal.
#### Step 1 - Add your start URLs
Enter one or more URLs you want to crawl. These are the pages the crawler starts from and follows links outward. You can add up to **5 start URLs** per schedule.
Only valid URLs are accepted. Invalid entries are highlighted in red on submit.
#### Step 2 - Enable recurring import
Toggle **"Schedule recurring import"** on. Three new fields appear:
| Field | Description | Default |
| -------------- | -------------------------------------------------------------------------------- | ------------- |
| **Start date** | The first date the schedule is active. Cannot be in the past. | Today |
| **Time** | The time of day to fire the crawl. Past times are hidden when today is selected. | 09:00 |
| **Repeat** | How often the crawl runs. | Every weekday |
**Repeat options:**
* **Every day** - fires daily at the chosen time
* **Every weekday** - fires Monday-Friday at the chosen time
* **Every week** - fires on the same weekday as the start date, weekly
* **Every month** - fires on the same day-of-month as the start date, monthly
**Timezone** - the schedule defaults to your browser's detected timezone. Click **"Select timezone"** to override it. The timezone is stored as a fixed UTC offset (not a named zone), so it does not shift with daylight saving time changes.
#### Step 3 - Configure advanced settings (optional)
Click **Advanced settings** to open the configuration panel:
**Crawl behaviour**
| Setting | Default | Description |
| ------------------ | ------- | -------------------------------------------------------------- |
| Use sitemap | Off | Seeds the crawl from the site's `sitemap.xml` |
| Document parser | Off | Saves downloadable files (PDFs, DOCX, etc.) found during crawl |
| Extract images | Off | Includes image URLs in the crawled content |
| Respect robots.txt | **On** | Honours the site's `robots.txt` crawl rules |
**Limits**
| Setting | Range | Default | Notes |
| --------- | ------- | ------- | -------------------------------------------------------------------------------------------------------------------------- |
| Timeout | 1–600 s | 30 s | Per-page request timeout |
| Max retry | 0–10 | 3 | Retries per page on failure |
| Max depth | 0–10 | **3** | Link-follow depth from start URL. Toggle off to crawl without a depth limit. |
| Max pages | 1–1000 | **10** | Total pages per run. Toggle off for unlimited. When sitemap is enabled, one extra page is reserved for the sitemap itself. |
#### Step 4 - Run
Click **Run Crawl**. For a one-time import (no schedule toggle), the crawl fires immediately. With a schedule, the first run fires at the chosen start date + time, then repeats automatically.
***
### How Re-Crawls Work
When a scheduled crawl fires, it does not create duplicate documents. Instead:
* Pages already in the knowledge base with a matching URL are **updated in place** (upsert by URL).
* New pages discovered since the last crawl are added as new documents.
* Pages that no longer exist on the site are left in place - they are not deleted automatically.
This means your knowledge base always reflects the latest content from the crawled site without accumulating duplicate entries.
***
### Managing Schedules via API
The following REST endpoints are available:
| Method | Path | What it does |
| -------- | ------------------------------------------------------ | ----------------------------------------- |
| `POST` | `/knowledge_base/crawl-schedules` | Create a new schedule |
| `GET` | `/knowledge_base/crawl-schedules?knowledgeBase=` | List all schedules for a knowledge base |
| `GET` | `/knowledge_base/crawl-schedules/{id}` | Fetch a single schedule with full details |
| `PATCH` | `/knowledge_base/crawl-schedules/{id}` | Update config, payload, or active state |
| `DELETE` | `/knowledge_base/crawl-schedules/{id}` | Delete a schedule and cancel its trigger |
Pausing a schedule (setting `isActive: false` via PATCH) keeps it in the database but stops it from firing. Re-activating it re-registers the cron trigger.
***
### Why Was My Scheduled Crawl Skipped?
A scheduled crawl can be skipped for the following reasons:
| Skip Reason | What It Means | What Happens Next |
| --------------------------- | ------------------------------------------------------------------------------------------ | ---------------------------------------------------------------------------------- |
| `feature_flag_off` | The feature flag was turned off after the schedule was created. | The schedule is preserved. It will resume automatically if the flag is re-enabled. |
| `concurrency_cap` | The system limit of **2 simultaneous crawls** was already reached when the schedule fired. | The schedule retries automatically on its next scheduled tick. |
| `dispatch_error: ` | An unexpected error occurred while trying to start the crawl job. | Check the error message for details and contact support if the issue persists. |
> **Note:** Skipped ticks do not delete or disable your schedule. In most cases, the schedule recovers automatically.
***
### System Limits
* **Max 5 start URLs** per schedule.
* **Max 2 concurrent cyclical crawls** system-wide across all tenants at any given moment. Schedules that fire while the cap is full are automatically retried at their next scheduled tick.
* Concurrency slots have a **6-hour TTL** - if a crawl process crashes without releasing its slot, the slot is automatically reclaimed.
***
### Known Behaviours & Gotchas
* **Timezone is a fixed offset.** If your timezone observes DST, the crawl will fire at a shifted wall-clock time after a DST change. To keep wall-clock time consistent, update the schedule's UTC offset manually after the DST transition.
* **Past times are filtered.** When the start date is today, times that have already passed are not shown — the picker automatically advances to the next available future slot.
* **"Every week" fires on the start date's weekday.** If you set a start date on a Wednesday and choose "Every week", the crawl will always fire on Wednesdays.
* **"Every month" fires on the start date's day-of-month.** If you start on the 31st, months with fewer days will skip that tick.
* **Deleted pages are not removed.** Re-crawls update and add content but do not prune documents for URLs that have disappeared from the site.
# Skills in Blockbrain
Skills are designed to save you time, ensure consistency, and make your AI agent smarter by giving it reusable procedures it can call upon whenever needed.
### What Are Skills?
**Skills** are reusable, saved instructions or procedures that you can create, store, and invoke within Blockbrain. Think of a Skill as a shortcut to a predefined workflow or action - instead of typing out the same instructions every time, you save them once as a Skill and run them on demand with just a few keystrokes.
***
### Why Use Skills?
| Benefit | Description |
| ---------------- | ---------------------------------------------------------------------- |
| **Speed** | Invoke complex workflows instantly without retyping instructions |
| **Reusability** | Create once, use many times across conversations |
| **Organization** | Store Skills in folders to keep your workspace tidy |
| **Agent-ready** | Your AI agent can execute Skills automatically as part of its workflow |
| **Precision** | Skills ensure the same procedure is followed every time |
***
### Creating and Managing Skills
#### Adding New Skills and Folders
To add a new skill or create a folder:
1. Click the **Add new ▼** dropdown button in your Skills panel
2. Select one of the following options:
* **Skill** — Create a new skill
* **New Folder** — Create a new folder to organize your skills
The dropdown menu consolidates both actions in a single control for a streamlined interface.
#### Creating a Skill
When you select **Skill** from the **Add new ▼** dropdown:
1. Choose the location where you want to save the skill (default folder or a specific folder)
2. Enter the skill name and description
3. Add the skill content (prompt, instructions, or commands)
4. Click **Save** to create the skill
#### Creating a Folder
When you select **New Folder** from the **Add new ▼** dropdown:
1. Enter a folder name
2. Click **Create** to add the folder
You can then organize your skills by moving them into folders.
### Using Skills in Conversations
#### Accessing Skills with Slash Command
To use a skill in a conversation, you can access skills through the slash menu:
1. Type `/` in your message input
2. A menu will appear with two options:
* **Prompt Library** — Search and use saved prompts
* **Skills** — Search and use connected skills
3. Click **Skills** to open the Skills search popup
4. The popup displays all available skills connected to this conversation
5. Type to search for a specific skill by name or handle
6. Click on a skill to insert it into your message
#### Skill Handles
Each skill has a unique **handle** (shown in the Skills list with a `/` prefix, e.g., `/my-skill`). Some skills and folders don’t have handles and will show as `-` in the handle column.
#### Empty States
When using the Skills search popup:
* **No skills connected** — You haven’t connected any skills to this conversation yet. Add skills from your Skills panel to use them here.
* **No results found** — Your search query didn’t match any connected skills. Try a different search term.
### Managing Your Skills
#### Viewing All Skills
1. Navigate to the **Knowledge Management section**
2. All your saved Skills are listed here, organized by folder
#### Skill List Columns
The Skills panel displays the following information:
* **Name** — The skill or folder name
* **Handle** — The unique identifier for the skill (prefixed with `/`). Folders and skills without handles show `-`.
* **Modified** — When the skill was last updated
* **More options** — Menu with additional actions for each skill
#### Moving and Managing Skills
You can organize skills by:
* Moving skills into different folders
* Renaming skills and folders
* Deleting skills or folders
* Sharing skills with other users (if enabled)
#### Editing a Skill
1. Go to the **Knowledge Management section**
2. Navigate to **Skills** section
3. Find the Skill you want to edit and click on it
4. Update the name, handle, content, or folder
5. Save your changes
#### Deleting a Skill
1. Go to the **Skills page**
2. Select the Skill you wish to delete
3. Click **Delete** and confirm the action in the confirmation dialog
{% hint style="info" %}
Deletion is permanent. Make sure you no longer need the Skill before confirming.
{% endhint %}
***
### Tips & Best Practices
* **Use clear handles** - choose short, descriptive handles like `summarize-report` or `send-weekly-update` so they're easy to remember and type
* **Use folders** - organize Skills into logical categories (e.g., Marketing, Finance, HR) to make them easy to find
* **Be specific in your instructions** - the more precise the Skill content, the more reliably your agent will execute it
* **Review Skills regularly** - archive or delete outdated Skills to keep your library clean
* **Combine Skills with Prompts** - use the `/` command to mix Skills and Prompts for maximum flexibility in your conversations
### Troubleshooting
I can’t find my skill in the Skills search popup
* Make sure the skill is connected to your current conversation
* Check your search query — try searching by a different part of the skill name
* Verify the skill exists in your Skills list and hasn’t been deleted
The “Add new ▼” button isn’t showing
* Make sure you have the required permissions to create skills
* Check that your account is active and not restricted
I can’t see all my skills
* Skills displayed depend on which bot or conversation you’re using
* Some skills may be private or shared only with specific people
# Guide on Advanced Knowledge Bot Features
This page is an overview of the advanced features available in your Knowledge Bot — the tools that go beyond simple chat to help you automate tasks, improve answer accuracy, and capture knowledge for
> **Last updated:** May 2026
***
### At a glance
Use this table to pick the right feature for what you're trying to do. Each row links to a deeper guide.
| Feature | Best for | How it works | Stored where | Shared with | Requires |
| -------------------- | -------------------------------------------------------- | --------------------------------------------------------------------------------- | ------------------------------------- | ------------------------------------------------ | -------------------------------------- |
| Prompts | Reusing a single, frequently-used instruction | One-shot shortcut that runs a saved prompt | In the Knowledge Bot's Prompt Library | Anyone with access to the bot | Admin/builder must create the Prompt |
| Workflows | Multi-step tasks that need structured reasoning | Runs a sequence of prompts; each step builds on the last | In the Knowledge Bot | Anyone with access to the bot | Admin/builder must create the Workflow |
| Intent Agent | Improving accuracy on large, multi-folder databases | Reads folder descriptions and routes the query to the most relevant folder(s) | N/A — runs at query time | N/A | Folder descriptions must be filled in |
| Insights | Saving and reusing important AI answers or text snippets | Saves a message or highlight as a complete, unchunked record | Insight Library | Personal by default; shareable across data rooms | Nothing — available to all users |
| Dynamic Insights | Tracking changes on the web automatically | Scheduled prompt that re-fetches selected URLs and saves the result as an Insight | Insight Library | Same as Insights | Web URLs to monitor |
| Contribute Knowledge | Adding curated AI answers back into a database | Saves an Insight or message into a selected database source | Inside the chosen database source | Anyone with access to that source | Write access to the database source |
{% hint style="info" %}
**New to the platform?** Some terms in this guide — *Knowledge Bot*, *database source*, *data room*, *builder* — are defined in the Glossary. First mentions on this page link there.
{% endhint %}
***
### Prompts
Prompts are customizable, single-prompt shortcuts that automate frequent tasks and keep responses consistent. They save time, reduce repetitive typing, and make it easy for a whole team to ask the same question in the same way.
**Example.** A sales team creates a Prompt called *"Draft RFP response"* that, in one click, asks the bot to draft a reply in the company's standard tone, cite the relevant product docs, and end with a call-to-action.
#### Why use Prompts
* **Efficiency** — eliminate repetitive typing for tasks you run every day.
* **Consistency** — every team member gets the same structured response format.
* **Customization** — tailor each Prompt to a specific workflow.
* **Collaboration** — share Prompts across your organization for uniform output.
* **Faster decisions** — instantly generate reports, summaries, and recommendations.
#### Two ways to activate a Prompt
* **Retrospective activation** — apply a Prompt to a message you've already sent, to re-format or expand on the previous answer.
* **Proactive selection** — pick a Prompt from the library *before* you send your message, so the bot follows it from the start.
{% hint style="info" %}
Prompt templates must be pre-configured by your builder before they appear in the library. For setup instructions, see Applying Advanced Features.
{% endhint %}
Learn more about Prompts →
***
### Workflows
Workflows automate **multi-step prompts**. Where a Prompt fires a single instruction, a Workflow guides the AI through a sequence of prompts so each step builds on the last — producing a more accurate, refined final answer.
**Example.** A market-research Workflow runs four steps: (1) pull the latest news on a competitor via live web search, (2) summarize the company's product line from your database, (3) compare it against your own offering, (4) produce a one-page brief. The user just clicks "Run."
#### Why use Workflows
* **Improved accuracy** — structured, step-by-step prompts produce more precise answers than a single long instruction.
* **Better context retention** — each step builds on previous answers for a more cohesive result.
* **Scalability** — automate repetitive multi-step tasks once, run them forever.
* **Live web search** — enable real-time web search in any step to pull the latest information.
* **API integrations** — call external systems via HTTP requests to fetch, send, or enrich data programmatically.
* **Scheduling and auto-delivery** — run Workflows on a recurring schedule and receive the results by email.
Learn more about Workflows →
***
### Intent Agent
The Intent Agent improves accuracy when querying large databases by intelligently identifying the most relevant folders for each question. It reads the folder descriptions you've written and routes the query to the folders most likely to contain the answer — so the AI spends its effort on the right material instead of scanning everything.
**Example.** A consulting firm has a Knowledge Bot with 40 client folders. When a user asks "What were the engagement objectives for Acme Corp?" the Intent Agent recognizes the *Acme Corp* folder description, restricts the search there, and returns a focused answer in seconds.
#### Why use the Intent Agent
* **Improved efficiency** — narrows the search to relevant folders instead of scanning everything.
* **Optimized workflows** — easier to find the right folder as your databases grow.
* **Faster results** — quickly identifies and retrieves the most relevant information.
* **Resource optimization** — conserves compute by prioritizing relevant data only.
{% hint style="warning" %}
The Intent Agent depends on accurate folder descriptions. Without them, it cannot reliably route queries. See Writing good folder descriptions before enabling it.
{% endhint %}
Learn more about the Intent Agent →
***
### Insights
**Insights** are saved AI messages or text highlights — bite-sized pieces of knowledge you can reuse later. Use them to retain key findings from documents or conversations without having to re-read everything, and share them across data rooms for better collaboration.
Unlike database sources — which split content into smaller chunks — an Insight is stored as one complete record, so the original context is preserved.
**Example.** During a long research conversation, the bot produces a tight summary of a regulatory change. You save it as an Insight titled *"EU AI Act — Q2 2026 changes."* Next month you (or a teammate) can pull that Insight straight into a new chat without rerunning the research.
#### Why use Insights
* **Consistent answers** — save and reuse key replies to keep teams aligned.
* **Faster knowledge access** — retrieve past findings without digging through chat history.
* **Smarter collaboration** — share refined prompts and findings as a centralized knowledge base.
* **Streamlined workflows** — drop stored Insights into new tasks to skip the repetitive setup.
#### Dynamic Insights
Dynamic Insights are scheduled Insights that automatically re-fetch their data from the web. Pick a prompt and one or more URLs, set a schedule, and the platform refreshes the Insight on its own — perfect for tracking trends, monitoring competitors, or staying on top of regulatory changes.
**Example.** A product manager creates a Dynamic Insight that pulls the changelog of three competitor websites every Monday. Each refresh becomes a new dated Insight, so the team has a running history of competitor releases without anyone manually checking.
**Why use Dynamic Insights:**
* **Automated updates** — schedule recurring web research from selected URLs.
* **Effortless capture** — extract fresh insights without manual monitoring or copy-pasting.
* **Always up to date** — keep your Insight library current, hands-free.
Learn more about Insights and Dynamic Insights →
***
### Contribute Knowledge
**Contribute Knowledge** lets you save an Insight, an AI-generated message, or a whole conversation directly into a database source. Once saved, the content is accessible to any teammate with access to that source — making it ideal for building a long-term, shared knowledge base.
Because database sources are *chunked* (split into smaller pieces for retrieval), contributed content may be divided across chunks. That improves searchability but can occasionally affect how the content is reassembled in answers. If you need the full message preserved verbatim, save it as an Insight instead.
**Example.** After a customer call, an account manager asks the bot to summarize the meeting notes and saves the result to the *"Customer Calls 2026"* database source via Contribute Knowledge. Future questions like *"What did Acme ask about pricing in Q2?"* can now surface that summary.
#### Why use Contribute Knowledge
* **Team-wide access** — save key insights into a shared database source for easier collaboration.
* **Structured sharing** — organize important AI responses in a centralized, searchable location.
* **Long-term knowledge** — build a base your team can reuse and expand over time.
Learn more about Contribute Knowledge →
***
### Frequently Asked Questions
#### Prompts
**How do Prompts differ from Workflows?** Prompts run a single instruction. Workflows chain multiple prompts together, with each step feeding into the next — better for complex tasks that need structured reasoning.
**Can I share my Prompts with my team?** Yes. Anyone with access to the same Knowledge Bot will see the Prompts created in it.
**Why can't I see any Prompts?** They may not be enabled. Ask your admin to activate Prompts in the Knowledge Bot settings, or to add Prompts to the library.
**How is the Intent Agent different from a Prompt?** A Prompt is a saved instruction the user runs. The Intent Agent is a retrieval feature that decides *where* the AI looks for an answer. They serve different purposes and can be used together.
#### Workflows
**Can I share Workflows with my team?** Yes — anyone with access to the Knowledge Bot can run the Workflows created in it.
**Why isn't my Workflow giving accurate results?** Make each step specific and self-contained, avoid stuffing several questions into one step, and try reordering steps. Generally, shorter and more focused steps produce better final answers.
**Can I run a Workflow on a schedule?** Yes. Use the Scheduling option to run a Workflow on a recurring basis and have the result delivered to your email.
#### Intent Agent
**How does the Intent Agent decide which folders are relevant?** It analyzes the folder descriptions you've written and prioritizes folders whose descriptions best match the user's query.
**When is the Intent Agent most useful?** When a database source contains many folders covering distinct topics — large client archives, multi-product documentation, or regional knowledge bases.
**Is there a minimum number of folders needed?** No, but the feature shines once you have multiple folders with clearly distinct topic areas.
**What happens if I don't write folder descriptions?** The Intent Agent will not perform reliably. Folder descriptions are essential — without them it has nothing to route on.
#### Insights and Dynamic Insights
**Why should I use Insights?** To save, organize, and retrieve useful AI answers without losing context. Great for personal reference, team collaboration, and reusing material in new conversations.
**How are Insights different from database sources?** Database sources split content into chunks for retrieval, which can cause partial answers. Insights are stored as one complete record, preserving full context.
**How should I name my Insights?** Use consistent, descriptive titles with relevant keywords — for example, *"EU AI Act — Q2 2026 summary"* rather than *"AI notes."*
**How often can a Dynamic Insight refresh?** You can set a recurring schedule (daily, weekly, monthly). See the Dynamic Insights setup guide for the full list of cadences.
**What happens if a monitored URL changes structure or goes offline?** The refresh will save whatever the page returns. If the page is unreachable, the Insight notes the failure so you know the data is stale.
#### Contribute Knowledge
**Who can see content I contribute to a database source?** Anyone with access to that database source. If you need to keep something private, save it as a personal Insight instead.
**Can I edit or remove contributed content later?** Yes — contributed entries can be edited or deleted from the database source the same way any other entry can.
**When should I use Contribute Knowledge vs. Insights?** Use **Insights** for content you (or a small group) will reuse and where preserving the exact wording matters. Use **Contribute Knowledge** when you want the content searchable by everyone with access to a database source as part of normal Q\&A.
***
### Next steps
* **For users:** explore the deep-dive page for the feature you want to try first (links above).
* **For admins and builders:** see Applying Advanced Features for setup instructions.
* **Need help?** Visit the Support Center or contact your account team.
# What is a Prompts Library?
Prompts are reusable, customizable prompt shortcuts that help streamline tasks, saving time and improving productivity. They allow you to automate specific queries, ensuring consistency and efficiency in responses.
### How to use Prompt Library
Before sending your message, you can designate a dedicated prompt:
* Use the **Prompt Button** in the Send-Box
* Make your selection from the portfolio of available specialists
* Compose your message as usual
* Upon sending, your selected prompt will directly process the request
These dual activation options ensure maximum flexibility and enable you to optimally utilize the expertise of our AI Prompts for your specific requirements.
### Sample Use Cases
Your commonly used queries can become Prompts, allowing you to trigger complex queries with a single click. Here are some practical ways to use Agents:
1. **Summarizing Documents** – Upload long documents and use a Prompt to generate concise summaries in a preferred format.
2. **Crafting Reports** – Gather multiple pieces of information and structure them into a well-organized report.
3. **Refining Tone & Style** – Improve writing clarity, simplify text, or adjust tone to match your audience.
4. **Strategizing** – Analyze company data and use a Prompt to generate business insights or summaries.
5. **Creating Sales Emails** – Input client and project details, and let a Prompt generate a personalized sales email.
# What are Workflows?
Workflows allow you to **automate multi-step prompts**, making complex interactions more structured and efficient. Unlike **Prompts**, which function as single-prompt shortcuts, **Workflows** guide the AI through a sequence of prompts to ensure a **more accurate and refined final response**.
### What you can do with Workflows
* **Break down complex queries** into smaller, manageable steps for better accuracy and relevance.
* **Run live web searches** within steps to fetch the latest, most relevant data from the internet.
* **Integrate external tools via API** (e.g., HTTP requests) to send, fetch, or enrich data programmatically.
* **Schedule recurring tasks** to run automatically—ideal for monitoring, reporting, or routine updates.
* **Improve context retention** by building on previous responses step-by-step.
### How to Use a Workflow
1. Click Workflows at the right sidebar
2. Select your desired workflow from the list
3. Click the **Play icon** ▶️ to the right of the workflow
4. The workflow will run automatically
#### Workflow Progress
After starting, a process visualization appears in the bottom right corner of your screen:
* **Current step**: Marked with a loading icon
* **Completed steps**: Highlighted in green
* **Pending steps**: Shown in neutral state
This visualization allows you to track the workflow's progress in real-time.
{% hint style="info" %}
*The available workflows are pre-configured specifically for your use cases.*
{% endhint %}
**Execution Control**
Choose between two execution modes for your workflow:
1. **Autopilot Mode**
* Fully automated execution
* Runs through all steps without interruption
* Best for standardized processes
* Maximum efficiency
2. **Human-in-the-Loop Mode**
* Requires manual approval between steps
* Offers greater control over the process
* Can be configured globally or per step
* Ideal for sensitive tasks requiring oversight
**Workflow Trigger**
1. **Automatic**
* Immediately starts when any chat or file is sent to the knowledgebot
2. **Manual**
* Click the play button to trigger the workflow
### Best Practices
1. **Break down complex prompts** – Focus on one specific query per step.
2. **Ensure continuity** – Each prompt should build on previous responses.
3. **Be clear and specific** – Define non-negotiable "need-to-know" information.
4. **Use concise, structured prompts** – Avoid vague or overly broad instructions.
5. **Provide context** – Give background information when necessary.
6. **Customize the LLM model** – Select the best model for each task to enhance output quality.
To maximize the effectiveness of your workflows, it's essential to design them with clarity, continuity, and precision in mind. Follow these best practices to ensure smooth execution and optimal AI performance:
### Sample Use Cases
1. **Crafting a Brand Analysis** – A structured workflow can automate a deep dive into a company’s positioning. Start by analyzing industry trends, then gather competitive insights, and finally perform an internal assessment of services and overall performance. This approach ensures a well-researched and strategic brand analysis.
2. **Writing a Sales Proposal** – A workflow can help structure a compelling sales pitch. Begin by summarizing the client’s needs and pain points. Next, outline your company’s value proposition and how it specifically addresses those needs. Then, generate a detailed proposal with pricing and deliverables, and finally, refine the language to ensure a persuasive and engaging tones.
# What is Intent Agent?
The **Intent Agent** enhances search accuracy across large Knowledge Bases by intelligently identifying the most relevant files based on Knowledge Base and folder descriptions. It helps the AI route queries to the right content, returning more precise and relevant information.
### How It Works
The Intent Agent analyzes your query and matches it against folder and Knowledge Base descriptions to determine where to search first. This is especially useful for large, complex data sources.
| Without Intent Agent | With Intent Agent |
| ----------------------------------- | ----------------------------------------- |
| Searches across all indexed content | Prioritizes the most relevant folders/KBs |
| May return less targeted results | Returns more precise, contextual answers |
### How to Enable Intent Agent
The Intent Agent is an optional feature activated when building a Knowledge Bot.
1. Navigate to your Knowledge Bot settings
2. Locate the **Intent Agent toggle** (typically on the left side of the interface)
3. Enable the feature
> **Note:** If you don't see the Intent Agent toggle, contact your Knowledge Bot Admin to enable this feature.´
### Folder Structure & Performance
A well-organized folder structure significantly improves Intent Agent accuracy.
#### How Structure Affects Performance
| Approach | Effect on Accuracy | Effect on Query Speed |
| ---------------------------------------------- | ------------------- | ---------------------- |
| Organizing folders **within** a Knowledge Base | ✅ Improves accuracy | ❌ No speed improvement |
| Splitting into **separate Knowledge Bases** | ✅ Improves accuracy | ✅ Reduces query time |
Currently, Intent Agents index at the **Knowledge Base level**. This means:
* **Folder reorganization** helps route queries more accurately
* **Separate Knowledge Bases** reduce both search scope *and* query time
#### Best Practice: Intent-Based Structure
Avoid generic folders like "Not Assigned." Use clear, domain-specific paths:
```
HR/
├── Processes/
│ ├── Onboarding/
│ ├── Travel/
│ └── Working Hours/
├── Policies/
├── Forms & Templates/
└── Systems & Tools/
```
> **Tip:** Keep an "Inbox" folder only as a temporary holding area—regularly sort content into proper categories.
#### Improving Folder & KB Selection
To increase accuracy when selecting folders and Knowledge Bases, adjust the LLM settings under **Settings > GenAI Defaults**.
### Best Practices for Queries
#### 1. Ask Detailed Questions
Provide enough context to ensure the AI fully understands your needs.
| ❌ Before | ✅ After |
| ----------------------------------- | ------------------------------------------------------------------ |
| How long should I keep client data? | How long should I keep client data accumulated during Project XYZ? |
#### 2. Rephrase If Necessary
If the AI's response isn't ideal, try rephrasing your question for better clarity.
#### 3. Use Domain-Specific Terms
Reference specific processes, systems, or document types to help the Intent Agent route your query correctly.
# What are Insight Use & Dynamic Insights?
## Insights vs Dynamic Insights
Blockbrain offers two types of Insights to help you retain and reuse valuable knowledge:
* **Insights** are manually saved AI messages or notes—bite-sized pieces of information from chats or documents that you can revisit, reference, and share across data rooms. They’re perfect for capturing key takeaways or highlights without re-reading full files.
* **Dynamic Insights** are scheduled, automated prompts that run at set intervals (e.g., daily or weekly) using web research. These generate up-to-date insights based on a specific topic or URL and are automatically saved, helping you stay informed without manual effort.
Whether you're manually saving learnings or automating recurring updates, Insights make it easy to build a knowledge base that evolves with you.
***
## Insights
**Insights** are bite-sized pieces of important information you can extract from your documents and conversations. They help you quickly find and share key knowledge without reading entire files. Think of them as smart highlights that make finding what you need faster and easier.
### **Use Cases**
#### Sample Scenario
A customer support team uses Blockbrain to handle common technical troubleshooting requests. Team members frequently ask the AI bot for solutions to repeating customer issues, but responses can vary slightly depending on how the query is phrased.
Insights can improve the workflow of that situation through the following:
1. A support specialist asks the AI for a troubleshooting guide on a common issue and refines the response for accuracy.
2. Once the response is validated, they save it as an Insight so the team can reuse the response instead of regenerating it each time.
3. Now, when another team member encounters the same issue, they can retrieve the saved Insight instantly instead of waiting for a new AI-generated response.
4. Over time, the support team builds a library of verified troubleshooting steps, ensuring consistent and accurate AI-generated answers across the entire team.
**Other Sample Use Cases**
* **Research & Development Knowledge Base** – A research team compiles summaries of scientific papers, experimental findings, and competitor analyses into Insights. This allows them to quickly retrieve and reference past knowledge instead of duplicating research efforts.
* **Content Marketing & Copywriting** – A content marketing team stores brand tone guidelines, product descriptions, and frequently used marketing messages in Insights. Writers can quickly pull pre-approved messaging to maintain brand consistency across multiple campaigns.
* Create brand tone and guidelines, then save them as an Insight for easy reference when generating future marketing campaign content.
* **HR & Employee Training** – An HR department uses Insights to store company policies, onboarding procedures, and answers to frequently asked employee questions. This ensures HR representatives provide accurate and consistent responses without searching for documents every time.
### How to Save an Insight
There are multiple ways to create an insight:
1. **Save AI Chat as Insight:** Click on the 3-dot icon in the AI chat, select "Save message as an insight".
1. Edit your Insight if needed: Add additional context, Modify the content, or Add tags for better organization
2. **Manually Add Insight:** Navigate to the Insights Tab, click "Add Insights" to type in your own insight, creating a text-based note in your own words. Or, you can manually add Insights from the Data Management page.
### Sharing Insights
To share an already existing Insight, click on Insights, then Contribute Insight and choose a database source to store it. If the database source is public, your teammates will also be able to use your Insight.
Sharing is also available in the Insights Page located in Knowledge Management.
### Managing Insights
Accessing Insights
* You can access all insights created across all Knowledge Bots and Data Rooms in the Knowledge Management Tab under the Insights sections
Searching Insights
* Navigate to the Knowledge Management Tab and click the Insights Tab. There are two methods to search for insights:
* **Keyword Search** – Use specific keywords to find relevant insights.
* **Insights AI Search** – A powerful search tool that allows users to find specific insights based on context, not just keywords, enhancing retrieval efficiency by allowing users to set the number of search results to display.
### Best Practices
To maximize the effectiveness of Insights, follow these best practices to ensure consistency, accuracy, and ease of access for your team.
1. **Store Only High-Quality, Validated Information**
* Save accurate and well-structured content that has been reviewed or refined.
* Avoid storing duplicate, outdated, or incorrect responses to maintain reliability.
* Regularly audit and update Insights to ensure information remains current.
2. **Store Only Clear and Focused Threads**
* Save well structured threads that focus on a desired topic
* Avoid overly complicated threads that may confuse the AI when referenced in the future
3. **Use Clear, Consistent, and Descriptive Titles**
* Include relevant keywords in the title to make searching faster and more intuitive.
* Use consistent naming conventions across teams to improve organization.
* Example: Instead of *"Client Pitch"*, use "Sales Team: Sales Email Email - Follow up for Company X".
4. **Keep Responses Concise and Actionable**
* Store only the necessary details instead of long, unstructured content.
* Summarize key points clearly to make Insights quick to read and apply.
* If context is needed, add links to supporting documents instead of storing long explanations.
5. **Leverage Insights for Consistency Across Teams**
* Standardize customer support answers, sales scripts, company policies, and technical instructions.
* Ensure that AI-generated responses align with company-approved messaging.
* Regularly train team members on how to use Insights to maintain uniformity.
6. **Regularly Review and Clean Up Insights**
* Schedule routine audits to remove outdated or redundant information.
* Ensure Insights remain relevant and useful for evolving business needs.
* Encourage team feedback on stored Insights to improve quality.
***
## Dynamic Insights
Dynamic Insights let you automate recurring web research by scheduling prompts that fetch updated information from selected URLs. The results are saved as Insights, so you can track changes, monitor trends, or stay updated on specific topics—without lifting a finger.
### **When to Use Dynamic Insights**
* Schedule a prompt to run daily, weekly, or monthly
* Automatically extract insights from web pages
* Keep your knowledge base fresh with the latest update
### How to create a Dynamic Insight
You can access Dynamic Insights from the same 'Add Insights' button used to create regular Insights. Follow the steps below to set one up.
1. Click **Add Insights**, then choose **Dynamic Insight**
2. **Fill in a Title**
* Give your Dynamic Insight a clear, descriptive title so it’s easy to find and recognize later.
3. Set a **Schedule**
* Choose the start date, time, and frequency (daily, weekly, etc.) for when the AI should run your prompt.
4. (Optional) Enable **Email Notifications**
* Check the box to receive email alerts whenever the Insight is updated.
5. Add your **Data Source**
* Select Web Research as the source.
* (Optional) Input one or multiple URLs you want the AI to pull data from.
6. Write your **Search Prompt**
* Tell the AI what to look for in the selected URLs. Be clear and specific—this drives the quality of your output.
### Best Practice
Follow these tips to get the most out of your scheduled research:
1. **Be specific and clear** in your prompt.
* Vague instructions lead to vague results.
2. **Include a formatting guide** in your prompt.
* For example, ask the AI to summarize updates in bullet points or provide insights in a comparison table.
3. **Define the scope.**
* If you're tracking a trend or update, tell the AI what kind of changes or data to look out for.
4. **Choose between adding URLs or not**
* Include URLs if you want the AI to focus on specific sources
* Leave it blank for broader, more flexible web research.
5. **Name your Insight descriptively**
6. **Avoid keyword-only prompts**
* Instead of “AI trends,” write: “Summarize this week’s major AI technology announcements with examples from the source.”
***
## Methods of Saving an AI Message
There are two ways to save an AI-generated message in Blockbrain, each offering different benefits depending on your needs:
| **Save as Insight** | **Contribute Knowledge** |
| ----------------------------------------------------------------------------------------------------------------------------------------------------------------------------------------------------------------------------------------------------------------------------------------- | ----------------------------------------------------------------------------------------------------------------------------------------------------------------------------------------------------------------------------- |
| *Best for Personal Reference & Selective Sharing* | Best for Team Collaboration |
| Stores AI messages in Insights, which function like personal notes | Stores AI messages in Database sources as an Insight, which is chunked and accessible by the team |
| Files are accessible via the Insights section in the Knowledge Management page | Files can be accessed from the Database sources section within the Knowledge area of the Knowledge Management page |
| Used when you want to save AI-generated responses in their original form, either for personal reference or for later sharing without structuring them in a database source. Great for keeping quick notes, ideas, or AI-generated responses without affecting team-wide database sources. | Used when you want AI-generated insights to be accessible to the entire team and systematically stored in a database source, allowing the AI to contribute within the broader context of the knowledge base you're working in |
# What is Contribute Knowledge?
**Contribute Knowledge** allows you to save an Insight, an AI-generated message or conversation into your database source. However, instead of saving it in the Insights section, it is stored **within a selected database source**, making it accessible to team members who have access to that database source.
This method is ideal for collaborative work, ensuring that key insights are stored and structured within a knowledge base. However, since database sources undergo chunking, the information may be divided into smaller sections, which could affect retrieval accuracy
### Contribute a Knowledge
Simply click any message in your AI conversation, then select 'Contribute Knowledge.' Choose the database source where you'd like to save the insight. Team members subscribed to that database source will automatically receive an update about the new contribution.
### Subscribing to Knowledge
Team members can be notified of new contributions by clicking Subscribe to Contribution to stay updated in the next working day through email notifications.
### Best Practices
To ensure a scalable and effective use of this feature, follow these best practices to ensure consistency, accuracy, and ease of access for your team.
1. **Use for Finalized or High-Value Insights**
* Save only high-quality, valuable AI responses that are worth sharing across the team. This avoids cluttering the database source with exploratory or draft-level messages.
2. **Review for Context Completeness**
* Since content may be broken into smaller sections due to chunking, ensure the saved message is self-contained and clear on its own or includes sufficient context for future retrieval.
3. **Keep Contributions Organized**
* Regularly review and clean up outdated or duplicated contributions to maintain a streamlined and efficient knowledge base.
### Use Cases
Below are sample use cases for Knowledge Contribution to help you explore how this feature can be applied effectively:
1. **Team Knowledge Sharing** – Save important AI-generated outputs—such as strategic ideas, summaries, or research findings—so others can easily access and build on them.
1. *Summarizing Legal Cases* – Save AI-generated summaries and analyses of lengthy legal documents into the database source, making it easier for team members to reference and cross-check relevant case information
2. **Project Collaboration** – Store key decision-making inputs or analysis generated during AI chats in a shared database source to keep all project collaborators aligned and informed.
1. *Marketing Playbook* – Contribute AI-generated marketing strategies, project guidelines, and brand messaging into the database source to ensure consistent execution and alignment across the team.
***
## Saving AI Messages
There are two ways to save an AI-generated message in Blockbrain, each offering different benefits depending on your needs:
Save as Insight
Contribute Knowledge
Best for Personal Reference & Selective Sharing
Best for Team Collaboration
Stores AI messages in Insights, which function like personal notes
Stores AI messages in Database sources, which is chunked and accessible by the team
Files are accessible via the Insights section in the Knowledge Management page
Files can be accessed from the Database sources section within the Knowledge area of the Knowledge Management page
Used when you want to save AI-generated responses in their original form, either for personal reference or for later sharing without structuring them in a database source. Great for keeping quick notes, ideas, or AI-generated responses without affecting team-wide database sources.
Used when you want AI-generated insights to be accessible to the entire team and systematically stored in a database source, allowing the AI to contribute within the broader context of the knowledge base you're working in
# Agents
AI Agents help you connect Blockbrain with your applications, such as SharePoint, Outlook, Excel, Google, and many more.
## What are AI Agents?
**AI Agents** are autonomous, task-oriented entities within Blockbrain that can reason, plan, and act across your connected systems and our predefined tools.\
Rather than being simple connectors, they use contextual understanding and your organization's knowledge to perform meaningful actions - such as analyzing information, coordinating workflows, or drafting communications - based on your intent.
AI Agents operate securely on your behalf, using authorized integrations to execute tasks in external tools (like sending emails, updating records, or scheduling events) while maintaining full transparency and control.
They combine three key abilities:
* **Understanding** - Interpreting context, goals, and available data
* **Reasoning** - Deciding what needs to be done and how to do it
* **Acting** - Executing tasks through your connected systems
## What are Tools and Connectors?
**Connectors** provide the secure infrastructure that links Blockbrain to external services and data sources - handling authentication, permissions, and communication with APIs.
**Tools** define specific capabilities available through those connections - for example, accessing files, managing tasks, or sending messages.
AI Agents use these **Tools and Connectors** to interact intelligently with your systems — turning static integrations into dynamic, context-aware actions.
## Usage
### Before You Start
Make sure you have:
* [x] A Blockbrain account with AI Agent access
* [x] An account in the external system you want to connect to
* [x] Permission to connect third-party applications (check with your IT team if unsure)
### How to Connect an AI Agent
The **Agents** section in the left sidebar gives you quick access to all available agents — all from one central location.
Each agent operates as an **agentic data room**: once you select an agent, a dedicated data room is created and named after that agent (e.g., "Outlook Agent," "SharePoint Agent"). All chats with that agent are organized underneath it. Once an agent is assigned to a data room, it cannot be switched to a different agent.
This feature is loacted below the data rooms and chats.
#### How the Agent List Works
| Feature | Description |
| ------------------ | -------------------------------------------------------------------------------------------------------------------------------------------------- |
| **Visible agents** | Up to **6 agents** are displayed directly in the sidebar. If you have more than 6 agents, a **"See More"** link appears at the bottom of the list. |
| **Sorting** | The list automatically reorders so that the **most recently used agent** appears at the top. |
***
### Agent Start Page
Clicking on any agent in the sidebar (or in the "See More" layer) opens the **Agent Start Page**. This is your central hub for interacting with and configuring the selected agent.
#### What You'll See
* **Chat History**: A list of all previous chats conducted with this agent.
* **Send Box**: A message input field at the bottom of the page that lets you immediately start a new chat with the agent.
* **Data Sources** — Opens the Knowledge Management view to define the agent's data sources.
#### Starting a New Chat
1. Navigate to the **Agent Start Page** by clicking the agent's name in the sidebar.
2. Type your message in the **sendbox.**
3. Press **Enter** or click the send button.
4. A new chat is created underneath the agent's data room and your conversation begins.
> **Note:** Each new chat appears in the agent's chat history on the start page and is also visible in the sidebar underneath the agent entry.
### Configuring an Agent (Admins & Builders only)
**Admins and Builders** can configure agents directly from the Agent Start Page.
#### Editing the Agent Prompt
The **Agent Editor** allows you to customize the prompt that defines how the agent behaves and responds. You can access the editor by clicking the link ***"Edit"*** that is located at the top of every chat page of the agent.
\
2\. Write or modify the agent's prompt in the editor. The content area is displayed directly above the button bar.
3. When finished:
* Click **"Save Changes"** to apply your updates.
* Click **"Cancel"** to discard your changes and close the editor.
4. Once you saved your Agent, it will appear in the "My custom Agents" section, which is located underneath the "Available Agents" section
#### Tips & Notes
* Once your agent is connected, the selector at the top of the page will no longer be marked yellow. Now it can **securely act on your behalf within the permissions** you’ve granted:
* **Access and explore your connected data** - such as documents, messages, or records from your linked systems.
* **Ask questions** about your content - for example, retrieving relevant information, summaries, or insights from your files and communications.
* **Request actions** - like sending a message, creating a task, scheduling an event, or updating information in your connected apps.
* **Agents are data rooms:** Each agent functions as an agentic data room. Once you assign an agent to a data room, it cannot be changed. All chats are organized under the agent's data room.
* **Dynamic sorting keeps your workflow fast:** The sidebar always places your most recently used agent at the top, so your active agents are always within easy reach.
* **Copy instead of recreate:** Use the copy feature to quickly spin up agent variants with different LLMs or prompts without starting from scratch.
* **Role restrictions apply:** Only Admins and Builders can edit prompts, manage tools, configure data sources, or copy agents. All users can chat with agents.
#### Managing Data Sources
1. On the Agent Start Page, click **"Data Sources"**.
2. The **Knowledge Management** view opens in a full-view layer.
3. Add, remove, or manage the data sources the agent has access to. This is the same interface used for LLM chats, data rooms, and the Bot Creator.
#### What Happens After Connection?
Once your agent is connected:
* **Instant Access:** Blockbrain can immediately interact with your authorized services and data sources.
* **Respecting Your Permissions:** The agent only accesses the information your account normally has permission to view or modify - *nothing more*.
* **Secure by Design:** Authentication is handled via secure and encrypted tokens. Your username and password are never stored.
* **Persistent Availability:** The connection stays active, allowing the agent to assist you seamlessly in future sessions without repeated logins.
#### Troubleshooting
**Can't see AI Agents in the model list?**
* Contact your administrator - they may need to enable AI Agents for your organization together with the Customer Success Manager of Blockbrain
**Microsoft sign-in not working?**
* Check your internet connection
* Try clearing your browser cache
* Contact your IT support if you're getting permission errors
**Agent showing as "Not Connected"?**
* Click "Configure" again and repeat the connection process
* Make sure you completed the external sign-in successfully
# PowerPoint Agent
Turn hours of manual slide building into on-brand decks in minutes, all grounded in your own internal knowledge, augmented by agentic insights.
{% hint style="warning" %}
**Beta feature**
The PowerPoint Agent is currently in beta. It's fully usable, but behavior, options, and output may change as we refine it. Always review generated decks, especially figures and citations, before external use. Your feedback shapes what ships next.
{% endhint %}
### What it is
The agent takes a written brief and a set of source documents and gives you back a complete deck, built on your company template.
You describe the audience, purpose, and key messages and point it at your sources; it structures the deck, builds each slide, and grounds the content in those sources.
### How it works
The following list details the ideal ingredients to achieve the best results in terms of quality and accuracy:
* **Template:** your branded deck. The agent works inside it, so output quality is bounded by template quality.
* **Brief:** the audience, purpose, and key messages. Your brief sets the deck's structure and emphasis; a thin brief gives you a generic deck.
* **Sources:** the documents it draws facts from and cites. Content is grounded in these rather than produced from the model's own knowledge.
* **Plan:** before generating slides, the agent lays out the deck's structure in a single pass.
* **Slides:** built from the plan and mapped to your template's layouts.
You can also start with a simple straight forward prompt and select from the available default templates and iterate accordingly.
{% embed url="" %}
#### Two ways to build: Mirror vs Fidelity
When generating a deck you can leverage two very distinct modes with two different degrees of freedom for the agent:
**Mirror: Deterministic.**
Preserves the template slide by slide, section by section, component by component, replacing only the text with the output of your chat and agentic search. It changes the content, not the design.
* Keeps output on-brand: the template is preserved; only text is swapped.
* Produces standardised, repeatable decks: the same structure on every run.
* Most useful for reoccurring use cases from material you already have:
* quarterly reviews, status updates, proposals, account summaries.
*Mirror is only as strong as the template beneath it: a weak template produces weak slides.*
**Fidelity: Generative.**
Builds slides within your template's layouts, including slide types the template doesn't already contain.
* Handles new or unplanned topics the template was never built for.
* Produces slides beyond the template's fixed set, still on its layouts.
* Adapts the layout to the material instead of forcing it into a placeholder.
* Best useful for discovery, new topics, ideation and producing new element that are not available in your template.
*Because Fidelity composes, brand-critical elements can vary between runs: always double-check them.*
The quick distinction: **Mirror is faithful to the template. Fidelity is faithful to the layout.**
**Your part in this:** give it a clear brief and good sources, then review the finished deck, figures and brand-critical slides especially before it goes out.
### Before you start
A couple of things to have ready:
* **Access** to the PowerPoint Agent.
* **A template:** either admin-provided or one you upload.
* **Your source materials:** uploaded, or already in your knowledge base.
* **Permissions** to run the agent and reach those sources.
### Quickstart
The short version: from nothing to a finished deck:
1. Select the PowerPoint Agent.
2. Select your template.
3. Enter your brief: audience, purpose, key messages and point it at your sources.
4. Choose a mode: **Mirror** to replicate the template exactly, **Fidelity** to generate slides beyond it.
5. Generate.
6. Review: figures against your sources, plus the cover, closing, footer, and numbering.
7. Export the deck.
### How-to guides
Jump to whatever matches what you're doing.
**Generate a recurring deck (like a QBR):** Give it the audience and period, list your fixed sections, and attach the sources that hold the figures. Brief the content, not the design: the template and mode take care of layout.
**Ground the deck in specific documents:** Point it at the exact sources rather than leaving it to search. Narrower scope means more faithful content and makes every claim easy to trace.
**Use Mirror for cover, closing, and agenda slides:** These need to reproduce the brand exactly, and Mirror populates the template without changing it.
**Use Fidelity for topics your template doesn't cover:** For slide types outside your template's fixed set, Fidelity builds them on your template's layouts.
**Verify figures before you share:** Treat every figure as unconfirmed until you've checked it against the source, including that each citation points where it claims to.
**Regenerate rather than repair:** If a run misses, refine the brief and run it again. Because output varies between runs, you'll get a genuinely different result, not the same one back.
**Update the template, not the deck:** The template carries all the branding, so changing it changes every deck that follows. If output is consistently off, the fix is usually in the template rather than the brief.
### Good to know (limits & what to verify)
**Before anything goes to an external audience,** confirm the figures are right and that each citation resolves correctly. The agent grounds content in your sources, but the final check is yours.
* **It's non-deterministic:** the same brief can produce different decks, so give the run you keep a quick review before you rely on it.
* **Fidelity can vary brand-critical elements:** closing slides, footers, numbering, and fonts may be inconsistent between runs. Put those slides in Mirror, or check them.
* **Output is bounded by the template:** sparse or loosely built templates give weaker results. If something looks off, look at the template first.
* **Check complex objects:** make sure tables and charts actually rendered, rather than showing up as empty placeholders.
* **Generation is all-or-nothing per run:** if part of the deck can't be produced, you may need to retry the run.
# Atlassian Agent
Connect the Atlassian Agent to access your Jira issues, projects, and Confluence pages directly through Blockbrain's AI assistant
### What Can You Do?
Once connected, the Atlassian Agent lets you:
* **Find Projects, Issues & Pages**: Search for Jira projects, list all issues, and find Confluence pages or spaces
* **Read & Analyze Content**: Ask questions about specific issues or pages, get summaries, or extract key points from project documentation
* **Manage Issues & Workflows**: Create, update, assign, or transition Jira issues; manage project boards and workflows
* **Automate Collaboration**: Assign issues, search for users, and streamline project communication
* **Access Documentation**: Search for Confluence content, get page details, and browse spaces for resources
* See also the [**Tools & Connectors** **section**](#tools-and-connectors) for further reference
### Quick Setup
#### Step 1: Select Atlassian Agent
1. In any Blockbrain conversation, click the **AI Model selection** dropdown
2. Click **"Show detailed AI model list"**
3. Find and click **"Atlassian Agent"**
4. Look for **"Configure"** under the Status column
#### Step 2: Connect to Atlassian
1. Click **"Configure"**
2. Click the **"Connect"** button
3. Sign in with your Atlassian (Jira/Confluence) account when prompted
4. Click **"Accept"** to allow Blockbrain to access your Jira and Confluence data.
#### Step 3: Start Using Atlassian
That's it! You can now ask Blockbrain about your Jira projects, issues, Confluence pages, and more.
### What You Can Ask
#### **Finding Projects, Issues & Pages**
```
"List all Jira projects I have access to"
"Show me all issues assigned to me in the Marketing project"
"Find the Confluence page about Q3 planning in the Product space"
```
#### **Reading & Analyzing Content**
```
"Summarize the description and comments for issue PROD-123"
"What are the key points from the 'Project Kickoff' Confluence page?"
"Extract all action items from the 'Sprint Review' page"
```
#### **Managing Issues & Workflows**
```
"Create a new bug in the Engineering project"
"Assign issue HR-456 to Jane Smith"
"Transition issue DEV-789 to 'In Progress'"
```
#### **Automating Collaboration**
```
"List all users assignable to the Marketing project"
"Get details for user john.doe@company.com"
"Show workflow statuses for the Support project"
```
#### **Accessing Documentation**
```
"Find all Confluence pages tagged 'Q4 Roadmap'"
"Show me the latest updates in the Design space"
"Get details for the page 'API Documentation'"
```
### How It Works
**Your Access = Blockbrain's Access**
* Blockbrain can only see Jira issues and Confluence pages you can access
* If you can't open/find an issue or page, neither can Blockbrain
* Your permissions stay exactly the same
**Safe and Secure**
* Your data remains in Jira and Confluence
* Blockbrain reads and updates only as instructed—no unauthorized changes
* All access is logged in your organization's audit trail
### Tips for Better Results
#### Be Specific
**False:** "Find my issue"\
**Correct:** "Find the Jira issue about the Q3 budget in the Finance project"
#### Use **Types or Status**
**False:** "Show me tasks"\
**Correct:** "Show me all open bugs assigned to me in the Marketing project"
#### Mention Locations (and if it's in Jira/Confluence)
**False:** "Find the document"\
**Correct:** "Find the **Confluence** page titled 'Project Kickoff' in the Engineering space"
### Troubleshooting
**"I can't find my issue or page"**
* Check if you can see the issue or page directly in Jira or Confluence
* Try using different search terms (e.g., part of the issue key, project name, or page title)
* The item might be in a project or space you don't have access to
**"Permission denied" errors**
* Your Jira or Confluence permissions may have changed
* Contact your IT team to verify your access
* Try reconnecting the agent
**"No projects or spaces found"**
* You might not have access to any Jira projects or Confluence spaces
* Check with your administrator about Atlassian licensing
* Verify you're signed in with the correct Atlassian account
### Privacy and Security
* **Respecting Permissions**: Blockbrain can only access Jira issues and Confluence pages you have permission to see
* **No Unauthorized Changes**: Blockbrain only creates, edits, or transitions issues/pages when you instruct it—no unsolicited actions
* **No Storage**: Blockbrain doesn't store copies of your issues, pages, or attachments
### Tools & Connectors
### Jira Tools
| Tool | Description |
| --------------------------- | -------------------------------------------------------- |
| **Search Issues** | Query issues using JQL |
| **Get Issue** | Fetch detailed info on a specific issue (e.g., PROJ-123) |
| **Create Issue** | Create new issues or subtasks |
| **Edit Issue** | Update fields on existing issues |
| **Transition Issue** | Move issues through workflow statuses |
| **Assign Issue** | Assign issues to team members |
| **Get Transitions** | List available status transitions for an issue |
| **Get Workflow Statuses** | View all statuses in a project's workflow |
| **Get All Projects** | List all accessible Jira projects |
| **Get Agile Boards** | Find Scrum/Kanban boards |
| **Get Create Metadata** | Retrieve issue type fields before creation |
| **Search Fields** | Find custom or system fields |
| **Search Users** | Find users by name or email |
| **Search Assignable Users** | Find users assignable to a project/issue |
***
### Confluence Tools
| Tool | Description |
| --------------------- | ---------------------------------------------- |
| **Search Confluence** | Find pages, blogs, or spaces by keyword or CQL |
***
### 📊 Data & Analysis Tools
| Tool | Description |
| -------------------- | ------------------------------------------- |
| **Code Interpreter** | Run Python for data analysis & calculations |
| **Process File** | Read & extract content from files |
| **Vector Search** | Semantic search through knowledge bases |
| **List Attachments** | View attached files in the data room |
| **List Emails** | Access connected emails |
***
### 📈 Chart Tools
* **Bar, Line, Pie, Doughnut, Radar, Scatter, Bubble, Polar Area** charts
***
### 🧠 Knowledge & Insight Tools
| Tool | Description |
| -------------------------------------------- | --------------------------------- |
| **Read / Create / Update / Delete Insights** | Manage notes & insights |
| **List / Create / Update / Delete Skills** | Manage reusable workflows |
| **Folder Structure** | Browse knowledge base documents |
| **Image Generation** | Generate images from text prompts |
***
### ⏰ Scheduler Tools
| Tool | Description |
| --------------- | ------------------------------------ |
| **Create Task** | Schedule recurring or one-time tasks |
| **List Tasks** | View all scheduled tasks |
| **Update Task** | Modify an existing task |
| **Delete Task** | Remove a scheduled task |
***
### Common Use Cases
**Project & Issue Management**
* Quickly list all your Jira projects and issues
* Find out who is assigned to an issue or project
* Get user details for collaboration
**Content & Workflow Analysis**
* Summarize long Confluence pages or Jira issue discussions
* Extract action items or decisions from project documentation
* Search for specific issues, comments, or Confluence content
**Resource & Documentation Access**
* Locate project documentation in Confluence
* Get details or links for important Jira issues
* Browse Confluence spaces for project resources
### Example Conversation
**You:** "List all issues assigned to me in the Product project"
**Blockbrain:** "Here are your issues in the Product project:
* PROD-101: Update user onboarding flow
* PROD-115: Fix login bug
* PROD-120: Review Q3 roadmap
Which issue would you like to view or update?"
**You:** "Show me the details for PROD-115"
### Next Steps
Want to connect more services? Try the [Excel Agent](/for-users/agents/excel-agent) to access your workbooks and analyze data through Blockbrain.
# Excel Agent
Connect the Excel Agent to access your workbooks, reports, and manage data directly through Blockbrain's AI assistant
#### What Can You Do?
Once connected, the Excel Agent lets you:
* **Find Workbooks & Worksheets**: Search for Excel files, list all worksheets, and navigate your workbook structure
* **Read & Analyze Data**: Ask questions about specific tables, ranges, or cells—get summaries, extract numbers, or analyze content
* **Edit & Update**: Add, update, or delete rows, tables, and worksheets; update cell values and formatting
* **Automate Calculations**: Recalculate formulas, clear ranges, and apply formatting changes automatically
* **File Upload:** The Excel Agent works exclusively with **.xlsx** files. **CSV** files are **not supported** and must be converted to **.xlsx** format.
#### Quick Setup
**Step 1: Select Excel Agent**
1. In any Blockbrain conversation, click the **AI Model selection** dropdown
2. Click **"Show detailed AI model list"**
3. Find and click **"Excel Agent"**
4. Look for **"Configure"** under the Status column
**Step 2: Connect to Excel**
1. Click **"Configure"**
2. Click the **"Connect"** button
3. Sign in with your Microsoft 365 account when prompted
4. Click **"Accept"** to allow Blockbrain to access your Excel files
**Step 3: Start Using Excel**
That's it! You can now ask Blockbrain about your Excel workbooks and data.
#### What You Can Ask
**Finding Workbooks & Worksheets**
```
"Find my sales report workbook"
"List all worksheets in the Q1 Financials file"
"Show me all tables in the Marketing Analysis sheet"
```
**Reading & Analyzing Data**
```
"Summarize the data in the Revenue table"
"What are the key numbers in the Budget worksheet?"
"Extract all email addresses from the Contacts table"
```
**Editing & Updating**
```
"Add a new row to the Expenses table"
"Update the value in cell B5 of the Forecast sheet"
"Delete the 'Archive' worksheet from the Operations workbook"
```
**Automating Calculations & Formatting**
```
"Recalculate all formulas in the Annual Report workbook"
"Clear the contents of range A1:D10 in the Inventory sheet"
"Make the header row bold in the Employees table"
```
#### How It Works
**Your Access = Blockbrain's Access**
* Blockbrain can only see Excel files you can access
* If you can't open a workbook, neither can Blockbrain
* Your permissions stay exactly the same
**Safe and Secure**
* Your files remain in Excel/OneDrive/SharePoint
* Blockbrain reads and updates only as instructed—no unauthorized changes
* All access is logged in your organization's audit trail
#### Tips for Better Results
**Be Specific**
**False:** "Find my file"\
**Correct:** "Find my budget spreadsheet from Q3 in the folder customers 2024"
**Use File Types**
**False:** "Show me documents"\
**Correct:** "Show me all Excel workbooks from last month"
**Mention Locations**
**False:** "Find the proposal"\
**Correct:** "Find the proposal worksheet in the Finance workbook"
#### Troubleshooting
**"I can't find my worksheet"**
* Check if you can see the worksheet in Excel Online or OneDrive directly
* If the file has been recently created/uploaded, it takes a couple of minutes to show up due to OneDrive synchronization
* Try using different search terms (e.g., part of the filename, worksheet name)
* The file might be in a location you don't have access to
**"Permission denied" errors**
* Your Excel/OneDrive/SharePoint permissions may have changed
* Contact your IT team to verify your access
* Reconnect your agent — reconfigure the Excel Agent again like in Step 2
**"No Excel files found"**
* You might not have any Excel files in your connected account
* Check with your administrator about file access or licensing
**"Unintended content was deleted/added"**
* Reverting back to an older version of the Excel File is possible via OneDrive -> version history
#### Privacy and Security
* **Read/Write Access**: Blockbrain can only read or edit files as instructed—no unauthorized changes, deletions, or sharing.
> **Important:** When working with Excel Files, any changes made via the Excel Agent are applied directly to the file and saved automatically. Always double-check that you've selected the correct file. Consider saving a backup before editing.
* **Your Permissions**: Access is limited to what you can normally see and do in Excel/OneDrive/SharePoint
* **No Storage**: Blockbrain doesn't store copies of your files
#### Common Use Cases
**Data Research**
* Quickly find information across multiple workbooks and sheets
* Compare data between different tables or files
* Extract specific data points from large spreadsheets
**Content Analysis**
* Summarize complex tables or worksheets
* Identify key trends in financial or operational data
* Extract action items or KPIs from project trackers
#### Example Conversation
**You:** "Find my 2023 budget workbook"
**Blockbrain:** "I found several workbooks named '2023 Budget' in your Excel files:
* 2023\_Budget.xlsx (in Finance)
* Budget\_2023\_Final.xlsx (in Shared Documents)
* Q1\_2023\_Budget.xlsx (in Projects)
Which one would you like me to open?"
**You:** "Open 2023\_Budget.xlsx and summarize the Expenses worksheet"
#### Next Steps
Want to connect more services? Try the MS Teams Agent to access your MS Teams channels, chats, and groups through Blockbrain.
### Next Steps
Want to connect more services? Try the [MS Teams Agent](/for-users/agents/ms-teams-agent) to access your MS Teams channels, chats, and groups through Blockbrain.
# MS Teams Agent
Connect Blockbrain to your Microsoft Teams and let AI help you find messages, summarize meetings, manage channels, and access shared files — all in plain language, no technical knowledge needed.
### What Can You Do?
Once connected, just type what you need — no special commands required.
| Feature | What it does |
| ---------------------------------------- | --------------------------------------------------------------- |
| 🔍 **Find Teams, Channels & Chats** | Search for teams, list channels, and locate recent messages |
| 💬 **Read & Analyze Conversations** | Summarize chats, extract key points, or find specific messages |
| 👥 **Manage Teams & Members** | See who's in a team, get user details, update your status |
| 📨 **Send Messages & Schedule Meetings** | Post to channels, start new chats, and organize online meetings |
| 📁 **Access Shared Files** | Find and browse files shared in Teams channels |
***
### Quick Setup — 3 Easy Steps
#### Step 1: Select the MS Teams Agent
1. Open any Blockbrain conversation
2. Click the **AI Models** dropdown (top left)
3. Click **"Show detailed AI model list"**
4. Find and click **"MS Teams Agent"**
#### Step 2: Connect to Your MS Teams Account
1. Click **"Configure"** in the Status column
2. Click **"Connect"**
3. Sign in with your **Microsoft 365 account**
4. Click **"Accept"** — this gives Blockbrain permission to access your Teams
#### Step 3: Start Using It!
That's it — you're ready to go! Just type what you need in plain language \[2].
***
### What Can You Ask?
Write naturally \[3], like you'd ask a colleague. Here are some examples:
#### 🔍 Finding Teams, Channels & Chats
* *"List all teams I am a member of"*
* *"Show me all channels in the Marketing team"*
* *"Find my recent chats with John Doe"*
#### 💬 Reading & Analyzing Conversations
* *"Summarize the last 10 messages in the Project Updates channel"*
* *"What are the key points from my last meeting with the Finance team?"*
* *"Extract all action items from the Q2 Planning chat"*
#### 👥 Managing Teams & Members
* *"List all members of the HR team"*
* *"Get details for user "*
* *"Set my Teams presence to 'Do Not Disturb'"*
#### 📨 Messaging & Meetings
* *"Send a message to the Announcements channel"*
* *"Create a new chat with Alice and Bob"*
* *"Schedule an online meeting for the Sales team"*
* *"Get the transcript from yesterday's team meeting"*
#### 📁 Accessing Shared Files
* *"Find all files shared in the Product Launch channel"*
* *"Show me the files folder for the Design team"*
* *"Get details for the file 'Q3\_Plan.xlsx'"*
***
### How Does It Work?
**Your account = Blockbrain's access**
Blockbrain acts on your behalf using your existing Teams permissions:
* You can only see teams, channels, chats, and files you normally have access to
* If you can't find or open something in Teams directly, Blockbrain can't either
* Your permissions stay exactly the same — nothing changes
**Safe and secure by design**
* Your files remain in your Teams channels, OneDrive, or SharePoint
* Blockbrain only reads or updates content when you specifically ask it to
* All activity is logged in your organization's audit trail
***
### Example Conversation
> **You:** "List all channels in the Product team"
>
> **Blockbrain:** "Here are the channels in the Product team:
>
> * General
> * Roadmap
> * Launch Planning
> * Feedback
>
> Which channel would you like to explore?"
> **You:** "Show me the last 5 messages in the Launch Planning channel"
>
> **Blockbrain:** "Here are the last 5 messages in the Launch Planning channel:
>
> 1. **Anna (Mon, 09:14):** "Can we confirm the go-live date by EOD?"
> 2. **Tom (Mon, 09:22):** "Yes — targeting May 20. I'll update the tracker."
> 3. **Anna (Mon, 09:25):** "Great, I'll notify the stakeholders."
> 4. **Lena (Mon, 10:01):** "Press release draft is ready for review."
> 5. **Tom (Mon, 10:15):** "On it — will send feedback this afternoon."
>
> Would you like me to summarize these or extract any action items?"
***
### Tips for Better Results
The more specific your request, the better Blockbrain can help you \[4].
#### Be Specific
* ❌ *"Find my message"*
* ✅ *"Find my message about the Q3 budget in the Finance channel"*
#### Use File Types When Searching for Files
* ❌ *"Show me files"*
* ✅ *"Show me all PDF files shared in the Marketing team last week"*
#### Mention the Location
* ❌ *"Find the meeting"*
* ✅ *"Find the meeting transcript from the Project Kickoff in the Engineering team"*
***
### Security & Privacy
#### What Blockbrain **can** do:
* Read messages, channel posts, and meeting transcripts you have access to
* Send messages or create chats when you ask it to
* Schedule or update meetings on your behalf
* Browse and retrieve files shared in Teams channels
#### What Blockbrain **cannot** do:
* Access teams, channels, or chats you don't have permission to see
* Send messages or make changes without your explicit instruction
* Store copies of your messages, files, or meeting data
#### Built-in safety:
* Access is strictly limited to what **your account** can normally see
* No unsolicited actions — Blockbrain only acts when you ask it to
* All access is logged in your **organization's audit trail**
***
### Troubleshooting
**"I can't find my team or message"**
* Check if you can see it directly in Microsoft Teams
* Try different search terms (e.g., part of the team name or channel)
* The item might be in a team or chat you don't have access to
**"Permission denied" errors**
* Your Teams permissions may have changed
* Contact your IT team to verify your access rights
* Try reconnecting: click **Configure** → **Connect** again
**"No Teams found"**
* You might not be a member of any Teams yet
* Check with your administrator about Teams licensing
* Make sure you're signed in with the correct Microsoft account
***
### Common Use Cases
#### 🗂️ Team & Channel Management
* Quickly list all your teams and channels
* Find out who's in a specific team or channel
* Get user details for collaboration
#### 📋 Conversation & Meeting Analysis
* Summarize long chat threads or channel discussions
* Extract action items or decisions from meeting transcripts
* Search for specific messages or mentions across channels
#### 📁 File & Resource Access
* Locate files shared in Teams or channels
* Get links or details for important documents
* Browse channel folders for project resources
***
### What's Next?
Want to manage your email and calendar too? Try the **Outlook Agent** to access\
your inbox, schedule meetings, and track tasks directly through Blockbrain.
# Outlook Agent
Connect Blockbrain to your Outlook and let AI help you manage your emails, calendar, and tasks — all from one place, in plain language.
### What Can You Do?
Once connected, just type what you need — no special commands required.
| Feature | What it does |
| --------------------------- | ---------------------------------------------------------- |
| 📧 **Send Emails** | Draft and send emails — just describe what you want to say |
| 🔍 **Read Messages** | Find and summarize emails in your inbox |
| 📅 **Manage Your Calendar** | Check your schedule and create meetings |
| ✅ **Handle Tasks** | Create and track your to-do items |
| 👤 **Find Contacts** | Look up people in your organization |
***
### Quick Setup — 3 Easy Steps
#### Step 1: Select the Outlook Agent
1. Open any Blockbrain chat
2. Click the **AI Models** dropdown (top left)
3. Click **"Show detailed AI model list"**
4. Find and click **"Outlook Agent"**
#### Step 2: Connect to Your Outlook Account
1. Click **"Configure"** in the Status column
2. Click **"Connect"**
3. Sign in with your **Microsoft 365 account**
4. Click **"Accept"** — this gives Blockbrain permission to access your Outlook
#### Step 3: Start Using It!
That's it — you're all set! Just type what you need in plain language.
***
### What Can You Ask?
Write naturally, like you'd ask a colleague. Here are some examples:
#### 📧 Emails
* *"Send an email to John about tomorrow's meeting"*
* *"Find emails from Sarah about the budget"*
* *"What important emails did I receive today?"*
* *"Draft a follow-up email for the client meeting"*
#### 📅 Calendar
* *"What's on my calendar today?"*
* *"Schedule a meeting with the team for Friday"*
* *"When is my next free 30-minute slot?"*
* *"Create a calendar event for the project review"*
#### ✅ Tasks
* *"Add 'Review budget' to my task list"*
* *"What tasks are due this week?"*
* *"Mark the presentation task as complete"*
* *"Create a task to follow up with the vendor"*
#### 👤 Contacts
* *"Find contact info for Maria from marketing"*
* *"Who works in the finance department?"*
* *"Get me John's email address"*
***
### How Does It Work?
**Your account = Blockbrain's access**
Blockbrain acts on your behalf using your existing Outlook permissions:
* You can only see emails and calendars you normally have access to
* Emails sent through Blockbrain appear as if **you** sent them directly
* Nobody can use Blockbrain to access things you can't access yourself
**Smart assistance, built in:**
* AI helps you write professional, well-structured emails
* It suggests meeting times that fit your availability
* Tasks are organized by priority and deadlines automatically
***
### Example Conversations
#### Sending an Email
> **You:** "Send an email to the marketing team about next week's campaign launch"
>
> **Blockbrain:** "Here's a draft for you:
>
> **Subject:** Campaign Launch — Next Week Preparation
>
> Hi Marketing Team,
>
> I wanted to touch base regarding our campaign launch scheduled for next week. Could we please ensure all materials are finalized and review the timeline one more time?
>
> Let me know if you need any support or have questions.
>
> Best regards"
>
> Would you like me to send this, or would you prefer to make any changes?
#### Checking Your Calendar
> **You:** "What meetings do I have tomorrow?"
>
> **Blockbrain:** "Here's your schedule for tomorrow (Thursday, Oct 24):
>
> * 9:00 AM — Team Standup (30 min) · Conference Room A
> * 11:00 AM — Client Presentation (1 hour) · Online
> * 2:00 PM — Budget Review (45 min) · Finance Office
> * 4:00 PM — Project Planning (1 hour) · Conference Room B
>
> You have a free slot from 12:00–2:00 PM."
***
### Tips for Better Results
The more specific your request, the better Blockbrain can help you.
#### For Emails
* ✅ Name the recipient clearly: *"Send to John Smith"* or *"Email the finance team"*
* ✅ Mention the topic: *"Email about the quarterly report"*
* ✅ Set the tone: *"Send a formal email"* or *"Write something friendly"*
#### For Calendar
* ✅ Include a timeframe: *"Schedule for next week"* or *"Find time tomorrow"*
* ✅ Specify the duration: *"30-minute meeting"* or *"2-hour workshop"*
* ✅ Mention who's attending: *"Meeting with Sarah and Tom"*
#### For Tasks
* ✅ Be specific: *"Add task: Review contract by Friday"*
* ✅ Set a priority: *"Create high-priority task for client follow-up"*
* ✅ Include a deadline: *"Task due next Tuesday"*
***
### Security & Privacy
#### What Blockbrain **can** do:
* Read your emails and calendar events
* Send emails on your behalf
* Create and modify calendar appointments
* Manage your tasks and to-do lists
* Access your contact directory
#### What Blockbrain **cannot** do:
* Access other people's private emails or calendar events
* Change your Outlook settings or password
* Share your data with unauthorized parties
#### Built-in safety:
* Sent emails always show **your name** as the sender
* Calendar invites come from **your account**
* You can **revoke access anytime** in the Outlook Agent settings
***
### Troubleshooting
**"Can't send email"**
* Check that you have permission to send emails from your account
* Verify your internet connection
* Try reconnecting: click **Configure** → **Connect** again
**"Calendar events not showing"**
* Click **Configure** again to refresh the connection
* Make sure you have calendar access in Outlook
* Check you're signed in with the correct Microsoft account
**"Tasks not syncing"**
* Make sure Microsoft To Do or Tasks is enabled in your account
* Check that your Microsoft 365 license includes task features
* Try creating a task directly in Outlook to test the connection
**"Contact search not working"**
* Verify you have access to your organization's address book
* Check if the person exists in your contacts
* Try searching with a different spelling or just their first or last name
***
### Advanced Features
These work with natural language too — just ask!
# SharePoint Agent
Connect the SharePoint Agent to access your files, documents, and SharePoint sites directly through Blockbrain's AI assistant
### What Can You Do?
Once connected, the SharePoint Agent lets you:
* **Find Files**: Search for documents across all your SharePoint sites
* **Read Documents**: Ask questions about specific files
* **Browse Sites**: Navigate through your SharePoint structure
* **Analyze Content**: Get summaries and insights from your documents
### Quick Setup
#### Step 1: Select SharePoint Agent
1. In any Blockbrain conversation, click the **AI Model selection** dropdown
2. Click **"Show detailed AI model list"**
3. Find and click **"SharePoint Agent"**
4. Look for **"Configure"** under the Status column
#### Step 2: Connect to SharePoint
1. Click **"Configure"**
2. Click the **"Connect"** button
3. Sign in with your Microsoft 365 account when prompted
4. Click **"Accept"** to allow Blockbrain to access your SharePoint files
#### Step 3: Start Using SharePoint
That's it! You can now ask Blockbrain about your SharePoint content.
### What You Can Ask
#### Finding Files
```
"Find my presentation about quarterly results"
"Show me all Excel files from the marketing folder"
"What documents did I work on last week?"
```
#### Reading Documents
```
"Summarize the report in the finance folder"
"What are the key points in the project proposal?"
"Extract the budget numbers from the spreadsheet"
```
#### Browsing Sites
```
"What sites do I have access to?"
"Show me what's in the HR site"
"List all files in the team workspace"
```
### How It Works
**Your Access = Blockbrain's Access**
* Blockbrain can only see files you can see
* If you can't access a SharePoint site, neither can Blockbrain
* Your permissions stay exactly the same
**Safe and Secure**
* Your files remain in SharePoint
* Blockbrain reads but doesn't change your documents
* All access is logged in your organization's audit trail
### Example Conversation
**You:** "Find my contract template"
**Blockbrain:** "I found several contract templates in your SharePoint:
* Standard Service Contract.docx (in Legal Templates)
* NDA Template 2024.docx (in HR Documents)
* Vendor Agreement Template.pdf (in Procurement)
Which one would you like me to open?"
**You:** "Open the Standard Service Contract and summarize it"
**Blockbrain:** "Here's a summary of your Standard Service Contract:
* 12-page document covering service delivery terms
* Includes payment schedules and liability clauses
* Last updated in March 2024
* Contains sections for customization based on client needs..."
### Tips for Better Results
#### Be Specific
**False:** "Find my file"\
**Correct:** "Find my budget spreadsheet from Q3 in the folder customers 2024"
#### Use File Types
**False:** "Show me documents"\
**Correct:** "Show me all PDF reports from last month"
#### Mention Locations
**False:** "Find the proposal"\
**Correct:** "Find the proposal in the sales team site"
### Troubleshooting
**"I can't find my file"**
* Check if you can see the file in SharePoint directly
* Try using different search terms
* The file might be in a site you don't have access to
**"Permission denied" errors**
* Your SharePoint permissions may have changed
* Contact your IT team to verify your access
* Try reconnecting the agent
**"No SharePoint sites found"**
* You might not have access to any SharePoint sites
* Check with your administrator about SharePoint licensing
* Verify you're signed in with the correct Microsoft account
### Privacy and Security
* **Read-Only Access**: Blockbrain can read your files but cannot edit, delete, or share them
* **Your Permissions**: Access is limited to what you can normally see in SharePoint
* **No Storage**: Blockbrain doesn't store copies of your files
### Common Use Cases
**Document Research**
* Quickly find information across multiple documents
* Compare content between different files
* Extract specific data points from reports
**Content Analysis**
* Summarize long documents
* Identify key themes in meeting notes
* Extract action items from project files
**File Organization**
* Understand what files you have access to
* Find duplicates or related documents
* Locate files by content rather than filename
### Next Steps
Want to connect more services? Try the [Knowledge Management Agent](/for-users/agents/knowledge-management-agent) to access your files, documents, and knowledge bases through Blockbrain.
# Knowledge Management Agent
Connect the Knowledge Management Agent to access your files, documents, and knowledge bases directly through Blockbrain’s AI assistant
#### What Can You Do?
Once connected, the Knowledge Management Agent lets you:
* **Find & Organize Content**: Search across all your knowledge bases, folders, and files—instantly locate documents, emails, and insights
* **Read & Analyze Documents**: Ask questions about specific files, get summaries, extract key data points, and generate actionable insights
* **Browse & Navigate Structures**: Explore folder hierarchies, understand document organization, and map your knowledge architecture
* **Create & Manage Insights**: Capture, categorize, and retrieve notes or insights linked to your documents and conversations
* **Automate Knowledge Workflows**: Tag, categorize, and structure content for optimal retrieval and future use
***
#### Quick Setup
**Step 1: Select Knowledge Management Agent**
1. In any Blockbrain conversation, click the **AI Model selection** dropdown
2. Click **"Show detailed AI model list"**
3. Find and click **"Knowledge Management Agent"**
**Step 2: Start Using Knowledge Management**
That's it! You can now ask Blockbrain about your documents, folders, emails, and insights.
***
#### What You Can Ask
**Finding & Organizing Content**
```
"List all files in the Legal folder"
"Show me all documents tagged 'Q2 Financials'"
"Find emails related to the merger project"
```
**Reading & Analyzing Documents**
```
"Summarize the contract in the Procurement folder"
"What are the key points in the project proposal.pdf?"
"Extract all dates and deadlines from the meeting notes"
```
**Browsing & Navigating Structures**
```
"Show me the folder structure for the HR knowledge base"
"List all subfolders under 'Client Projects'"
"What documents are in the '2024 Planning' folder?"
```
**Creating & Managing Insights**
```
"Create a new insight from this report"
"List all insights related to compliance"
"Show me notes from last week's board meeting"
```
***
#### How It Works
**Your Access = Blockbrain's Access**
* Blockbrain can only see files, emails, and notes you have access to
* If you can't open or find a document, neither can Blockbrain
* Your permissions stay exactly the same
**Safe and Secure**
* Your data remains in your knowledge bases and systems
* Blockbrain reads and updates only as instructed - no unauthorized changes
* All access is logged in your organization's audit trail
***
#### Tips for Better Results
**Be Specific**
**False:** "Find my file"\
**Correct:** "Find the Q3 budget report in the Finance folder"
**Use Types or Tags**
**False:** "Show me documents"\
**Correct:** "Show me all PDF files tagged 'Board Meeting' from last month"
**Mention Locations**
**False:** "Find the note"\
**Correct:** "Find the insight about GDPR compliance in the Legal knowledge base"
***
#### Troubleshooting
**"I can't find my file or note"**
* Check if you can see the file or note directly in your knowledge base
* Try using different search terms (e.g., part of the filename, folder name, or tag)
* The item might be in a location you don't have access to
**"Permission denied" errors**
* Your permissions may have changed
* Contact your IT team to verify your access
* Try reconnecting the agent
**"No files or folders found"**
* You might not have access to any knowledge bases or folders
* Check with your administrator about access rights
* Verify you're signed in with the correct account
***
#### Privacy and Security
* **Respecting Permissions**: Blockbrain can only access documents, emails, and notes you have permission to see
* **No Unauthorized Changes**: Blockbrain only creates, edits, or tags content when you instruct it—no unsolicited actions
* **No Storage**: Blockbrain doesn't store copies of your files, emails, or notes
***
#### Common Use Cases
**Knowledge Discovery & Organization**
* Quickly list all files, folders, and emails in a knowledge base
* Find and tag important documents for future reference
* Map out folder structures for better navigation
**Content Analysis & Summarization**
* Summarize lengthy reports or meeting notes
* Extract key data points, deadlines, or action items
* Generate insights from multiple documents
**Insight & Note Management**
* Capture and categorize insights from documents or conversations
* Retrieve notes linked to specific projects or topics
* Maintain a searchable knowledge base of organizational learnings
***
#### Example Conversation
**You:** "List all files tagged 'Q2 Review' in the Finance knowledge base"
**Blockbrain:** "Here are the files tagged 'Q2 Review' in Finance:
* Q2\_Review\_Summary.pdf
* Q2\_Financials.xlsx
* Q2\_Action\_Items.docx
Which one would you like to open or analyze?"
**You:** "Summarize Q2\_Review\_Summary.pdf"
***
#### Next Steps
Want to connect more services? Try the [MS Viva Engage Agent](/for-users/agents/ms-viva-engage-agent) to access your Viva Engage communities, posts, and conversations directly through Blockbrain.
# MS Viva Engage Agent
Connect the MS Viva Engage Agent to access your Viva Engage communities, posts, and organizational discussions directly through Blockbrain's AI assistant
### What Can You Do?
Once connected, the MS Viva Engage Agent lets you:
* **Find Communities & Posts**: Search across all Viva Engage communities and discover relevant posts and discussions
* **Read & Analyze Conversations**: Get summaries of discussion threads, extract key insights, and identify trending topics
* **Monitor Your Feed**: Stay updated with your personalized feed and track important organizational communications
* **Discover Users & Experts**: Find subject matter experts, active contributors, and networking opportunities within communities
* **Extract Knowledge**: Identify best practices, solutions, and organizational updates shared across communities
### Quick Setup
#### Step 1: **Select MS Viva Engage Agent**
1. In any Blockbrain conversation, click the **AI Model selection** dropdown
2. Click **"Show detailed AI model list"**
3. Find and click **"MS Viva Engage Agent"**
4. Look for **"Configure"** under the Status column
#### **Step 2: Connect to MS Viva Engage**
1. Click **"Configure"**
2. Click the **"Connect"** button
3. Sign in with your Microsoft account when prompted
4. Click **"Accept"** to allow Blockbrain to access your Viva Engage data.
#### Step 3: Start Using Viva Engage
That's it! You can now ask Blockbrain about your Viva Engage communities, posts, discussions, and more.
### What You Can Ask
#### **Finding Communities & Posts**
```
"List all Viva Engage communities I have access to"
"Search for posts about 'remote work policies' in the last month"
"Show me recent posts in the Engineering community"
```
#### **Reading & Analyzing Conversations**
```
"Summarize the discussion about Q3 planning in the Leadership community"
"What are the key insights from posts about 'digital transformation'?"
"Extract action items from the HR community discussions this week"
```
#### **Monitoring Your Feed**
```
"Show me the latest posts in my personalized feed"
"What are the trending topics in my feed today?"
"Find important announcements in my recent feed"
```
#### **Discovering Users & Experts**
```
"Who are the most active users in the Marketing community?"
"Find experts discussing 'cloud migration' across communities"
"Get details for user jane.smith@company.com"
```
#### **Extracting Knowledge**
```
"Find best practices shared about project management"
"What solutions have been discussed for customer onboarding?"
"Show me organizational updates from the last week"
```
### How It Works
**Your Access = Blockbrain's Access**
* Blockbrain can only see Viva Engage posts and communities you can access
* If you can't view a post or community, neither can Blockbrain
* Your permissions stay exactly the same
**Safe and Secure**
* Your data remains in Viva Engage
* Blockbrain reads and analyzes only as instructed - no unauthorized posting or changes
* All access is logged in your organization's audit trail
### Tips for Better Results
#### Be Specific
**False:** "Find my post"\
**Correct:** "Search for posts about 'Q3 budget planning' in the Finance community"
#### **Use Keywords and Topics**
**False:** "Show me discussions"\
**Correct:** "Show me all recent posts about 'remote work policies' in the HR community"
#### Mention **Communities and Context**
**False:** "Find the conversation"\
**Correct:** "Find posts in the **Engineering** community about 'API deployment guidelines'"
### Troubleshooting
**"I can't find my post or community"**
* Check if you can see the post or community directly in Viva Engage
* Try using different search terms (e.g., part of the post content, author name, or community name)
* The post might be in a community you don't have access to
**"Permission denied" errors**
* Your Viva Engage permissions may have changed
* Contact your IT team to verify your community access
* Try reconnecting the agent
**"No communities or posts found"**
* You might not have access to any Viva Engage communities
* Check with your administrator about Viva Engage licensing
* Verify you're signed in with the correct Microsoft account
### Privacy and Security
* **Respecting Permissions**: Blockbrain can only access Viva Engage posts and communities you have permission to view
* **No Unauthorized Changes**: Blockbrain only reads and analyzes content—no posting, commenting, or editing without your instruction
* **No Storage**: Blockbrain doesn't store copies of your posts, comments, or community discussions
### Common Use Cases
**Community & Discussion Management**
* Quickly list all your Viva Engage communities
* Search for posts across communities using keywords
* Monitor your personalized feed for important updates
**Content & Knowledge Analysis**
* Summarize lengthy discussion threads and conversations
* Extract action items and decisions from community posts
* Identify trending topics and organizational announcements
**User & Network Discovery**
* Find subject matter experts in specific communities
* Get user details for collaboration and networking
* Identify active contributors and thought leaders
### Example Conversation
**You:** "Search for posts about 'project management tools' in the IT community"
**Blockbrain:**"Here are recent posts about project management tools in the IT community:
* Discussion on Agile management platform evaluation (15 replies)
* Best practices for remote team coordination (8 likes)
* Integration tips for development workflows (3 shares)
Which discussion would you like to explore in detail?"
**You:** "Show me the details from the Agile platform discussion"
**Blockbrain:** *Provides comprehensive summary with key insights, participant recommendations, and action items from the discussion*
### Next Steps
Want to connect more services? Try the [OneNote Agent](/for-users/agents/onenote-agent) to access your notebooks, organize your notes, and manage all your OneNote content directly through Blockbrain.
# OneNote Agent
Connect the Atlassian Agent to access your Jira issues, projects, and Confluence pages directly through Blockbrain's AI assistant
### What Can You Do?
Once connected, the OneNote Agent lets you:
* **Find Notebooks, Sections & Pages:** Search for and list all your OneNote notebooks, sections, and pages (notes) across your account
* **Read & Analyze Notes:** Ask questions about specific pages, get summaries, or extract key points from your notes
* **Organize & Manage Content:** Create, update, and organize notebooks, sections, and pages to keep your information structured
* **Extract & Summarize Content:** Retrieve the full text of notes, extract action items, or summarize lengthy content for quick review
* **Analyze Images in Notes:** Extract and describe content from images embedded in your notes for richer information access
### Quick Setup
#### Step 1: Select OneNote Agent
1. In any Blockbrain conversation, click the **AI Model selection** dropdown
2. Click **"Show detailed AI model list"**
3. Find and click **"OneNote Agent"**
4. Look for **"Configure"** under the Status column
#### Step 2: Connect to OneNote
1. Click **"Configure"**
2. Click the **"Connect"** button
3. Sign in with your Microsoft account when prompted
4. Click **"Accept"** to allow Blockbrain to access your OneNote data
#### Step 3: Start Using OneNote
That's it! You can now ask Blockbrain about your notebooks, sections, pages, and more.
### What You Can Ask
#### **Finding Notebooks, Sections & Pages**
```
"List all my OneNote notebooks"
"Show me the most recent pages in my 'Project Notes' notebook"
"Find the section called '2026 Planning' in my 'Strategy' notebook"
```
#### **Reading & Analyzing Notes**
```
"Summarize the content of my 'Weekly Meeting' page"
"What are the key points from the 'Q1 Review' note?"
"Extract all action items from the 'Sprint Retrospective' page"
```
#### **Organizing & Managing Content**
```
"Create a new notebook called 'Personal Journal'"
"Add a section named 'Ideas' to my 'Work' notebook"
"Create a new page titled 'Brainstorming' in the 'Ideas' section"
```
#### **Extracting & Summarizing Content**
```
"Summarize all notes from the last week"
"List all to-dos from my 'Tasks' section"
"Show me a summary of the 'Project Kickoff' page"
```
#### **Analyzing Images in Notes**
```
"Extract text from images in my 'Receipts' section"
"Describe the images on my 'Whiteboard Photos' page"
```
### How It Works
**Your Access = Blockbrain's Access**
* Blockbrain can only see OneNote notebooks, sections, and pages you can access
* If you can't open or find a note, neither can Blockbrain
* Your permissions stay exactly the same
**Safe and Secure**
* Your data remains in OneNote
* Blockbrain reads and updates only as instructed—no unauthorized changes
* All access is logged in your organization's audit trail
### Tips for Better Results
#### Be Specific
**False:** "Find my note"\
**Correct:** "Find the page about the Q3 budget in the 'Finance' notebook"
#### Use **Section or Notebook Names**
**False:** "Show me tasks"\
**Correct:** "Show me all pages in the 'Tasks' section of my 'Work' notebook"
#### Mention Locations
**False:** "Find the page"\
**Correct:** "Find the page titled 'Project Kickoff' in the 'Engineering' section of my 'Projects' notebook"
### Troubleshooting
**"I can't find my note or section"**
* Check if you can see the notebook, section, or page directly in OneNote
* Try using different search terms (e.g., part of the page title or section name)
* The item might be in a notebook you don't have access to
**"Permission denied" errors**
* Your OneNote permissions may have changed
* Contact your IT team to verify your access
* Try reconnecting the agent
**"No notebooks or sections found"**
* You might not have access to any OneNote notebooks
* Check with your administrator about Microsoft licensing
* Verify you're signed in with the correct Microsoft account
### Privacy and Security
* **Respecting Permissions:** Blockbrain can only access OneNote content you have permission to see
* **No Unauthorized Changes:** Blockbrain only creates, edits, or updates notes when you instruct it - no unsolicited actions
* **No Storage:** Blockbrain doesn't store copies of your notes or attachments
### Common Use Cases
**Notebook & Section Management**
* Quickly list all your notebooks and sections
* Create new notebooks for projects or personal use
* Organize sections for better information structure
**Content & Note Analysis**
* Summarize long meeting notes or research pages
* Extract action items or decisions from your notes
* Search for specific topics, keywords, or to-dos
**Resource & Documentation Access**
* Locate important project documentation in your notebooks
* Get details or links for key notes
* Browse sections for quick access to resources
### Example Conversation
**You:** "List all pages in my '2026 Planning' section"\
**Blockbrain:** "Here are your pages in the '2026 Planning' section:
* Kickoff Agenda
* Budget Overview
* Milestone Tracker
Which page would you like to view or summarize?"
**You:** "Show me the summary for 'Budget Overview'"
### Next Steps
Want to connect more services? Try the [GitHub Agent](/for-users/agents/github-agent) to manage your repositories, issues, and pull requests directly through Blockbrain.
# MS Planner Agent
Connect the MS Planner Agent to find and manage Microsoft Planner plans and tasks from chat, track plan progress, and keep your personal Microsoft To Do list up to date
### What Can You Do?
Once connected, the MS Planner Agent lets you:
* **Ask What Is On Your Plate**: Get your open, overdue, and upcoming work without opening a board
* **Get a Real Status Summary**: Ask how a plan is going and get totals, progress per bucket, what is overdue, what is due soon, and who is carrying how much
* **Create and Change Tasks**: Add a task with a bucket, due date, assignee, description, and checklist, or update one you already have
* **Use Your Plan's Own Labels**: Tag a task by the label name you see in Planner, not by a slot number
* **Read the Discussion**: Ask what the team said on a task
* **Keep Your Personal List**: Manage your own Microsoft To Do tasks, the **My Tasks** side of Planner, from the same chat
### Quick Setup
#### Step 1: Open the MS Planner Agent
1. In the left sidebar, find the **Agents** section
2. Click **"MS Planner Agent"**. If you do not see it, click **"See More"** to view the full list
3. The Agent Start Page opens, with a message box at the bottom
#### Step 2: Connect to Microsoft Planner
1. Click **"Configure"**, then click the **"Connect"** button
2. Sign in with your Microsoft work account when prompted
3. Click **"Accept"** to allow Blockbrain to work with your plans and tasks
#### Step 3: Start Asking
That's it. Try "what's overdue in the Q3 launch plan?" and the agent takes it from there.
### Two Kinds of Tasks
This is the one thing worth knowing up front, because the Planner app shows both and they behave differently.
| | **Plan tasks** | **Personal tasks** |
| ------------------------- | ---------------------------- | -------------------------- |
| Where they live | A plan and a bucket | Your own **My Tasks** list |
| Who can see them | Everyone in the plan's group | Only you |
| Can be assigned to others | Yes | No |
| Also known as | Planner tasks | Microsoft To Do |
Ask for "my tasks" and the agent shows you both, in two labelled groups. When you ask it to *create* something without saying which kind, it will ask you first, because a task in the wrong place is annoying to undo.
A task cannot be moved from one side to the other. It has to be created again.
### What You Can Ask
#### Finding Work
```
"What's on my plate this week?"
"What's overdue in the Q3 launch plan?"
"Show me everything unassigned in the Marketing plan"
"What tasks are in the Sprint bucket?"
```
#### Plan Status
```
"How is the Q3 launch plan going?"
"Give me a status summary of the Marketing plan"
"Who is carrying the most work right now?"
```
#### Creating and Changing Tasks
```
"Create a task 'Prepare demo' in the Sprint bucket, due Friday, assigned to Dana"
"Move the onboarding task to the In Review bucket"
"Mark 'Prepare demo' as done"
"Add a checklist to the launch task: draft copy, review, publish"
"Tag the launch task Urgent"
```
#### Personal Tasks
```
"What's on my personal to-do list?"
"Remind me to call the supplier on Thursday"
"Add 'book flights' to my personal tasks"
"Mark 'book flights' as done"
```
#### Plans and Buckets
```
"Create a plan called Website Refresh for the Marketing group"
"Add buckets: Backlog, In Progress, Done"
"What buckets does the Q3 plan have?"
```
### How It Works
**Nothing Changes Until You Say So**
* The agent reads freely, so questions never need approval
* Before it creates, changes, completes, or deletes anything, it restates the exact change and waits
* One confirmation covers one change. It will not slip an extra edit into something you approved
**Your Access = Blockbrain's Access**
* You see the plans of the Microsoft 365 groups you belong to, and so does the agent
* Every change is recorded under your name, exactly as if you made it in Planner
* Your permissions stay exactly the same
**Someone Else Editing at the Same Time**
* If a task changes while the agent is updating it, the agent stops, shows you the current state, and asks you to confirm again
* Nothing is silently overwritten
### Example Conversation
**You:** "How is the Q3 launch plan going?"
**Blockbrain:** "**Q3 Launch**: 24 tasks, 9 completed (38%).
**By bucket**
* Backlog: 7 tasks, 0 done
* In Progress: 10 tasks, 3 done
* In Review: 4 tasks, 3 done
* Done: 3 tasks, 3 done
**Needs attention**
* 3 overdue: Finalize pricing sheet (5 days), Book venue (2 days), Send partner brief (1 day)
* 4 due in the next week
* 2 unassigned
**Workload**: Dana 8, Sam 6, Alex 5, unassigned 2"
**You:** "Push the pricing sheet to next Monday and give it to Sam"
**Blockbrain:** "Here's the change:
**Finalize pricing sheet** (Q3 Launch, In Progress)
* Due date: Aug 14, 2026 to Aug 24, 2026
* Assignee: Dana to Sam
Shall I apply it?"
**You:** "Yes"
**Blockbrain:** "Updated **Finalize pricing sheet**. Due Aug 24, 2026, assigned to Sam, still in In Progress. That clears one of the three overdue tasks."
### Tips for Better Results
#### Name the Plan When You Have Several
**False:** "What's overdue?"\
**Correct:** "What's overdue in the Q3 launch plan?"
#### Say Which Kind of Task You Mean
**False:** "Add a task to call the supplier"\
**Correct:** "Add a personal task to call the supplier"
#### Give the Whole Task in One Go
**False:** "Make a task for the demo"\
**Correct:** "Create 'Prepare demo' in the Sprint bucket, due Friday, assigned to Dana, with a checklist for slides and rehearsal"
### Troubleshooting
**"The agent can't find my plan"**
* Planner access follows Microsoft 365 group membership, so you need to be a member of the group that owns the plan
* Ask the group owner to add you, then try again
* If you just joined, ask the agent to list your plans again. It re-reads live every time
**"It says a task changed concurrently"**
* Someone edited the same task while your change was being applied
* The agent shows you the current state. Confirm once more and it will go through
**"Assignees show as long strings of characters instead of names"**
* Your IT team needs to grant one more permission on the connection
* Send them this page. The Prerequisites card links the admin setup
**"I asked it to add a comment and it refused"**
* The agent can read a task's discussion but cannot post to it
* It will offer to put the note in the task description instead
**"It won't put something in My Day"**
* Microsoft does not let any app pin a task to My Day
* Set a due date instead, and check My Day yourself
**"The connect card keeps appearing"**
* Complete the Microsoft sign-in fully, including the **Accept** step
* If you see a message about needing administrator approval, your IT team has to consent once for the organization. This agent needs one permission that individual users cannot approve on their own
**"It worked yesterday and now everything fails"**
* Your authorization has most likely expired. Disconnect and reconnect the agent
* If that does not help, check with your IT team that your account is still licensed for Microsoft Planner
### Privacy and Security
* **Nothing Without Approval**: Blockbrain only creates or changes a task when you confirm it, never on its own
* **Your Permissions**: Access is limited to what you can normally do in Planner and Microsoft To Do
* **Your Tasks Stay Yours**: Tasks live in Microsoft Planner and Microsoft To Do. Blockbrain reads them on request and keeps no copy
* **Personal Means Personal**: Your Microsoft To Do tasks belong to you alone. They are not visible to your plan's group
### Common Use Cases
**Running a Plan**
* Open the week with a status summary instead of a board review
* Find everything overdue in one question
* Spot unassigned work before it becomes a problem
**Capturing Work**
* Turn a decision from a conversation straight into a task in the right bucket
* Build a task out with a checklist without clicking through the board
* Attach the spec or ticket link to the task that needs it
**Your Own Day**
* Keep your personal list and your plan work in the same conversation
* Set reminders in plain language
* Check what is on your plate across both without switching views
### Next Steps
Want to connect more services? Try the [Outlook Agent](/for-users/agents/outlook-agent) so your calendar and your plans can be looked at side by side.
# MS Forms Agent
Connect the MS Forms Agent to create Microsoft Forms and quizzes from a prompt, refine them in chat, collect responses, and download forms as Word documents
### What Can You Do?
Once connected, the MS Forms Agent lets you:
* **Build a Form from a Description**: Say what you need in plain language and get a complete draft form back, with questions, types, and options already worked out
* **Build a Graded Quiz**: Ask for a quiz and get point values and a marked answer key, graded automatically by Microsoft Forms
* **Use Your Own Material**: Ground a form or quiz in your knowledge bases so the questions come from your organization's own documents
* **Refine Before Anything Is Created**: Change wording, add or remove questions, adjust options and points, all while the form is still just a draft in the chat
* **Read and Summarize Responses**: Ask what people answered, and get themes and counts instead of a spreadsheet
* **Download as Word**: Export any form, including one you have not created yet, as a Word document
### Quick Setup
#### Step 1: Open the MS Forms Agent
1. In the left sidebar, find the **Agents** section
2. Click **"MS Forms Agent"**. If you do not see it, click **"See More"** to view the full list
3. The Agent Start Page opens, with a message box at the bottom
#### Step 2: Connect to Microsoft Forms
1. Click **"Configure"**, then click the **"Connect"** button
2. Sign in with your Microsoft work account when prompted
3. Click **"Accept"** to allow Blockbrain to work with your forms
#### Step 3: Start Building
That's it. Describe the form you want and the agent drafts it for you.
### What You Can Ask
#### Drafting a Form
```
"Create a feedback form for our customer training day"
"Make a short survey about how people are finding the new intranet"
"Build a form to collect travel requests, with a date and a cost estimate"
```
#### Building a Quiz
```
"Create a 5 question quiz on our information security policy, 10 points each"
"Turn this into a graded quiz with the correct answers marked"
"Make a knowledge check based on the onboarding documents in my knowledge base"
```
#### Finding and Updating Forms
```
"List my forms"
"Add a comments question at the end of my training feedback form"
"Change question 3 of my onboarding quiz to allow multiple answers"
```
#### Reading Responses
```
"How many people have responded to my training feedback form?"
"Summarize the responses to my intranet survey"
"What are the most common complaints in the feedback responses?"
```
#### Downloading as Word
```
"Export this form as a Word document"
"Give me the quiz as a document I can print"
```
### How It Works
**Nothing Is Created Until You Say So**
* The agent shows you a full draft in the chat first, as a numbered list of questions
* You can change anything about it while it is still a draft
* A real form is only created once you explicitly approve, for example by saying "create it" or "looks good"
**The Form Belongs to You**
* Forms are created in your own Microsoft Forms account, under your name
* You get two links back: a **respondent link** to share, and an **edit link** that opens the form in Microsoft Forms for fine-tuning
* Everything you can do in Microsoft Forms afterwards still works normally
**Your Access = Blockbrain's Access**
* Blockbrain can only see and change forms you can see and change
* Your permissions stay exactly the same
* All access is logged in your organization's audit trail
### Example Conversation
**You:** "Create a short feedback form for our onboarding week"
**Blockbrain:** "Here's a draft:
**Onboarding Week Feedback**
1. How would you rate onboarding week overall? (rating, 5 levels, required)
2. Which sessions were most useful? (choice, multiple selection: Welcome, Systems setup, Team introductions, Product overview)
3. What would you change? (long text)
Shall I create this?"
**You:** "Add a question asking which team they joined, and make question 3 required"
**Blockbrain:** "Updated:
**Onboarding Week Feedback**
1. How would you rate onboarding week overall? (rating, 5 levels, required)
2. Which team did you join? (short text, required)
3. Which sessions were most useful? (choice, multiple selection: Welcome, Systems setup, Team introductions, Product overview)
4. What would you change? (long text, required)
Shall I create this?"
**You:** "Yes, create it"
**Blockbrain:** "Created **Onboarding Week Feedback**.
* Share with respondents: `https://forms.office.com/Pages/ResponsePage.aspx?id=...`
* Edit in Microsoft Forms: `https://forms.office.com/Pages/DesignPageV2.aspx?...`
Would you like this as a Word document too?"
### Tips for Better Results
#### Say Who It Is For and Why
**False:** "Make a form"\
**Correct:** "Make a form to collect session feedback from people who attended our onboarding week"
#### Name the Question Types You Want
**False:** "Ask about their experience"\
**Correct:** "Ask them to rate their experience out of 5, then a long text question for comments"
#### Point at Your Own Material for a Quiz
**False:** "Make a security quiz"\
**Correct:** "Make a 5 question quiz based on our information security policy in my knowledge base, 10 points per question"
### Troubleshooting
**"The agent says it cannot build that question type"**
* Ranking, Likert, Net Promoter Score, and file-upload questions are not available yet
* The agent will suggest the closest thing it can build, usually a choice or rating question
* You can always create the form, then add the unsupported question yourself using the edit link
**"I asked for a quiz but the form is not graded"**
* Quiz mode is set when the form is created and cannot be switched on afterwards
* Ask the agent to create a new quiz instead
* For a choice question to be graded it needs correct answers, not just points
**"Points were rejected"**
* Microsoft Forms only accepts whole numbers, from 0 to 100
* Ask for "10 points" rather than "2.5 points"
**"I can't find the form that was created"**
* Go to `https://forms.office.com` signed in with the same work account you connected
* Use the edit link from the chat, which opens the form directly
**"The connect card keeps appearing"**
* Complete the Microsoft sign-in fully, including the **Accept** step
* If it still appears, contact your IT team. The integration may need a configuration change
**"It worked yesterday and now everything fails"**
* Your authorization has most likely expired. Disconnect and reconnect the agent
* If that does not help, check with your IT team that your account is still licensed for Microsoft Forms
### Privacy and Security
* **Nothing Without Approval**: Blockbrain only creates or changes a form when you tell it to, never on its own
* **Your Permissions**: Access is limited to what you can normally do in Microsoft Forms
* **Your Forms Stay Yours**: Forms and responses live in Microsoft Forms. Blockbrain reads them on request and keeps no copy
* **Temporary Downloads**: Word documents are served through a link that expires after one hour
### Common Use Cases
**Surveys and Feedback**
* Collect feedback after an event, training, or release
* Run a short pulse survey and summarize the results in the same chat
* Find the recurring themes across many free-text answers
**Quizzes and Knowledge Checks**
* Turn a policy document into a graded quiz
* Build a recurring knowledge check for new joiners
* Adjust points and correct answers by asking, rather than clicking through the editor
**Working with Existing Forms**
* Find a form you made months ago and check how many responses it has
* Add a question to a form that is already collecting answers
* Export a form to Word for review or sign-off before you share it
### Next Steps
Want to connect more services? Try the [GitHub Agent](/for-users/agents/github-agent)to analyze the response data you collect in your own workbooks.
# GitHub Agent
Connect the GitHub Agent to manage your repositories, pull requests, issues, and workflows directly through Blockbrain's AI assistant
### What Can You Do?
Once connected, the GitHub Agent lets you:
* **Browse Repositories**: List and explore your personal and organization repositories, view files and branches
* **Manage Pull Requests**: List, review, and create pull requests — including viewing comments, reviews, and commit history
* **Handle Issues**: Manage issue assignees and labels across your projects
* **Monitor Workflows**: List, trigger, and track GitHub Actions CI/CD workflows
* **Search Code**: Find specific code across your repositories and organizations
### Quick Setup
#### Step 1: Select GitHub Agent
In any Blockbrain chat, click the AI Models selection dropdown. Click **Show detailed AI model list**. Find and click **GitHub Agent**. Look for **Configure** under the Status column.
#### Step 2: Connect to GitHub
Click **Configure**. Click the **Connect** button. Sign in with your GitHub account when prompted. Review the permissions Blockbrain is requesting and click **Authorize** to grant access.
#### Step 3: Start Using GitHub
You're ready! Now you can ask Blockbrain to help with your repositories, pull requests, issues, and workflows.
### What You Can Ask
#### Browsing Repositories
```
"List all my GitHub repositories"
"Show me the repositories in our organization"
"What branches exist in the main project repo?"
"Show me the contents of the README file in the docs repo"
```
#### Pull Request Management
```
"List all open pull requests in the backend repo"
"Show me the review comments on PR #42"
"What's the commit history for PR #15?"
"Create a pull request from feature-branch to main"
```
#### Issue Assignees and Labels
```
"Who can be assigned to issues in the frontend repo?"
"Assign the login bug issue to Maria"
"Add the 'urgent' label to issue #7"
"Remove the 'wontfix' label from issue #12"
```
#### Workflow Monitoring
```
"What CI/CD workflows are set up in the backend repo?"
"Show me the recent workflow runs for the deploy pipeline"
"What's the status of the latest build?"
"Trigger the staging deployment workflow"
```
#### Code Search
```
"Search for 'authentication' across all our repositories"
"Find where the API key validation is implemented"
"Search for files containing 'database migration' in the backend repo"
```
### How It Works
**Your Account = Blockbrain's Access**
* Blockbrain uses your GitHub permissions — you can only access repositories and data you normally have access to
* Actions like creating pull requests or triggering workflows are performed under your GitHub identity
**Smart Assistance**
* The AI helps navigate complex repositories and find relevant information quickly
* Automatically retries if a request fails, adjusting parameters as needed
* Confirms actions before executing write operations like creating PRs or triggering workflows
### Tips for Better Results
#### Repository Tips
* Be specific about which repository: *"List PRs in the **backend** repo"* instead of just *"List PRs"*
* Include the organization name if needed: *"Show repos in the **acme-corp** organization"*
* Specify branches when relevant: *"Show me the contents of config.yaml on the **develop** branch"*
#### Pull Request Tips
* Include the PR number when asking about a specific PR: *"Show comments on **PR #42**"*
* Mention the repository: *"Create a PR in the **frontend repo** from feature-login to main"*
* Specify what you want to see: *"Show me the **reviews** for PR #15"* vs. *"Show me the **commits** for PR #15"*
#### Workflow Tips
* Name the workflow: *"Trigger the **deploy-staging** workflow"*
* Ask for status with context: *"What's the status of the **last 5 runs** of the CI pipeline?"*
* The agent will check workflow inputs before triggering and ask for your confirmation
### Troubleshooting
#### "Can't see my repositories"
* Check if you can access the repository directly on GitHub
* Verify your GitHub connection is active under the agent settings
* Try reconnecting by clicking **Configure** again
#### "Permission denied" errors
* Your GitHub permissions may not include the requested action
* Some organizations require admin approval for OAuth apps — check with your GitHub organization admin
* Verify you're connected with the correct GitHub account
#### "Workflow trigger failed"
* Make sure the workflow supports manual dispatch (`workflow_dispatch` trigger)
* Check that you have permission to trigger workflows in the repository
* Verify the required inputs for the workflow are provided correctly
#### "Can't find code or files"
* Try using more specific search terms
* Verify the repository exists and you have access to it
* Check if the file path or branch name is correct
### Privacy and Security
#### What Blockbrain Can Do
* Read your repositories, branches, and file contents
* List and create pull requests on your behalf
* View and manage issue assignees and labels
* List and trigger GitHub Actions workflows
* Search code across your accessible repositories
#### What Blockbrain Cannot Do
* Access private repositories you don't have permission to view
* Delete repositories, branches, or files
* Change repository settings, webhooks, or GitHub Apps
* Access other users' private data or repositories
* Bypass organization-level access restrictions
#### Safety Features
* Pull requests and actions are performed under your GitHub identity
* Workflow triggers require your explicit confirmation
* You can revoke access anytime under the GitHub Agent settings
### Common Use Cases
#### Development Workflow
* **PR Reviews**: Quickly check the status and feedback on your pull requests
* **Code Discovery**: Find implementations or patterns across multiple repositories
* **Branch Management**: View branches and create references for new features
#### Project Oversight
* **Repository Browsing**: Navigate organization repos and understand project structure
* **Issue Management**: Assign team members to issues and organize work with labels
* **CI/CD Monitoring**: Track build and deployment status across workflows
#### Team Collaboration
* **Pull Request Creation**: Create PRs with proper base and head branches
* **Review Tracking**: See who reviewed what and what feedback was given
* **Workflow Automation**: Trigger deployments or test runs directly from the chat
### Example Conversation
**You:** "Show me all open pull requests in the backend repository"
**Blockbrain:** "Here are the open pull requests in the backend repository:
| # | Title | Author | Status |
| ------ | ---------------------------------- | ------ | ---------------------------- |
| PR #42 | Add user authentication middleware | sarah | 2 reviews, changes requested |
| PR #38 | Update database migration scripts | tom | 1 review, approved |
| PR #35 | Fix rate limiting on API endpoints | maria | Awaiting review |
Would you like to see details, reviews, or comments for any of these?"
**You:** "Show me the reviews for PR #42"
**Blockbrain:** "PR #42 has 2 reviews:
1. **John** (Changes Requested): 'The middleware looks good overall, but the token validation should handle expired tokens gracefully. See my inline comments on auth.ts.'
2. **Lisa** (Commented): 'Nice approach! One suggestion — could we add rate limiting to the auth endpoint as well?'
Would you like me to show the commit history or the inline comments?"
### Next Steps
Want to connect more services? Try the [Salesforce Agent](/for-users/agents/salesforce-agent) to manage your leads contacts, and accounts directly through Blockbrain.
# Salesforce Agent
Connect the Salesforce Agent to access your CRM data - leads, contacts, accounts, and more - directly through Blockbrain's AI assistant.
### What Can You Do?
Once connected, the OneNote Agent lets you:
* **Find & Browse Records**: Search for accounts, contacts, leads, and any other Salesforce object by name or criteria
* **Read & Analyze CRM Data**: Get summaries, extract key details, or ask questions about specific records
* **Create & Update Records**: Add new leads, contacts, or accounts — and update existing records with new field values
* **Manage Sales Operations**: Track opportunities, manage pipelines, and keep your CRM data accurate and up to date
* **Discover Salesforce Objects**: Automatically resolve object names (standard or custom) to ensure every action targets the right data
### Quick Setup
#### Step 1: Select Salesforce Agent
1. In any Blockbrain conversation, click the **AI Model selection** dropdown
2. Click **"Show detailed AI model list"**
3. Find and click **"Salesforce Agent"**
4. Look for **"Configure"** next to the *Salesforce Tools* section
#### Step 2: Connect to Salesforce
1. Click **"Configure"**
2. Click the **"Connect"** button
3. Sign in with your Salesforce account when prompted
4. Click **"Accept"** to allow Blockbrain to access your Salesforce data
#### Step 3: Start Using Salesforce
That's it! You can now ask Blockbrain to search, create, and update records across your entire Salesforce CRM.
### What You Can Ask
#### **Finding & Browsing Records**
```
"Show me all open leads created this month"
"Find the account for Acme Corporation"
"List all contacts associated with the TechCorp account"
```
#### **Reading & Analyzing CRM Data**
```
"Summarize the details for lead John Smith"
"What is the current status of our deal with GlobalTech?"
"Give me an overview of all opportunities closing this quarter"
```
#### **Creating Records**
```
"Create a new lead for Sarah Connor at Cyberdyne Systems"
"Add a new account for Initech with industry set to Technology"
"Create a contact called James Brown linked to the Acme account"
```
#### **Updating Records**
```
"Update the phone number for contact Jane Doe to +1 555 000 1234"
"Change the lead status for John Smith to 'Working'"
"Set the close date on the GlobalTech opportunity to June 30"
```
#### **Managing Sales Operations**
```
"Show all opportunities in the Negotiation stage"
"Which leads have not been contacted in the last 30 days?"
"List all accounts in the Financial Services industry"
```
### How It Works
**Your Access = Blockbrain's Access**
* Blockbrain can only see Salesforce records you have permission to access
* If a record is restricted in Salesforce, Blockbrain cannot retrieve it either
* Your existing Salesforce permissions are always respected
**Safe and Secure**
* Your data stays in Salesforce — Blockbrain never stores copies of your records
* Records are only created or modified when you explicitly instruct it — no unsolicited changes
* All activity follows your organization's Salesforce access controls
### Tips for Better Results
#### **Be Specific About the Object**
**False:** "Find that company"\
**Correct:** "Find the Salesforce account for Acme Corporation"
#### **Include Field Details When Creating or Updating**
**False:** "Create a lead"\
**Correct:** "Create a lead for John Smith, email , company Initech, status Open"
#### **Mention Status or Stage When Filtering**
**False:** "Show me deals"\
**Correct:** "Show me all opportunities in the Proposal stage closing before December"
### Troubleshooting
**"Record not found"**
* Confirm the record exists and is visible directly in Salesforce
* Try using a different identifier (full name, email, or account name)
* The record may be in a restricted object or sharing rule you don't have access to
**"Connection failed" or "Authorization error"**
* Wait 2–10 minutes after creating the Salesforce app, then try again
* Double-check that the Consumer Key, Consumer Secret, and Scopes were entered correctly in Blockbrain
* Try reconnecting by going to **Admin** > **Agents** > **Tools** > **Salesforce Tools**
**"No objects or fields found"**
* Your Salesforce profile may not have API access enabled
* Contact your Salesforce administrator to verify your API and object permissions
* Ensure the OAuth scopes were saved correctly during setup
**"Field could not be updated"**
* Some Salesforce fields are read-only and cannot be modified via API
* Blockbrain automatically skips read-only fields — check if the field you want to update is editable in Salesforce directly
### Privacy and Security
* **Respecting Permissions**: Blockbrain only accesses records your Salesforce user is permitted to see
* **No Unauthorized Changes**: Records are only created, updated, or modified when you explicitly request it
* **No Storage**: Blockbrain does not store copies of your Salesforce records, fields, or attachments
* **Secure Credentials**: Your Consumer Key and Secret are stored encrypted and used solely for authentication
### Common Use Cases
**Lead & Contact Management**
* Search for leads and contacts by name, email, or company
* Create new leads directly from a conversation
* Update contact details or lead status without opening Salesforce
**Opportunity & Pipeline Tracking**
* Get a snapshot of your current pipeline by stage
* Identify deals at risk or closing soon
* Update opportunity stages, close dates, or amounts on the fly
**Account Research**
* Pull up full account details before a client meeting
* List all contacts and open opportunities tied to an account
* Identify accounts by industry, region, or owner
### Example Conversation
**You:** "Show me all leads created this week that haven't been contacted yet"\
**Blockbrain:** "Here are this week's leads that haven't been contacted yet:
* **Sarah Connor** - Cyberdyne Systems -Created: Apr 15
* **Miles Dyson** - Cyberdyne Research - Created: Apr 16
* **John Connor** -Resistance Inc. - Created: Apr 17
Would you like to update their status, assign them to a rep, or get more details on any of these?"
### Next Steps
Want to connect more services? Try the [Atlassian Agent](/for-users/agents/atlassian-agent) to manage your Jira projects, track issues, and access Confluence content directly through Blockbrain.
# Agent Memory
Agents in Blockbrain can now remember you. When you tell an agent something worth keeping — your role, a project you are working on, how you like answers formatted — it can save that as a memory and use it in later conversations, with any agent, without you repeating yourself. You decide whether memory is on, you can see everything it holds, you can add to it, correct it, delete single memories or wipe it entirely.
Memory is switched on for your organisation by Blockbrain. If you do not see **Memory** in your account menu, it is not yet enabled for your organisation — contact your Blockbrain Customer Success Manager.
### Where to find it
Open your account menu from your avatar in the top-right corner. **Memory** sits in the list of account entries, below API Access.
{% embed url="" %}
The Memory window has four parts: the on/off switch, an import option, the link to view and manage your memories, and two fields that shape how every agent talks to you — what agents should call you, and your standing instructions.
### Turning memory on and off
**Reference saved memories** is your personal switch. When it is on, agents may save memories from your conversations and use them when responding. When it is off, agents stop saving new memories, stop using the ones you already have, and can no longer look anything up in your memory — but your stored memories are kept until you delete them, so you can switch memory back on later without losing anything.
The switch is yours alone: it controls memory for your account, not for anyone else. It covers agent memory only. It does not change the knowledge bases, files or data rooms a bot or agent is connected to — those are shared content, not memory about you.
### What agents remember
Memory is meant for durable facts about you, not a transcript of your chats. There are three ways a memory is created:
* **Learned from chats.** At the end of a conversation turn, the platform picks out facts worth keeping — who you are, what you are working on, preferences and standing instructions you have stated — and stores them. Casual content that will not matter next week is skipped.
* **Asked of the agent.** Tell an agent directly: “Remember that I lead the procurement team” or “Forget that I still report to the sales team”. The agent saves or removes the memory and tells you it has done so. If a request to forget matches several memories, the agent asks which one you mean rather than deleting blindly.
* **Added by you.** Type a fact into the **Add or update a memory** box in Manage memory, or import what another AI assistant already knows about you (see below).
Memories are only captured from your own interactive chats. Automated runs — workflows, scheduled messages — do not read or write your memory, and assistants embedded in websites or apps do not use it either. Your memories are private to you: they are not shared with other people in your organisation, and a memory written in one conversation is never visible to another user.
### How agents use memory
Every time you send a message, the agent receives two things in the background: a short profile of you, and the handful of stored memories most relevant to what you just asked. It treats both as background — what you write in the conversation always takes priority. If a question needs more than that, the agent can also search your memory directly, the same way it would search a knowledge base.
You can always see what was used. When a reply drew on your memory, the sources panel of that message gains a **From memory** section. Each entry shows whether it is a saved memory or a past chat, when it was captured, and where it came from: memories you typed are marked **Added manually**, memories learned from a conversation show that conversation’s title, and clicking one opens that chat at the message it came from.
### Nickname and instructions for agents
Two fields in the Memory window apply to every agent, across all your chats, from the moment you save them — no learning period needed:
* **What should agents call you?** — a nickname the agents use when addressing you.
* **Instructions for Agents** — tell the agents how to respond: your preferences, role and context, in your own words. “Answer in German, keep it short, I am a controller and care about numbers” is a good example.
Press **Save** after editing either field. If you are new to memory, these two fields are the quickest way to get personal answers today; the learned memories build up over time.
{% embed url="" %}
### Viewing and managing your memories
Click **View and manage memory** to open **Manage memory**. The top of the window shows *the profile the agents see*: a short text with an **Overview** of you, a **Top of mind** section for what you are currently working on, and further sections by topic. It is generated from your stored memories, written in the language you mostly chat in, and is read-only here — to change it, change the memories underneath it. It is refreshed about once a day, and rebuilt straight away when you add or delete a memory yourself (a rebuild takes under a minute, so reopen the window if the text has not caught up yet).
#### Adding or correcting a memory
Type a fact into **Add or update a memory…** and press the arrow. The box does two jobs: if the fact is new it is added; if it contradicts or restates something already stored (“I moved to the Munich office” after “I work in the Berlin office”), the old memory is replaced immediately, so a correction takes effect in your next message rather than after the next refresh. Typing something with no fact in it returns “Nothing to remember in that text”; a fact you already have returns “You already have that memory saved”.
#### Stored memories
Below the profile, **Stored memories** lists every memory in two tabs, each with a live count so nothing is hidden:
| Tab | What it holds |
| ---------------------- | ------------------------------------------------------------------------------------------------------------------------------------------------------------------------------ |
| **Added by you** | Memories you typed into the box, asked an agent to remember, or imported from another AI assistant. This tab opens first, so you can always check what you deliberately added. |
| **Learned from chats** | Everything the platform captured automatically from your conversations. |
Use the bin icon on any row to delete that single memory. The profile rebuilds right away.
#### Deleting everything
**Delete all memories** at the bottom of the list removes everything memory holds about you: every stored memory, the profile, your nickname and your instructions. It cannot be undone. Your **Reference saved memories** setting stays as it is, and you can wipe your memory even while the setting is off.
### Importing memory from another AI assistant
If you have used ChatGPT, Claude or Gemini for a while, that assistant already knows a lot about you. You can bring that over instead of starting from zero:
1. In the Memory window, click **Import** next to *Import memory from other AI providers*.
2. Copy the prompt shown in step 1 and paste it into a chat with your other AI assistant. The prompt asks it to export everything it has stored about you — instructions, facts, preferences and lasting context.
3. Paste the assistant’s answer into the box in step 2 and click **Add to memory**.\
\
`Export everything you have stored about me in memory.`
`Rules:`
* `Only include what is actually saved in your memory or custom instructions. Do not infer, summarise our current chat, or invent anything.`
* `If a category is empty, skip it.`
* `Output plain text only, no commentary before or after.`
`Group it like this:`
#### `About me`
`Role, employer, location, languages, anything else stored about who I am.`
#### `Work and projects`
`Ongoing projects, teams, tools, systems I work with.`
#### `How I like answers`
`Tone, length, format, language, and any standing instructions I have given you.`
#### `People and context`
`People, products or terms you have stored that are specific to me.`
#### `Other`
`Anything saved that does not fit above.`
`Write each item as a single short line, one fact per line.`
The import runs in the background; you can close the window. The platform extracts individual facts from the pasted text, stores them as memories in the **Added by you** tab, skips duplicates of things you already have, and refreshes your profile. One import runs at a time, and there is a daily limit on imports.
{% embed url="" %}
### Memory and your compute blocks
Saving, recalling and consolidating memories uses AI processing, and that usage counts towards your compute blocks like any other activity. If you reach your compute-block limit, memory pauses with the rest of the platform: imports and manual additions are declined with the usual limit message, background learning skips your turns, and agents answer without recalled memories until your limit resets. Nothing already stored is lost.
### Tips
* Say it plainly. “Remember that…” and “Forget that…” are understood by every agent.
* Use **Instructions for Agents** for standing preferences (language, tone, format). Use memories for facts (role, projects, tools you use).
* Correct, do not accumulate. Adding the updated fact replaces the outdated one; you do not need to delete first.
* Check the profile now and then. It is the shortest way to see what agents assume about you.
* Working in a shared or test account? Turn **Reference saved memories** off there, so that account does not build a profile from several people.
### Troubleshooting
| Symptom | What to do |
| --------------------------------------------------------- | -------------------------------------------------------------------------------------------------------------------------------------------------------------------------------------------------------------------- |
| Memory is not in my account menu | Memory is not yet enabled for your organisation. Ask your administrator or Blockbrain Customer Success Manager. |
| The agent did not remember something I said | Check that **Reference saved memories** is on. Only durable facts are captured automatically; if something matters, tell the agent to remember it, or add it in Manage memory. |
| I added a memory but the profile has not changed | The profile rebuilds in the background and can take up to a minute. Close and reopen Manage memory. The memory itself is already in use by agents. |
| I switched memory off but the agent still knows something | Memory off stops saving and recalling across conversations. Within a single conversation the agent still sees everything said earlier in that chat, which is not memory. |
| I want to remove one thing the agent knows | Open Manage memory, find it under **Added by you** or **Learned from chats**, and use the bin icon. Or tell the agent “Forget that…”. |
| An import did nothing | If the pasted text contained no facts, or only facts you already had, nothing new is added. Check that you pasted the assistant’s answer, not the prompt. One import runs at a time and imports are limited per day. |
# Regenerate a Response
### Overview
The **Regenerate** feature allows you to refine, adjust, or completely regenerate any response from the AI directly within your chat. Whether you need more detail, a simpler answer, or want to try a different AI model, the regeneration options give you full control over the output — without resending your original message.
***
### Where to Find the Regenerate Button
The **Regenerate** button is located in the **message toolbar** that appears beneath each AI response in your chat.
1. Open a chat with any Knowledge Bot.
2. Send a message and wait for the AI to generate a response.
3. Look at the **bottom of the AI response** — you will see a toolbar with action icons.
4. The **Regenerate** icon is displayed within this toolbar alongside other message actions (e.g., copy, like, dislike).
5. Click the **Regenerate** icon to open the regeneration options menu.
> 💡 **Tip:** The Regenerate icon is only available on AI responses — it does not appear on your own messages.
***
### Regeneration Options
When you click the **Regenerate** icon on an AI response, an options menu appears with the following choices:
| Option | Description |
| ----------------------- | -------------------------------------------------------------------------------------------------------- |
| **Custom Prompt** | Type a custom instruction describing how the response should be improved. |
| **Regenerate** | Regenerate the entire response from scratch using the same settings. |
| **Add More Details** | Regenerate the response with additional depth and elaboration. |
| **Simplify** | Regenerate a shorter, more concise version of the response. |
| **Web Search** | Regenerate the response using a live web search to incorporate up-to-date information from the internet. |
| **Regenerate with LLM** | Choose a different AI model (LLM) from a list and regenerate the response using that model. |
***
### How to Regenerate a Response
#### Option 1: Regenerate with a Custom Prompt
1. Click the **Regenerate** icon on the AI response.
2. Select **Custom Prompt**.
3. Type your instruction describing how the response should be improved (e.g., *"Focus more on the pricing comparison"* or *"Rewrite in a more formal tone"*).
4. Submit your prompt.
5. The improved response replaces the original in the chat.
#### Option 2: Quick Regenerate
1. Locate the **Regenerate** icon displayed on the AI response you want to regenerate.
2. Click the **Regenerate** icon. The options menu opens.
3. Select **Regenerate** to regenerate the full response with the same settings.
4. A loading indicator appears while the new response is being generated.
5. The regenerated response replaces the original in the same position within the chat.
#### Option 3: Add More Details
1. Click the **Regenerate** icon on the AI response.
2. Select **Add More Details**.
3. The AI regenerates the response with expanded explanations and additional context.
#### Option 4: Simplify
1. Click the **Regenerate** icon on the AI response.
2. Select **Simplify**.
3. The AI regenerates a shorter, more concise version of the response.
#### Option 5: Regenerate with Web Search
1. Click the **Regenerate** icon on the AI response.
2. Select **Web Search**.
3. The AI performs a live web search on the topic and regenerates the response using up-to-date online sources.
#### Option 6: Regenerate with a Different LLM
1. Click the **Regenerate** icon on the AI response.
2. Select **Regenerate with LLM**.
3. A list of available AI models appears.
4. Select the LLM you want to use for the regeneration.
5. The response is regenerated using the selected model and replaces the original.
***
### Switching Between Response Versions
After you regenerate a response, you can navigate between all generated versions of that response.
1. Look for the **version indicator** displayed on the response (e.g., *"Version 2 of 3"*).
2. Use the **navigation arrows** to switch between available versions.
3. The chat always displays the currently selected version.
> **Note:** All previously generated versions are preserved. You can switch back to any earlier version at any time.
# Word Add-in – Quick Tour
A walkthrough of the May 2026 update: bookmarks panel, AI suggestions with comments, model picker, chat history, and file upload — all inside Microsoft Word.
## Overview
The Blockbrain Word Add-in brings your AI workspace into Microsoft Word. With the document open you can chat about it, ask the model to **suggest edits, accept suggestions with or without a tracked comment, switch between models, browse past conversations, and attach files** — all without leaving Word.
This guide covers the features visible in the latest update: summarizing and editing documents, selecting AI models and bots, using Insights and Knowledge Bases, uploading files and contributing knowledge to your Blockbrain system.
## What you'll need
• Microsoft Word for Microsoft 365 (desktop or web) signed in with your work account.
• The Blockbrain for Microsoft 365 Add-in installed and the user signed in.
• A document open in Word that you want to discuss or edit with the AI.
## 1. Opening the add-in
Once the add-in is installed, open any Word document. The Blockbrain panel appears on the right-hand side of the Word window. The panel has its own title ("Bookmarks for Microsoft 365") and stays in sync with the document you are working on.
Use the chevron at the top of the panel to expand or collapse it. The panel can stay open while you scroll, edit, or switch documents.
## 2. Initiate all actions from the add-in sidepanel
In the add-in the right-hand panel is your home base for everything the add-in does. From here you can analyze or summarize a document, start new chats, edit and add paragraphs, pull in or store content in the Knowledge Management-infrastructure.
## 3. AI Suggestions on selected text
Highlight any text in the document and ask the assistant to refine, rewrite, condense, or extend it. The assistant returns a suggested change in the side panel, and you can apply it directly to the document with one click.
### 3.1 Generate a suggestion
Select the paragraph or phrase you want the AI to work on. In the side panel, type your instruction (e.g. "Tighten this paragraph" or "Rewrite for a non-technical audience") and submit. The panel displays the proposed change next to the original.
### 3.2 Review and apply the suggestion
The Suggestion panel shows what will be inserted, replaced, or removed. Use Apply to accept the change. The change is written directly back into the document and the panel updates with a confirmation ("Apply").
### 3.3 Apply with a tracked comment
If you want to leave a note alongside the change — for reviewers, or as a reminder to yourself — choose Apply with comment. A small dialog opens for your comment text; the comment is attached to the modified passage so it shows up in the Word review pane.
Choose Apply without comment if you only want the edit and not the annotation. Both options apply the change immediately.
### 3.4 Track what has been applied
After applying, the side panel keeps a running tally of suggestions you've accepted, so you can audit changes during longer editing sessions.
## 4. Choosing an AI model
Different tasks suit different models. The AI Model Selection screen lets you pick the model that will power the assistant in the current chat. The selector at the top of the add-in lists all models that have been approved for use with the selected bot.
**Tip:** pick a fast, lightweight model (Haiku, Flash) for short rewrites and a more capable model (Opus, Sonnet, GPT 5) for long-form drafting or analysis. Smart Routing is a good default if you are unsure.
## 5. BB Chat history sidebar
Open BB Chat from the panel to see your conversation history with Blockbrain — both document-specific and general chats. Each entry shows the chat title (e.g. "Clean Energy and Industrial Sec…", "Project Roadmap and Timeline…"), and selecting one reopens that conversation alongside the current document.
Use New Chat at the top of the list to start a fresh thread. The search box helps you find a specific past chat by keyword.
You can also make use of the sidebar to select any of the approved bots on your system.
## 6. Attaching files to a chat
You can give the assistant additional context by uploading a file. From the chat panel, choose the upload action — a native file picker opens labelled "Choose file to upload to 'Blockbrain for Microsoft 365' add-in". Pick any file from your computer (PDFs, slides, spreadsheets, additional Word docs, images, and so on).
Once uploaded, the assistant can reference the attached file in the conversation, summarize it, compare it against the document you have open, or quote passages from it.
## 7. Recommended working patterns
#### Drafting and refining
Write your first draft, then walk through it section by section. Highlight a paragraph, ask for a rewrite, and either accept or refine the suggestion. Use Apply with comment when collaborating so reviewers can see why a passage changed.
#### Document Q\&A
For complex documents (policy papers, contracts, reports), use the chat panel to ask questions instead of searching manually. Bookmark the most useful answers — they become a curated, document-linked reference.
#### Cross-document research
Upload supporting files to the chat so the assistant can reason across the open document and the attachments. This is useful for comparison, citation hunting, and gap analysis.
## Troubleshooting and tips
* **Panel not visible:** Re-open the add-in from Word's Home ribbon → Add-ins → Blockbrain for Microsoft 365. The panel docks on the right by default.
* **No model response:** Check the AI Model Selection screen — if a model is rate-limited, switch to another one or select Smart Routing.
* **Suggestion did not apply:** Make sure the original selection still exists in the document. If the text was edited after the suggestion was generated, regenerate the suggestion against the new selection.
* **Lost a chat:** Use the search box in the BB Chat sidebar to look up a previous chat by keyword from its title or contents.
# Troubleshooting
Encountering issues with a bot? This guide is here to help and provides solutions to common problems, ensuring you can quickly resolve any issues and maintain smooth operation.
## Problem-Solving Process
When encountering issues with the Blockbrain Knowledgebots, please follow this escalation path for efficient problem resolution:
### 1. Self-Help Resources
First, try to resolve the issue independently using these resources:
* **Blockbrain User Guide**
* Check error messages and common problems
* Review step-by-step solutions
* Follow recommended fixes
* **Blockbrain User Guide Bot**
* Ask direct questions
* Get immediate automated responses
* Access specific problem-solving guidance
{% hint style="info" %}
You can find the Blockbrain User Guide Bot as a Default Bot on your Dashboard.
{% endhint %}
### 2. Internal Support
If self-help resources don't resolve your issue, escalate internally:
1. **Contact Your Company Builder**
* Share detailed problem description
* Provide relevant screenshots
* Explain steps already taken
2. **Consult Your Company Admin**
* Escalate if Builder cannot resolve
* Provide previous communication history
* Detail all attempted solutions
### 3. Blockbrain Expert Support
The Blockbrain team is always here to help with complex issues that couldn't be resolved through other channels. Feel free to reach out when:
* You've explored self-help resources and internal support options
* Your Company Admin recommends escalation
* You need specialized expertise for your specific case
Our dedicated team will be happy to assist you with:
* In-depth technical analysis
* Custom solutions
* Expert guidance
{% hint style="warning" %}
This structured approach helps us provide you with the fastest and most effective support possible. While our team is always ready to help, many issues can be resolved quickly through self-help or internal support channels, saving you valuable time.
{% endhint %}
## Common Chat Room Troubles and Solutions
#### Why is the bot not giving me the desired answers?
Sometimes, your AI assistant might not provide the answers you're looking for. While this can be frustrating, it's often easily remedied. In this section, we'll explore the most common reasons why a bot might not give desired answers and offer practical solutions.
Whether it's issues with the knowledge base, query formulation, or bot settings - we'll help you identify the cause and optimize your AI assistant. Let's work together to ensure your bot reaches its full potential and delivers the precise, relevant answers you need.
### 1. Data Room Selection
**Problem:**
* Receiving irrelevant or incomplete answers
* Not getting context-specific information
**Solution:**
* Select the appropriate data room for your query
**Why Data Rooms Matter:**
* Each data room contains specific knowledge bases
* Enables more accurate and relevant responses
* Helps organize information by topics or departments
* Ensures data privacy and access control
* Improves response quality through focused context
### 2. Web Search Feature
**Problem:**
* Web search running for every query when not needed
* Slower response times due to web searching
* Too much external information in responses
**Solution:**
* Toggle Web Search feature on/off at the bottom of the chat field
* Enable only when you need current information
* Disable for queries that only require internal knowledge
**About Web Search:**
* Enhances responses with current web information
* Useful for up-to-date topics and external references
* Can be selectively used based on query needs
### 3. Prompting: A (very) Quick Guide
1. **Length Matters**
* **Too long:** Prompts that are too long can confuse the AI or exceed token limits, potentially leading to incomplete or inaccurate responses.
* **Too short:** Prompts that are too short may lack the necessary context, making it difficult for the AI to understand your request fully.
* **Aim for concise yet informative prompts:** To get the best results, aim for prompts that are concise yet informative, striking a balance between providing enough context and keeping the query focused and manageable.
2. **Keep It Simple**
* **Avoid using overly complex or nested prompts**, as these can confuse the AI and lead to unclear or inaccurate responses.
* **Break down complex queries** into smaller, more manageable parts. This approach allows the AI to process each component of your request more effectively, resulting in clearer and more accurate answers.
3. **Provide Sufficient Context**
* When crafting your prompt, be sure to **include relevant background information** that provides context for your query. This helps the AI understand the full scope of your request.
* Additionally, **specify the desired format or style of response you're looking for**, or indicate where the AI should retrieve the desired data from. Being clear about these details helps ensure that the AI's response meets your expectations and needs.
4. **Avoid Contradictions**
* Ensure that your **instructions are consistent** throughout your prompt to avoid confusing the AI.
* Before submitting your query, **double-check** for any conflicting requirements or contradictory information.
5. **Be Specific**
* When formulating your prompt, **use clear and unambiguous language** to communicate your request effectively. Avoid vague terms or phrases that could be interpreted in multiple ways.
* **State your expectations explicitly**, clearly outlining what you want the AI to do or provide. Being direct and specific in your instructions helps ensure that the AI understands your request accurately and can deliver a response that meets your needs.
6. **Use Appropriate Formatting**
* When providing multiple instructions in your prompt, **utilize bullet points or numbering to clearly separate and organize each step or request.** This structured approach makes it easier for the AI to process and address each part of your query.
* **Highlight key points or crucial information using formatting techniques such as bold or italics.** This emphasis helps draw attention to the most important elements of your prompt, ensuring that the AI focuses on the essential aspects of your request.
7. **Iterate and Refine**
* If your first attempt at prompting doesn't yield the desired results, don't be discouraged; **try rephrasing your query using different words or structures.** Effective prompting often requires some experimentation.
* Pay attention to the **prompts that generate successful responses and learn from them.** Apply the techniques and patterns you've found effective in these successful prompts to future queries, as this can help improve your overall prompting skills and results.
Remember, effective prompting is often an iterative process. Don't hesitate to experiment and refine your approach based on the results you receive.
## **Connected Data Functionality**
### 1. Difference between Files and VectorDB
**Connected Files:**
* **Context/Token Limit:** Connected files count directly towards the context/token limit of the conversation. Large files can quickly exceed this limit, leading to incomplete or truncated responses.
* **Usage:** Ideal for smaller datasets or when immediate context is crucial.
**Issue:** Large files can quickly consume the available token limit for a conversation. This can lead to incomplete or truncated responses from the AI, as it cannot process all the necessary information within the token limit.
**VectorDB:**
* **Efficient Storage:** Stores data in a vector format, allowing for efficient retrieval and processing.
* **Token Management:** Helps manage token limits more effectively by indexing data, making it suitable for larger datasets.
* **Usage:** Best for extensive datasets where fast search and retrieval are necessary.
**Issue:** Queries that require nuanced understanding or context might be challenging for VectorDB to handle effectively. This can result in less accurate or relevant responses if the query context is not well-defined.
### 2. Contextual Overlap
**Problem:**\
When a query generates hits in different database sources or topics, it can lead to ambiguous or incoherent answers.
**Example:**
* **HR Database Source:** "Christmas" might relate to holiday regulations.
* **Marketing Database Source:** "Christmas" might relate to campaigns and advertising materials.
**Solution:**
* **Refine Queries:** Clearly specify the desired context in your queries to avoid ambiguity.
* **Database Source Segmentation:** Consider segmenting your data into more narrowly focused database sources to minimize overlap.
### 3. Database Source Size and Topic Variety
**Issue:**\
Overly large database source or database sources with a wide variety of topics can exacerbate contextual overlap, leading to less precise answers.
**Recommendation:**
* **Thematic Structuring:** Organize your data into smaller, thematically focused database sources. This reduces the likelihood of overlap and improves response accuracy.
* **Regular Audits:** Periodically review and reorganize your database sources to ensure they remain focused and relevant.
### 4. Reviewing Advanced Settings
**Problem:**\
The Knowledge Bot does not understand my uploaded Image or Table. Ensure the following advanced settings are correctly configured to optimize data processing and retrieval:
**Smart Image Processing:**
* **Function:** Enhances the AI's ability to interpret and utilize images within your data.
* **Configuration:** Verify that this setting is enabled if your data includes significant visual content.
**Smart Table Processing:**
* **Function:** Improves the AI's handling of tabular data, ensuring accurate interpretation and response generation.
* **Configuration:** Enable this setting for database sources with extensive tabular information.
**Chunk Size and Chunk Overlap:**
* **Chunk Size:** Adjust the size of data chunks to balance between context and token usage.
* **Chunk Overlap:** Modify overlap settings to ensure continuity and coherence in responses, especially for large documents.
#### Additional Tips
**Iterative Refinement:**
* **Experimentation:** If the initial setup doesn’t yield the desired results, iteratively refine your settings and queries.
* **Learning from Success:** Analyze successful prompts and configurations to apply those techniques to other queries.
**User Feedback:**
* **Engagement:** Encourage users to provide feedback on the AI's responses to identify areas for improvement.
* **Continuous Improvement:** Use this feedback to continuously refine and enhance your data and settings.
By considering these points, you can significantly optimize the performance of your Connected Data functions and obtain more precise, relevant answers from your AI assistant.
## Limitations of the Knowledge Bot
#### 1. Temporal Awareness
**Limitation:**
* The bot cannot determine when a document was uploaded to the database source.
* It cannot answer queries about the most recently uploaded document.
**Implication:**
* The bot can only provide information based on the content of the documents, not their upload dates.
#### 2. Web Search Dependency
**Limitation:**
* Without Web Search enabled, the bot lacks information on current topics.
* It only knows up to the point when it was last trained.
**Implication:**
* For up-to-date information, ensure Web Search is turned on.
* The bot's knowledge is static and does not include recent developments unless Web Search is used.
#### 3. Knowledge Scope
**Limitation:**
* The bot can only provide information it has been trained on or that is available in the connected database sources.
* It cannot generate or infer information outside its training data or connected sources.
**Implication:**
* Ensure the correct database source is linked and the context is provided for accurate responses.
* The bot cannot provide company-specific information unless it is included in the connected data.
#### 4. Token Limit
**Limitation:**
* There is a token limit for files uploaded and connected to the bot.
* Extremely large files cannot be processed.
**Implication:**
* Break down large documents into smaller parts if necessary.
* Ensure files are within the token limit for successful processing.
#### 5. Text-Based Output
**Limitation:**
* The bot's output is limited to text responses.
* While it can understand and process files like Excel or PDF, it cannot generate or output these formats.
**Implication:**
* Use the bot for text-based queries and responses.
* For file-specific outputs, manual handling outside the bot is required.
{% hint style="info" %}
Understanding these limitations helps in setting realistic expectations and utilizing the Knowledge Bot effectively. Always ensure the correct settings and context for optimal performance.
{% endhint %}
# Frequently Asked Questions
Welcome to Blockbrain’s FAQ page. Here, you’ll find quick answers and helpful tips for setting up, customizing, and maximizing your Knowledge Bot experience. Whether you're just starting or troubleshooting advanced features, this page is designed to guide you every step of the way.
***
## Prompts & Interactions
### **1. How can I write better prompts for my Knowledge Bot?**
To get more accurate and useful responses from your Knowledge Bot, make sure your prompts are:
* Clear and specific
* Focused on one request at a time
* Written using the same keywords or terminology your team uses (especially when referencing attached files)
* Rich with context or background when needed
{% hint style="info" %}
**Tip:** Visit the [Prompt Guide](https://docs.blockbrain.ai/for-users/pages/ki7QnF5ofj7rVSAoW9Oi#id-2.-chat-prompt-guide) for examples and best practices.
{% endhint %}
### 2. Is it better to upload a file or connect a database?
It depends on how focused you want your chat to be:
* **File Upload**. Use when you want to focus on a specific document.
* Keeps the full structure of your document (no chunking), which is best for short, structured files like contracts or reports.
* Uses more tokens, since the whole file is processed at once.
* **Database Source**. Use when you're working with larger document collections or need to search across many files.
* Breaks documents into smaller chunks. This improves performance for large document collections and broad queries.
* More efficient for high-volume or team-wide use.
{% hint style="info" %}
Learn what other types of data you can connect in the [Connect Data to your Knowledge Bot](/for-users/all-about-knowledge-bots/connect-data-to-your-knowledge-bot#types-of-connectable-data) page.
{% endhint %}
***
## Bot Setup and Customization
{% hint style="warning" %}
If you don’t see these options, request access from your **Admin** or a team member with the **Builder** role.
{% endhint %}
### 1. How do I create a new bot?
You can create a bot in two ways:
* Click **Bot Creator** in the menu to create a new bot. Bots created here can be shared with your team (*Note: data rooms are not automatically shared with it*).
### How do I change my bot's name and profile photo?
* Open your Knowledge Bot.
* Click the **⚙️** gear icon (top-left corner) to access Settings.
* Go to the Set Up page to update the bot's name, photo, and more.
### Can I hide or disable features on the right sidebar in my Knowledgebot?
Yes. Head to **Settings > Action Settings**, where you’ll find a list of available sidebar features and toolbar shortcuts. You can toggle on/off what you'd like to show.
### How do I create prompt shortcuts?
You have two options:
* **Enable Conversation Starters**: This shows quick prompt suggestions whenever a new data room is opened.
* **Use the Prompt Library**: Add pre-made prompts created by your organization directly to your Knowledgebot.
Prompt Library
Go to Settings, enable the Prompt Library, then click the “Prompts” button near the input field in your Knowledgebot.
***
## Knowledgebot Settings
### Can I make the bot automatically use the detected language?
Yes, You can click “Language” in the sidebar and change the default language.
### Can I switch to a different AI model?
Yes, simply use click the AI model, also known as an LLM, in the right sidebar to choose your preferred AI model for the task. If you want to choose the right AI model, simply view the options and their descriptions for a more detailed insight on what is best for you.
### **How can I share my Knowledgebot with selected people?**
Only bots created in the Bot Creator can be shared with others. There, you could find the **Share** button with the following settings:
* Set the bot to **Public**, **Private**, or **Restricted**
* Add specific collaborators if restricted
* Control who can view or edit the bot
***
## Troubleshooting
### Why are my some features missing or not showing up for me?
Many features are toggled on/off through the **Action Settings** page. This can be accessed through the settings.
{% hint style="warning" %}
If you can't access these settings, contact your **Admin** or someone with a **Builder** role.
{% endhint %}
### I am not satisfied with the AI's response, what can I do?
Here are a few things you can try:
* **Switch to a different AI model (LLM)**
* **Adjust the model modifiers** (e.g., tone, creativity, precision)
* **Improve your prompt** (see the [Prompt Guide](https://docs.blockbrain.ai/for-users/pages/ki7QnF5ofj7rVSAoW9Oi#id-2.-chat-prompt-guide) for help)
These small changes can often lead to better, more relevant answers.
\
# How to build a Knowledge Bot
Welcome to the Builder’s Guide. This section will walk you through what a **Knowledgebot** is, how it works, and the different ways you can create one in Blockbrain.
Creating a Knowledgebot is your first step toward building an AI-powered assistant tailored to your specific needs. It transforms your files, data, and documentation into an intelligent system that can answer questions, perform tasks, and support your team’s day-to-day operations.
{% embed url="" %}
{% hint style="warning" %}
Please note that not all steps are required for a quick bot setup. \
Specifically, steps 3, 4, 5, 6, and 9 are optional and delve deeper into the details. \
These steps can be configured at a later time if needed. \
For a quick bot setup, simply follow steps 0, 1, 2, 7, 8, and 10.
{% endhint %}
## Bot Creator
Use the **Bot Creator** to build bots for team-wide use. This allows you to configure sharing settings, add workflows, attach databases, and collaborate with others from the start.
# Basic Knowledge Bot Set Up
Setting up your Knowledgebot doesn’t have to be complicated. Once you've created a bot, either through the **Bot Creator** or your **Dashboard**, you'll be directed to its **Settings** page. This is where you’ll configure the basics that shape how your bot interacts with users.
This guide covers all the essential steps to get your bot up and running quickly
***
## 1. Name the bot
Begin by giving your bot a unique and memorable name. This is how users will identify your bot. You can also upload an Avatar so your bot may also be identified visually.
{% hint style="info" %}
**Pro Tip**: It is best to clearly name your bot in relation to its use. Keep in mind a naming convention that best suits your organization especially if there will be more bots for different purposes in the future.
{% endhint %}
***
## 2. Provide Instructions
Create the initial instructions of your bot. This should define your bot's core mission, writing style, and any context it should be aware of. Think of it like a brief job description that the bot will always consider in its responses. Use the default template or write your own instructions to customize the bot to fit your use case.
{% hint style="info" %}
**Tip**: For most business use cases, a simple and more generic prompt can perform better than long and complex descriptions.
{% endhint %}
> Your task is to provide precise and relevant information. \
> Your communication should be professional yet easy to understand. \
> Your responses must be thorough and detailed, using professional formatting.\
> \
> Clarify Ambiguous or General Inquiries: \
> Ask specific questions to gather additional context. If a query can have multiple interpretations or answers, ask the user for clarification. \
> Inform Users About the Scope of Answers: \
> Let users know that answers may not always be exhaustive, indicating that further research and verification might be necessary. Encourage users to consult the original documents in the reference if they wish to look up more information themselves, or they can ask follow-up questions for further assistance. \
> Methodical Approach: \
> Guide users through the answer to their question methodically. Clearly state the steps to be taken and, where possible, refer to specific sections, figures, and tables in the guidelines and forms.\
> \
> Your ultimate goal is to enhance the expertise and efficiency of users, enabling them to perform their tasks more effectively through quicker access to relevant information.
### Customize Your Instructions (Optional)
In order to make the Knowledge Bot behave in a more specific way or limit the scope of its tasks, you can enhance the prompt by tailoring it using these 4 key elements:
1. **Role / Context**: Define the bot’s use case or audience
* e.g., *“You are assisting the tech staff with internal IT support.”*
2. **Task**: Describe the bot's main functionality in a concise way.
* e.g. "*Provide factual responses and step-by-step guides using the provided knowledge base."*
3. **Tonality**: Tailor the writing style to your use case and user group.
* e.g. "*You write in a professional, yet easy to understand tone. Your answers are very precise and brief. You use professional formatting, like headlines, sub-headlines, bold, italic, underline, or numbering*."
{% hint style="info" %}
**Tip**: Upload sample documents or branding guides into the knowledge base to teach the bot your tone
{% endhint %}
4. **Guidelines**: Set boundaries to reduce hallucinations or misinformation.
* e.g. "*Do not make up an answer when you cannot offer a factual answer based on your knowledge base. Tell the user what information you are missing to respond*."
***
## 4. Add a Description & Categorize your Bot
A clear and concise **bot description** helps users understand your bot’s purpose, capabilities, and intended use.
This appears in the bot's profile (not in the chat) and helps other team members decide if it fits their needs.
Your description should:
* Summarize the bot’s primary role
* Mention its area of expertise
* Clarify the types of tasks it handles
**Sample Description**
> *Supports employees with HR questions, form submissions, and company policy clarifications*
Create and assign **categories** to your bot make it easy for your team to find the appropriate bots that they would want to use.
***
## 4. Create Conversation Starters & Follow-Up Questions
Conversation starters and follow-up questions help guide users through meaningful interactions with your bot.
Navigate to Bot Settings > Conversation Design to configure these elements.
#### Conversation Starters
Pre-defined prompts shown when a user first opens the bot. They showcase your bot’s core capabilities and eliminate the guesswork of “What should I ask?”
> Example Starters:
>
> * “Summarize the uploaded report”
> * “What are the key deadlines?”
> * “Explain this in simpler terms”
#### Follow-Up Questions
These dynamic suggestions appear after the bot replies, encouraging users to dive deeper or explore related topics.
> Use follow-ups to:
>
> * Suggest next steps
> * Clarify complex answers
> * Encourage more engagement
***
## 5. Configure your Bot’s Capabilities & Skills
Your bot can be enhanced with features that match how your team wants to interact via voice, visuals, citations, or smarter search.
#### Audio Settings
* **Text-to-Speech:** Let the bot speak its replies aloud using OpenAI’s voice options. Useful for accessibility or presentation use.
* **Speech-to-Text**: Enable voice input so users can talk to the bot. Makes interactions more intuitive and mobile-friendly.
#### General Settings
* **Image Search & Retrieval**
* Allows your bot to process and reference images embedded in PDFs or uploaded as standalone files in a connected database source.
* Ideal for bots that need to read diagrams, scanned documents, or charts.
* *Note: This does not apply to files uploaded directly in the chat.*
* **Smart OCR**
* Toggle this ON to add an OCR-based upload for more scanned or complex PDFs.
* This may increase costs.
* **References & Inline Citations**
* Toggle this ON to display a list of sources used in your bot’s responses to build transparency and is useful for research-heavy bots.
* When “References” is enabled, you can also check Enable Inline Citations to embed the source link directly within the answer.
* **Intent Agent**
* Enables the bot to use intent-based logic to automatically match queries to the most relevant database sources or subfolders
* Use only if you've configured custom intent routing across multiple Data Rooms.
* **Image Generation**
* Toggle this ON to allow your bot to generate images directly from text prompts in the chat.
* You can choose which image model to use from the available options (e.g., Gemini 2.5 Flash, GPT Image 1, Flux Schnell, Imagen 4).
* Ideal for bots that need to create mockups, social content, simple diagrams, or other visual assets on demand.
#### Search Methods
Choose how your bot searches your knowledge base. Each method has its strengths:
* **Index Search:** Best for precise keyword or phrase matching. Fast and accurate when content is highly structured.
* **AI Search:** Uses semantic understanding to interpret meaning. Great for complex or loosely phrased queries.
* **Hybrid Search:** Combines both methods for the best of both worlds. Ideal for general-purpose or varied data sets.
{% hint style="info" %}
**Tip:** Choose your search method based on your specific needs: Index Search for precision, AI Search for context understanding, or Hybrid Search for versatile applications.
{% endhint %}
***
## 6. Select your Bot’s default AI Model
### LLM Selection (Large Language Model)
LLMs, or Large Language Models, are the AI engines that power your Knowledgebot. They process user queries, understand context, and generate responses. Choosing the right model is essential for optimizing accuracy, speed, cost-efficiency, and overall user experience.
### How to pick an LLM?
Blockbrain gives you access to top-performing models from OpenAI, Anthropic, Vertex AI, and Azure. These models vary in:
* **Context Window Size**
* How much information the model can “remember” per prompt.
* *Short context window* (e.g., 16K tokens): Best for shorter prompts, quick responses, and direct answers.
* *Large context window* (e.g., 1M tokens): Ideal for reading long documents, summarizing reports, deep analysis, or having extended conversations without losing context.
* **Response Quality**
* Determines how accurate, helpful, and nuanced the model’s outputs are.
* Refer to Blockbrain’s ratings to find what works best for you.
* **Speed**
* Lighter models respond faster which is great for quick chats or bots requiring low latency
* **Cost Efficiency**
* Some models use fewer tokens or compute, helping you optimize usage for budget-sensitive deployments.
* **Hosting Location**
* You can choose between US-hosted, EU-hosted and CN-hosted models.
* *Note: Choose EU-hosted models if your data privacy policy or security requirements prioritize regional compliance.*
* **Specialized Strengths**
* Each LLM perform better in specific areas which you can discover in the LLM page of Blockbrain
{% hint style="info" %}
**Tip:** For most users, starting with the latest flagship model from each provider is a safe and powerful choice
If unsure, try these well rounded options:
* **Claude 3.5 Sonnet v2**: Excellent for reasoning, accuracy, and general tasks.
* **GPT 5**: Great for structured responses, logical reasoning, and complex queries.
{% endhint %}
Considering these factors is helpful for optimizing your bot for your specific needs. Some use cases are as follows:
* **Reading and summarizing long documents** → Use a model with a large context window (e.g., Claude 3 Opus, GPT-4o)
* **Fast performance for quick answers** → Use a lightweight, fast model (e.g., Gemini Flash)
* **Creative, conversational tone** → Use expressive models (e.g., GPT-4o, Claude 3 Sonnet)
{% hint style="info" %}
Take a deeper dive into LLM selection by visiting the [**Pick Your LLM**](/for-users/all-about-llms/overview-of-llms) page or the **LLM Settings**, where each model is explained with its strengths and ideal use cases.
{% endhint %}
### Set your Default LLM
Choose your preferred model (e.g., GPT-4o, Claude 3 Opus, Gemini 1.5 Pro, etc.). Review the specializations of each LLM in the settings. Your chosen LLM will be the default applied to every new Data Room opened by the bot.
{% hint style="info" %}
Once you’ve selected your LLM, you can customize its behavior using **model modifiers**. These settings let you shape how your bot responds, whether you need more creativity, formality, or tighter focus. Visit the [**Advanced Knowledge Bot Set Up**](/for-builders/how-to-build-a-knowledge-bot/advanced-knowledge-bot-set-up) page for a full guide.
{% endhint %}
***
## 8. Save & Share your Bot
After configuring your bot, it’s important to save your settings to make sure all customizations are preserved. Simply click the Save button this will securely store your setup, including instructions, capabilities, and preferences.
{% hint style="warning" %}
Only bots created from the Bot Creator can be shared.
{% endhint %}
### Sharing Your Bot
For a bot created in Bot Creator, the sharing preferences can be adjusted:
* **Private**: only visible to you
* **Public**: available for anyone in your workspace
* **Restricted**: shared only with selected teammates
If you make your bot public or restricted, your coworkers will be able to use it in their own dashboards.
{% hint style="warning" %}
Bots created in Bot Creator won’t appear on your personal dashboard by default. To access them, click + Add a Bot in your dashboard and search for the bot you created.
{% endhint %}
# Advanced Knowledge Bot Set Up
If you want to get more out of your Knowledgebot, you can unlock more control and intelligence by using adjusting the more of the Knowledgebot settings. These settings allow you to fine-tune how your bot behaves, where it stores information, and what features it offers users inside each Data Room.
Use the sections below to explore each advanced configuration page in **Bot Settings**.
***
## Adjust the Bot’s Model Modifiers
Model Modifiers allow you to fine tune your Knowledge Bot’s behavior by adjusting key parameters that influence how it processes and generates responses. These settings help you balance creativity, precision, and relevance based on your use case, whether that’s legal summarization, creative content generation, technical support, or general conversation.
#### Is it required to adjust the Model Modifier settings?
It’s not necessary to adjust Model Modifiers if your chosen LLM already meets your needs and delivers the results you expect. However, if you want deeper customization, Model Modifiers give you the flexibility to fine-tune its behavior.
By adjusting Model Modifiers, you can:
* Increase or decrease creativity and idea variety.
* Refine vocabulary to match your audience.
* Expand or narrow the range of information considered.
* Reduce repetition and improve clarity.
### Model Modifier Settings
**Creative Freedom**
Controls the balance between creativity and consistency:
* Higher values: More creative, varied, but less predictable responses
* Lower values: More factual and consistent outputs
**Vocabulary Range**
Adjusts the breadth of language used:
* Higher values: More diverse vocabulary, potentially less relevant
* Lower values: More focused vocabulary, higher relevance
**Topic Variety**
Manages the introduction of new ideas:
* Higher values: More varied topics and fresh perspectives
* Lower values: More focused discussion, higher coherence
**Word Variety**
Controls vocabulary repetition:
* Higher values: Broader word choice, fewer repetitions
* Lower values: More familiar vocabulary, consistent terminology
**Search Range**
Defines the range of information considered:
* Higher values: Broader document search, more comprehensive but potentially less precise
* Lower values: Focused search, higher relevance but narrower context
{% hint style="info" %}
It's best to stay close to the default settings when adjusting Model Modifiers to maintain balanced AI performance. Avoid maxing out values; going too high or too low can lead to unexpected or ineffective outputs. For example:
* Creative Freedom should not be set too high, as excessive creativity may lead to unpredictable or overly abstract responses
* Search Range should remain within 5 to 8 to ensure the AI retrieves relevant information without unnecessary noise
Adjust settings gradually to fine-tune the AI’s behavior while maintaining accuracy and consistency.
{% endhint %}
#### Adjustment Templates
To get the best results from AI generated responses, it's important to fine tune model modifiers based on your specific use case. These settings act as a starting point, allowing you to tailor the AI’s behavior to meet your needs.
| *Use Case* | *Recommended Settings* |
| ------------------------------------------------------------------------------------------- | ----------------------------------------------------------------------------------------------------------------------------------------------------------------------------------------------------------------------------------------------------------------------------------------------------------------------------------------------------------------------------------------------------------------------------------------------------------------------------------------------------------------------------------------------------------------------------------- |
| **General Use:** Balanced settings for everyday tasks. |
Creative Freedom: Low → Allows for engaging but still logical responses.
Vocabulary Range: Medium → Ensures diverse yet relevant wording.
Topic Variety: Medium → Encourages AI to introduce new ideas while maintaining coherence.
Word Variety: Medium → Keeps wording fresh without sacrificing clarity.
Search Range: Medium → Provides a balance between precision and breadth of information.
|
| **Sales & Company Analysis:** Slight creativity with a strong focus on structured insights. |
Creative Freedom: Medium → Keeps responses logical while allowing for slight adaptability.
Vocabulary Range: Medium → Uses varied vocabulary for engaging business communication.
Topic Variety: Medium → Ensures coverage of related business topics without excessive divergence.
Word Variety: Medium → Encourages compelling, clear business writing.
Search Range: High → Retrieves a broad set of insights to support decision-making.
|
| **Technical Analysis & Reports:** Prioritizes accuracy and consistency over creativity. |
Creative Freedom: High → Encourages original, engaging, and sometimes unexpected responses.
Vocabulary Range: High→ Expands word choice for a more colorful and engaging tone.
Topic Variety: High → Allows AI to introduce fresh concepts and ideas.
Word Variety: High → Enhances writing flow and prevents repetition.
Search Range: Low → Prioritizes relevance over broad, factual accuracy.
|
***
## Set up Data Retention Period
Set how long user inputs, responses, and interactions are stored.
This setting helps align your bot’s behavior with your organization’s privacy policies and compliance requirements.
***
## Choose the default Web Research Tool
Web Research tools allow your Knowledgebot to search the internet in real-time to retrieve up-to-date information, facts, and sources outside your connected databases. This is especially useful for tasks that require current data or broad context beyond your internal knowledge base.
In the **Web Research Settings** page, you can:
* Enable or disable Web Research for your Knowledgebot
* Set a default tool to be used in all new Data Rooms
* Choose between multiple providers (e.g., Blockbrain, Perplexity, Sonar)
* Select between EU or US hosting depending on your compliance and data residency needs
#### Types of Web Research Tools
* **Standard**: Best for fast and simple lookups
* **Pro**: Analyzes more sources for deeper answers
* **Pro (R)**: Advanced reasoning mode, ideal for strategic or complex queries
***
## Choose the Destination Databases
When your bot saves Insights from conversations, this setting determines where those insights go. Choose a default destination database for easy tracking and consistent knowledge storage.
***
## Set Default Database Sources
Set a default connected database that your bot uses for retrieving answers. This ensures the bot pulls from the correct source every time a Data Room is opened.
{% hint style="info" %}
Learn more about what types of data you can connect in the [**Connect Data to your Knowledgebot**](/for-users/all-about-knowledge-bots/connect-data-to-your-knowledge-bot#types-of-connectable-data) page.
{% endhint %}
***
## Activate the Prompt Library
Customize your pre-made prompts so users can quickly access standardized questions. This becomes a button for them, so that all users are using the most optimized prompt for the task. To add a prompt, you may opt to:
* Create your knowledgebot’s premade prompt
* Choose which premade prompts are available in that Knowledgebot.
### **How To Add Pre-made Prompts**
Prompts can be added or activated through the Knowledgebot Settings.
* **Activate a Prompt**: Simply press the plus (+) icon next to a prompt to make it available to users of that Knowledgebot.
* **Create a Prompt**: Click on (+) Add a Prompt for to add a new premade prompt
{% hint style="info" %}
Visit the [Create a Prompt](/for-builders/prompting-for-prompt-library-and-workflows) page to set up your own collection of effective prompts, or explore it to spark ideas for your custom use cases
{% endhint %}
***
## Prepare the Workflows
Workflows allow you to break down long or complex prompts into an automated series of steps that run in sequence. This helps ensure consistency, save time, and improve efficiency across all Knowledgebot interactions.
You can set up workflows in the Knowledge Bot Settings so they are available to all users of that Knowledge Bot in any data room.
#### How to Add or Activate Workflows
* Click on (+) New Workflow
* Click on a New Prompt Card to reveal additional settings
{% hint style="info" %}
For detailed guidance on building effective workflows, visit the [**Set Up Workflows**](/for-builders/build-and-apply-advanced-features/create-workflows) page.
{% endhint %}
## Customize with Action Settings
The Action Settings let you choose which features and toolbar buttons are available to users of your Knowledgebot. This keeps the interface clean and easy to navigate, helping users focus only on the tools they need.
From here, you can toggle on or off features such as the Prompt Library, Workflows, and other Knowledgebot tools. To enable them, simply turn on the corresponding switch in the Action Settings panel.
You can also activate the Docs Reranker.
* What it is: The Docs Reranker improves the accuracy of AI responses by reordering and filtering search results from your database.
* When to use it: It’s most useful when you have a large database; it helps the AI find and prioritize the most relevant files before generating an answer.
{% hint style="info" %}
**Tip**: Enable only the features relevant to your Knowledgebot’s purpose to keep the interface streamlined and avoid confusing your users.
{% endhint %}
# Embedding Model Guide
#### **What is an Embedding Model**
An embedding model converts text, documents, or images into numerical vectors that represent their meaning. These vectors are stored in a vector database, allowing systems to search for information based on similarity rather than exact keywords.
Different embedding models are designed for different purposes. Some are optimized for long document retrieval, others for multilingual understanding, code search, or semantic similarity. **Choosing the right embedding model helps ensure that the system retrieves the most relevant information for a given task**.
| Embedding Model | Best Uses | Description |
| ------------------------ | -------------------------------------------------------------------- | ----------------------------------------------------------------------------------------------------------------------------------------------------------------------------- |
| Text Embedding 3 Large | Enterprise Search, Large Document Retrieval, Knowledge Base Indexing | Handles accurate semantic search and retrieval across complex datasets. |
| Text Embedding Ada 002 | Legacy Systems, Lightweight Semantic Search, Simple Vector Databases | Suited for basic semantic search and lightweight applications at lower costs. |
| Gemini Embedding 001 | Multi-lingual Datasets, RAG pipelines | Best suited for multilingual and long-context document retrieval. It performs well across multiple languages and maintains strong semantic understanding in longer documents. |
| Multilingual Embedding 2 | Multilingual Search, Cross-Language Document Retrieval. | For multilingual text retrieval, similarity, and search across many languages. |
| English Embedding 4 | English-only datasets, document retrieval. |
Optimized for English
documents.
|
#### Advanced Settings
* **Language**: Select the language(s) used in the database to improve retrieval accuracy.
* **Chunk Size**: Determines how much text from a document is processed in each segment. Smaller chunks focus on specific details and improve precision, while larger chunks include more context but may introduce less relevant information.\
*Important: Chunk Size must always be larger than Chunk Overlap.*
* **Chunk Overlap**: Controls how much text is shared between neighboring chunks. More overlap helps maintain context between chunks, while less overlap improves processing efficiency.
* **Smart Table Processing:** Detects tables in PDFs and converts them into structured text that is readable for LLMs. This uses additional compute costs.
* **Smart Image Processing:** Detects images in PDFs and converts any readable content into structured information for LLMs. This uses additional compute costs.
* **Smart OCR Processing:** Adds an OCR-based upload option for scanned or complex PDFs. This uses additional compute costs.
* **Image Extraction:** Extracts images from PDFs or image files (e.g. PNG, JPEG) so these images can be referenced in the responses.
* **Contextualized Chunking \[Experimental]:** Adds an LLM-generated summary header to each PDF chunk. This helps retrieval systems understand the context of each section, improving search and answer relevance.
* **Enable Large PDF Chunk:** Concatenates multiple PDF pages into 1 chunk (for a larger chunk size)
# Prompting for Prompt Library and Workflows
### What is a Prompt?
Prompting is how you “talk” to the Knowledge Bot. Think of it like giving instructions to a smart assistant. **The more specific and clear you are, the better it performs**.
**How to Prompt**
* **Be clear and specific**: Ensure that the question is specific enough in order to get more accurate answers
* **Use the same keywords**: Match the terminology used in your documents (e.g. “Annual Report 2023” not “last year’s file”)
* **Add context**: Make it easy for the bot and provide enough context like you are onboarding a new employee.
* **Confirm the data exists**: Make sure the bot is connected to the relevant files, emails, or database sources that contain the information.
* **Make it easy for the bot**: Break down complex questions, avoid vague pronouns (“this,” “that”), and point it to the right sources.
***
### Chat Prompts Guide
#### Breakdown of a Good Chat Prompt
To get the best results from your Knowledge Bot, your prompt should be clear, specific, and complete. A strong prompt always includes these key parts:
1. **Context** – Tell the bot *what it should refer to* or *why you’re asking*. You can give context in different ways:
* **Reference a file or data source**
* *Example: “Based on the 2023 Sales Report in the Marketing Folder…”*
* **Explain the purpose of your question**
* *Example:* “I need this for a client presentation, so keep the tone professional.”
* **Give all relevant information**
* *Example: “This error came up when I tried to upload the CSV. The message said: ‘Invalid format in row 14.’”*
2. **Question or Task** – Be clear and specific about what you want the bot to do.
* **Ask a direct question**
* *Example: “…what are the top-performing campaigns by ROI?”*
* **Give a specific instruction**
* *Example: “…summarize the differences between File A and File B into a short report.”*
3. **Limits** (optional) – Set boundaries or define what not to include to keep results focused.
* *Example:* “Only include data from 2023.”, “Keep the summary under 100 words.”, “Do not include personal opinions or recommendations.”
**Examples**
| ***Sample Prompt*** | ***Context*** | ***Question*** |
| ----------------------------------------------------------------------------------------------------------------------------------------------------------------------------- | ------------------------------------------------------------------------------------------------------------- | ------------------------------------------------------------------------------ |
| Based on the 2023 Sales Report in the “Marketing Folder,” what were our top 3 performing campaigns by ROI? | Based on the 2023 Sales Report in the “Marketing Folder,”... | ...what were our top 3 performing campaigns by ROI? |
| Based the files "File Name A" and "File Name B", can you make a comparison between the two and summarize it into a document? | Based the files "File Name A" and "File Name B",... | ...can you make a comparison between the two and summarize it into a document? |
| Please turn the campaign results in the dashboard into a one-pager I can show to our sales director. Ensure that the pitch is optimized to what a sales director cares about. | ...I can show to our sales director. Ensure that the pitch is optimized to what a sales director cares about. | Please turn the campaign results in the dashboard into a one-pager... |
| Here’s the system log + the error message I got. Can you explain what might be wrong in plain language? | Here’s the system log + the error message I got... | ... Can you explain what might be wrong in plain language? |
| What are all my benefits as a senior employee under the Marketing department? | ... as a senior employee under the Marketing department? | What are all my benefits... |
#### Chat Prompting Tips
* Give as much context as possible.
* Use the exact terms found in your documents.
* Mention the document name or section if possible.
* Avoid vague words like "this" or "that" without clarifying what you mean.
* Rephrase the question, add more context, or make the instructions more specific if you get a vague response
#### Chat Prompting Templates
| **Legal** |
Based on (insert contract or policy document), what clauses affects remote work eligibility for employees?
Based on (insert campaign brief), create (insert desired output) that follow (specific instructions)
|
| **Coding / Engineering** |
Can you write a sample function in (insert language) that achieves the logic described in (insert feature spec or doc)
|
| **Human Resource** |
Generate a hiring policy summary from (insert recruitment or compliance policy document)
|
***
## Prompt Guide
Prompts are reusable, structured instructions that automate complex tasks. They’re ideal for collecting information, generating structured outputs, or producing content in a consistent format.
### Breakdown of a Good Prompt
Complex questions tend to confuse AI. To create a strong Prompt, include the following components:
1. **Output Structure** – Define how the result should be formatted, and be descriptive of the outline. This is often a template or structured output format.
* Use bullet points, sections, or headers to organize the result.
* Helps ensure consistency across different runs.
2. **Context Instructions** – Give the bot the background it needs to complete the task correctly. This tells the prompt:
* Where to extract the data from (e.g., a document, database source, or user input)
* What the input means or how it should be interpreted
* *Examples:* “Request and confirm this information from the requester or document”, “Pull this from the uploaded company profile or product list”
1. **Final Instructions & Edge Cases** (Optional but Recommended) – Tell the bot additional instructions, and what to do if information is missing, unclear, or contradictory, and reminders on how to provide a quality response
* **What to do when information is not perfect**
* “If the information is missing, ask for clarification.”
* “If not found, note as N/A.”
* **Fact Checking**
* "Look out for contradictions in the data"
* "Ensure all aspects or elements are covered"
* "Check for consistency across all sections."
* **Formatting, Tone, and Style**
* "Use simple, concise sentences."
* "Only include the answers and not the questions"
**Example**
| *Prompt* | *Output Structure* | *Context & Limitations* | *Final Instructions* |
| -------------------------------------------------------------------------------------------------------------------------------------------------------------------------------------------------------------------------------------------------------------------------------------------------------------------------------------------------------------------------------------------------------------------------------------------------------------------------------------------------------------------------------------------------------------------------------------------------------- | --------------------------------------------------------------------------------------------------------------------------------------------------------------------------------------------------------------------------------------------------------------------------------------------------------------- | ----------------------------------------------------------------------------------------------------- | --------------------------------------------------------------------------------------------------------------------------------------------------------------- |
|
Creating A Template
Situation Today: \[Describe the current state or challenge]
Situation Tomorrow: \[Explain the desired future state]
Risk of Not Performing: \[What happens if nothing is done]
|
Pull from the submitted business proposal or user-uploaded document.
|
Use simple formatting.
If something is not provided, mark it “N/A”.
Do not include the prompts, only the answers.
|
|
Use the meeting notes provided from the Product Meeting, and summarize them into the following format
Date: (Date of the meeting)
Topic: (1-2 sentence description of the entire meeting)
Highlights: (Important dates, information, and other meeting highlights in bullet form)
If something is not provided, mark it “N/A”.
Ensure that it is clear and concise as if non technical team members will read this as well.
|
Date: (Date of the meeting)
Topic: (1-2 sentence description of the entire meeting)
Highlights: (Important dates, information, and other meeting highlights in bullet form)
| Use the meeting notes provided from the Product Meeting, and summarize them into the following format |
If something is not provided, mark it “N/A”
.Ensure that it is clear and concise as if non technical team members will read this as well.
|
### Prompting Tips
* Make it repeatable—don’t include one-off names or details.
* Be consistent with naming conventions (e.g. "Client Proposal" not "that file").
* Always include reminders in the Prompt (e.g. "Only include the answers and not the questions")
* Always test your Prompt first to see how it performs—this helps identify what reminders or final instructions you need to include for better results.
### Prompting Templates
Start with Blockbrain’s ready-made templates in Bot Settings, or build your own Prompts using the examples below as a guide:
| **Data Collection** |
Collect and Organize Information
Request and confirm the following details from the user or uploaded document. Always get the most recent or relevant version.
1. \[Insert Topic/Field] – e.g., Product Name, Department, Request Type
2. \[Insert Field 2] – e.g., Budget Range, Estimated Timeline
3. \[Insert Field 3] – e.g., Stakeholders, Teams Involved
4. \[Insert Field 4] – e.g., Key Metrics, Current Status
Final Instructions
- If any required information is missing, ask the user clear follow-up questions.
- If content is sourced from a document, cite the document or section name.
- If something is unclear, use “N/A” but flag it as needing review.
- Add suggestions for further research or clarification if applicable.
4. Observations or Insights:5. Conclusion or Recommendations:
Final Instructions
- Use professional, concise language.
- Follow the above outline exactly.
- If any sections are missing data, note it as “N/A.”
- If writing based on a document, reference the source in the summary.
- End with a suggested next step or recommendation on how the requester can proceed based on the document (e.g. Create a pitch, Draft an email)
|
***
## **What Are Workflow Prompts?**
Workflow prompts are the individual instructions given to an AI at each step of a Workflow—a multi-step automation that guides the AI through a structured conversation or task.
Rather than asking the AI one big question, you break the task into smaller, focused prompts. Each prompt (or “step”) builds on the previous one, helping the AI understand context better and deliver more accurate and refined results.
### **Why Use Workflow Prompts?**
* They improve accuracy
* Help the AI retain context
* Make complex tasks scalable and repeatable
* Let you add control or automation (Human-in-the-Loop or Autopilot)
**Think of it like this:**
* A single prompt:\
*"Write a brand strategy for our company." →* may lead to a generic or incomplete answer.
* A workflow using prompts:
1. *"Analyze current industry trends."*
2. *"Identify key competitors and their positioning."*
3. *"Assess our internal strengths and service gaps."*
4. *"Based on the above, create a tailored brand strategy."*
Each workflow prompt has:
* A title
* An instruction (the actual prompt)
* A chosen AI model (LLM)
* Optional: Web research or embedded prompt tools
* **Note:** Enabling **Web Research** allows the AI to search the internet for relevant information. It will not access your internal files or database source during this step.
### Parts of a Good Workflow Prompt
Each prompt should include:
* **Title** – Short and clear, e.g.: “Company Overview”, “Identify Risks”, “Summarize Pitch”
* **Instruction** – The actual prompt to the AI (e.g., “Based on the database source provided to you, summarize the company’s business model in detail. Highlight key revenue streams, customer segments, and cost structure.”)
* **LLM Model** – Choose which AI model to use
* **Optional settings** – Add Web Search or reuse a prompt if needed
### Best Practices
1. **One Prompt = One Task**\
Don’t overload a step. If needed, split into smaller steps.
2. **Use Context from Previous Steps**\
Phrase prompts like: *“Based on the previous findings…”*
3. **Make Prompts Clear & Connected**\
Ensure each step flows logically and contributes to the final outcome.
4. **Keep It Simple**\
Avoid complex instructions. Simpler prompts = faster, more accurate results.
5. **Test Your Workflow**\
Always review the full output to ensure each step is delivering what you expect.
### Prompt Examples
***Deep Research on a Company***
1. **Company Overview**\
*“Summarize the company’s business model based on internal documents or prior research. Identify the value proposition, core products/services, customer segments, and major partners.*”
2. **Recent Developments**\
*“Search for and summarize any significant company news from the past 12 months. Focus on product launches, leadership changes, M\&A, and legal issues.*”
3. **SWOT Analysis**\
*“Generate a SWOT analysis using all prior findings. Provide bullet points for each category with supporting facts from earlier steps.*”
***End-of-Year Company Evaluation***
1. **Performance Summary**\
*“Review internal performance reports and summarize the top 3 achievements and 3 challenges from this year. Focus on impact, not just activity.”*
2. **Leadership Summary**\
*“Create a high-level summary for leadership: major wins, key risks, and strategic areas needing focus in the upcoming year.”*
***Pitch Making (with Research)***
1. **Client Research**\
*“Based on the database source provided to you, analyze the target client’s pain points based on uploaded case notes, prior interactions, or online research. List 3–5 key challenges with brief explanations.”*
2. **Solution Mapping**\
*“Map our product/service features directly to the client’s challenges. These products/services are available to you in the database source. The clients needs are outlined \_\_\_. Show clear benefit alignment, using bullet points.”*
3. **Draft the Pitch**\
*“Write a persuasive pitch summary using the solution mapping using the insights from the prior query. Use a confident, consultative tone. Limit to 250 words.”*
4. **Refinement**\
*“Review the pitch. Improve structure, tone, and clarity. Ensure it speaks directly to the client’s business goals.”*
### Quick Checklist for an Effective Workflow
* [ ] One task per step
* [ ] Uses previous answers as context
* [ ] Clear, direct language
* [ ] Workflow flows logically
* [ ] Fully tested and easy to use
# Build a custom MCP server with OAuth 2.1
### **What you'll build:**
> A minimal, runnable Python MCP server that Blockbrain can connect to via OAuth 2.1 — so internal tools or data you expose can be safely consumed by a Blockbrain agent.
>
> **Audience:** a developer at your side. Copy the four code blocks below into a folder, run five commands, point Blockbrain at the resulting URL, and you have a working authenticated integration.
>
> **Time required:** \~20 minutes for a working local server; \~45 minutes including hardening.
>
> See also: [MCP Server — admin UI walkthrough](https://docs.en.theblockbrain.ai/for-admins/mcp-server).
***
### Prerequisites
* Python **3.11+**
* A public HTTPS URL for your local server while testing — easiest options: an HTTPS tunnelling tool such as `cloudflared tunnel` or `ngrok`
* **Tenant Administrator** access to your Blockbrain tenant
* Familiarity with OAuth 2.1 Authorization Code flow with PKCE (helpful but not required)
***
### When to use which authentication mode
Blockbrain's MCP-server registration UI offers four authentication methods. Choose based on how your MCP server should know who is calling:
| Method | Use when… | Trade-off |
| ---------------------------- | ------------------------------------------------------------------------------------------------------ | -------------------------------------------------------------------- |
| **None** | Internal/dev only and the server URL is not public | Anyone who reaches the URL can call the tools |
| **API Key** (Fixed Token) | Service-to-service. One shared secret. No per-user identity needed. | Cannot distinguish individual Blockbrain users on your side |
| **OAuth 2.1** ← *this guide* | Production scenarios. Blockbrain's tenant admin authorizes the connection once via consent flow. | More moving parts, but the standard MCP-spec way |
| **User Token** (delegated) | You want per-user authorization on your MCP server (e.g. enforce that User A only sees their own data) | Your server must validate Blockbrain's forwarded JWT — see section 8 |
***
### The OAuth 2.1 discovery flow Blockbrain uses
When you select **OAuth 2.1** in the admin UI and click *Discover OAuth*, Blockbrain follows [RFC 9728](https://datatracker.ietf.org/doc/html/rfc9728) + [RFC 8414](https://datatracker.ietf.org/doc/html/rfc8414) to find your authorization server, then runs Authorization Code + PKCE:
```mermaid
sequenceDiagram
participant BB as Blockbrain
participant MCP as Your MCP Server
BB->>MCP: 1. GET /.well-known/oauth-protected-resource
MCP-->>BB: { "authorization_servers": [...] }
BB->>MCP: 2. GET /.well-known/oauth-authorization-server
MCP-->>BB: { "authorization_endpoint": ..., "token_endpoint": ... }
BB->>MCP: 3. Redirect admin → /authorize (response_type=code, code_challenge, ...)
BB->>MCP: 4. POST /token (code + code_verifier)
MCP-->>BB: { "access_token": "...", "token_type": "Bearer" }
BB->>MCP: 5. Subsequent /mcp calls with Authorization: Bearer
```
***
### The Python example
Three files in one folder. Copy each block verbatim.
#### `server.py`
```python
"""
MCP Server Starter — OAuth Integration with Blockbrain
A minimal example demonstrating the full OAuth 2.1 + PKCE flow.
Run: python server.py
"""
import os
import secrets
import hashlib
import base64
from datetime import datetime, timedelta, timezone
from typing import Optional
from urllib.parse import urlencode
import httpx
import uvicorn
from dotenv import load_dotenv
from fastapi import FastAPI, HTTPException, Form, Request, Response
from fastapi.responses import JSONResponse, RedirectResponse
from jose import jwt
from mcp.server.fastmcp import FastMCP
load_dotenv()
# ---- Configuration ---------------------------------------------------------
SERVER_HOST = os.getenv("SERVER_HOST", "http://localhost:8080")
JWKS_URL = os.getenv("JWKS_URL", "https://auth.theblockbrain.ai/oauth/v2/keys")
AUDIENCE = os.getenv("AUDIENCE", "your-api-audience")
OAUTH_CLIENT_ID = os.getenv("OAUTH_CLIENT_ID", "demo-client-id")
OAUTH_CLIENT_SECRET = os.getenv("OAUTH_CLIENT_SECRET", "demo-client-secret")
VALIDATE_USER_TOKEN = os.getenv("VALIDATE_USER_TOKEN", "0") == "1"
# Scopes this server advertises in both .well-known documents and validates
# every /authorize request against.
SUPPORTED_SCOPES = {"mcp:read", "mcp:write"}
# ---- In-memory stores (DEMO ONLY — use Redis/DB in production) -------------
auth_codes: dict = {}
access_tokens: dict = {}
# ---- MCP server: tools + resources -----------------------------------------
mcp_server = FastMCP("blockbrain-oauth-example")
@mcp_server.tool()
def echo(message: str) -> str:
"""Echo back the provided message — verifies end-to-end connectivity."""
return f"echo: {message}"
@mcp_server.resource("static://welcome")
def welcome() -> str:
"""A static welcome resource."""
return "Hello from your custom MCP server!"
# ---- FastAPI app: OAuth endpoints + mounted MCP transport ------------------
app = FastAPI(title="MCP OAuth Example for Blockbrain")
# RFC 9728 — Protected Resource Metadata
@app.get("/.well-known/oauth-protected-resource")
async def oauth_protected_resource():
return {
"resource": SERVER_HOST,
"authorization_servers": [SERVER_HOST],
"scopes_supported": ["mcp:read", "mcp:write"],
"bearer_methods_supported": ["header"],
}
# RFC 8414 — Authorization Server Metadata
@app.get("/.well-known/oauth-authorization-server")
async def oauth_authorization_server():
return {
"issuer": SERVER_HOST,
"authorization_endpoint": f"{SERVER_HOST}/authorize",
"token_endpoint": f"{SERVER_HOST}/token",
"response_types_supported": ["code"],
"grant_types_supported": ["authorization_code"],
"code_challenge_methods_supported": ["S256"],
"scopes_supported": ["mcp:read", "mcp:write"],
"token_endpoint_auth_methods_supported": ["client_secret_post"],
}
# Authorization endpoint — issues an auth code bound to the PKCE challenge
@app.get("/authorize")
async def authorize(
response_type: str,
client_id: str,
redirect_uri: str,
code_challenge: str,
code_challenge_method: str = "S256",
scope: str = "mcp:read",
state: Optional[str] = None,
):
if response_type != "code":
raise HTTPException(400, "unsupported response_type")
if client_id != OAUTH_CLIENT_ID:
raise HTTPException(400, "unknown client_id")
if code_challenge_method != "S256":
raise HTTPException(400, "code_challenge_method must be S256")
# RFC 6749 §5.2 — reject any scope the server doesn't advertise.
requested_scopes = set(scope.split())
unknown = requested_scopes - SUPPORTED_SCOPES
if unknown:
raise HTTPException(400, f"invalid_scope: {sorted(unknown)}")
code = secrets.token_urlsafe(32)
auth_codes[code] = {
"client_id": client_id,
"redirect_uri": redirect_uri,
"code_challenge": code_challenge,
"scope": " ".join(sorted(requested_scopes)),
"expires_at": datetime.now(timezone.utc) + timedelta(minutes=10),
}
params = {"code": code}
if state:
params["state"] = state
return RedirectResponse(f"{redirect_uri}?{urlencode(params)}")
# Token endpoint — exchanges code + verifier for an access token
@app.post("/token")
async def token(
grant_type: str = Form(...),
code: str = Form(...),
redirect_uri: str = Form(...),
client_id: str = Form(...),
client_secret: str = Form(...),
code_verifier: str = Form(...),
):
if grant_type != "authorization_code":
raise HTTPException(400, "unsupported grant_type")
if client_id != OAUTH_CLIENT_ID or client_secret != OAUTH_CLIENT_SECRET:
raise HTTPException(401, "invalid client credentials")
record = auth_codes.pop(code, None)
if not record or record["expires_at"] < datetime.now(timezone.utc):
raise HTTPException(400, "invalid or expired code")
if record["redirect_uri"] != redirect_uri:
raise HTTPException(400, "redirect_uri mismatch")
# PKCE verification: base64url(SHA256(code_verifier)) == code_challenge
expected = base64.urlsafe_b64encode(
hashlib.sha256(code_verifier.encode()).digest()
).rstrip(b"=").decode()
if expected != record["code_challenge"]:
raise HTTPException(400, "invalid code_verifier")
access_token = secrets.token_urlsafe(32)
access_tokens[access_token] = {
"client_id": client_id,
"scope": record["scope"],
"expires_at": datetime.now(timezone.utc) + timedelta(hours=1),
}
return {
"access_token": access_token,
"token_type": "Bearer",
"expires_in": 3600,
"scope": record["scope"],
}
# ---- Optional: validate Blockbrain's forwarded user JWT (delegated mode) ---
async def validate_user_jwt(authorization_header: str) -> dict:
token_str = authorization_header.replace("Bearer ", "", 1)
if not token_str:
raise HTTPException(401, "missing bearer token")
async with httpx.AsyncClient() as client:
jwks = (await client.get(JWKS_URL)).json()["keys"]
header = jwt.get_unverified_header(token_str)
key = next((k for k in jwks if k["kid"] == header["kid"]), None)
if not key:
raise HTTPException(401, "signing key not found in JWKs")
return jwt.decode(token_str, key, algorithms=["RS256"], audience=AUDIENCE)
# ---- Bearer-token middleware for /mcp --------------------------------------
# RFC 6750: every MCP transport call must carry a valid access token.
# This runs BEFORE the request reaches the mounted MCP app.
@app.middleware("http")
async def require_bearer_for_mcp(request: Request, call_next):
if request.url.path.startswith("/mcp"):
auth = request.headers.get("authorization", "")
if not auth.lower().startswith("bearer "):
return JSONResponse(
{"error": "invalid_token", "error_description": "missing bearer token"},
status_code=401,
headers={"WWW-Authenticate": 'Bearer realm="mcp"'},
)
token_str = auth.split(" ", 1)[1].strip()
record = access_tokens.get(token_str)
if not record or record["expires_at"] < datetime.now(timezone.utc):
return JSONResponse(
{"error": "invalid_token", "error_description": "expired or unknown token"},
status_code=401,
headers={"WWW-Authenticate": 'Bearer error="invalid_token"'},
)
# Optionally enforce per-call scope here, e.g. require "mcp:write"
# for state-changing tools by inspecting record["scope"].
return await call_next(request)
# ---- Mount MCP server (streamable HTTP transport) at /mcp ------------------
app.mount("/mcp", mcp_server.streamable_http_app())
if __name__ == "__main__":
uvicorn.run(app, host="0.0.0.0", port=8080)
```
#### `requirements.txt`
```
mcp>=1.2.0
fastapi>=0.110.0
uvicorn[standard]>=0.27.0
python-jose[cryptography]>=3.3.0
httpx>=0.26.0
python-dotenv>=1.0.0
```
#### `.env.example`
> **Replace the demo client credentials with strong random values before deploying anywhere reachable from the public internet.**
```
# Public URL where your server is reachable from Blockbrain.
# When tunnelling locally with cloudflared/ngrok, set this to the tunnel URL.
SERVER_HOST=http://localhost:8080
# Blockbrain's JWKs endpoint — only used when VALIDATE_USER_TOKEN=1
JWKS_URL=https://auth.theblockbrain.ai/oauth/v2/keys
AUDIENCE=your-api-audience
# Static OAuth client credentials. Generate strong random values for production.
OAUTH_CLIENT_ID=demo-client-id
OAUTH_CLIENT_SECRET=demo-client-secret
# Set to 1 to additionally validate Blockbrain's forwarded user JWT
# on every /mcp request (delegated-access mode). Leave 0 for OAuth-only.
VALIDATE_USER_TOKEN=0
```
***
### Run it locally
```
python -m venv .venv
source .venv/bin/activate # Windows: .venv\Scripts\activate
pip install -r requirements.txt
cp .env.example .env # then edit .env
python server.py # listens on :8080
```
***
### Verify the endpoints with curl
```
# Discovery — RFC 9728
curl -s http://localhost:8080/.well-known/oauth-protected-resource | jq
# → { "resource": "...", "authorization_servers": ["..."], ... }
# Discovery — RFC 8414
curl -s http://localhost:8080/.well-known/oauth-authorization-server | jq
# → { "authorization_endpoint": "...", "token_endpoint": "...",
# "code_challenge_methods_supported": ["S256"], ... }
# MCP transport handshake
npx @modelcontextprotocol/inspector http://localhost:8080/mcp
# → lists tool "echo" and resource "static://welcome"
```
***
### Register your MCP server in Blockbrain
1. Expose your local server publicly: `cloudflared tunnel --url http://localhost:8080` (or `ngrok http 8080`). Note the public HTTPS URL.
2. Set `SERVER_HOST` in `.env` to that public URL and restart the server.
3. Open Blockbrain → **Admin** → **Agents** → **MCP Servers** → **+ Add MCP Server**.
4. Fill in:
* **Server Name:** e.g. *my-mcp-demo*
* **Server URL:** `https:///mcp`
* **Transport:** `HTTP`
* **Authentication:** `OAuth 2.1`
5. Click **Discover OAuth**. Blockbrain reads your two `.well-known` endpoints and pre-fills the OAuth config.
6. Click **Configure**, complete the consent flow, and confirm the access token comes back.
7. Save. Assign the integration to a test agent. In a chat, ask the agent to call `echo "hello"` — you should see `echo: hello` come back.
Full admin-UI walkthrough with screenshots: [MCP Server — for admins](https://docs.en.theblockbrain.ai/for-admins/mcp-server).
***
### Optional — validate Blockbrain's forwarded user JWT
If you also want per-user authorization (delegated-access mode), set `VALIDATE_USER_TOKEN=1`. The `validate_user_jwt` helper in `server.py` checks every incoming bearer token against Blockbrain's public JWKs at `https://auth.theblockbrain.ai/oauth/v2/keys`, verifies signature, expiration, and audience, and returns the claims (including `external_user_id`, `urn:zitadel:iam:org:id`, etc.).
***
### Headers Blockbrain sends with every request
Your MCP server can read these to identify the calling user, tenant, and thread context:
| Header | Description | Example |
| -------------------- | -------------------------------------------------------- | -------------- |
| `X-User-ID` | End-user identifier | `user_12345` |
| `X-External-User-ID` | Your system's user identifier (if activated) | `ext_user_abc` |
| `X-Tenant-ID` | Tenant identifier | `tenant_xyz` |
| `X-Agent-ID` | Agent making the request | `agent_007` |
| `X-Data-Room-ID` | Associated data room | `room_456` |
| `X-Thread-ID` | Conversation thread | `thread_789` |
| `Authorization` | Bearer token (OAuth access token, or forwarded user JWT) | `Bearer ...` |
***
### Troubleshooting
| Symptom | Likely cause | Fix |
| -------------------------------------- | ----------------------------------------------------------------------- | ----------------------------------------------------------------------------------------- |
| "Discover OAuth" returns 404 | `.well-known` paths not exposed at the public URL | Confirm the tunnel forwards root paths; re-curl both well-known endpoints |
| Redirect-URI mismatch on consent | IdP does not support Dynamic Client Registration (e.g. Microsoft Entra) | Use the static `OAUTH_CLIENT_ID` in this example rather than a dynamically registered one |
| Token returned but tools list is empty | Scopes not preserved during configure | Make sure your authorization-server metadata includes `scopes_supported` |
***
### Production hardening checklist
Before shipping to a production environment, replace or add:
* The in-memory `auth_codes` / `access_tokens` dicts → a persistent store (e.g. Redis), so tokens survive restarts and can be shared across replicas.
* Refresh-token rotation. The example issues access tokens only.
* Structured logging and an audit trail for every `/authorize` and `/token` call.
* Move `OAUTH_CLIENT_SECRET` to a secrets manager — never check it into source control.
* Terminate HTTPS in front of the server (reverse proxy, load balancer, or your platform's ingress).
* Rate limiting on `/token` and `/authorize`.
* If multi-tenant, scope `OAUTH_CLIENT_ID` per tenant rather than reusing one shared value.
***
### Next steps
* **SSE transport** — Blockbrain also supports SSE (`https://your-server/sse`). To switch, replace the `app.mount("/mcp", ...)` line with the SSE app from `mcp.server.sse`.
* **Real tools** — replace the `echo` tool with calls into your domain (database queries, internal APIs, etc.).
* **JavaScript / TypeScript example** — a Node/Express equivalent of this guide using `@modelcontextprotocol/sdk` is being prepared as a follow-up.
# Build and Apply Advanced Features
This section explores advanced Knowledge Bot features, allowing you to customize settings for better accuracy, optimized search results, and improved responses.
## Prompt Library
Prompts are reusable, customizable prompt shortcuts that help streamline tasks, saving time and improving productivity. They allow you to automate specific queries, ensuring consistency and efficiency in responses.
#### **Why use Pre Made** Prompts**?**
* **Efficiency**: Reduce repetitive typing and automate frequently used prompts.
* **Consistency**: Ensure responses follow a structured and standardized format especially across scaling teams.
* **Customization**: Tailor Prompts to fit specific workflows and your needs.
* **Collaboration**: Share Prompts within your organization for uniform responses.
* **Faster Decision-Making**: Instantly generate reports, summaries, and recommendations.
It is possible to create custom Prompts or take advantage of Blockbrain’s pre-made Prompts for quick and easy implementation. Simply activate the pre-made prompts or create your organization's own custom prompt through the bot settings.
{% hint style="info" %}
For a closer look at the Prompt feature, check out the full details [here](/for-builders/build-and-apply-advanced-features/set-up-prompt-library).
{% endhint %}
## Workflows
Workflows allow you to **automate multi-step prompts**, making complex interactions more structured and efficient. Unlike **Prompts**, which function as single-prompt shortcuts, **Workflows** guide the AI through a sequence of prompts to ensure a **more accurate and refined final response**.When asking for too much in a single prompt, the AI may struggle to process and provide precise answers. **Workflows break down complex queries into manageable steps**, improving accuracy and relevance at each stage.
#### **Why use Workflows?**
* **Improved Accuracy**: The AI delivers more precise responses when given structured, step-by-step prompts.
* **Better Context Retention**: Each step builds on previous answers, leading to **a more cohesive final result**.
* **Scalability**: Automate repetitive, multi-step tasks to save time and improve efficiency.
{% hint style="info" %}
For a closer look at the Workflow feature, check out the full details [here](/for-builders/build-and-apply-advanced-features/create-workflows).
{% endhint %}
***
## Intent Agent
The **Intent Agent** is a feature that users can enable to enhance AI efficiency. By providing descriptions for folders, the Intent Agent enables the AI to sift through the database source and assess which information is most relevant to users. The AI uses these folder descriptions to identify and prioritize the folders most likely to contain relevant information.
This feature transforms database sources from simple file repositories into structured resources optimized for quick and accurate data retrieval.
#### **Why use Intent Agent?**
* **Improved Efficiency**: Reduces time spent scanning irrelevant folders by narrowing the search to relevant areas.
* **Optimized Workflows**: Simplifies the process of locating the correct folder, especially as database sources grow larger and more complex.
* **Faster Results**: Quickly identifies and retrieves the most relevant information, saving time.
* **Resource Optimization**: Conserves computational resources by prioritizing the processing of relevant data.
{% hint style="info" %}
For a closer look at the Intent Agent feature, check out the full details [here](/for-builders/build-and-apply-advanced-features/prepare-intent-agent).
{% endhint %}
***
## Insights
Insights are are text-based notes that you can input yourself, or allows you to store and retrieve previously saved AI interactions, making it easy to reuse knowledge from past conversations. This is useful for ensuring consistency in responses and retaining key learnings across teams.
These saved insights act as a personal knowledge base, helping users retain important AI-generated information, streamline workflows, and maintain consistency across multiple interactions. Unlike database sources, Insights are stored in full context without chunking, preserving the original message structure for improved retrieval and reuse.
#### **When to Use Insights**
* When past AI-generated responses need to be referenced frequently
* When team members share refined prompts or key findings from Data Rooms
* When specific contextual knowledge should be stored for quick access
{% hint style="info" %}
For a closer look at the Insights feature, check out the full details [here](/for-builders/build-and-apply-advanced-features/use-insights).
{% endhint %}
***
## Contribute Knowledge
**Contribute Knowledge** allows you to save an Insight—an AI-generated message or conversation—directly into your database source. Instead of storing it in the Insights section, the content is saved within a selected database source, making it accessible to team members who have access to that database source.
This method is ideal for collaborative work, ensuring that key insights are systematically stored and structured within a shared knowledge base. Additionally, **team members who are subscribed to the database source will receive email notifications about new contributions**, keeping everyone updated without manual coordination. However, since database sources undergo **chunking**, the information may be divided into smaller sections, which could slightly affect retrieval accuracy depending on the query.
{% hint style="info" %}
For a closer look at the Contribute Knowledge feature, check out the full details [here](/for-builders/build-and-apply-advanced-features/optimize-contributed-knowledge).
{% endhint %}
# Set Up Prompt Library
Prompts are reusable, customizable prompt shortcuts that help streamline tasks, saving time and improving productivity. They allow you to automate specific queries, ensuring consistency and efficiency in responses.
#### **Why use** Prompts**?**
* **Efficiency**: Reduce repetitive typing and automate frequently used prompts.
* **Consistency**: Ensure responses follow a structured and standardized format especially across scaling teams.
* **Customization**: Tailor Prompts to fit specific workflows and your needs.
* **Collaboration**: Share Prompts within your organization for uniform responses.
* **Faster Decision-Making**: Instantly generate reports, summaries, and recommendations.
It is possible to create custom Prompts or take advantage of Blockbrain’s pre-made Prompts for quick and easy implementation. Simply activate the pre-made prompts or create your organization's own custom prompt through the bot settings.
***
## **How to Create a Pre-made Prompt**
* Go to **Bot Settings** (or during bot creation).
* Click **+ Add a Prompt**.
* Select or create a category for the prompt.
* Name your prompt and add instructions.
* (Optional) Add a description so your team knows the prompt’s purpose.
{% hint style="info" %}
For crafting an effective prompt for the Prompt Library, visit the [**Prompting for Prompt Library and Workflows**](/for-builders/prompting-for-prompt-library-and-workflows)
{% endhint %}
## **How to** use **a Pre-made Prompt**
* Access prompts directly from the text box once they are activated in your Knowledgebot.
* Manage which prompts appear by toggling them on/off in **Bot Settings** (right-side toolbar)
***
## Sample Use Cases
Store your commonly used prompts into the Prompt Library, allowing you to trigger complex queries with a single click. Here are some practical ways to use Prompts:
1. **Summarizing Documents**: Upload long documents and use a Prompt to generate concise summaries in a preferred format.
2. **Crafting Reports**: Gather multiple pieces of information and structure them into a well-organized report.
3. **Refining Tone & Style**: Improve writing clarity, simplify text, or adjust tone to match your audience.
4. **Strategizing**: Analyze company data and use a Prompt to generate business insights or summaries.
5. **Creating Sales Emails**: Input client and project details, and let a Prompt generate a personalized sales email.
## Best Practices
Here are some best practices to ensure your Prompts work effectively and seamlessly integrate into you and your team's workflow:
1. **Use clear and descriptive names**: Ensure each Prompt is easy to identify and use.
2. **Organize Prompts into categories**: Group Prompts by function for better navigation.
3. **Test and refine prompts regularly**: Improve response quality over time.
4. **Encourage team collaboration**: Share and standardize Prompts to improve efficiency across teams.
By following these best practices, you can maximize the effectiveness of Prompts and create a more streamlined, automated workflow.
## FAQs
1. **How do Prompts differ from Workflows?**
* Prompts handle single-use prompts, while Workflows automate multi-step processes for more structured interactions.
2. **Can I share my Prompts with a team?**
* Yes, you can share Prompts with a team once you have given them access to the same Knowledge Bot
3. **Why can't I see any Prompt?**
* Simply activate your organization's prompts in the Knowledge Bot settings.
4. **Is Intent Agent different from Prompts?**
* Yes, **Intent Agents** is an advanced features with different functions. While **Prompts** are customizable prompt shortcuts designed to automate tasks, **Intent Agents** enhance answer quality by referencing database source folder descriptions. They operate independently from regular **Prompts** and serve different purposes in refining AI interactions.
# Create Workflows
Workflows allow you to **automate multi-step prompts**, making complex interactions more structured and efficient. Unlike **Prompts**, which function as single-prompt shortcuts, **Workflows** guide the AI through a sequence of prompts to ensure a **more accurate and refined final response**.
You can enhance each step by activating **web search** capabilities, adding **external integrations** via API (e.g., HTTP requests), or scheduling workflows to run automatically. These upgrades make workflows even more powerful for tasks like continuous monitoring, report generation, and real-time research.
When asking for too much in a single prompt, the AI may struggle to process and provide precise answers. **Workflows break down complex queries into manageable steps**, improving accuracy and relevance at each stage.
**Why use Workflows?**
* **Improved Accuracy**: The AI delivers more precise responses when given structured, step-by-step prompts.
* **Better Context Retention**: Each step builds on previous answers, leading to **a more cohesive final result**.
* **Scalability**: Automate repetitive, multi-step tasks to save time and improve efficiency.
* **Live Web Search (New!)**: Enable real-time web search in specific steps to pull the latest, most relevant information directly from the internet.
* **API Integrations (New!)**: Connect external systems and tools using HTTP requests in any workflow step, allowing you to fetch, send, or enrich data programmatically.
* **Import Prompt (New!)**: Quickly write prompt instructions by importing ready made Prompts.
* **Scheduling & Auto-Delivery (New!)**: Run workflows on a recurring schedule and receive results via email—perfect for ongoing research, updates, or reporting tasks.
***
## How to use a Workflow
1. **Locate the Workflows button** on the right side toolbar.
2. **Click the Play button** to start the workflow.
3. The workflow will run according to the **execution settings** you’ve configured.
***
## Creating a Workflow
### **1. Starting with a New Workflow**
When you first access the workflow page, it will appear empty, indicating that there are no workflows set up yet. To create a new workflow, follow these steps:
* **Step 1: Create a New Workflow**
* Look for the **"+ New Workflow"** button. This button can be found in two places:
* On the **left sidebar**, in the Settings button.
* On the **right sidebar**, under the Workflow section.
* Clicking this button will trigger the creation of a new workflow, and you will see a new card appear on the screen with the details of your first workflow step.
### **2. Workflow Execution Settings**
At the bottom of the workflow area, you will find two key settings that control how the workflow behaves:
* **Execution Mode**:
* **Human in the Loop**: This mode requires the user to manually click a button to move to the next step after each one completes. This gives you control to review each step before proceeding.
* **Autopilot**: In this mode, the workflow will automatically move from one step to the next without any manual input. This is ideal when you want the process to run automatically.
* **Workflow Trigger**:
* **Manual**: When set to manual, the workflow will only start when the user triggers it manually (by clicking a "play" button).
* **Automatic**: In automatic mode, the workflow will begin as soon as certain actions occur, such as when a file is uploaded or when a message is received in the chat.
### **3. Saving or Cancelling the Workflow**
Once you have configured the workflow to your liking, you can choose to either **Save** or **Cancel** your changes:
* **Save**: Click the **Save** button to save the workflow you’ve just created or modified.
* **Cancel**: If you wish to discard any changes and not save the workflow, click **Cancel**.
{% hint style="info" %}
Workflows can be configured in the bot’s settings or when creating the bot. Once saved, they’ll be available to all users of that specific Knowledgebot.
{% endhint %}
***
## Editing the Workflow Card
### **1. Editing the Workflow Card Name**
The **Name** field helps you clearly identify the purpose of each step in your workflow.
* Use a descriptive label like **"Step 1: Analyze"**, **"Step 2: Summarize"**, or **"Step 3: Extract Action Items"**.
* Good naming makes it easier to follow complex workflows later on.
### **2. Select the Type of Workflow Step**
The **Step Type** field determines what kind of task this card will execute. There are several options, but for now, let’s focus on the most common one: **Prompt**.
* **Prompt**: This step type allows you to provide a detailed instruction to the AI. The AI will use this instruction to carry out the task.
* **Integration**: Connect to an external API or service to fetch or send data. Requires additional configuration (e.g., URL, method).
{% hint style="info" %}
This section focuses on setting up **Prompt** steps. Detailed instructions for configuring **Integration** steps are covered later [below](#adding-integrations).
{% endhint %}
### **3. Optimize with the right AI Model**
After choosing the Prompt step type, you’ll be asked to select an **AI model**.
* The choice of model can impact performance. Some are optimized for creative writing, while others handle technical tasks or large data better.
* You can choose from a list of supported models (e.g., **GPT-4 Omni**).
* Use the **Modifier Settings** to tweak the model’s behavior (e.g., creativity, vocabulary, coherence).
{% hint style="info" %}
Find more guidance on choosing the right AI model for your use case in the [**Pick Your LLM**](/for-users/all-about-llms/overview-of-llms) page.
{% endhint %}
{% hint style="info" %}
For more control over tone, creativity, and output style, see the [**Advanced Knowledge Bot Set Up**](/for-builders/how-to-build-a-knowledge-bot/advanced-knowledge-bot-set-up) page for guidance on Modifier Settings.
{% endhint %}
### **4. Write the Prompt Instruction**
This is where you define the exact task you want the AI to perform. You can either **import an existing pre-made prompt** or **write a new one** from scratch.
Tips for Writing Effective Workflow Prompts:
* Be as **clear**, **specific**, and **structured** as possible.
* Well-written instructions help the AI understand the outcome you're aiming for.
* Each step contains a single prompt, but workflows often involve multiple, connected steps to achieve more complex outputs.
* Designing effective workflows may require testing and refining your prompts until the results meet your expectations.
* You can also reuse an existing Prompt that contains a prompt by clicking the **Import Prompt** button in the workflow card.
{% hint style="info" %}
Explore the [**Prompt Guide**](/for-builders/prompting-for-prompt-library-and-workflows#what-are-workflow-prompts) for best practices on writing effective workflow instructions
{% endhint %}
### **5. Activate Web Research (Optional)**
The **Web Research** toggle allows the AI to search the internet for relevant and up-to-date information to support the task in this specific step.
* When enabled, the AI will supplement its response with online data — useful when you need timely information that may not be available in your Data Room.
* If the task doesn't require web-based information, you can simply leave this toggle off
{% hint style="info" %}
**Tip:** Activate the Web Research feature when your prompt is focused on a single, specific task (e.g., “Get current stock price of X” or “Summarize the latest article on Y”). Avoid using it for complex, multi-part prompts — this helps the AI return more accurate and targeted results.
{% endhint %}
### **6. Data Room Selection**
The **Data Room** is where the AI pulls information from to generate the result for this step.
* Think of it as a container of accumulated messages, documents, and insights which is everything shared in that workspace so far.
* The AI uses this context to produce more informed and relevant results for the current step.
* Selecting a Data Room ensures continuity across steps, allowing the AI to reference outputs or instructions from earlier in the workflow
### **7. Attach Results from Previous Step**
In longer, multi-step workflows, you can choose whether the output from a previous workflow card is passed on to the current one. This gives you control over how earlier results influence the next step in the process.
### Key Features Recap:
1. **Name**: Descriptive title for the task.
2. **Step Type**: Choose **Prompt** for tasks requiring instructions to the AI.
3. **Model**: Select the AI model that is most suited for the task.
4. **Instruction**: Provide detailed guidance for the AI on what to do.
5. **Web Research**: Toggle on if you want the AI to search the internet for additional data.
6. **Data Room**: Use the conversation thread (data room) as context for the task.
By following these instructions, you can effectively customize and configure each card in your workflow to meet your specific needs.
***
## Adding Integrations
You can integrate external APIs directly into a specific step of your Workflow. This allows your Workflow to fetch, post, or interact with live data from external tools or platforms.
### 1. Change Step Type to “Integration”
In the Workflow card, change the **Step Type** from `Prompt` to `Integration`.\
This unlocks additional configuration options for connecting to external APIs.
### 2. Add API URL
The **API URL** is the endpoint you want to connect to. This is typically provided by the external service you’re integrating with.
* Example: `https://api.example.com/v1/company-profile`
### 3. Choose HTTP Method
Select how the Workflow should interact with the API.\
You can choose from common HTTP methods:
* `GET` – Retrieve data
* `POST` – Send new data
* `PATCH` – Partially update data
* `PUT` – Fully update or replace data
* `DELETE` – Remove data
Choose the method that matches the API action you need.
### 4. Configure HTTP Settings
Click the **HTTP Settings** button to open the setup panel. You’ll need to choose the appropriate **Authentication Type** depending on the API you're using:
**🔐 Authentication Options:**
* **None.** No authentication required
* **Basic Auth.** Enter a **Username** and **Password** for authentication
* **Bearer Token.** Enter your **Token** for secure access
You can also configure:
* **Headers** (e.g., content-type, authorization)
* **Query Parameters** (key-value pairs added to the URL)
* **Request Body** (in JSON format)
These settings let you pass extra information the API might require (e.g., authentication credentials, filters, data payloads, etc.).
{% hint style="info" %}
**Tip**: For complex structures, validate your JSON before pasting.
{% endhint %}
### 5. Select a Data Room
Choose the **Data Room** where this Integration step will be executed and its results stored. Think of this like the chatroom context in ChatGPT—it helps the AI understand the environment for this task.
### 6. Set Run Mode
Choose how this step will be triggered:
* **Human in the Loop**: Manual review required before moving to the next step.
* **Autopilot**: Runs automatically as part of the Workflow.
***
## Scheduling Workflows
Workflows can now be scheduled to run automatically at specific times and frequencies—perfect for recurring tasks like daily reports, market scans, or product updates.
{% hint style="info" %}
Use this to automate research, reporting, or other regular AI tasks so you don’t have to start them manually.
{% endhint %}
### 1. Open the Workflow Menu
From your list of workflows, find the workflow you want to schedule. In this example, we’ll use **“Company Analysis.”**
### 2. Access the Scheduling Option
Click the **three-dot menu (•••)** beside the workflow name, then select **“Workflow Scheduling.”**
* A window will appear with scheduling fields:
* **Start Date**: Choose when the workflow should begin.
* **Time**: Set the specific time of day the workflow will run.
* **Repeat**: Select if you want the workflow to repeat (e.g., daily, weekly, monthly).
* **Notifications**: You may choose to **receive an email** every time this workflow executes.
{% hint style="warning" %}
Scheduling workflows can only be accessed through the right side toolbar settings.
{% endhint %}
***
## Sample Use Cases
Below are some practical ways to integrate workflows:
1. **Crafting a Brand Analysis** – A structured workflow can automate a deep dive into a company’s positioning. Start by analyzing industry trends, then gather competitive insights, and finally perform an internal assessment of services and overall performance. This approach ensures a well-researched and strategic brand analysis.
2. **Setting Up Continuous Market Monitoring** – Stay up to date on rapidly evolving topics like AI advancements or economic trends. You can now create a workflow that performs weekly web searches on a topic (e.g., “latest LLM model releases”) and summarizes them. Schedule it to run every Monday and send results directly to your email for convenient tracking.
3. **Enriching Reports with API Integrations** – Use integrations to fetch external data (e.g., product pricing, financial stats, or competitor feeds) directly into your workflow. For example, Step 1 could use an integration step to query an external pricing API, and Step 2 could summarize and contextualize that data using the AI model. This is especially useful for dashboards or real-time reporting.
***
## Best Practices
To maximize the effectiveness of your workflows, it's essential to design them with clarity, continuity, and precision in mind. Follow these best practices to ensure smooth execution and optimal AI performance:
1. **Break down complex prompts**: Focus on one specific query per step.
2. **Ensure continuity**: Each prompt should build on previous responses.
3. **Be clear and specific**: Define non-negotiable "need-to-know" information.
4. **Use concise, structured prompts**: Avoid vague or overly broad instructions.
5. **Provide context**: Give background information when necessary.
6. **Customize the LLM model**: Select the best model for each task to enhance output quality.
7. **Use Data Rooms to Organize**: Try organizing workflow responses into different datarooms
8. **Leverage Workflow Scheduling**: Have weekly scans, or automate repetitive workflows
## **FAQs**
1. **How do I trigger a Workflow?**
* You can start a Workflow manually from the Workflow tab or integrate it into other automated processes for seamless execution.
2. **Can I share Workflows with my team?**
* Anyone with access to the Knowledge Bot can also access the Workflows created within that bot.
3. **Why isn’t my Workflow giving accurate results?**
* Ensure each step is specific and clear, avoid overly complex prompts in a single step, and test different step sequences to optimize results.
# Prepare Intent Agent
The **Intent Agent** is a feature that users can enable to enhance AI efficiency. By providing descriptions for folders, the Intent Agent enables the AI to sift through the database source and assess which information is most relevant to users. The AI uses these folder descriptions to identify and prioritize the folders most likely to contain relevant information.
This feature transforms database sources from simple file repositories into structured resources optimized for quick and accurate data retrieval.
#### How it Works
1. **Folder Descriptions**: Users provide brief descriptions for each uploaded folder, enabling the AI to better understand the folder's contents.
2. **Intelligent Scanning**: The AI first analyzes these folder descriptions before processing large volumes of data.
3. **Relevance Assessment**: The AI identifies which folders are most likely to contain relevant information.
4. **Targeted Search**: The AI focuses on exploring files within the most promising folders.
## General Best Practices
1. **Avoid Complex and Large Folders**:
* Organize files into clearly defined subfolders based on specific themes, topics, or categories.
* *Example*: Divide a large department folder into smaller subfolders, such as project-specific subfolders for the entire Sales department.
2. **Limit Folder Depth**:
* Keep folder structures shallow, with a maximum of four levels.
* *Example*:
* Main Folder → 1st Subfolder
* Subfolder #1 → 2nd Subfolder
* Subfolder #2 → 3rd Subfolder
* Subfolder #3 → 4th Subfolder
3. **Maintain a Clean Database Sources**:
* Regularly remove duplicates, unused documents, and other unnecessary files to keep the database source organized and efficient.
4. **Consistent Labeling**:
* Create a standardized naming convention for files, including relevant keywords and dates when applicable.
5. **Ensure Files Have Complete Information**:
* Make sure all documents contain the necessary details to address potential queries.
* *Example A*: Clearly label company document templates and include the word "template" in the file name.
* *Example B*: Include the responsibilities and scope of each team or department in documents to help the AI direct users to the correct resources.
6. ***C*****onnect Relevant Database Sources**:
* Link related database sources to your Data Room to provide consistent and accurate responses.
7. ***S*****tart Small**:
* Focus on creating folder descriptions for complex folders first, while still aiming to make all folders clear and descriptive.
8. **Manage Database Sources Size Appropriately**:
* You can create up to 1,000 folders with descriptions without sacrificing accuracy. However, it’s best to gradually expand the folder structure to maintain a well-organized database source.
### Tips for Making Folder Descriptions
1. **Provide Context**:
* Clearly describe the folder's contents and explain how the information can be used.
2. **Keep Descriptions Concise**:
* Limit your descriptions to 500–800 characters to maintain clarity and readability.
3. ***U*****se Keywords**:
* Include words commonly associated with the folder's contents. These keywords improve search accuracy and categorization.
4. **Be Direct**:
* Avoid unnecessary introductions and focus on the essential details of the folder's contents.
* **Example**:
* *Before*: The folder '{{folder name}}' includes important files.
* *After*: This folder contains files related to XYZ.
### Outline for a "Good" Folder Description
Below is a sample folder description with three main parts: (a) short description, (b) details on the folder contents, and (c) keywords.
Example Case*: Describing a Folder Filled with Administrative Forms*
* Folder Description: "This folder contains essential administrative and operational forms and documents for 'COMPANY A' including forms for employee onboarding, preference calculations, and quality management procedures. This folder consist of administrative and operational forms used to support various aspects of company operations, compliance, and employee management."
### **Folder Description Breakdown**:
| *short description* | "Contains essential administrative and operational forms and documents for 'COMPANY A'..." |
| ------------------- | ------------------------------------------------------------------------------------------------------------------------------------------------------------ |
| *content details* | "...including forms for employee onboarding, preference calculations, and quality management procedures..." |
| *keywords* | "...This folder consist of administrative and operational forms used to support various aspects of company operations, compliance, and employee management." |
### How to Improve Folder Descriptions
1. ***Case 1: Too long***. Descriptions that are redundant can reduce efficiency.
| *sample case* | *bad folder description* | *improved description* |
| ------------------------------------------------------- | -------------------------------------------------------------------------------------------------------------------------------------------------------------------------------------------------------------------------------------------------------------------------------------------------------------------------------------------------------------------------------------------------------------------------------------------------------------------------------------------------------------------------------------------------------------------------------------------------------------------------------------------------------------------------------------------------------------------------------------------------------------------------------------------------------------------------------------------------------------------------------------------------------------------------------------------------------------------------------------------------------------------------------------- | ------------------------------------------------------------------------------------------------------------------------------------------------------------------------------------------------------------------------------------------------------------------------------------------------------------------------------------------------------------------------------------------------------------------------------------------------------------- |
| *Describing a folder filled with administrative forms.* |
This folder contains a variety of forms and documents used for different administrative, operational, and compliance purposes. Here is a detailed summary of its contents:
TR48-02: This form is used for documenting company property that is temporarily handed over to employees. It includes fields for item details, serial numbers, department, and signatures for both issuance and return.
TR48-03: This form is an onboarding plan for new employees. It outlines the necessary training and introductions, including safety briefings, department tours, and specific job-related training.
TR48-05: This document outlines the non-disclosure agreement terms between parties, including the return or destruction of confidential documents, rights to developments, and the governing laws.
TR48-10: This form is used for supplier information, particularly regarding environmental management systems and compliance with various environmental regulations.
|
Contains essential administrative and operational forms and documents for 'COMPANY A,' including forms for employee onboarding, property management, non-disclosure agreements, supplier information, access rights and device requests, preference calculations, and quality management procedures.
These documents support critical aspects of company operations, ensuring compliance and facilitating effective employee management.
|
1. ***Case 2: Too short***. Descriptions that don't give enough context.
| *sample case* | *bad folder description* | *improved description* |
| --------------------------------------------------------------------------------------------------- | ------------------------ | ---------------------------------------------------------------------------------------------------------------------------------------------------------------------------------------------------------------------------------------------------------------------------------------------------------------------------------------------------------------------------------------------------------------------------------------------------------------------------------------------------------------------------------------------------------------------------- |
| *Describing a folder that includes all details to an internship and trainee program in the company* | Folder for trainees |
Contains essential documents related to the company's apprenticeship and training programs.
This folder includes information on apprenticeship positions, trainer contact details, and guidelines for apprentices. Topics covered include working hour requirements, vacation entitlements, exam policies, and training report requirements, as well as details about additional training opportunities.
It serves as a vital resource for both apprentices and trainers at 'COMPANY A,' supporting effective program management and development.
|
1. ***Case 3: Inconsistent keywords***. Use words that are commonly used in the documents and widely understood by the company.
| *sample case* | *bad folder description* | *improved description* |
| ------------------------------------------------------------------ | ---------------------------------------------------------------------------- | ----------------------------------------------------------------------------------------------------------------------------------------------------------------------------------------------------------------------------------------------------------------------------------------------------------------------------------------------------------------------------------------------------------------------------------------------------------------------------------------------- |
| *Describing a folder on the equipments and tools of a sales team.* | Contains documents regarding information on the items used by the sales team |
Contains essential documents for 'COMPANY A's' sales team (TeamB2B), including:
An equipment list for the sales team's pilot case (Sales Kit).
An overview of product sample cases (Sales Equipment Inventory).
These documents detail the equipment, tools, and materials used for field sales activities, product demonstrations, and customer presentations, supporting the team's operational efficiency and effectiveness.
|
## **FAQs**
* **How does the Intent Agent decide which folders are most relevant?**
* The Intent Agent analyzes user-provided folder descriptions to identify and prioritize folders likely to contain relevant information before processing the contents.
* **When is it best to use the Intent Agent feature?**
* The feature is most useful when applied to database sources containing multiple folders with distinct topic areas, allowing it to efficiently prioritize and retrieve relevant information.
* **Is there a minimum number of files or folders required for the Intent Agent to be effective?**
* There is no strict minimum number of files or folders needed to use the Intent Agent. However, the feature is most useful when applied to database sources containing multiple folders with distinct topic areas, allowing it to efficiently prioritize and retrieve relevant information.
* **What happens if I don’t provide folder descriptions? Will the Intent Agent still work?**
* Without folder descriptions, the Intent Agent may not function optimally, as these descriptions are essential for relevance assessment.
# Use Insights
Insights are are text-based notes that you can input yourself, or allows you to store and retrieve previously saved AI interactions, making it easy to reuse knowledge from past conversations. This is useful for ensuring consistency in responses and retaining key learnings across teams.
These saved insights act as a personal knowledge base, helping users retain important AI-generated information, streamline workflows, and maintain consistency across multiple interactions. Unlike database sources, Insights are stored in full context without chunking, preserving the original message structure for improved retrieval and reuse.
#### **When to Use Insights**
* When past AI-generated responses need to be referenced frequently
* When team members share refined prompts or key findings from Data Rooms
* When specific contextual knowledge should be stored for quick access
## Sample Use Cases
#### **In Depth Example Use Case of Insights**
A customer support team uses Blockbrain to handle common technical troubleshooting requests. Team members frequently ask the AI bot for solutions to repeating customer issues, but responses can vary slightly depending on how the query is phrased.
Insights can improve the workflow of that situation through the following:
1. A support specialist asks the AI for a troubleshooting guide on a common issue and refines the response for accuracy.
2. Once the response is validated, they save it as an Insight so the team can reuse the response instead of regenerating it each time.
3. Now, when another team member encounters the same issue, they can retrieve the saved Insight instantly instead of waiting for a new AI-generated response.
4. Over time, the support team builds a library of verified troubleshooting steps, ensuring consistent and accurate AI-generated answers across the entire team.
#### **Other Use Case of Insights**
* **Research & Development Knowledge Base:** A research team compiles summaries of scientific papers, experimental findings, and competitor analyses into Insights. This allows them to quickly retrieve and reference past knowledge instead of duplicating research efforts.
* **Content Marketing & Copywriting**: A content marketing team stores brand tone guidelines, product descriptions, and frequently used marketing messages in Insights. Writers can quickly pull pre-approved messaging to maintain brand consistency across multiple campaigns.
* Create brand tone and guidelines, then save them as an Insight for easy reference when generating future marketing campaign content.
* **HR & Employee Training**: An HR department uses Insights to store company policies, onboarding procedures, and answers to frequently asked employee questions. This ensures HR representatives provide accurate and consistent responses without searching for documents every time.
## Ways to Create an Insight
There are multiple ways to create an insight:
1. **Save AI Chat as Insight:** Click on the 3-dot icon in the AI chat, select "Save message as an insight," using the AI-generated message as a note;
* Save message as an insight to your connected Destination Database
2. **Manually Add Insight:** Navigate to the Insights Tab, click "Add Insights" to type in your own insight, creating a text-based note in your own words.
* Insights in the Navigation to the Left
* Adding an Insight
## Managing Insights
#### **Accessing Insights**
You can access all insights created across all Knowledgebots and Data Rooms in the Knowledge Management Tab under the Insights section.
#### **Searching Insights**
Navigate to the Knowledge Management Tab and click the Insights Tab. There are two methods to search for insights:
1. **Keyword Search** → Use specific keywords to find relevant insights.
2. **Insights AI Search** → A powerful search tool that allows users to find specific insights based on context, not just keywords, enhancing retrieval efficiency by allowing users to set the number of search results to display.
This feature helps users quickly locate relevant information without manually browsing the Insights Page, which contains all insights created or shared with them.
***
## Best Practices
To maximize the effectiveness of Insights, follow these best practices to ensure consistency, accuracy, and ease of access for your team.
1. **Store Only High-Quality, Validated Information**
* Save accurate and well-structured content that has been reviewed or refined.
* Avoid storing duplicate, outdated, or incorrect responses to maintain reliability.
* Regularly audit and update Insights to ensure information remains current.
2. **Store Only Clear and Focused Threads**
* Save well structured threads that focus on a desired topic
* Avoid overly complicated threads that may confuse the AI when referenced in the future
3. **Use Clear, Consistent, and Descriptive Titles**
* Include relevant keywords in the title to make searching faster and more intuitive.
* Use consistent naming conventions across teams to improve organization.
* Example: Instead of *"Client Pitch"*, use "Sales Team: Sales Email Email - Follow up for Company X".
4. **Keep Responses Concise and Actionable**
* Store only the necessary details instead of long, unstructured content.
* Summarize key points clearly to make Insights quick to read and apply.
* If context is needed, add links to supporting documents instead of storing long explanations.
5. **Leverage Insights for Consistency Across Teams**
* Standardize customer support answers, sales scripts, company policies, and technical instructions.
* Ensure that AI-generated responses align with company-approved messaging.
* Regularly train team members on how to use Insights to maintain uniformity.
6. **Regularly Review and Clean Up Insights**
* Schedule routine audits to remove outdated or redundant information.
* Ensure Insights remain relevant and useful for evolving business needs.
* Encourage team feedback on stored Insights to improve quality.
## FAQs
* **Why should I use Insights?**
* Insights help you quickly save, organize, and retrieve useful AI responses without losing context. They are great for personal reference, collaboration, and sharing specific messages with others.
* **How are Insights different from Database Sources?**
* Unlike database sources, which store large volumes of structured data that undergo chunking, Insights are stored in full context, preserving the original message format.
* **How should I name my Insights?**
* Use consistent and descriptive titles that include relevant keywords for easy searching. Clear titles help you quickly locate Insights when needed.
# Optimize Contributed Knowledge
**Contribute Knowledge** allows you to save an Insight—an AI-generated message or conversation—directly into your database source. Instead of storing it in the Insights section, the content is saved within a selected database source, making it accessible to team members who have access to that database source.
This method is ideal for collaborative work, ensuring that key insights are systematically stored and structured within a shared knowledge base. Additionally, **team members who are subscribed to the database sources will receive email notifications about new contributions**, keeping everyone updated without manual coordination. However, since database sources undergo **chunking**, the information may be divided into smaller sections, which could slightly affect retrieval accuracy depending on the query.
## Managing Knowledge
**Contributed Knowledge can be managed in two ways.** You can access it directly within the specific database source where it was uploaded, or manage it centrally through the **Admin page**.
The Admin page provides a full overview of all contribution history, allows you to see which team members are subscribed to each database source, and gives you control over the **email notification content** sent to users when new knowledge is contributed.
{% hint style="info" %}
*Tip*: Create a separate folder within your database source for Knowledge Contributions in order to organize and easily clean up old contributions
{% endhint %}
***
## Best Practices
To ensure a scalable and effective use of this feature, follow these best practices to ensure consistency, accuracy, and ease of access for your team.
1. **Use for Finalized or High-Value Insights**: Save only high-quality, valuable AI responses that are worth sharing across the team. This avoids cluttering the database source with exploratory or draft-level messages.
2. **Review for Context Completeness**: Since content may be broken into smaller sections due to chunking, ensure the saved message is self-contained and clear on its own or includes sufficient context for future retrieval.
3. **Keep Contributions Organized**: Regularly review and clean up outdated or duplicated contributions to maintain a streamlined and efficient knowledge base.
***
## Use Cases
Below are sample use cases for Knowledge Contribution to help you explore how this feature can be applied effectively:
1. **Team Knowledge Sharing:** Save important AI-generated outputs, such as strategic ideas, summaries, or research findings, so others can easily access and build on them.
1. *Summarizing Legal Cases* → Save AI-generated summaries and analyses of lengthy legal documents into the database source, making it easier for team members to reference and cross-check relevant case information
2. **Project Collaboration:** Store key decision-making inputs or analysis generated during AI chats in a shared database source to keep all project collaborators aligned and informed.
1. *Marketing Playbook* → Contribute AI-generated marketing strategies, project guidelines, and brand messaging into the database source to ensure consistent execution and alignment across the team.
# Manage Bot Access
Your Knowledge Bot can be shared with your coworkers. By simply setting your bot on "Public", all your colleagues will be able to add the Bot to their dashboard. For more personalized sharing options, we have created the following options:
## Sharing Options
#### Direct Access
You can share your bot by providing its unique URL to the intended users. This method allows you to control access through permission settings, ensuring that only authorized individuals can interact with your bot. Additionally, you can monitor usage through analytics to track how and when your bot is being used.
#### Team Collaboration
For collaborative environments, enable your team members to access the bot's configurations (make them an Editor). This feature allows multiple users to make adjustments as needed and collaborate on improvements. By sharing access with your team, you can ensure that the bot evolves with collective input and expertise. If your coworkers should not edit the Bot Settings, simply invite them as Users.
#### Different Roles of Access
* User: If you give User access, your coworker will be able to use the Bot with the Settings you have chosen.
* Editor: If you give Editor access, your coworker will be able to edit the Bot's Settings.
* Owner: If you are the Owner of the bot, you are able to delete the Bot.
#### Access Management
Effective access management is essential for maintaining security and control over your bot. You can specify who has the ability to view the bot, use it, edit settings, and access analytics. This granular control helps in safeguarding your bot's integrity and ensuring that only authorized personnel can make significant changes.
{% hint style="danger" %}
*Before sharing your bot, double-check the access settings to ensure that they align with your security and collaboration policies.*
{% endhint %}
# AI Model and Agents Availability Control
Control which LLMs and Agents are available to your bot users. Set a permitted list of models and agents, or restrict users to the bot's default selection.
#### Overview
The **AI Models** section in Bot Settings lets **bot owners** and **bot editors** control which LLMs and Agents are available to bot users. The redesigned interface provides two dedicated sections:
* **Manage LLM Availability**: control which Large Language Models users can select
* **Manage Agent Availability**: control which Agents users can select
Both sections offer a toggle to allow all available options, or a customizable permitted list that restricts access to only the models and agents you choose.
***
#### Prerequisites
* You must have the **Bot Owner** or **Bot Editor** role for the bot you want to configure
* The LLMs and Agents you want to make available must already be enabled for your platform by your admin
***
#### How It Works
Each availability section has two modes:
| Mode | Behavior |
| --------------------------------- | --------------------------------------------------------------------------------- |
| **Allow all available** (default) | All platform-enabled LLMs or Agents are accessible to bot users |
| **Customize List** | Only the LLMs or Agents you add to the permitted list are accessible to bot users |
When **Allow users to select alternative LLMs** is toggled off, bot users are locked to the bot's configured default model and cannot switch. The same applies to Agents when **Allow users to select alternative Agents** is toggled off.
***
#### Managing LLM Availability
**Step 1: Open the AI Models Section**
1. Navigate to the bot you want to configure.
2. Open **Bot Settings**.
3. Select the **AI Models** section.
**Step 2: Configure LLM Availability**
In the **Manage LLM Availability** card you have three options:
**Option A: Allow all LLMs**
1. Make sure **Allow users to select alternative LLMs** is toggled on.
2. Select **Allow all available LLM**. All platform-enabled models will be accessible to users.
**Option B: Customize the permitted list**
1. Make sure **Allow users to select alternative LLMs** is toggled on.
2. Click **Customize List**.
3. In the **List of Permitted Bots** modal, select the LLMs you want to make available.
4. Save your selection. Only the chosen models will appear in the Quick Model Selector for users.
**Option C: Restrict to default model only**
1. Toggle off **Allow users to select alternative LLMs**. Users will only have access to the bot's configured default model and cannot switch.
{% hint style="info" %}
If you want to switch from a custom list back to allowing all LLMs, click **Allow all available LLM**. A confirmation dialog will appear warning you that your curated list will be cleared. Click **Allow All LLMs** to confirm.
{% endhint %}
***
#### Managing Agent Availability
The **Manage Agent Availability** card works the same way as LLM Availability:
**Option A: Allow all Agents**
1. Make sure **Allow users to select alternative Agents** is toggled on.
2. Select **Allow all available Agents**.
**Option B: Customize the permitted list**
1. Make sure **Allow users to select alternative Agents** is toggled on.
2. Click **Customize List**.
3. In the **List of Permitted Agents** modal, select the Agents you want to make available.
4. Save your selection.
**Option C: Restrict to default agent only**
1. Toggle off **Allow users to select alternative Agents**.
***
#### Configuring the Initial Model
At the top of the AI Models section, the **Configure Initial Model** card lets you set the default LLM that is pre-selected when users open the bot. Click **Change** to choose a different model, or open the model modifiers to adjust settings like temperature and response style.
***
#### Behavior by User Role
The table below summarizes what each role can see and do:
| Capability | Bot Owner / Bot Editor | Bot User |
| --------------------------------------------------------- | ----------------------------------- | ----------------------------------- |
| **Access Bot Settings: AI Models** | Yes | No |
| **Toggle LLM / Agent availability** | Yes | No |
| **Edit the permitted list** | Yes | No |
| **Quick Model Selector (all allowed)** | All platform-enabled models visible | All platform-enabled models visible |
| **Quick Model Selector (custom list)** | Only permitted models visible | Only permitted models visible |
| **Quick Model Selector (alternative selection disabled)** | Default model only | Default model only |
# Troubleshooting
Encountering issues with your bot? This guide is here to help and provides solutions to common problems, ensuring you can quickly resolve any issues and maintain smooth operation.
{% hint style="info" %}
If you are experiencing trouble with the usage of a Knowledge Bot (Connected Data, Prompting, Chatroom problems, Bot Limitations), please visit the the page: "Troubleshooting" in the for users section.
{% endhint %}
## Problem-solving Process
When encountering issues with the Blockbrain Knowledgebots, please follow this escalation path for efficient problem resolution:
### 1. Self-Help Resources
First, try to resolve the issue independently using these resources:
* **Blockbrain User Guide**
* Check error messages and common problems
* Review step-by-step solutions
* Follow recommended fixes
* **Blockbrain User Guide Bot**
* Ask direct questions
* Get immediate automated responses
* Access specific problem-solving guidance
{% hint style="info" %}
You can find the Blockbrain User Guide Bot as a Default Bot on your Dashboard.
{% endhint %}
### 2. Internal Support
If self-help resources don't resolve your issue, escalate internally:
1. **Contact Your Company Builder**
* Share detailed problem description
* Provide relevant screenshots
* Explain steps already taken
2. **Consult Your Company Admin**
* Escalate if Builder cannot resolve
* Provide previous communication history
* Detail all attempted solutions
### 3. Blockbrain Expert Support
The Blockbrain team is always here to help with complex issues that couldn't be resolved through other channels. Feel free to reach out when:
* You've explored self-help resources and internal support options
* Your Company Admin recommends escalation
* You need specialized expertise for your specific case
Our dedicated team will be happy to assist you with:
* In-depth technical analysis
* Custom solutions
* Expert guidance
{% hint style="warning" %}
This structured approach helps us provide you with the fastest and most effective support possible. While our team is always ready to help, many issues can be resolved quickly through self-help or internal support channels, saving you valuable time.
{% endhint %}
## Bot does not Generate Desired Responses - what can a builder do to remedy that?
If your bot is not producing the expected outputs, consider the following solutions:
#### Keep Prompts in English and Concise
* Ensure all prompts are written in clear, concise English for optimal performance. This is especially important in the initial instructions, prompt library and workflow prompts.
#### Vector Database Source Issues
* Check for overlapping or disorganized data in the vector database source.
* Ensure data is sufficient and accessible for AI processing.
* Pay attention to the bot's short-term and long-term memory capabilities. (connected files vs. database sources - for more information see "how to use a Knowledgbot")
* Verify proper data input procedures.
### Intent Agent
{% hint style="danger" %}
Have you tried using the Intent Agent for better Retrieval-Results?
{% endhint %}
#### Best Practices
1. **Avoid Complex and Large Folders**:
* Organize files into clearly defined subfolders based on specific themes, topics, or categories.
* *Example*: Divide a large department folder into smaller subfolders, such as project-specific subfolders for the entire Sales department.
2. **Limit Folder Depth**:
* Keep folder structures shallow, with a maximum of four levels.
* *Example*:
* Main Folder → 1st Subfolder
* Subfolder #1 → 2nd Subfolder
* Subfolder #2 → 3rd Subfolder
* Subfolder #3 → 4th Subfolder
3. **Maintain a Clean Database Sources**:
* Regularly remove duplicates, unused documents, and other unnecessary files to keep the database source organized and efficient.
4. **Consistent Labeling**:
* Create a standardized naming convention for files, including relevant keywords and dates when applicable.
5. **Ensure Files Have Complete Information**:
* Make sure all documents contain the necessary details to address potential queries.
* *Example A*: Clearly label company document templates and include the word "template" in the file name.
* *Example B*: Include the responsibilities and scope of each team or department in documents to help the AI direct users to the correct resources.
6. ***C*****onnect Relevant Database Sources**:
* Link related database sources to your Data Room to provide consistent and accurate responses.
7. ***S*****tart Small**:
* Focus on creating folder descriptions for complex folders first, while still aiming to make all folders clear and descriptive.
8. **Manage Database Source Size Appropriately**:
* You can create up to 1,000 folders with descriptions without sacrificing accuracy. However, it’s best to gradually expand the folder structure to maintain a well-organized database source.
#### Folder Description Best Practices
1. **Provide Context**:
* Clearly describe the folder's contents and explain how the information can be used.
2. **Keep Descriptions Concise**:
* Limit your descriptions to 500–800 characters to maintain clarity and readability.
3. ***U*****se Keywords**:
* Include words commonly associated with the folder's contents. These keywords improve search accuracy and categorization.
4. **Be Direct**:
* Avoid unnecessary introductions and focus on the essential details of the folder's contents.
* **Example**:
* *Before*: The folder '{{folder name}}' includes important files.
* *After*: This folder contains files related to XYZ.
#### Enhance Bot Creativity
* Select Nexus for improved creative outputs.
* Choose the right Language Learning Model (LLM) in the Settings.
* Adjust Model Modifiers in Settings for individual AI performance.
* Select the most suitable Search Method for your use case (see "how build a knowledgebot for more information).
## Issues with Sharing Bots
To avoid problems when sharing bots:
#### Create Bots in Workshop
* Always create bots intended for sharing in the Workshop, not directly on the Dashboard.
* Only bots created in the Workshop can be shared.
#### User Permissions
* Ensure users have the correct permissions for both the bot and associated database sources.
## Missing Features or Information Overload in Chatbot
#### Manage Action Settings
* Use toggles in Action Settings to activate or deactivate specific features and optimize chatbot functionality.
* Enable only the toggles essential for your use case.
* Deactivate unnecessary toggles to maintain bot simplicity and efficiency.
By following these troubleshooting steps, you can address common issues in the Builder role of your tool, ensuring optimal performance and user satisfaction.
# Manage your Domain
This guide is designed to help administrators effectively manage and configure their domain settings within our platform. Here, you'll find detailed instructions on setting up user permissions, customizing domain preferences, and optimizing security features to ensure a seamless and secure experience for all users.
## Invite Members
1. **Access User Management:** Go to the Admin tab and open the User Management dashboard.
2. **Initiate Invitation:** Click on the "Invite User" button.
3. **Enter User Details:** In the provided fields, type in the first name, last name, and email address of the user(s) you wish to add.
{% hint style="info" %}
**Note:** You have the option to add multiple users simultaneously by entering the details for each person before proceeding to the next step.
{% endhint %}
4. **Send Invitations:** Click on "Send Invitations" to dispatch email invites to the users you've added.
## Manage User Permission
Only administrators can see and manage user permissions.
1. Navigate to the **Admin** tab and **User Management** dashboard.
2. Click on the **Edit** icon located at the far right of a user row.
3. Assign a **Role** from the drop-down.
4. Click on **Save Changes**.
## Permission Levels
There are 3 types of permission levels/user roles for Knowledge Bots enterprise clients.
Role
Permissions
Administrator
Add Users: Invite new members to the platform.
Manage User Roles: Assign or change roles of platform members.
Manage Billing: Oversee subscription details and payments.
Manage Platform Capabilities: Configure platform settings and features.
Create & Manage Knowledge Bots: Build and customize bots for various use cases.
Create & Manage Knowledge Bases: Compile and organize information sources for bots to draw from.
Use Knowledge Bots: Interact with any of the bots that are publicly available or that were specifically shared with them.
Share Knowledge Bots: Distribute access to bots among team members.
Builder
Create & Manage Knowledge Bots: Build and customize bots for various use cases.
Create & Manage Knowledge Bases: Compile and organize information sources for bots to draw from.
Use Knowledge Bots: Interact with any of the bots that are publicly available or that were specifically shared with them.
Share Knowledge Bots: Distribute access to bots among team members
Consumer
Use Knowledge Bots: Interact with any of the bots that are publicly available or that were specifically shared with them.
## Deleting a User Account & Transferring Ownership
When a user leaves your organization and their account needs to be permanently deleted, you can transfer all of their assets to another person before removal.
***
#### What Gets Transferred?
When you select a **transfer recipient** during the permanent deletion process, the following assets are automatically transferred to that person — including **full ownership rights**:
* **Bots**
* **Knowledge Bases**
* **Files**
***
#### How to Delete a User & Transfer Their Assets
1. Navigate to **User Management** in your workspace settings.
2. Select the user account you want to delete.
3. Choose the **Permanent Delete** option.
4. When prompted, select a **transfer recipient** from your workspace.
5. Confirm the deletion.
All assets listed above will be transferred to the selected recipient automatically.
> **Important:** Always select a transfer recipient **before** confirming the permanent deletion. Skipping this step may result in permanent data loss.
## Customizing Domain Preferences
### AI Model Selection
As an admin, you have the ability to choose from a variety of AI models that can be utilized by bot builders on the platform. This flexibility allows you to tailor the capabilities of your bots to meet specific needs and preferences.
AI Model Selection for Admins
1. **Accessing the AI Models Section**:
* Log in to your admin account.
* Navigate to the "AI Models" section in the admin dashboard.
2. **Review Available Models**:
* Browse through the list of AI models provided by leading providers such as OpenAI, Anthropic, Meta, and Mistral.
* Each model comes with a brief description of its capabilities.
3. **Model Selection**:
* Select the models you wish to make available for bot builders by activating the toggle on the left hand side.
{% hint style="info" %}
**Consider the specific requirements of your bots, such as language processing capabilities, response time, and data handling.**
{% endhint %}
### Embedding Model Selection
As an admin, you have the capability to choose from a variety of embedding models that can be utilized to enhance database source functionalities. These models help in transforming data into vector representations, enabling efficient search and retrieval operations.
Embedding Model Selection
1. **Accessing the Embedding Models Section**:
* Log in to your admin account.
* Navigate to the "Embedding Models" section in the admin dashboard.
2. **Review Available Models**:
* Browse through the list of embedding models provided by leading providers.
* Each model comes with a brief description of its capabilities and ideal use cases.
3. **Model Selection**:
* Select the models you wish to make available for bot builders by activating the toggle on the left hand side.
{% hint style="info" %}
Consider the specific requirements of your database source, such as data type compatibility, processing speed and data quantity.
{% endhint %}
### Managing Analytics
The "Analysis" Tab provides comprehensive tools for tracking user activity. \
You can view the total number of requests made, total and active users, the number of requests in various systems like Nexus and Retriever, and how activity has changed over time.
#### **Features of the Analytics Tab**
1. **Monitoring User Activity**:
* Track the number of requests made and activity across Nexus & Retriever.
* Identify trends in user activity and see how many users are currently active.
2. **Setting the Timeframe**:
* Adjust the timeframe in the top right corner to obtain specific evaluations for a selected period.
* Use the option in the upper right corner to select the desired timeframe.
3. **Viewing Conversations**:
* Analyze conversations for the selected period.
* Use Conversation IDs to trace what was written and understand why certain results were produced.
* By clicking on the Window-Icon on the right hand side of any given conversation you may see the chat history.
# User Account Management
Learn how to manage and edit user accounts as an Admin.
### Deactivating and Reactivating Users
As an admin, you can temporarily disable a user's access to Blockbrain without permanently deleting their account. This is useful in situations such as when an employee leaves the company but you want to preserve their account data.
**How to Deactivate a User**
1. Navigate to the Users section in the admin panel.
2. Locate the user you want to deactivate.
3. In the Active column, toggle the switch off for that user.
4. A confirmation dialog will appear, warning that the user will lose access to the platform after deactivation.
5. Click Deactivate to confirm, or Cancel.
**What Happens When a User is Deactivated**
* The user's Status changes from *Active* to *Inactive*.
* The user will no longer be able to log in to the platform.
* The account and all associated data are preserved and can be restored at any time.
***
#### Editing a User's Role
As an admin, you can change a user's role by clicking the pencil (edit) icon in their row. A user's role determines what they can access and manage within the platform.
**How to Edit a Role**
1. Navigate to the Users section in the admin panel.
2. Locate the user whose role you want to change.
3. Click the pencil icon on the right side of their row.
4. Select the desired role from the list.
5. Save your changes.
**Available Roles**
| Role | Description |
| ------------ | ---------------------------------------------------------- |
| **Admin** | Can manage all user roles and access for the organization. |
| **Builder** | Can build and manage all bots for the organization. |
| **Pro User** | Can build and manage their own bots. |
| **User** | Can use knowledge bots that are provided. |
# Classic Microsoft Integrations
Explore the various integrations available in Blockbrain and learn how to connect your existing tools for seamless authentication, file access, and collaboration
## Available Integrations
1. [**Entra ID**](/for-admins/classic-microsoft-integrations/entra-id-integration) *(preliminary)*
2. [**Azure Groups**](/for-admins/classic-microsoft-integrations/azure-groups-integration)
3. [**Sharepoint**](/for-admins/classic-microsoft-integrations/create-a-sharepoint-connection)
4. [**Onedrive**](/for-admins/classic-microsoft-integrations/onedrive-admin-consent)
### Recommended App Registration per Azure App
For most customers, we recommend creating a **separate Azure App Registration for each Blockbrain agent or capability** (e.g. one for SharePoint, one for Outlook, one for OneDrive).
This approach gives you:
* **Least privilege:** Each App Registration only holds the Microsoft Graph scopes it actually needs, so no agent is over-permissioned.
* **Separation of concerns:** A misconfigured or unused agent cannot accidentally affect another agent's access.
* **Easy secret rotation and revocation:** You can rotate or revoke the client secret for a single capability without disrupting the others.
* **Cleaner audit trail:** Entra ID sign-in and audit logs are scoped per App Registration, which makes incident review and access reviews simpler.
{% hint style="warning" %}
While this documentation provides detailed steps we recommend a brief setup call with our expert team to ensure a smooth implementation.
Though not mandatory, experience has shown that a 15-20 minute setup call can significantly accelerate your integration and help avoid potential configuration issues.
To schedule a setup call please contact your Key Account Manager.
{% endhint %}
# Entra ID Integration
This guide provides a step-by-step walkthrough for integrating Microsoft Azure Active Directory (AD) as an identity provider with Blockbrain Auth, streamlining the registration and login experience.
## 1. Azure AD Configuration
You need to have access to an Azure AD Tenant. If you do not yet have one follow [this guide from Microsoft](https://docs.microsoft.com/en-us/azure/active-directory/develop/quickstart-create-new-tenant) to create one for free.
## 2. Register a new client
1. Browse to the [App registration menus create dialog](https://portal.azure.com/#view/Microsoft_AAD_RegisteredApps/CreateApplicationBlade/quickStartType~/null/isMSAApp~/false) to create a new app.
2. Give the application a name and choose who should be able to login (Single-Tenant, Multi-Tenant, Personal Accounts, etc.) This setting will also have an impact on how to configure the provider later on in Blockbrain Auth.
3. Choose "Web" in the redirect uri field and add the URL: `https://auth.theblockbrain.ai/ui/login/login/externalidp/callback`
Azure App Registration
4. Save the **`Application (client) ID`** and the **`Directory (tenant) ID`** from the detail page.
Azure Client ID and Tenant ID
## 3. Generate a new client secret
1. Click on client credentials on the detail page of the application or use the menu **`Certificates & secrets`**
2. Click on **`+ New client secret`** and enter a description and an expiry date, add the secret afterwards
3. Copy the **Value of the secret** and store it in a safe place (Password Manager) for future usage.
> You will not be able to see the value again in Azure in the future. \
> If you lose your secret or if the secret is expired, you need to create a new secret again.
Azure Client Secret
## 4. Configure the Auth Token
1. Click on **`Token configuration`** in the side menu
2. Click on **`+ Add optional claim`**
3. Add **`email`**, **`family_name`**, **`given_name`** and **`preferred_username`** to the **`ID`** token
Azure Token Configuration
## 5. Set API permissions
1. Go to **`API permissions`** in the side menu
2. Make sure the permissions include "Microsoft Graph": **`email`**, **`profile`** and **`User.Read`**
Azure API Permissions Step 1
## 6. Setup Entra-ID in Blockbrain
1. Go to the **`Integration`** section in the **`Admin`** Settings.
2. Click on the **`Connect`** button for EntraId with the following settings.
## 7. Add other permissions granted
OpenID authorization is essential for enabling the OpenID Connect protocol. This protocol is particularly important for managing user logins and issuing ID tokens in applications.
> In the context of app registration, 'other permissions' refer to the specific access rights or 'scopes' required by an application. These Scopes determine what data and features the application can access on behalf of the user.
1. User Consent: On the user's first login, they will be prompted to grant these permissions. This step is crucial for ensuring user agreement and security compliance. \
**Depending on your Organization setup, admin consent might be needed**.
Azure Permission Consent Screen
2. After the consent was fulfilled, the permissions will be active and listed in the App Registration - Authentication and signin is now possible, the application has the necessary access rights.
1. The "Other permissions granted" should include "Microsoft Graph: **`openid`**"
Azure API Permissions Step 2
# System for Cross-Domain Identity Management (SCIM)
### Pre-requisites
1. You need to be Entra ID Admin
2. You need to be Blockbrain Admin
### Step 1 - Generate SCIM Token in Blockbrain
1. Go to the Admin Tab → Integrations → SCIM Provisioning → Manage → Generate token
2. Copy the token for the next steps
### Step 2 - Create an Enterprise Application in Azure
1. Go to Azure Portal → Entra ID → Enterprise applications
2. Click New application → Create your own application
3. Name it blockbrain (or your org's name), select "Integrate any other application you don't find in the gallery"
4. Click Create
### Step 3 - Configure Provisioning
1. Go to Provisioning → Get started
2. Set Provisioning Mode to Automatic
3. Under Admin Credentials:
1. Tenant URL, Value: `https://integrations.theblockbrain.ai/scim/v2`
2. Secret Token, Value: ``
4. Click Test Connection — you should get a green success banner
5. Click Save
### Step 4 - Configure for Attribute Mappings
Entra's defaults work but need minor cleanup. Under Mappings, open Provision Entra ID Users.
Required user attributes (keep these):
Entra attribute
SCIM attribute
userPrincipleName
userName
IsSoftDeleted
active
mail
emails[type eq "work"].value
givenName
name.givenName
surname
name.familyName
displayName
displayName
objectId
externalId
Important: externalId mapped to objectId is what blockbrain uses for idempotency — if a user is re-provisioned, blockbrain finds the existing record by Entra object ID and returns 200 instead of creating a duplicate.
For Groups, open Provision Entra ID Groups:
Entra attribute
SCIM attribute
displayName
displayName
objectId
externalId
members
members
Entra automatically flattens nested group hierarchies server-side before sending — blockbrain's Entra adapter expects this and treats all members entries as direct user IDs.
### Step 5 - Scope which users/groups get provisioned
Under Settings → Scope, choose one of:
* "Sync only assigned users and groups" — recommended; you control who is provisioned by assigning them to this Enterprise App
* "Sync all users and groups" — provisions your entire directory
To assign users/groups: go to Users and groups → Add user/group.
### Step 6 - Start provisioning
1. Under Provisioning, set Provisioning Status to On
2. Click Save
3. Click Provision on demand to test with a specific user before the full cycle runs
### What happens when Entra provisions a user
Entra POST /scim/v2/Users → blockbrain checks MongoDB for existing userName or externalId (idempotent)\
→ if new: creates identity in Zitadel, writes to MongoDB mapping\_user\
→ user auto-added to tenant's general group\
→ effectiveRole computed and synced to Zitadel project grant\
→ returns 201 (or 200 if already existed)
### When a user is disabled in Entra (or removed from the app scope):
→ MongoDB status → "inactive"\
→ Zitadel: POST /v2/users/{id}/deactivate\
→ user can no longer log in to blockbrain
▎ Note: Entra sometimes sends active: "False" as a string — the handler covers both false (boolean) and "False" (string).
### What happens when Entra provisions a group
```
Entra POST /scim/v2/Groups
{ "displayName": "KB Builders", "externalId": "", "members": [...] }
```
→ blockbrain checks by externalId (idempotent)\
→ creates group\_user record in MongoDB with isAutoSync: true\
→ members list contains Zitadel user IDs (Entra flattens nesting automatically)\
→ returns 201
Groups in blockbrain default to the consumer role. To elevate a group to builder, admin, etc., update the group's role via the blockbrain admin interface — that role is then applied as the effectiveRole for all members.
### Provisioning cycle
Entra runs an incremental sync every \~40 minutes. A full cycle runs every \~24 hours. You can trigger Provision on demand anytime for a specific user/group.
### Troubleshooting
Symptom
Check
Test Connection fails 401
Token is wrong or provider mismatch — regenerate with "provider": "entra"
Test Connection fails 404
Tenant URL wrong — must end in /scim/v2 not /scim/v2/
Duplicate users
externalId → objectId mapping missing from attribute map
### Role Provisioning
#### The core problem
SCIM has no standard for roles. Entra sends roles through an AppRoleAssignmentsComplex attribute using a non-obvious format. The code handles this in parseSCIMRoleValue inside repository.ts:9.
What Entra actually sends
When you assign an App Role to a user in Entra, it arrives in the SCIM PATCH body like this:
The value field is a stringified JSON object, not a plain string. The code at repository.ts:13 detects this, parses it, and extracts the inner value field ("admin") as the actual role key.
Entra may also send roles as an array of objects (without the filter path), in which case value\[0].value is used.
#### Blockbrain role names
The valid roles are defined in role-engine.ts. They must match exactly (case-insensitive):
* consumer
* builder
* pro-user
* admin
* superadmin
Anything that doesn't match falls back to consumer.
#### How to configure this in Entra
**Step 1 — Define App Roles in your Enterprise Application**
In Azure Portal, go to your Enterprise App → App roles → Create app role. Create one role per blockbrain role level:
Display name: Blockbrain Consumer\
Value: consumer\
Description: Read-only access Allowed: Users/Groups
Display name: Blockbrain Builder\
Value: builder\
...
Display name: Blockbrain Admin Value: admin ...
The Value field is what blockbrain reads. It must be exactly consumer, builder, pro-user, admin, or superadmin.
**Step 2 — Add the attribute mapping in Entra SCIM**
In the Enterprise App → Provisioning → Attribute Mappings → Provision Entra ID Users, add a new mapping:
* Mapping type: Expression
* Expression: AppRoleAssignmentsComplex(\[appRoleAssignments])
* Target attribute: roles
This is what causes Entra to send the stringified JSON object format the code expects.
**Step 3 — Assign roles to users or groups**
In the Enterprise App → Users and groups, when you assign a user or group, Entra will ask you to select a role. Pick the appropriate blockbrain role. Users with no role assignment get consumer by default.
# Azure Groups Integration
This guide provides a step-by-step walkthrough for setting up Azure Groups Integration within the Blockbrain Knowledge Bot Platform.
{% hint style="warning" %}
**Attention:** Before you connect **Azure Groups**, please make sure that you have already completed the [**Entra ID integration**](/for-admins/classic-microsoft-integrations/entra-id-integration)**!**
{% endhint %}
## 1. **Create a New Sites Admin App**
Go to the Overview page and obtain the **`Application (client) ID`** and **`Directory (tenant) ID`**. \
Save this information in a text file.
## **2. Grant Graph API Permission**
1. Navigate to **`API permission`** and **`+ Add a permission`** there. Use the **`Application permission`** option there.
Always use application permissions instead of delegated permissions
2. In the Sites Admin App Registration, grant Graph API permissions for **`User.Read.All`**, **`Group.Read.All`**, **`GroupMember.Read.All`**
Azure group access will always need User.Read.All rights (User.Read only will not work)
3. With admin rights, click the **`Grant admin consent`** link to approve the permissions.
## 3. Create a Client Secret Key
1. Navigate to the **`Certificates & Secrets`** page to create client secrets.
2. Copy the **Secret Key Value** (NOT the Secret ID) to the text file containing the Client ID and Tenant ID.
3. Your text file should now include
## 4. Set up the Azure Groups Integration
1. Inside of the Admin Integration Section on Blockbrain, provide the **`Client ID`**, **`Secret Key Value`, `Tenant ID`** of the Target Application, and a list of selected sites to connect to the Knowledge Bots platform.
## 5. Sync your Azure Groups
1. In the Admin Groups Section on Blockbrain, use the **`Sync Azure Group`** Button to manually sync your groups from Azure.
# Create a Sharepoint Connection
This guide provides a step-by-step walkthrough for setting up SharePoint folders as knowledge bases using Azure Active Directory applications.
{% hint style="warning" %}
**Attention:** Before you connect **Sharepoint**, please make sure that you have already completed the [**Entra ID integration**](/for-admins/classic-microsoft-integrations/entra-id-integration)**!**
{% endhint %}
## 1. **Create a New Sites Admin App**
Go to the Overview page and obtain the `Application (client) ID` and `Directory (tenant) ID`. \
Save this information in a text file.
{% hint style="success" %}
We will only need the Admin App in this step to assign permissions to your Target App and credentials are not persisted. Optionally you can also delete the Admin App after the full setup process.
{% endhint %}
Still want to avoid Admin App Permissions?
If you prefer to avoid giving admin app permissions, please integrate using[Sharepoint Manual Site Setup](/for-admins/classic-microsoft-integrations/create-a-sharepoint-connection/sharepoint-manual-site-setup).
*(This will require you to use **PnP PowerShell** or **Microsoft Graph API** to manually grant the app access to specific SharePoint sites)*
## **2. Grant Graph API Permission**
1. Navigate to `API permission` and `+ Add a permission` there. Use the `Application permission` option there.
Always use application permissions instead of delegated permissions
2. In the Sites Admin App Registration, grant Graph API permissions for **`Application.Read.All`, `Sites.FullControl.All`.**
Important: Why Sites.FullControl.All?
The far-reaching rights (Sites.FullControl.All) are only required for the one-off setup. Specifically:
1. **Admin Application:**
* The Admin App only needs Sites.FullControl.All to assign the required authorizations to the target application.
* The access data of the Admin App is not saved permanently.
2. **After setup:**
* During operation, only the target application accesses SharePoint - and only the sites that are actually relevant.
* The rights of the target application are restricted accordingly.
3. **Optional:**
* The admin app can even be deleted again once setup is complete.
**Conclusion:**\
The extensive rights are only temporary and only necessary for the initial configuration. During subsequent operation, only the minimum required rights are used.
3. With admin rights, click the **`Grant admin consent`** link to approve the permissions.
## 3. Create a Client Secret Key
1. Navigate to the **`Certificates & Secrets`** page to create client secrets.
2. Copy the **Secret Key Value** (NOT the Secret ID) to the text file containing the Client ID and Tenant ID.
3. Your text file should now include
## **4. Create an additional Target Application**
1. Follow the same steps as above to register another application, which will serve as the target application for SharePoint integration.
2. Ensure that this application also has **`Sites.Selected`** permissions.
3. After registering, create a new **Secret Key Value** (NOT the Secret ID) and save it. Your target app text file should now include:
## **5. Configure SharePoint Integration in Blockbrain**
{% hint style="warning" %}
**Attention:** At this point you will have 2 Azure Apps configured (Admin and Target). \
If not, go back to step [#id-4.-create-an-additional-target-application](#id-4.-create-an-additional-target-application "mention").
{% endhint %}
1. Access the **`Integrations`** Panel in Blockbrain by clicking on the **`Admin`** button at the top right corner of the screen.
2. In the Integrations section, click on the SharePoint Integrations **`Connect`** button to begin setting up the integration.
3. Choose the **`SharePoint Site Discovery (Admin Key Required)`** option.
{% hint style="warning" %}
**Attention:** If you prefer to avoid giving admin access permissions with the **`SharePoint Site Setup (No Admin Key)`** Option, please refer to[Sharepoint Manual Site Setup](/for-admins/classic-microsoft-integrations/create-a-sharepoint-connection/sharepoint-manual-site-setup).
{% endhint %}
4. Enter the **Admin Azure App Details** in the pop-up window that will appear for configuring the integration.
* **`Application (client) ID`** (Admin App)
* **`Secret Key Value`** (NOT the Secret ID - of the Admin App)
* **`Directory (tenant) ID`** (Admin App)
5. Fetch all available sites by click on **`Get Sites`**. The system will display a list of SharePoint sites that you can connect to.
6. From the list of available sites, **select the ones you want to integrate** with Blockbrain. Multiple sites can be selected by clicking on each option. Click on the **`Next`** button to finalise.
{% hint style="success" %}
You can aways change the connected Sites later by selecting new ones in this view or deselecting the ones you want to disconnect.
{% endhint %}
7. In the final configuration screen, enter the **Target Azure App Details from** [#id-4.-create-an-additional-target-application](#id-4.-create-an-additional-target-application "mention") and click on the **`Save`** button to connect.
* **`Application (client) ID`** (Target App)
* **`Secret Key Value`** (NOT the Secret ID - of the Target App)
{% hint style="danger" %}
**Data Disconnection Warning:**
Be aware that **all data in the old SharePoint folder will be disconnected** when you proceed with the integration. Ensure that you are ready to disconnect the old folder before saving.
{% endhint %}
## 6. Connect a Sharepoint Site as Knowledge Base
1. To connect a site to a knowledge base and use it with a bot, follow the instructions in [Connect a Sharepoint Site as Knowledge Base](/for-admins/classic-microsoft-integrations/create-a-sharepoint-connection/connect-a-sharepoint-site-as-knowledge-base)
## Best Practices & Troubleshooting
* **Credentials Accuracy**\
Double‑check **`Client ID`**, **`Client Secret Key`**, and **`Tenant ID`** against your Azure AD app.
* **API Permissions**\
Confirm the Azure AD app has been granted and consented for the required Graph scopes.
# Sharepoint Manual Site Setup
This guide provides a step-by-step walkthrough for setting up SharePoint folders as knowledge bases using Azure Active Directory applications without the need for an Admin App.
## 1. **Create a New Sites Target App**
Go to the Overview page and obtain the `Application (client) ID` and `Directory (tenant) ID`. \
Save this information in a text file.
## **2. Grant Graph API Permission**
1. Navigate to `API permission` and `+ Add a permission` there. Use the `Application permission` option there.
Always use application permissions instead of delegated permissions
2. In the Sites Admin App Registration, grant Graph API permissions for **`Sites.Selected`**.
3. With admin rights, click the **`Grant admin consent`** link to approve the permissions.
## 3. Create a Client Secret Key
1. Navigate to the **`Certificates & Secrets`** page to create client secrets.
2. Copy the **Secret Key Value** (NOT the Secret ID) to the text file containing the Client ID and Tenant ID.
3. Your text file should now include
## 4. Manually **Grant SharePoint Site Access**
1. Follow the Step-by-Step guide to grant the Target App permissions for given Sharepoint sites: [Manually Grant SharePoint Site Access](/for-admins/classic-microsoft-integrations/create-a-sharepoint-connection/sharepoint-manual-site-setup/manually-grant-sharepoint-site-access)
## **5. Configure SharePoint Integration in Blockbrain**
1. Access the **`Integrations`** Panel in Blockbrain by clicking on the **`Admin`** button at the top right corner of the screen.
2. In the Integrations section, click on the SharePoint Integrations **`Connect`** button to begin setting up the integration.
3. Choose the **`SharePoint Site Setup (No Admin Key)`** option.
4. Enter the **Admin Azure App Details** in the pop-up window that will appear for configuring the integration.
* **`Application (client) ID`** (Target App)
* **`Secret Key Value`** (NOT the Secret ID - of the Target App)
* **`Directory (tenant) ID`** (Target App)
* **`Site URL`** (Add all sites you want to connect)
5. After setup, you can always add or remove the sites at any time by clicking on the **`Re‑configure`** button.
## 6. Connect a Sharepoint Site as Knowledge Base
1. To connect a site to a knowledge base and use it with a bot, follow the instructions in [Connect a Sharepoint Site as Knowledge Base](/for-admins/classic-microsoft-integrations/create-a-sharepoint-connection/connect-a-sharepoint-site-as-knowledge-base)
## Best Practices & Troubleshooting
* **Credentials Accuracy**\
Double‑check **`Client ID`**, **`Client Secret Key`**, and **`Tenant ID`** against your Azure AD app.
* **URL Format**\
Ensure each URL begins with **`https://`** and follows **`/sites/`**.
* **API Permissions**\
Confirm the Azure AD app has been granted and consented for the required Graph scopes.
* **Scaling Up**\
If you need to onboard many sites at once, consider the **Site Discovery** method with Admin Key.
# Manually Grant SharePoint Site Access
This guide provides a step-by-step walkthrough for granting specific SharePoint sites permissions to a given target application.
{% hint style="warning" %}
**Prerequisites:** Before proceeding, ensure you have **Site Admin rights** on the target SharePoint site. You can verify this by navigating to `_layouts/15/mngsiteadmin.aspx` on your SharePoint site. Additionally, the SharePoint site permissions must be set to **Full Access** for this step to work.
You can use **PnP PowerShell** or **Microsoft Graph API** to grant the app access to specific SharePoint sites with only **`Read`** permission.
* 🔗 [PnP PowerShell Documentation](https://pnp.github.io/powershell/cmdlets/Grant-PnPAzureADAppSitePermission.html)
* 🔗 [Microsoft Graph API Documentation](https://learn.microsoft.com/en-us/sharepoint/dev/sp-add-ins-modernize/understanding-rsc-for-msgraph-and-sharepoint-online) (shown below)
{% endhint %}
## 1. Create an Admin App
1. Create Admin App with **`Sites.FullControl.All`** permission. For a step-by-step guide, check the admin app section on[Create a Sharepoint Connection](/for-admins/classic-microsoft-integrations/create-a-sharepoint-connection).
## 2. Get access token of Admin App by Postman
1. Use the **`Client Id`**, **`Client Secret Key`**, **`Tenant Id`** of the Admin App to **`POST`** to **`https://login.microsoftonline.com//oauth2/token`**
## 3. Get the Sharepoint site id
1. Create a **`GET`** request to **`https://graph.microsoft.com/v1.0/sites/`** with the **`access_token`** from the previous step as **`Bearer Token`** auth and save the returned **`id` .**
## 4. **Assign** SharePoint site **permission to target application**
1. Create a **`POST`** request to **`http://graph.microsoft.com/v1.0/sites//permissions`** with the following JSON payload:
```json
{
"roles": [
"read"
],
"grantedToIdentities": [
{
"application": {
"id": YOUR_TARGET_APPLICATION_ID,
"displayName": "displayName"
}
}
]
}
```
## 5. Add Sharepoint site on Blockbrain platform
1. Continue with **`5. Configure SharePoint Integration in Blockbrain`** on [Sharepoint Manual Site Setup](/for-admins/classic-microsoft-integrations/create-a-sharepoint-connection/sharepoint-manual-site-setup)
# Connect a Sharepoint Site as Knowledge Base
This guide provides a step-by-step walkthrough for connecting a SharePoint Site as knowledge base to use with bots.
## 1. Connect a new Sharepoint Site as Database
1. Go to the **`Knowledge Management`** tab and click the **`Connect Sharepoint`** button.
## 2. Select the Sites or Folders
1. Connect the relevant Sites, Folders and even Events you want to index and click the **`Continue`** button.
## 3. Create the database
1. Provide a reasonable **`Name`** and **`Description`** for your database and click the **`Create`** button to \`finalize.
## 4. Use the Sharepoint Database
1. Once fully indexed and vectorized, the database can be used just like a regular database.
2. Select the database in your bot to use it for RAG.
# OneDrive (Admin Consent)
This guide provides instructions for Connecting to OneDrive When Admin Consent Is Required
### 1. **Understand the Admin Consent Request**
* **What You See:** A notification that informs you the application requires admin consent to access organizational resources.
* **Message:** The app cannot be used until an administrator grants the necessary permissions.
**How to Proceed:**
* **If you are an administrator:** Log in using your admin account to approve the request.
* **If you are not an administrator:** Contact your organization's admin to request approval for the app.
### 2. **Review the Requested Permissions**
* This page lists all the permissions the app is requesting, such as:
* Reading items in site collections.
* Reading user files.
* Accessing all files that users can access.
* Maintaining data access.
* Reading user profiles.
* Consent on behalf of the organization (applies permissions for all users in the organization).
**Key Notes:**
* Only administrators can grant "Consent on behalf of your organization."
* Ensure that you carefully review these permissions before proceeding.
### 3. **Approve or Decline the Request**
* If you **trust the app and are an administrator**, click **“Accept”** (Akzeptieren) to grant the requested permissions.
* If you **do not approve**, click **“Cancel”** (Abbrechen) to deny access.
### 4. **Report or Seek Support If Necessary**
* If the app seems suspicious, click **“Report this app”** (Hier melden) to notify Microsoft.
* For further assistance, contact your IT department or system administrator.
{% hint style="warning" %}
#### **Security Reminder**
* Only approve apps you fully trust and understand.
* Avoid granting permissions that provide broad access to organizational data unless strictly necessary.
{% endhint %}
# Google SSO
Simplify user access to your Blockbrain-Instance with Google Single Sign-On (SSO).
## Integrating Google as an Identity Provider
#### Prerequisites
Before you begin:
* You have access to the **Google Cloud Console** with permissions to create OAuth credentials.
* Request the **ZITADEL Callback URL** for your instance from Blockbrain
#### 1. Google Configuration[](https://zitadel.com/docs/guides/integrate/identity-providers/google#google-configuration)
**Register a new client**[****](https://zitadel.com/docs/guides/integrate/identity-providers/google#register-a-new-client)
1. Go to the Google Cloud Platform and choose your project:
2. Choose or create a project.
3. Click on "+ CREATE CREDENTIALS" and choose "OAuth client ID".
4. Choose "Web application" as application type and give a name.
5. Set a name (e.g., `Blockbrain SSO Client`).
6. Paste the **ZITADEL Callback URL** you copied before to the Authorised redirect URIs.
#### 2. Finalize the Configuration in ZITADEL
**Client ID and Key (Secret)**[****](https://zitadel.com/docs/guides/integrate/identity-providers/google#client-id-and-secret)
After you've created the project, you will receive **Client ID** and **Client Key (Secret)**.
> **Important**: For security reasons, do not send your Client Secret or Client ID to Blockbrain via email or chat.
>
> You can configure Google as your identity Provider directly in your Blockbrain account admin interface.
**To complete the setup**:
1. Log in to your Blockbrain admin interface with your admin account
2. Navigate to **Admin** > **Integrations** > **Google Identity Providers**
3. Click **Add connection**
4. Enter your **Client ID** and **Client Secret** from your Google Cloud project
5. Save your changes by clicking **Connect**
If you encounter any issues, please contact Blockbrain support.
#### 3. Logging in
After successful completion of the setup your contact at Blockbrain will let you know that Google SSO is now available to users of your instance. \
Just click the "Google"-Button and enter your credentials to sign on.
# Add-Ins
Explore the various Add-Ins available with Blockbrain and learn how to integrate them into your daily work.
## Available Add-Ins
1. [Word](https://docs.blockbrain.ai/~/revisions/cIYk4huBoAvhOouMPj2d/for-admins/add-ins/word)
2. [Outlook](https://docs.blockbrain.ai/~/revisions/cIYk4huBoAvhOouMPj2d/for-admins/add-ins/outlook)
{% hint style="warning" %}
While this documentation provides detailed steps we recommend a brief setup call with our expert team to ensure a smooth implementation.
Though not mandatory, experience has shown that a 15-20 minute call can significantly accelerate your integration and help avoid potential configuration issues.
To schedule a setup call please contact your Key Account Manager.
{% endhint %}
# Word
This tutorial outlines the steps to integrate the Blockbrain Add-in into Word.
## Deploying the Blockbrain Word add-in to Microsoft 365
The Blockbrain add-in for **Word** is deployed centrally from the Microsoft 365 admin center. No local installation and no file downloads are required. It is published as a manifest URL that Microsoft 365 reads directly.
### Before you start
| Requirement | Detail |
| ------------ | ------------------------------------------------------------------------------------------------------------------------------------------------ |
| Admin role | **Global Administrator.** An Exchange Administrator can view Integrated apps, but only a Global Admin can consent to and deploy a custom add-in. |
| Manifest URL | Publicly reachable HTTPS URL |
**Manifest URL**
* Word — `https://ms-word-addin.theblockbrain.ai/manifest.xml`
### Deployment steps
#### 1. Open Integrated apps
Go to [admin.cloud.microsoft](https://admin.cloud.microsoft/?#/Settings/IntegratedApps) → **Settings** → **Integrated apps**.
#### 2. Select "Upload custom apps"
The button sits above the app list and opens the upload wizard.
#### 3. Set the app type to "Office Add-in"
Do **not** choose **Teams app** — that option expects a zipped unified manifest, which is not the format the Blockbrain add-ins use.
#### 4. Choose the URL option, not the file upload
Under **Choose how to upload app**, select **Provide URL for manifest** instead of **Upload manifest file**.
Paste the Word manifest URL, then select **Validate**. \
The add-in name and icon appear once the manifest has been read successfully.
#### 5. Assign users
Select **Add users**, then pick one of:
* **Entire organization** — the usual choice for a full rollout.
* A specific Microsoft 365, security, or distribution group.
* **Just me** — useful for a pilot before widening the scope.
#### 6. Accept the permission request
Review the capabilities and permissions the add-in requests, then select **Accept permissions**. This is the step that requires the Global Administrator role.
#### 7. Finish the deployment
Select **Next**, check the summary, then **Finish deployment**. The add-in now appears on the Integrated apps **Overview** tab, where its assigned users can be edited or the deployment removed later.
{% hint style="warning" %}
Rollout can take **up to 24 hours** to reach every user and every client. To check, restart Word and look under **Home → Add-ins**
{% endhint %}
### Troubleshooting
**Validation fails after pasting the URL**
Open the manifest URL in a browser first. It must return XML over HTTPS with no sign-in prompt.
If the manifest loads in the browser but is still rejected, the add-in ID most likely already exists in the tenant. Remove the earlier deployment on the **Overview** tab and upload again.
**The add-in does not appear for users**
Confirm the assigned users on the **Overview** tab, then allow the full 24-hour propagation window before investigating further. Users on Office for the web may need to reload the browser tab; desktop users need to restart the app.
# Outlook
This tutorial outlines the steps to integrate the Blockbrain Add-in into Outlook.
## Deploying the Blockbrain Outlook add-in to Microsoft 365
The Blockbrain add-in for **Outlook** is deployed centrally from the Microsoft 365 admin center. No local installation and no file downloads are required. It is published as a manifest URL that Microsoft 365 reads directly.
### Before you start
| Requirement | Detail |
| ------------ | ------------------------------------------------------------------------------------------------------------------------------------------------ |
| Admin role | **Global Administrator.** An Exchange Administrator can view Integrated apps, but only a Global Admin can consent to and deploy a custom add-in. |
| Manifest URL | Publicly reachable HTTPS URL |
**Manifest URL**
* Outlook — `https://ms-outlook-addin.theblockbrain.ai/manifest.xml`
### Deployment steps
#### 1. Open Integrated apps
Go to [admin.cloud.microsoft](https://admin.cloud.microsoft/?#/Settings/IntegratedApps) → **Settings** → **Integrated apps**.
#### 2. Select "Upload custom apps"
The button sits above the app list and opens the upload wizard.
#### 3. Set the app type to "Office Add-in"
Do **not** choose **Teams app** — that option expects a zipped unified manifest, which is not the format the Blockbrain add-ins use.
#### 4. Choose the URL option, not the file upload
Under **Choose how to upload app**, select **Provide URL for manifest** instead of **Upload manifest file**.
Paste the Outlook manifest URL, then select **Validate**. \
The add-in name and icon appear once the manifest has been read successfully.
#### 5. Assign users
Select **Add users**, then pick one of:
* **Entire organization** — the usual choice for a full rollout.
* A specific Microsoft 365, security, or distribution group.
* **Just me** — useful for a pilot before widening the scope.
#### 6. Accept the permission request
Review the capabilities and permissions the add-in requests, then select **Accept permissions**. This is the step that requires the Global Administrator role.
#### 7. Finish the deployment
Select **Next**, check the summary, then **Finish deployment**. The add-in now appears on the Integrated apps **Overview** tab, where its assigned users can be edited or the deployment removed later.
{% hint style="warning" %}
Rollout can take **up to 24 hours** to reach every user and every client. To check, restart Outlook and look under **Home → Add-ins**
{% endhint %}
### Troubleshooting
**Validation fails after pasting the URL**
Open the manifest URL in a browser first. It must return XML over HTTPS with no sign-in prompt.
If the manifest loads in the browser but is still rejected, the add-in ID most likely already exists in the tenant. Remove the earlier deployment on the **Overview** tab and upload again.
**The add-in does not appear for users**
Confirm the assigned users on the **Overview** tab, then allow the full 24-hour propagation window before investigating further. Users on Office for the web may need to reload the browser tab; desktop users need to restart the app.
# Web Components
Explore the various Webcomponents available for Blockbrain and learn how to integrate them into your daily work.
## Available Integrations
1. [**Website Web Component**](/for-admins/web-components/website-web-component)
2. [**Teams & Sharepoint Web Component**](/for-admins/web-components/teams-and-sharepoint-web-component)
3. [**Sharepoint Chat Extension**](/for-admins/web-components/sharepoint-chat-extension)
{% hint style="warning" %}
While this documentation provides detailed steps we recommend a brief setup call with our expert team to ensure a smooth implementation.
Though not mandatory, experience has shown that a 15-20 minute setup call can significantly accelerate your integration and help avoid potential configuration issues.
To schedule a setup call please contact your Key Account Manager.
{% endhint %}
# Website Web Component
This tutorial outlines the steps to integrate the Blockbrain web component into a website, either in public or private mode, ensuring proper setup and authentication.
## Key Steps
### **Step 1: Choose Integration Mode**
Private Mode
Public Mode
* Decide between two integration modes:
* **Public Mode**: No authentication required; all users can chat with the interface.
* **Private Mode**: Requires user authentication; users must log in to access their conversation history.
* **Ping your Blockbrain Key Account Manager** that you want to add a webcomponent to your website.
### **Step 2: Prepare Your Website**
* **Add the necessary header script to your website.**
```
```
* Ensure you have the following information ready:
* **Organization ID**: Obtain from your Blockbrain key account or team member.
* **Issuer URL**: This will be your company Blockbrain URL (e.g. ).
* **Webcomponent Bot UID**: The Id of a bot mapping created in the admin section of your Blockbrain. Needs to be added by an admin.
### **Step 3: Configure the Web Component**
* Set up the web component with the following parameters:
* **Organization ID**: Insert your organization ID - retrieved from Blockbrain team.
* **Issuer**: Insert the issuer URL - .
* **UID**: Webcomponent Bot UID - e.g., CompanyGPT.
* **User UID**: Not relevant for private and restricted bots, optional for public bots.
## Private Mode
### **Step 4: Setup Authentication**
* If using private mode, **ensure the issuer is included** in the configuration.
* Remove the userUid, that is only for public mode.
* Test the login functionality:
* Click the login button to trigger the OAuth authentication.
* Verify that you can access your conversation history.
## Public Mode
### **Step 5: Use Public Mode**
* To switch to public mode, **remove the issuer from the configuration**.
* Ensure the organization ID and company UID are still included.
* Remove the userUid if not needed, it can be used to distinguish users.
* Test the public chat functionality to confirm it works without authentication.
## Video
{% embed url="" %}
# How to Embed a Blockbrain Bot into Bosch any.site
This guide provides a step-by-step walkthrough for embedding a Blockbrain Bot inside Bosch any.site.
{% hint style="warning" %}
**Attention:** Before you start, make sure you have Admin access in Blockbrain (so you can generate an API Key and create a Web Component mapping), and that you already have a bot ready to connect.
{% endhint %}
### 1. Open any.site and start a new bot connection
1. In any.site, click “My bots” on the left-side navigation.
Home page of any.site
2. Click the “Connect bot” button.
My bots page
3. Select Blockbrain as the provider.
### 2. Create and copy your Blockbrain API Key
In Blockbrain:
1. Go to the Blockbrain website.
2. Click Admin and open the API Keys tab
API Keys Tab in Admin
3. Click Generate API key.
Button located on upper right side
4. Name your API Key and add a description.
Generate API Key pop up
5. Copy the API Key.
Click the censored API Key to copy
In any.site:
6. Paste the API Key into the API Key field in any.site.
Input API Key in any.site
### 3. Copy your Org Key
In Blockbrain:
1. Open the Blockbrain website.
2. Click your profile on the upper-right corner.
Profile on the upper right corner
3. Copy your Org Key.
In any.site:
4. Paste the Org Key into the Org Key field in any.site.
Input Org Key in any.site
### 4. Create a Web Component UID (bot mapping)
In Blockbrain:
1. Go to the Blockbrain website.
2. Click Admin → go to the Web Components tab.
Click Admin to find the Web Components tab
3. Click Create new bot mapping.
Button located on upper right side
4. Select the chosen bot you want to embed.
5. Create a name for the Web Component UID (this is your mapping name).
6. After creating the new bot mapping, copy the **ID**.
Click the copy button located beside the Web Component UID
Back in any.site:
7. Paste that ID into the UID / Web Component ID field (wording may vary).
### 5. Finalize setup in any.site
1. Add an image that represents your bot.
2. Include a short description.
3. Add instructions for the bot (optional but recommended).
4. Click Finish
# Teams & Sharepoint Web Component
This tutorial outlines the steps to upload and configure SharePoint apps for use in SharePoint and Teams environments.
{% hint style="warning" %}
**Attention:** The Blockbrain Team will provide you with your specific Sharepoint package, please provide the following information to you Contact.
* Which bot do you want to integrate?
{% endhint %}
## Key Steps
### **Step 1: Access SharePoint Admin Center**
* Navigate to the Microsoft Admin Center.
* Select the SharePoint Admin Center to begin the app upload process.
### **Step 2: Manage Apps Section**
* In the SharePoint Admin Center, locate the 'Manage Apps' section.
* Click on the 'Upload' button to upload the SharePoint app.
### **Step 3: Upload the App**
* Ensure you have admin rights to upload the app.
* Upload the SharePoint app provided to you.
### **Step 4: Enable the App**
* Choose the default option to enable the app and add it to all SharePoint sites.
* Optionally, select 'Add to Teams' to make the app available in Teams.
{% hint style="warning" %}
Ensure you have the necessary admin rights for both SharePoint and Teams to perform these actions.
{% endhint %}
### **Step 5: Confirm App Availability**
* After uploading, confirm that the app is available for both SharePoint and Teams.
## Teams Webcomponent
### **Step 6: Manage Permissions in Teams**
* As a Teams admin, search for the uploaded app in the 'Manage Apps' section.
* Limit access to specific user groups as needed.
{% hint style="warning" %}
Be aware of user permissions when limiting access to the app.
{% endhint %}
### **Step 7: Add App to Teams**
* Go to the Teams app and find the organizational apps.
* Edit the app settings to add it to the left pane or a specific channel.
## Sharepoint In-Page Webcomponent
### **Step 8: Create a New SharePoint Page**
* In SharePoint, create a new empty page to demonstrate the app's functionality.
### **Step 9: Add App to SharePoint Page**
* In the web parts section, search for the uploaded app.
* Add the app to the specific SharePoint page.
### **Step 10: Configure App Settings**
* Adjust settings such as user login options and bot identifiers as necessary.
## Video
{% embed url="" %}
# Sharepoint Chat Extension
This tutorial outlines the steps to add the Blog Brain web chat extension to SharePoint, ensuring it is enabled for specific pages only.
{% hint style="warning" %}
**Attention:** The Blockbrain Team will provide you with your specific Sharepoint package, please provide the following information to you Contact.
* Which bot do you want to integrate?
{% endhint %}
## Setup Steps
### **Step 1: Access SharePoint Admin Center**
* Navigate to the SharePoint Admin Center.
* Click on 'Additional Functionality'.
* Select 'Apps' from the SharePoint options.
### **Step 2: Upload the Extension File**
* Locate the 'Upload' button in the SharePoint apps section.
* Upload the extension file provided to you.
### **Step 3: Enable the App**
* After uploading, find the 'Enable App' section.
* Choose the option to 'Only enable this app' to restrict it to specific pages.
{% hint style="warning" %}
Ensure you select 'Only enable this app' to avoid it being added to all SharePoint sites.
{% endhint %}
### **Step 4: Activate API Access**
* Click to activate any API access requests that may appear.
### **Step 5: Verify App Activation**
* Confirm that the SharePoint chat extension is enabled and ready for use.
### **Step 6: Add the App to a Specific Page**
* Navigate to the desired SharePoint page (e.g., Communication site).
* Click on the extension to view information and add it to the page.
{% hint style="warning" %}
Remember to activate the app for additional pages where you want it to appear.
{% endhint %}
### **Step 7: Confirm Addition of the App**
* Look for a notification indicating that the app has been successfully added to the page.
### **Step 8: Access the Chat Feature**
* Check the bottom right corner of the page for the company chat feature.
* Use the chat as needed.
### **Step 9 (Optional): Activate for Additional Pages**
* Repeat the process to activate the app for any additional SharePoint pages.
## **Deleting the extension**
* The extension is part of the website content, it can only be deleted from there.
## Video
{% embed url="" %}
# Styling your own Web Component
### **Theme & Core Colors**
* `--bbc-color-primary` → Used in buttons, links, texts and more to hightlight and emphasize.
* `--bbc-color-secondary` → Used for hints, descriptions and subtitles.
* `--bbc-color-theme` → Used as the app-wide default background.
* `--bbc-icon-hover-color` → Used for icon color on hover.
* `--bbc-button-hover-bg-color` → Used for button background on hover.
* `--bbc-button-hover-text-color` → Used for button text color on hover.
***
### **Sidebar (Navigation)**
* `--bbc-sidebar-bg-color` → Sidebar background color
* `--bbc-sidebar-text-color` → Sidebar text color
* `--bbc-sidebar-font-size` → Sidebar font size
* `--bbc-sidebar-font-weight` → Sidebar font weight
* `--bbc-sidebar-font-family` → Sidebar font family
You can hide the top bar using the `hideTopbar` parameter.
* `--bbc-top-bar-text-color` → Top bar text color
* `--bbc-top-bar-bg-color` → Top bar background color
* `--bbc-top-bar-font-family` → Top bar font family
* `--bbc-top-bar-font-weight` → Top bar font weight
* `--bbc-top-bar-font-size` → Top bar font size
**Message Citation**
Message citation
* `--bbc-msg-citation-text-color` → Citation text color
* `--bbc-msg-citation-bg-color` → Citation background color
* `--bbc-msg-citation-font-family` → Citation font family
* `--bbc-msg-citation-font-size` → Citation font size
* `--bbc-msg-citation-font-weight` → Citation font weight
* `--bbc-msg-citation-py` → Citation vertical padding
* `--bbc-msg-citation-px` → Citation horizontal padding
* `--bbc-msg-timestamp-color: #007b5e;` — sets the color for *all message timestamps*
***
### **Desktop Messages**
* **Bot message**
* `--bbc-bot-msg-bg-color` → Bot-message background
* `--bbc-bot-msg-text-color` → Bot-message text color
* `--bbc-bot-msg-font-family` → Bot font family
* `--bbc-bot-msg-font-size` → Bot font size
* `--bbc-bot-msg-font-weight` → Bot font weight
* `--bbc-bot-msg-py` → Bot vertical padding
* `--bbc-bot-msg-px` → Bot horizontal padding
* **User message**
* `--bbc-user-msg-bg-color` → User-message background
* `--bbc-user-msg-text-color` → User-message text color
* `--bbc-user-msg-font-family` → User font family
* `--bbc-user-msg-font-size` → User font size
* `--bbc-user-msg-font-weight` → User font weight
* `--bbc-user-msg-py` → User vertical padding
* `--bbc-user-msg-px` → User horizontal padding
***
### Document Layout
* **Title**
* `--bbc-document-title-font-size` → Title font size
* `--bbc-document-title-font-weight` → Title font weight
* `--bbc-document-title-text-color` → Title text color
* **Chunk**
* `--bbc-document-chunk-text-color` → Chunk text color
* `--bbc-document-chunk-bg-color` → Chunk background color
* `--bbc-document-chunk-border-color: #007b5e;` — controls the left‑border color of document chunks
***
### Reference List & Cards
* **List Title**
* `--bbc-ref-list-title-font-size` → List title font size
* `--bbc-ref-list-title-font-weight` → List title font weight
* `--bbc-ref-list-title-text-color` → List title text color
* **Card**
* `--bbc-ref-list-card-border-color` → Card border color
* `--bbc-ref-list-card-border-radius` → Card corner radius
* `--bbc-ref-list-card-text-color` → Card text color
* `--bbc-ref-list-card-bg-gradient-start` → Card gradient start
* `--bbc-ref-list-card-bg-gradient-stop` → Card gradient end
* `--bbc-ref-list-card-icon-bg-color` → Card-icon background
***
**Example Usage**
```html
```
# Webcomponent API
### Authentication (Required)
| Name | Type | Required? | Mode | Example | Description |
| -------- | ------ | --------- | ------- | -------------------------- | --------------------------------- |
| `orgId` | string | Yes | All | `"org_123"` | Your Blockbrain org ID. |
| `uid` | string | Yes | All | `"bot_abc"` | Unique bot/app instance ID |
| `issuer` | string | Yes | Private | `"https://…blockbrain.ai"` | OAuth issuer URL for your tenant. |
### User Identification
| Name | Type | Required? | Default | Description |
| --------- | ------ | --------- | -------------------------------- | ---------------------------------------------------------------------- |
| `userUid` | string | No | New anonymous session each visit | Stable user ID (email, username, phone, etc.) used to persist history. |
### Appearance & Layout
| Name | Type | Required? | Default | Description |
| ------------ | ---------------------------------- | --------- | ---------- | ----------------------------------------------------------------------------------------------------------- |
| `layout` | `"compact" \| "minimal" \| "full"` | No | `"full"` | Chooses how much UI chrome/space the chat uses (see guidance below). |
| `width` | string (CSS) | No | `"100%"` | Component width. Set an explicit value (e.g., `"420px"`) to prevent it from stretching horizontally. |
| `height` | string (CSS) | No | `"100dvh"` | Component height. Use a fixed value (e.g., `"600px"`) to keep the chat scrollable inside a fixed container. |
| `themeColor` | string (CSS color) | No | — | Primary theme color for buttons and accents. |
#### Choosing a `layout`
* `full` – Best for full‑page chat experiences or when the chat is the main focus. It expands to fill available space and shows all controls.
* `minimal` – Adaptive, lighter chrome. Good for embedding in dashboards, side panels, or sections where chat is important but not dominant.
* `compact` – Ultra‑tight, mobile‑style layout. Ideal for tiny widgets, popovers, or cramped UI areas.
> **Tip:** For precise control, always pair your chosen `layout` with explicit `width` and `height`. Let the layout pick the chrome; let CSS sizes define the footprint. If you skip sizes, `full` will happily take everything it can.
### Icons & Avatars
| Name | Type | Required? | Default | Description |
| ------------ | ------ | --------- | ------- | ------------------------------------ |
| `iconUrl` | string | No | — | Fallback icon for messages. |
| `iconSize` | string | No | — | Fallback icon size (e.g., `"50px"`). |
| `userAvatar` | string | No | — | User avatar URL. |
| `botAvatar` | string | No | — | Bot avatar URL. |
`introImageUrl` — URL of the starter logo displayed before the first chat message
### Message Overrides
| Name | Type | Required? | Description |
| ---------- | ------------- | --------- | ---------------------------------------------------------------------------------------------- |
| `messages` | string (JSON) | No | Customize `title`, `description`, `iconUrl`, `iconSize` per status (`loading`, `error`, etc.). |
**Example**
`{ "messages": { "loading": { "title": "Just a sec…", "description": "Fetching answers", "iconUrl": "/spinner.svg", "iconSize": "32px" } } }`
### Feature Toggles
| Name | Type | Required? | Default | Description |
| ------------------------- | ----------------------------------- | --------- | -------- | ---------------------------------------------------------------------------------------------------------------------------------------------------------------------------------------------------------------------------- |
| `defaultWebSearchEnabled` | boolean or `"true"/"false"` | No | `true` | Enable web search by default. |
| `hideReference` | boolean or `"true"/"false"` | No | `false` | Hide reference links. |
| `openDocumentMode` | `"auto" \| "same_tab" \| "new_tab"` | No | `"auto"` | How to open documents. |
| `disableRecording` | boolean | No | `false` | Disable audio recording. |
| `hideTopbar` | boolean | No | `false` | Hide the chat UI top bar. |
| `defaultSidebarOpen` | boolean or `"true"/"false"` | No | `false` | Control Show/Hide Sidebar by default |
| `enableDocumentUpload` | boolean or `"true"/"false"` | No | `false` | Control Show/Hide Upload File Feature |
| `autoNewConversation` | string `"true"` / `"false"` | No | `false` | Automatically starts a new conversation each time the chat is opened, instead of resuming the user's previous one. Only the exact string `"true"` enables it; any other value (or omitting it) keeps the default behavior. |
| `botUidSelectionOption` | string `"true"` / `"false"` | No | `false` | Shows the bot selection option in the switch-bot dialog, letting users switch between available bots. When disabled (default), the widget always uses the bot specified by `uid`. Only the exact string `"true"` enables it. |
### Proxy / Advanced
| Name | Type | Required? | Description |
| ------------------ | ------------- | --------- | -------------------------------------------- |
| `proxyUrl` | string | No | Proxy base URL for API requests. |
| `customHeaders` | object (JSON) | No | Static headers sent with every request. |
| `getCustomHeaders` | function | No | Callback to set headers per session/request. |
# Web Component Versioning – Overview & Guide
The versioning feature for the web component is now live on Production. Below you will find all relevant details on how versioning works and how you can manage which version you are using.
#### 1. Current Setup (Legacy URL)
You are currently using the following build URL:
🔗
This is the legacy URL and will always serve the latest version automatically. No action is needed if you want to stay on the most recent version using this URL.
***
#### 2. New Versioning URLs
With the new versioning feature, you now have two options to control which version of the web component you use:
| Option | URL | Description |
| -------------- | -------------------------------------------------------------------------------------- | --------------------------------------------------------------------------------------------------------------------------- |
| Always Latest | | Automatically points to the newest version at all times. |
| Pinned Version | | Points to a specific version (e.g., `v1.0.1-rc5`). Replace the version segment in the URL to switch to a different version. |
All available versions and release tags are managed and published here:\
🔗 \
\
Language
The web component ships its built-in UI texts - button labels, the "New Conversation" title, and the "Write your message" input placeholder - in **English (default)** and **German**. The language is selected by the bundle path: add the locale segment **after** the version segment.
| Language | Locale segment | Example URL |
| ------------------ | -------------- | ------------------------------------------------------------------------------------- |
| English (default) | *(none)* | `https://assets.theblockbrain.io/scripts/blocky-chat/latest/blocky-chat.bundle.js` |
| English (explicit) | `/en/` | `https://assets.theblockbrain.io/scripts/blocky-chat/latest/en/blocky-chat.bundle.js` |
| German | `/de/` | `https://assets.theblockbrain.io/scripts/blocky-chat/latest/de/blocky-chat.bundle.js` |
The pattern works with any version: `.../scripts/blocky-chat/{version}/{locale}/blocky-chat.bundle.js` (e.g. `latest/de/` or `v1.0.5/de/`).
To switch the widget to German, change only the script `src` — keep all other attributes (`orgId`, `uid`, `userUid`, `publicToken`) unchanged:
```
```
> **Note:** This path controls only the component's built-in static texts. The welcome message and the bot's answers follow the platform's language settings and are not affected by this path. If the static labels appear in English on a German site, the embed is loading the default (English) bundle — switch the `src` to the `/de/` path.
Only English and German are available today.
***
#### 3. How to Switch Versions
Switching to a different version is straightforward:
1. Choose the [desired version](https://github.com/theblockbrain/b2b-webcomponents/releases)
2. Replace the version segment in the URL (e.g., change `v1.0.1-rc5` to the new version tag).
3. Update the script reference in your integration to use the new URL.
That's it — no further configuration is required.
***
#### 4. How Will You Know About New Versions?
* If you use the `/latest/` URL, you will always receive the newest version automatically.
* If you use a pinned version URL, we will notify you whenever a new version is released (including new features and release tags).
***
#### 5. Web Component Configuration
You can manage your web component settings directly in your admin tab. Each tenant has a dedicated Web Components tab for managing their specific configuration:
🔗
---
[Next Page](/llms-full.txt/1)
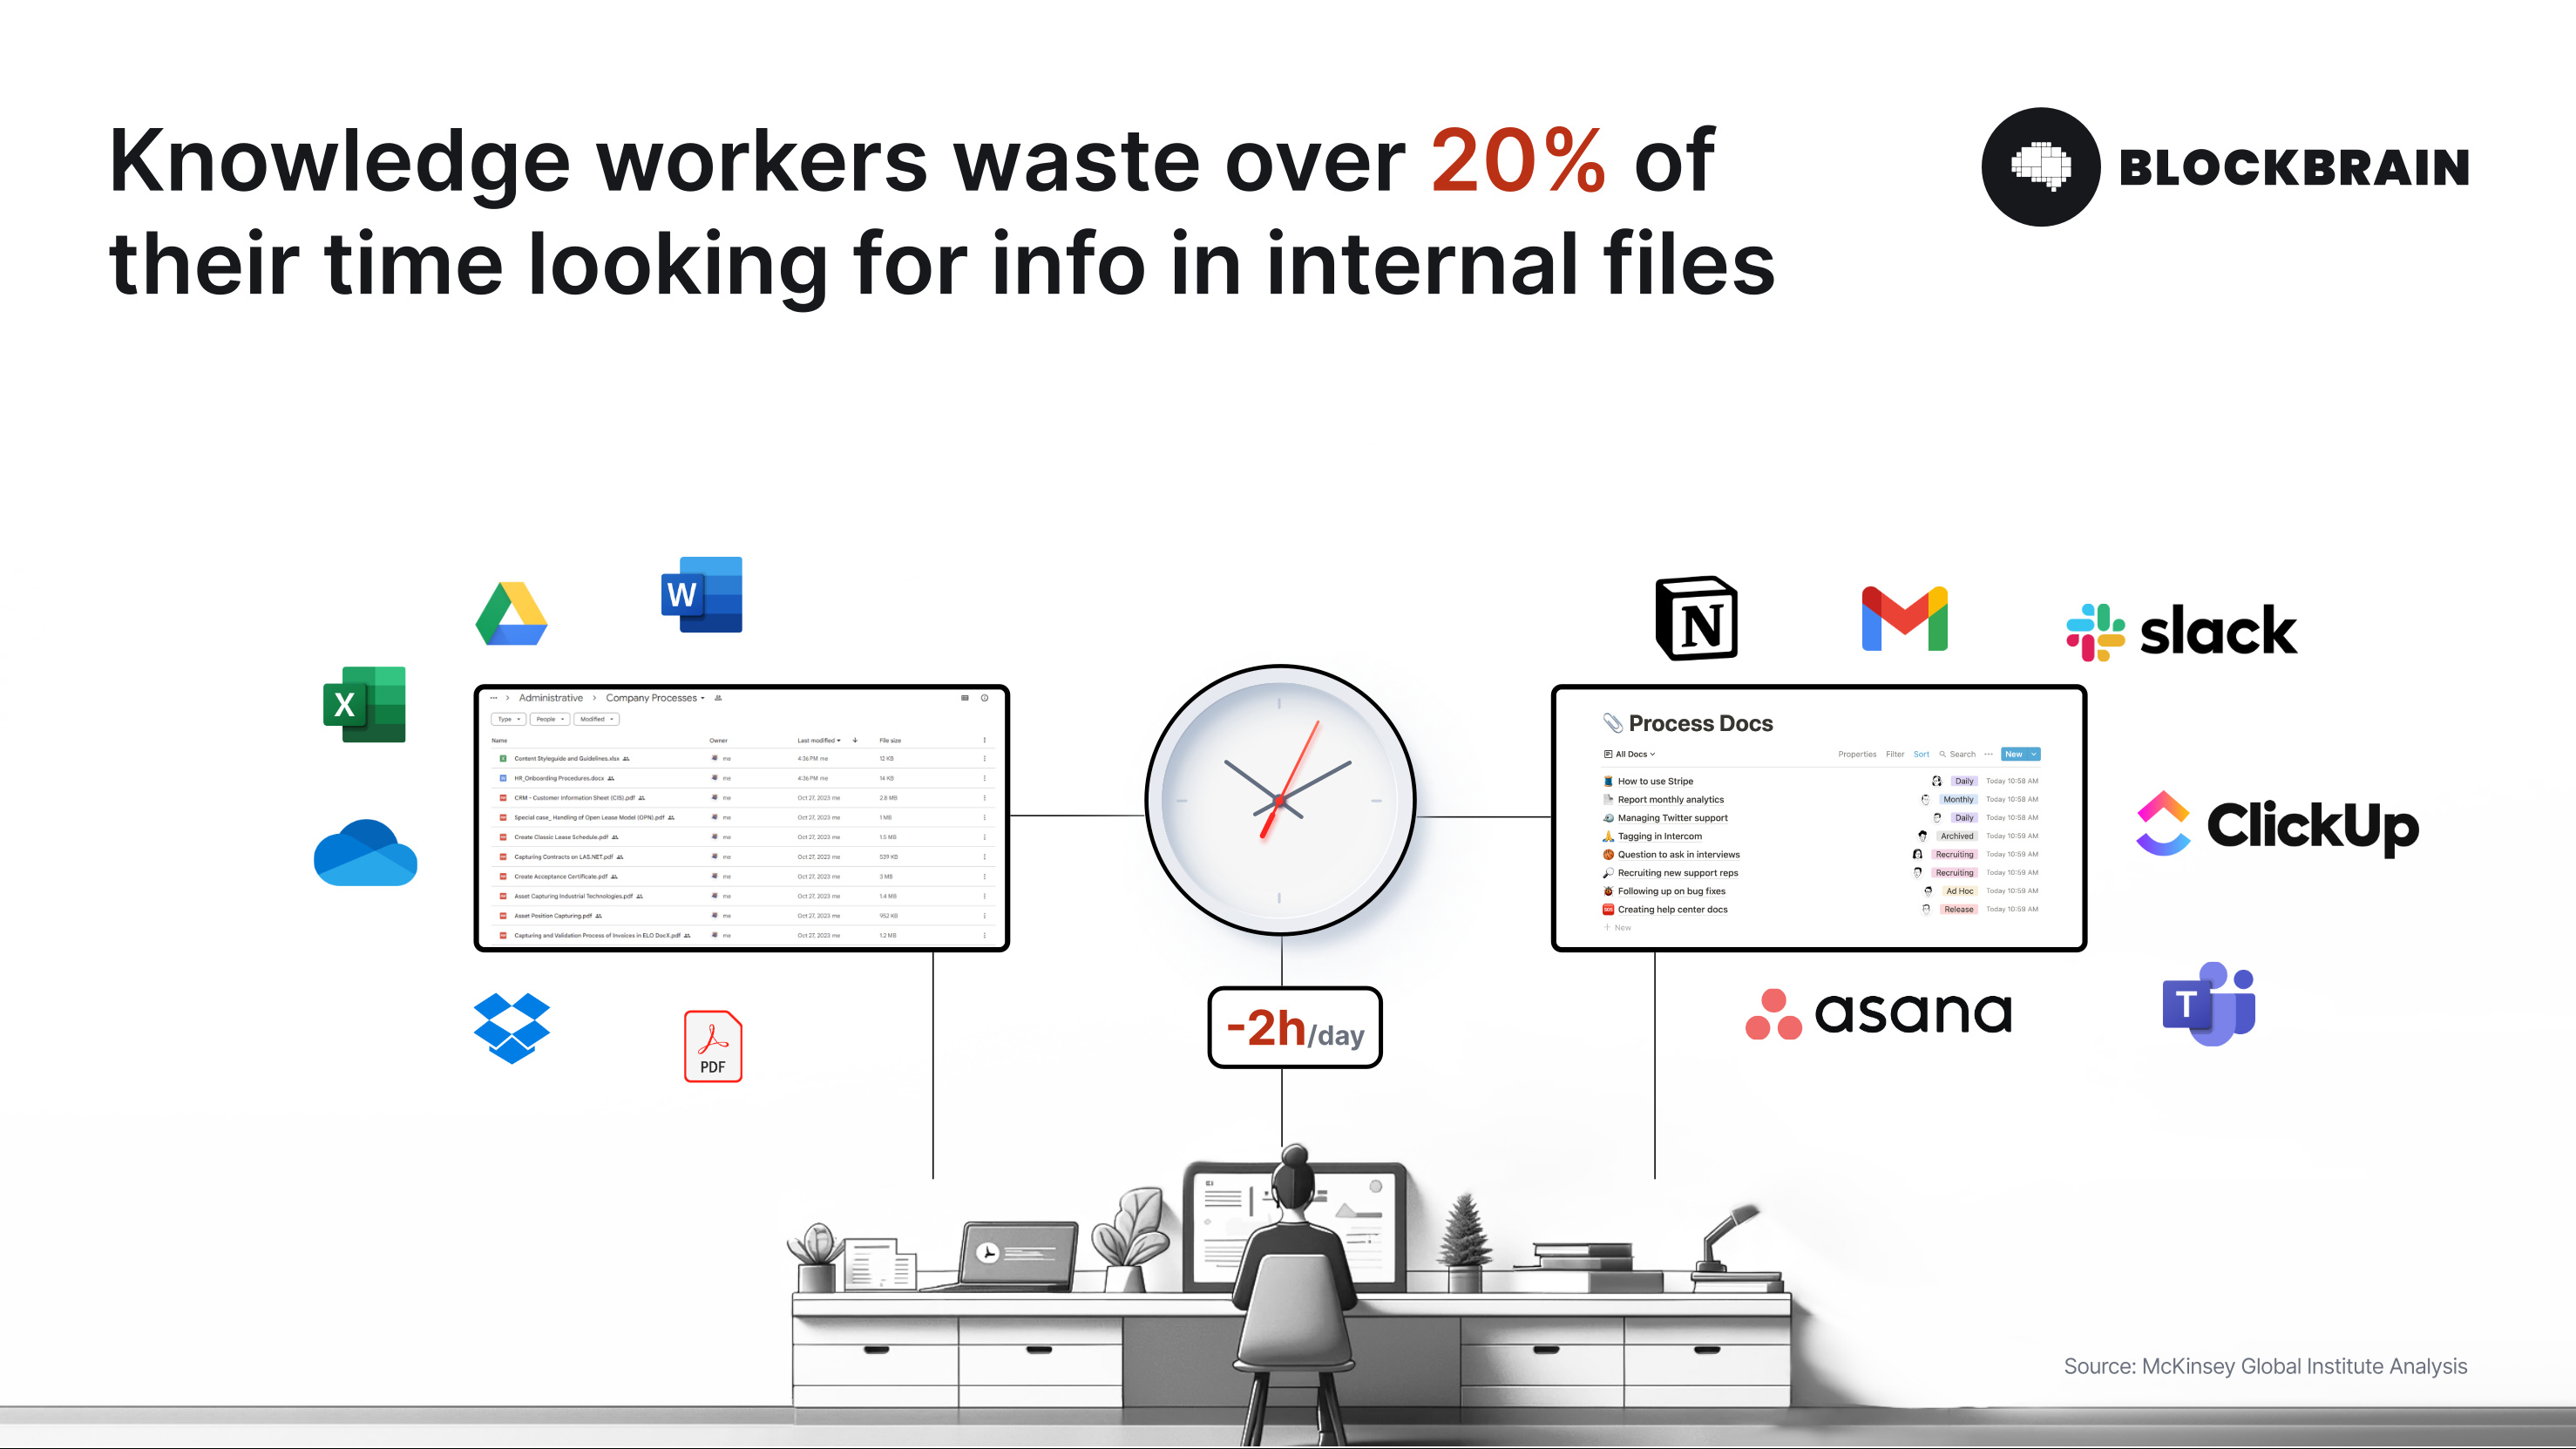
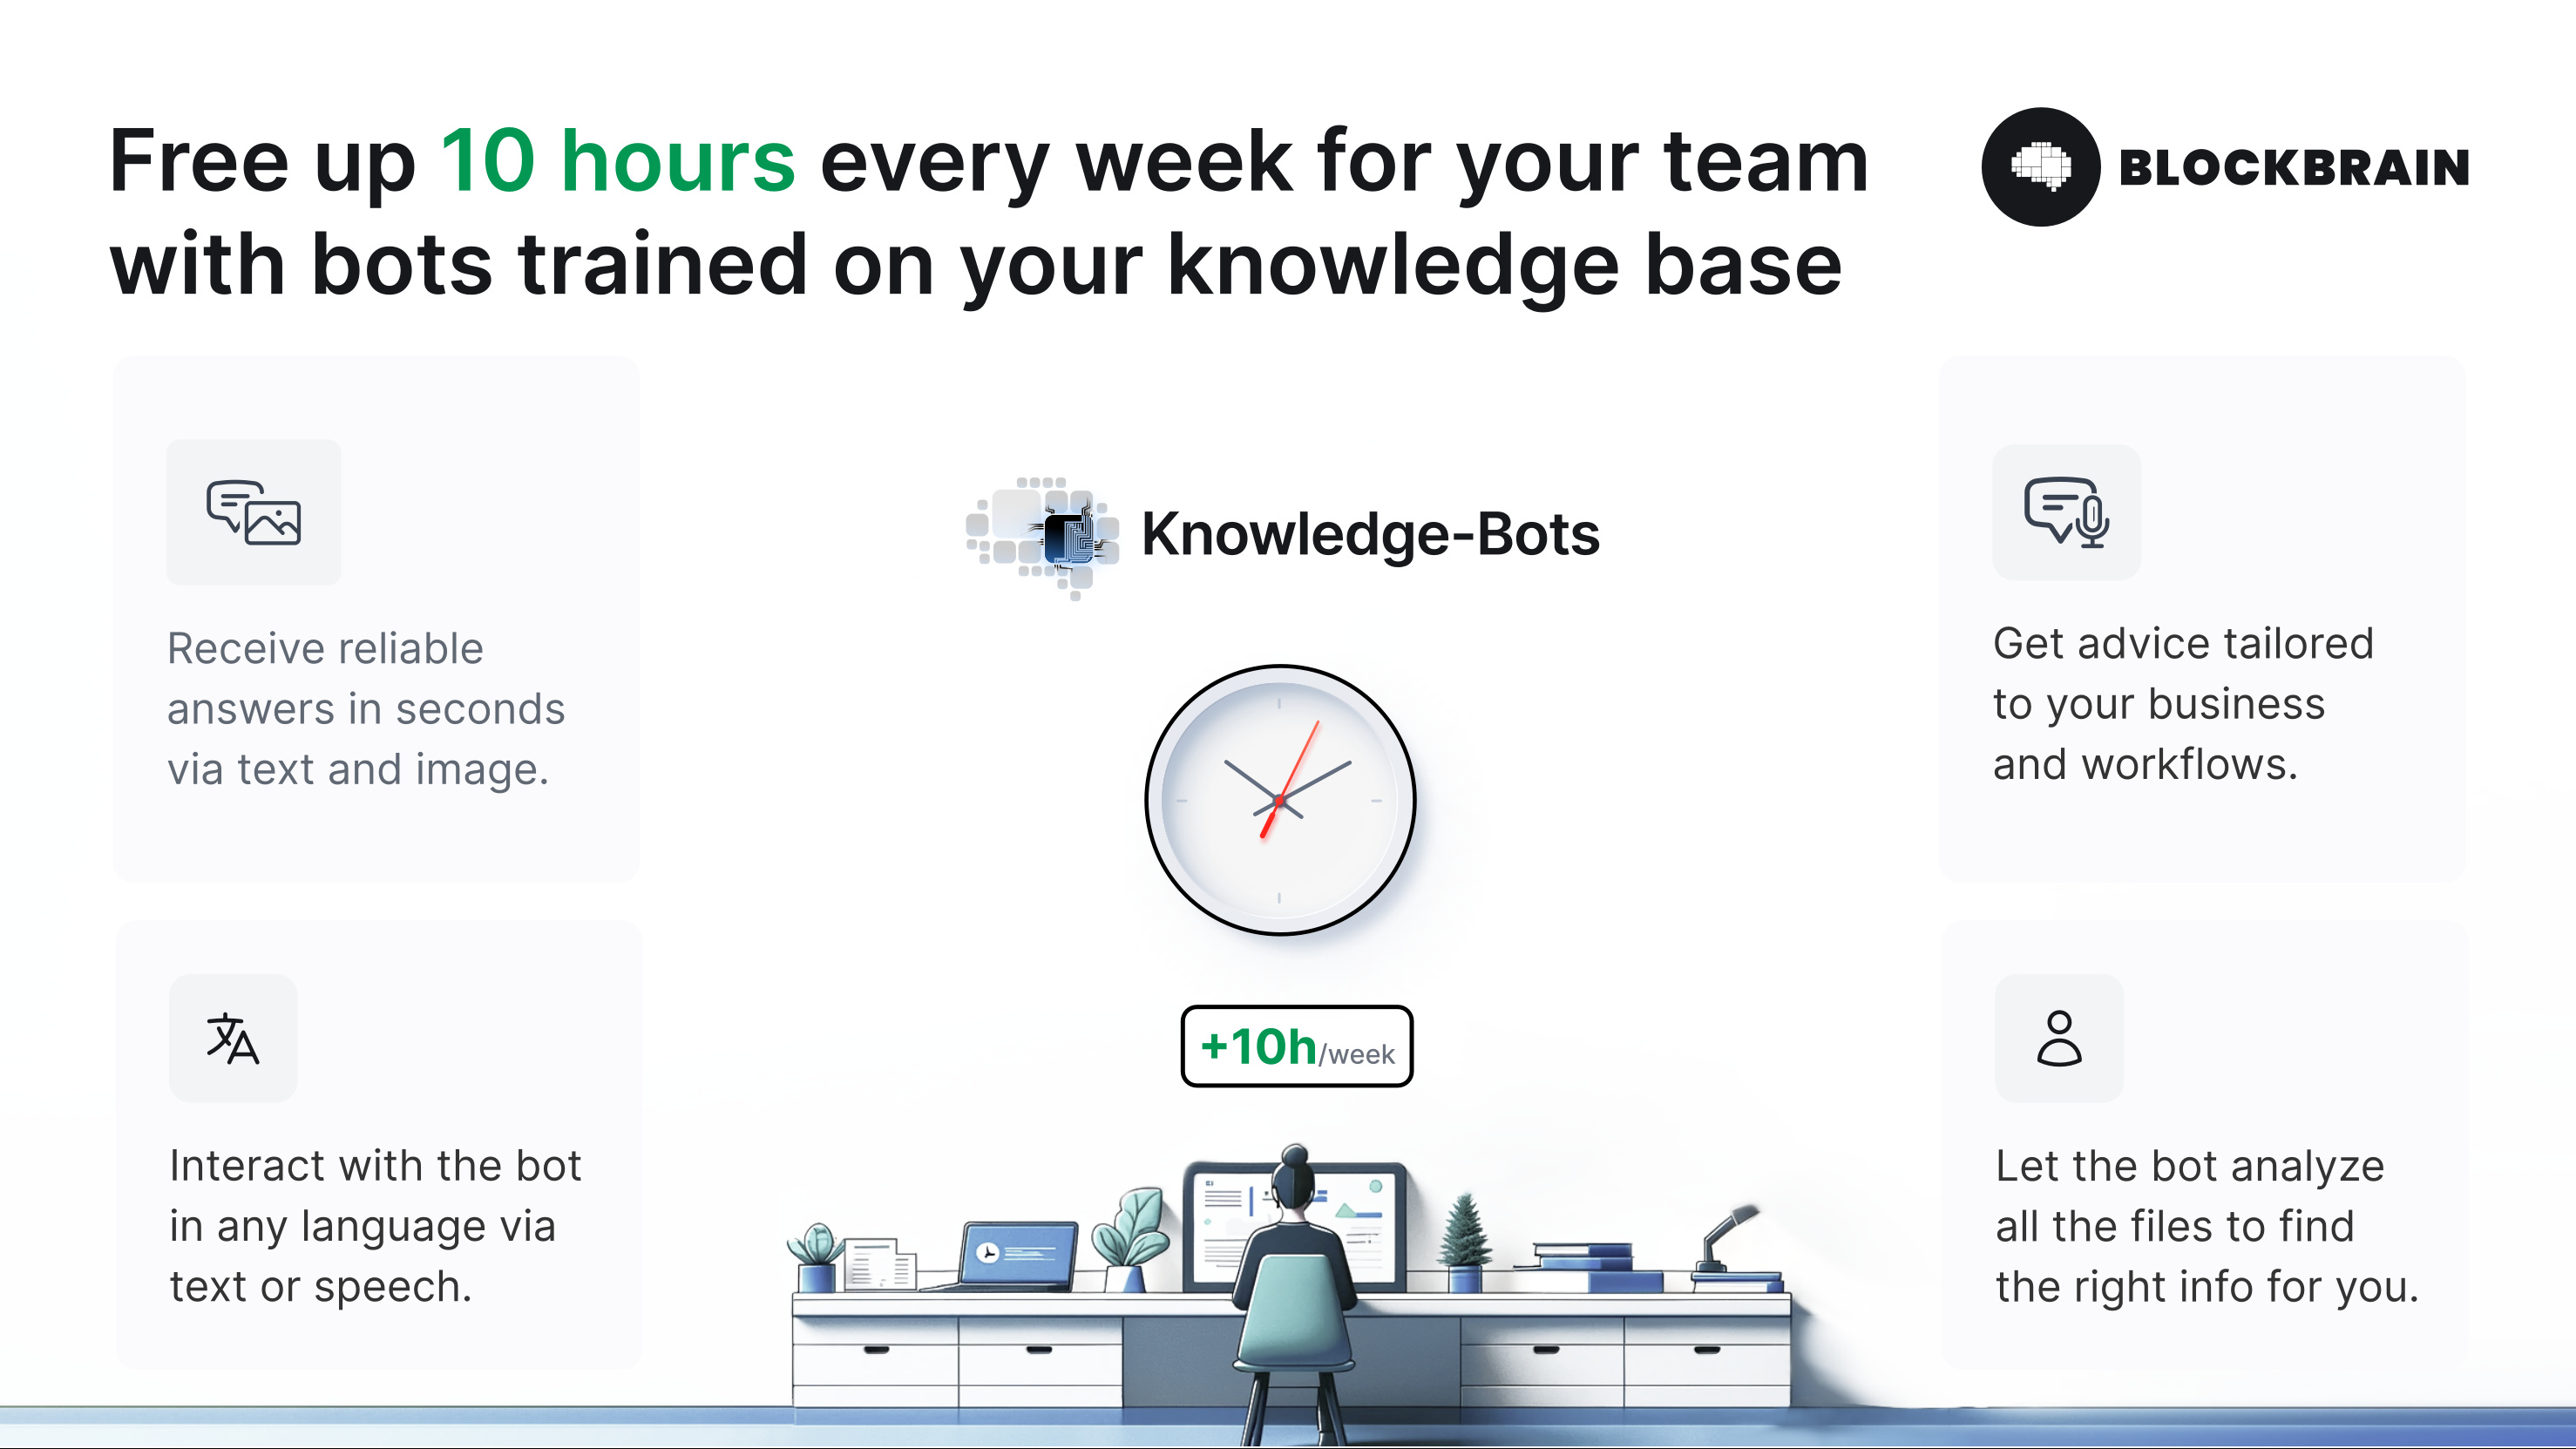
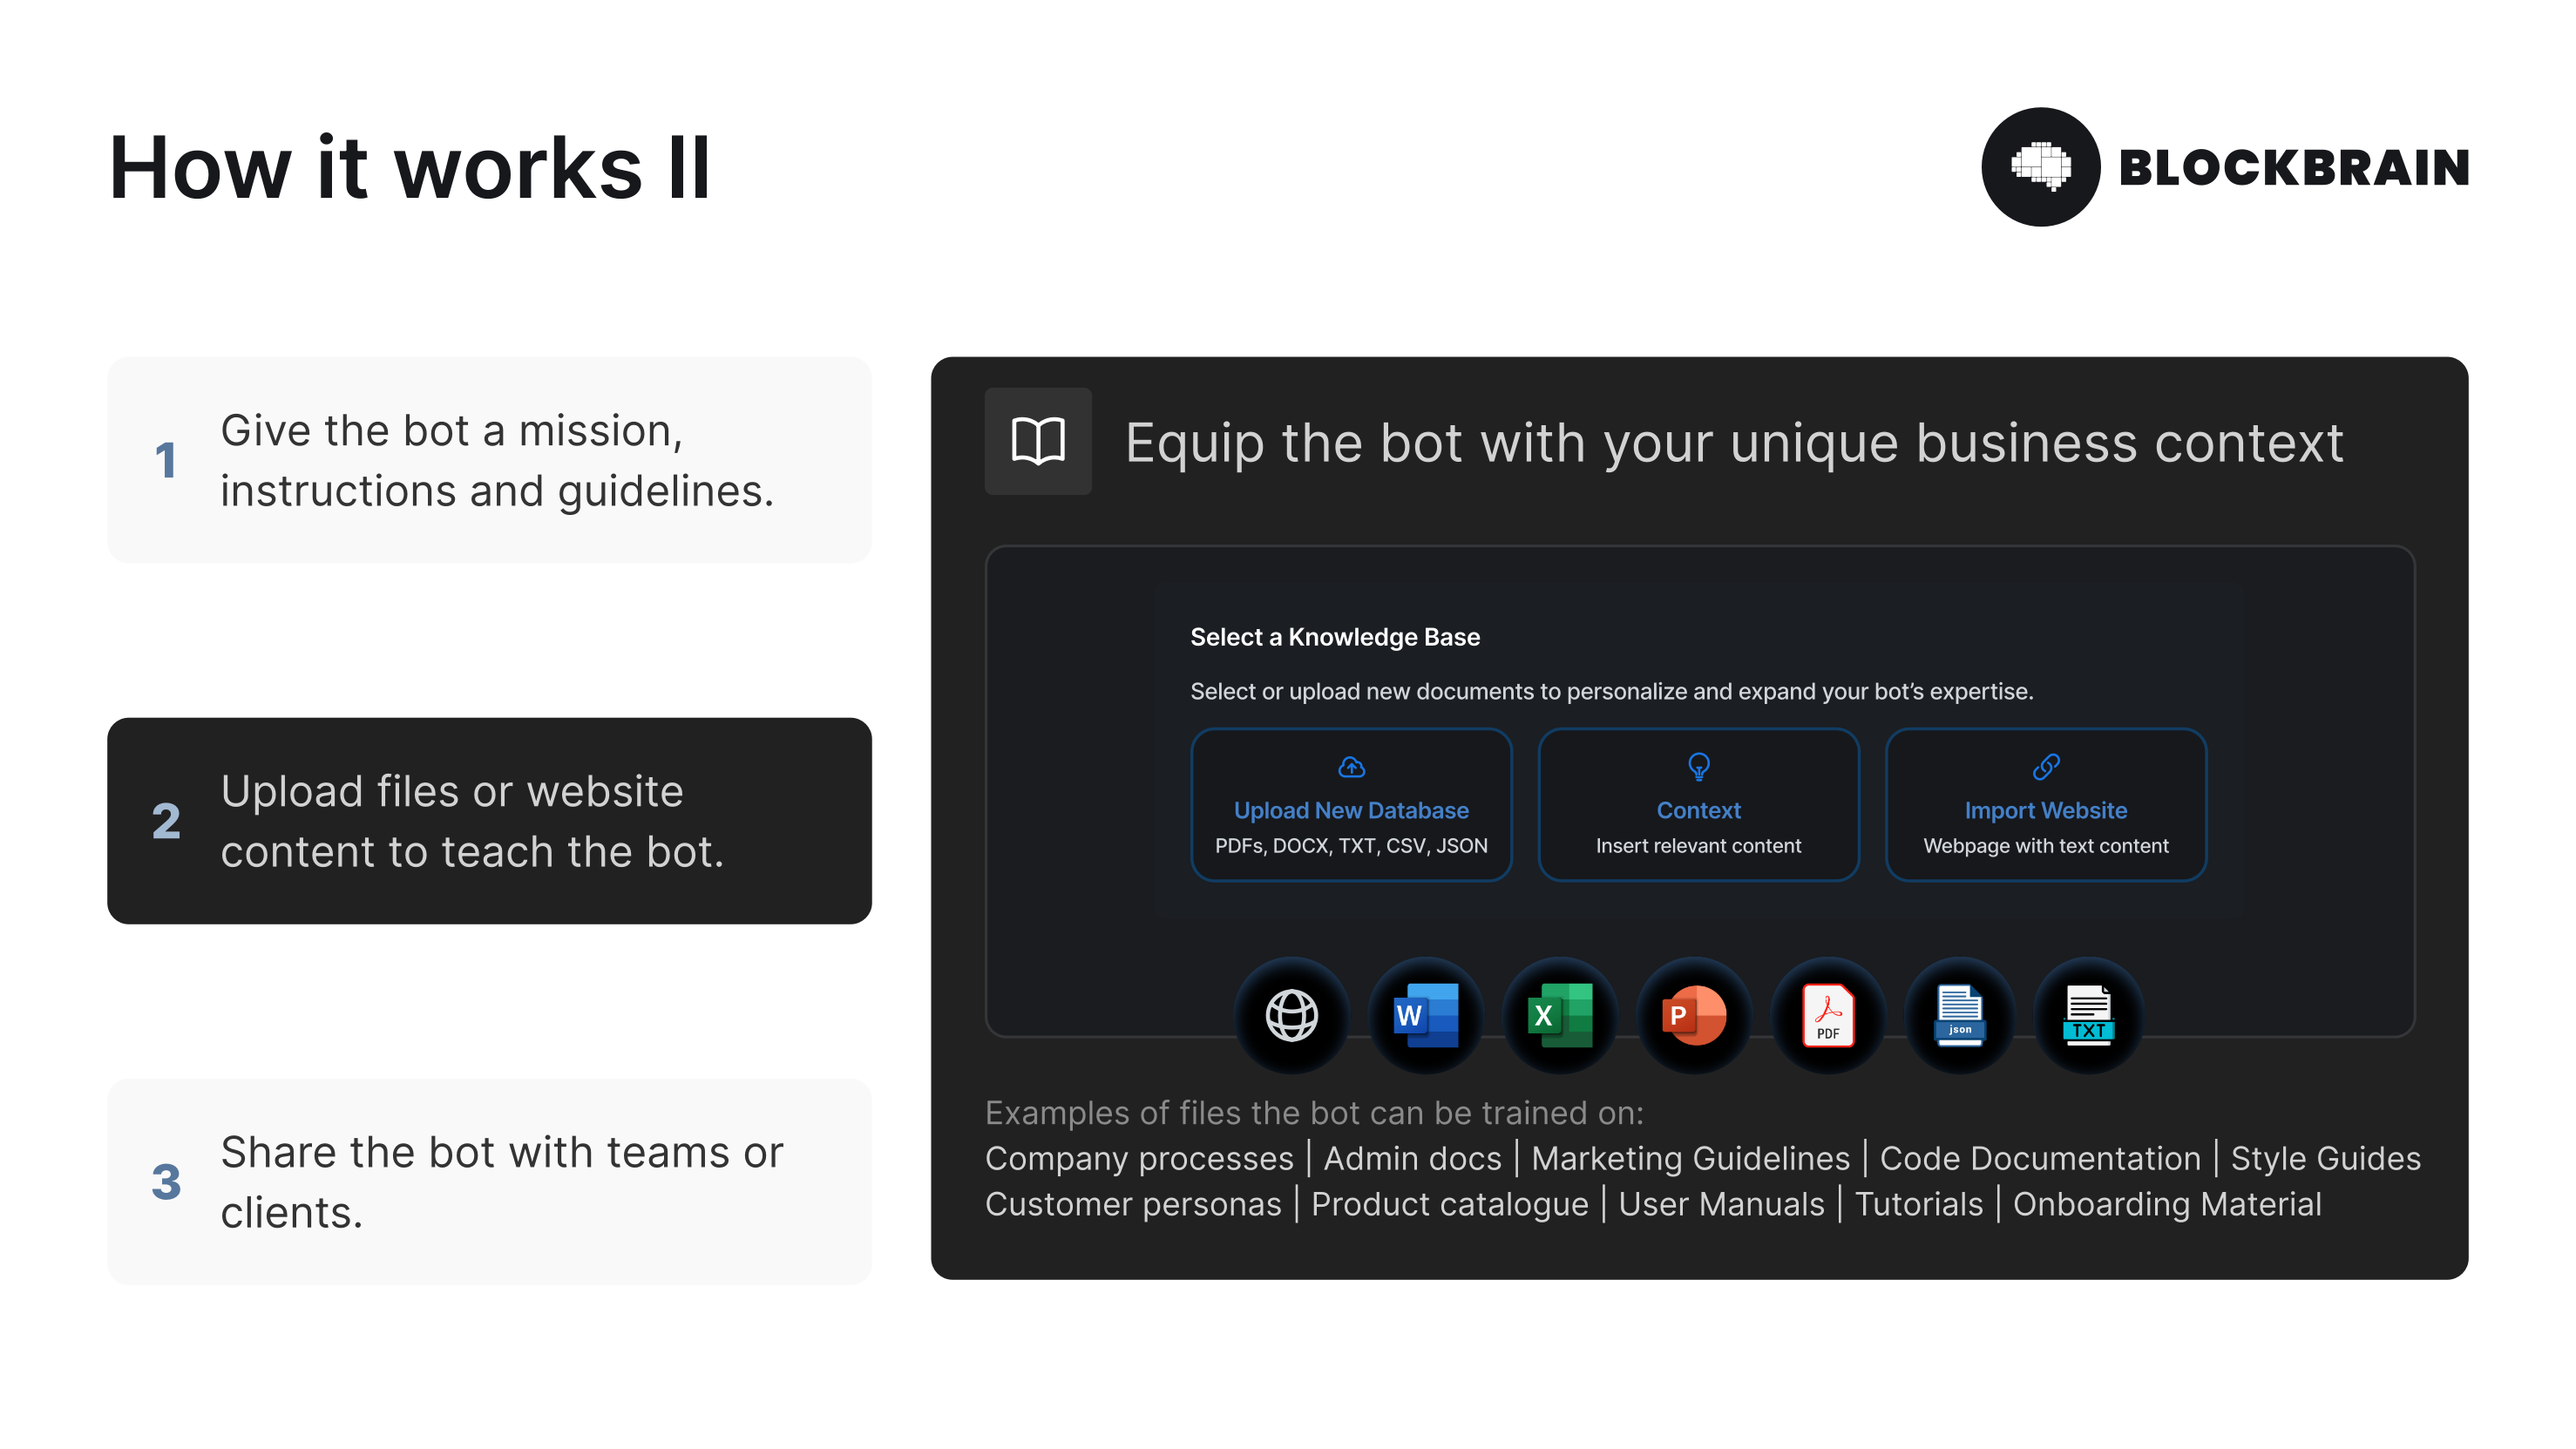
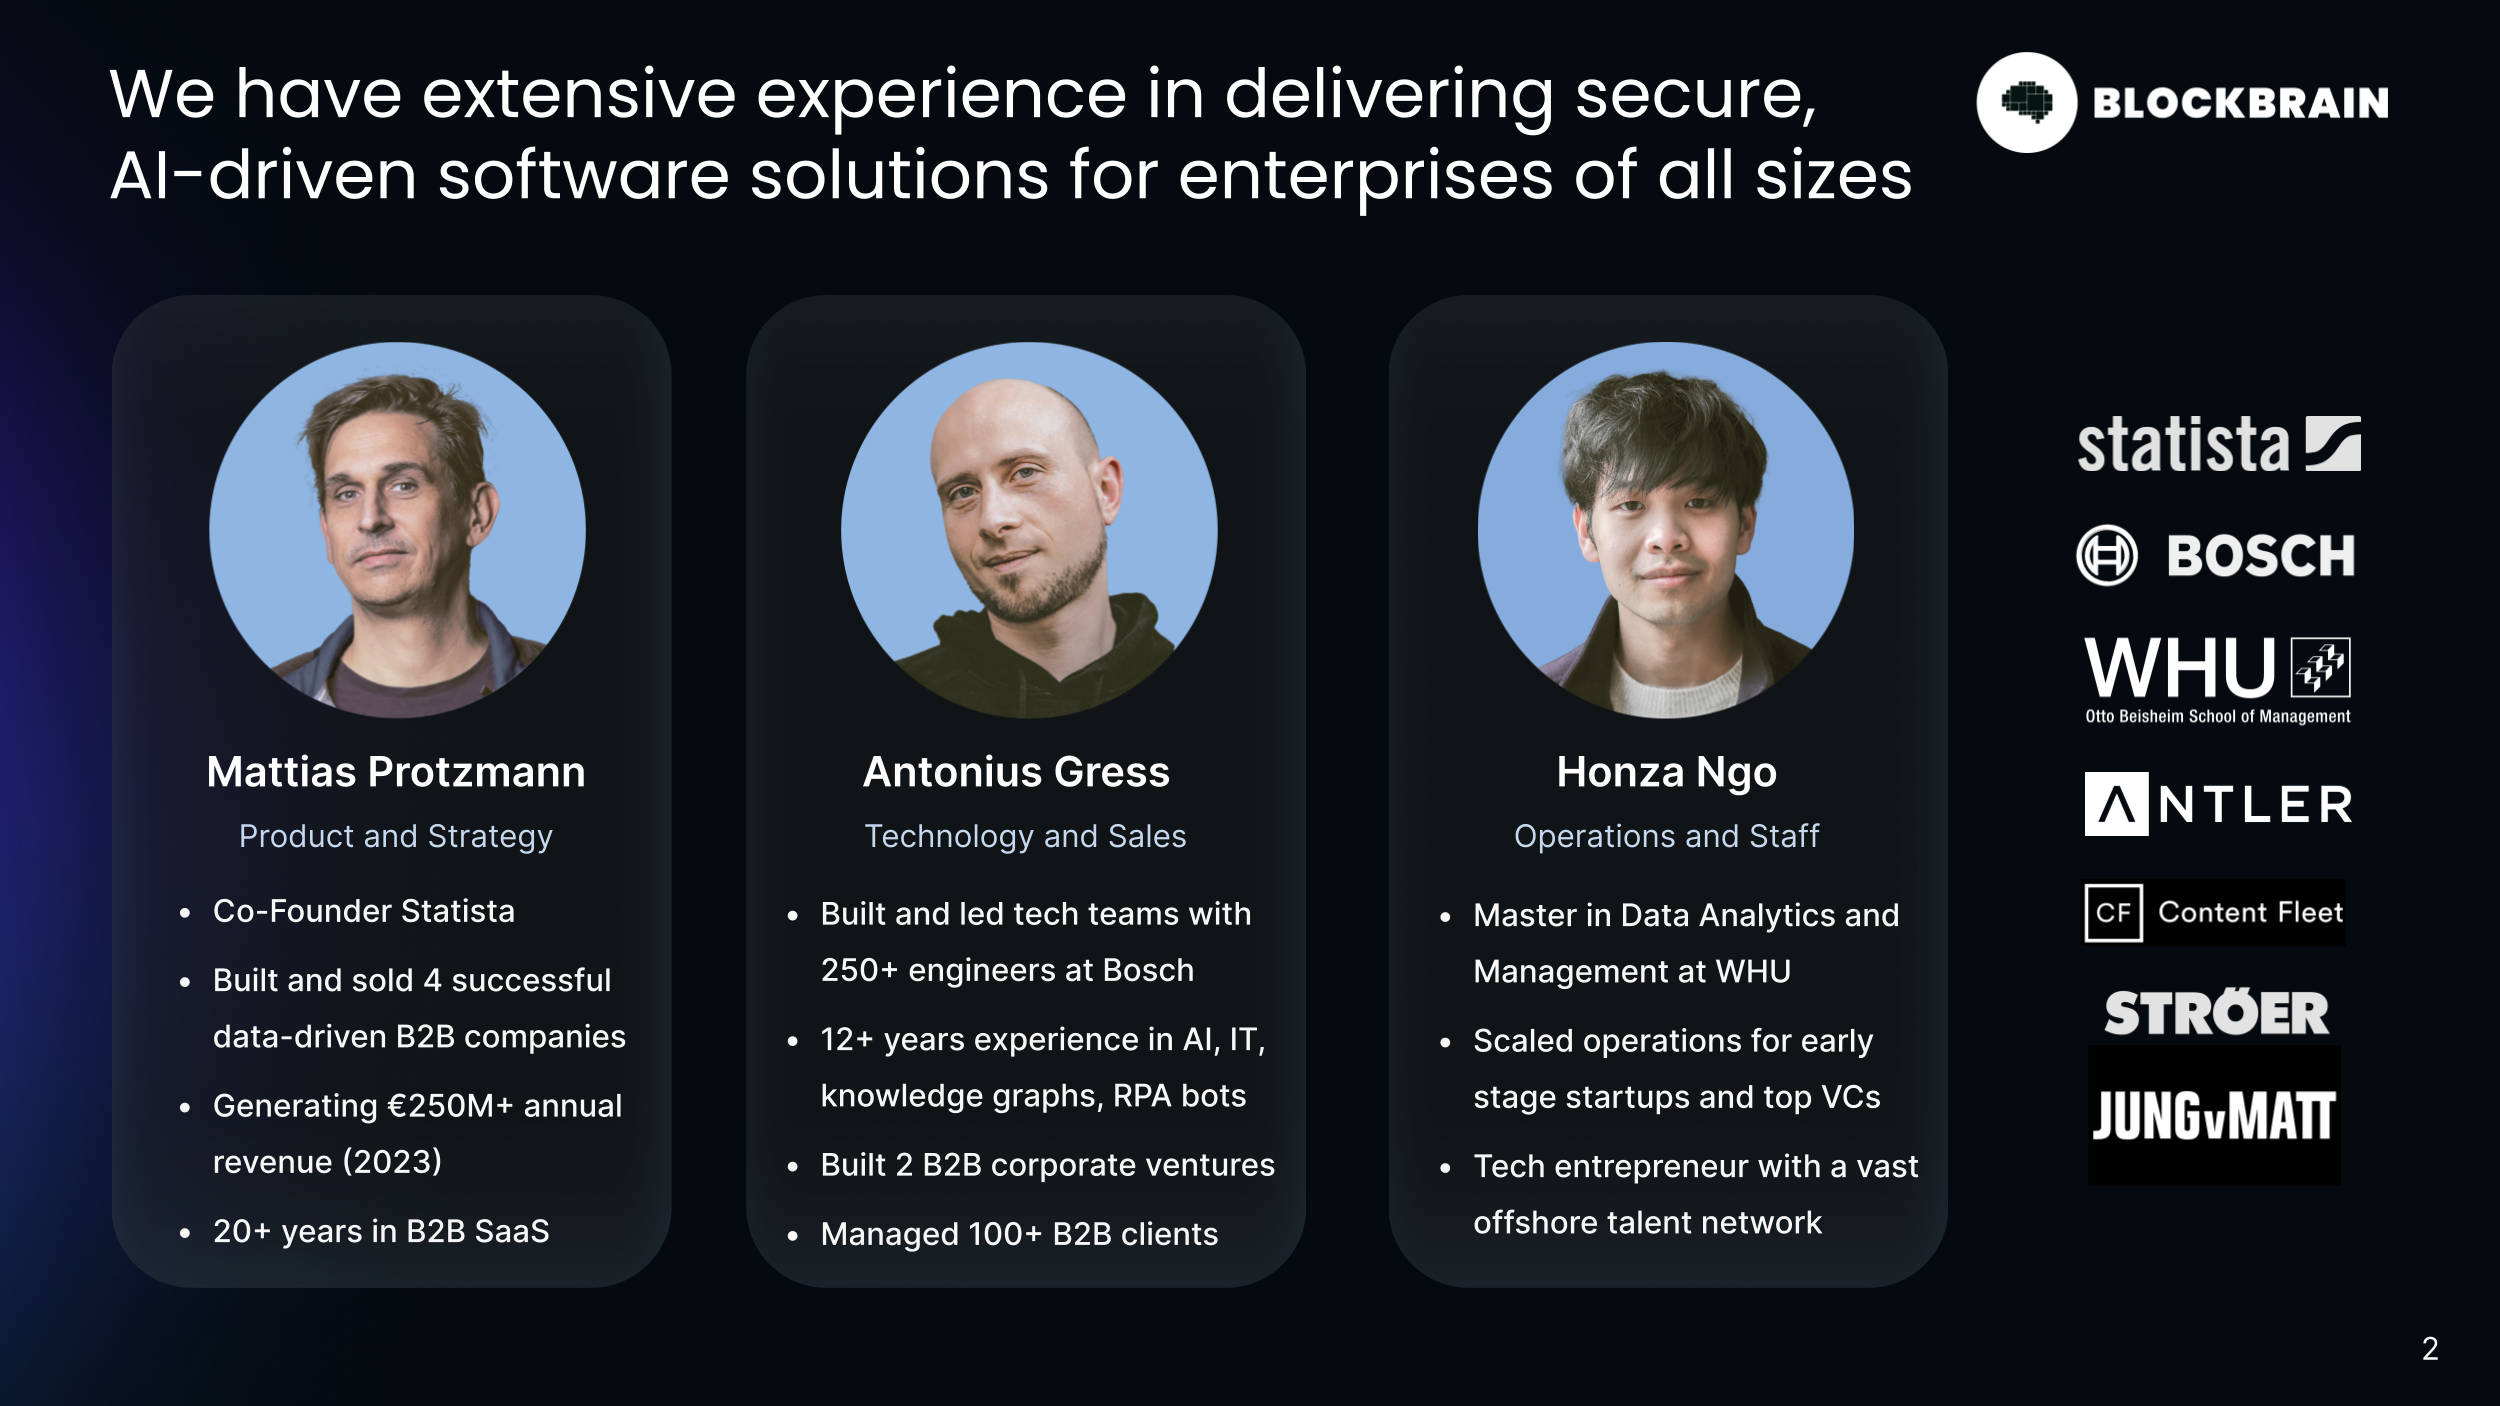
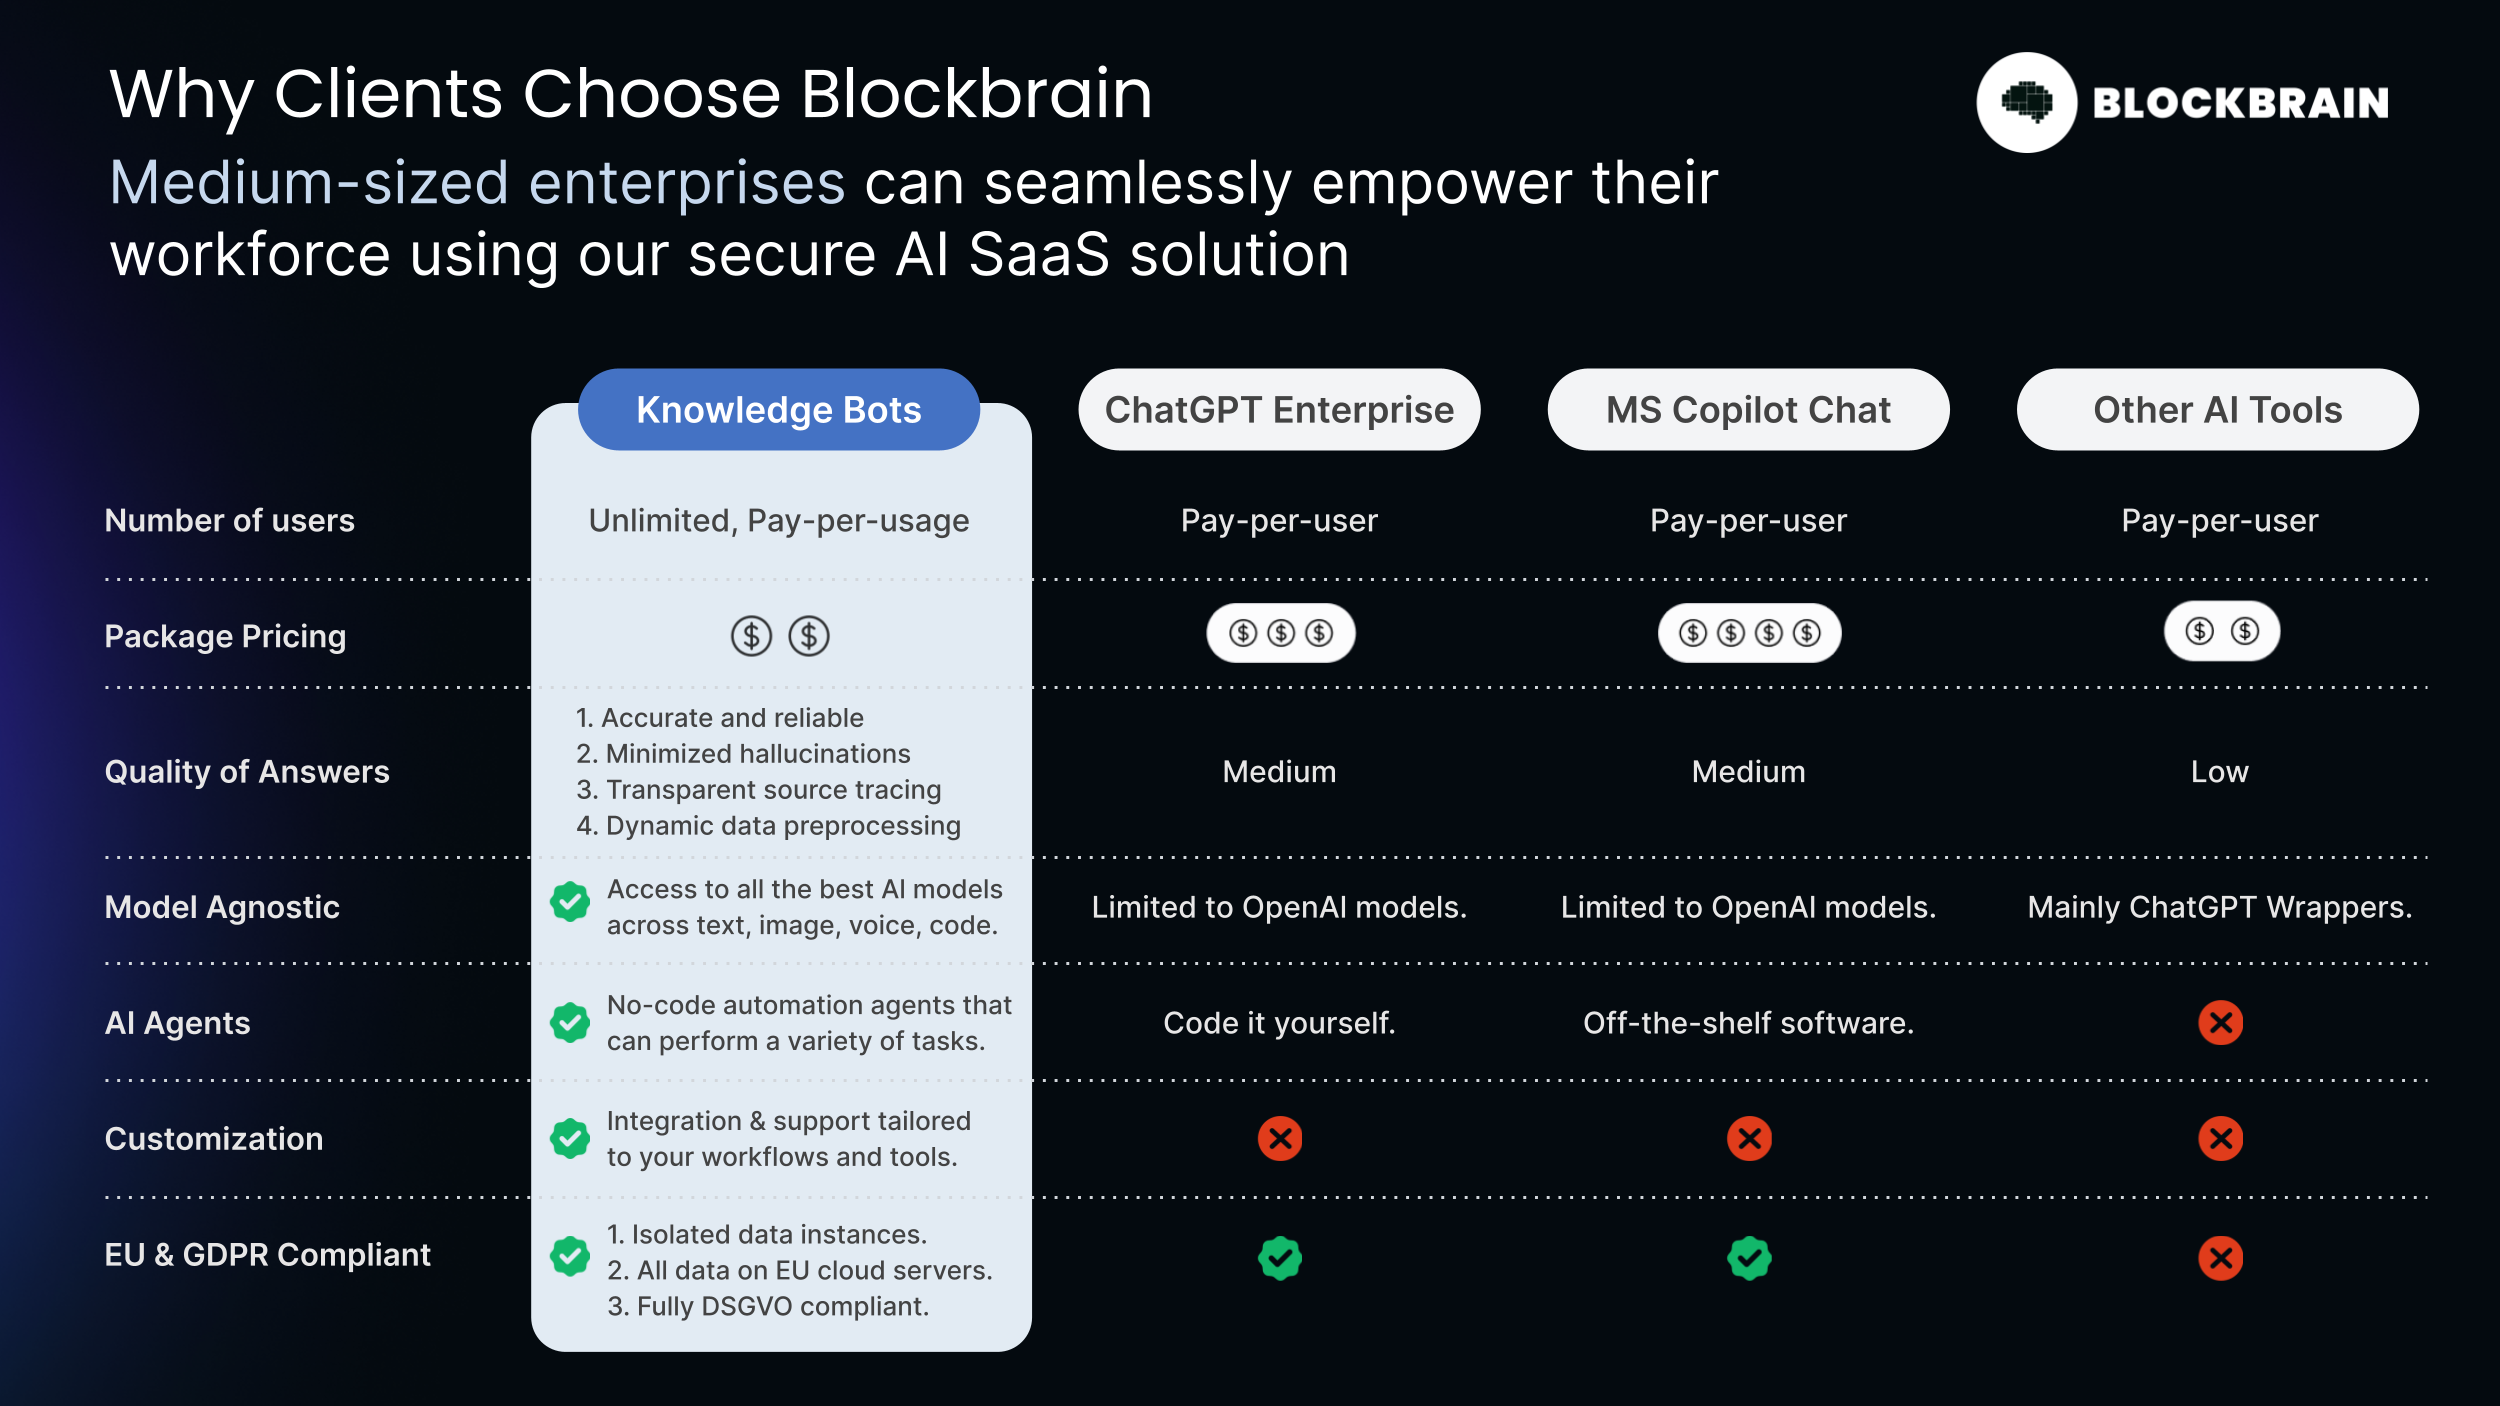
.png?alt=media&token=bc27bfb4-aa8f-4e18-a7ff-2bcddea367f8)


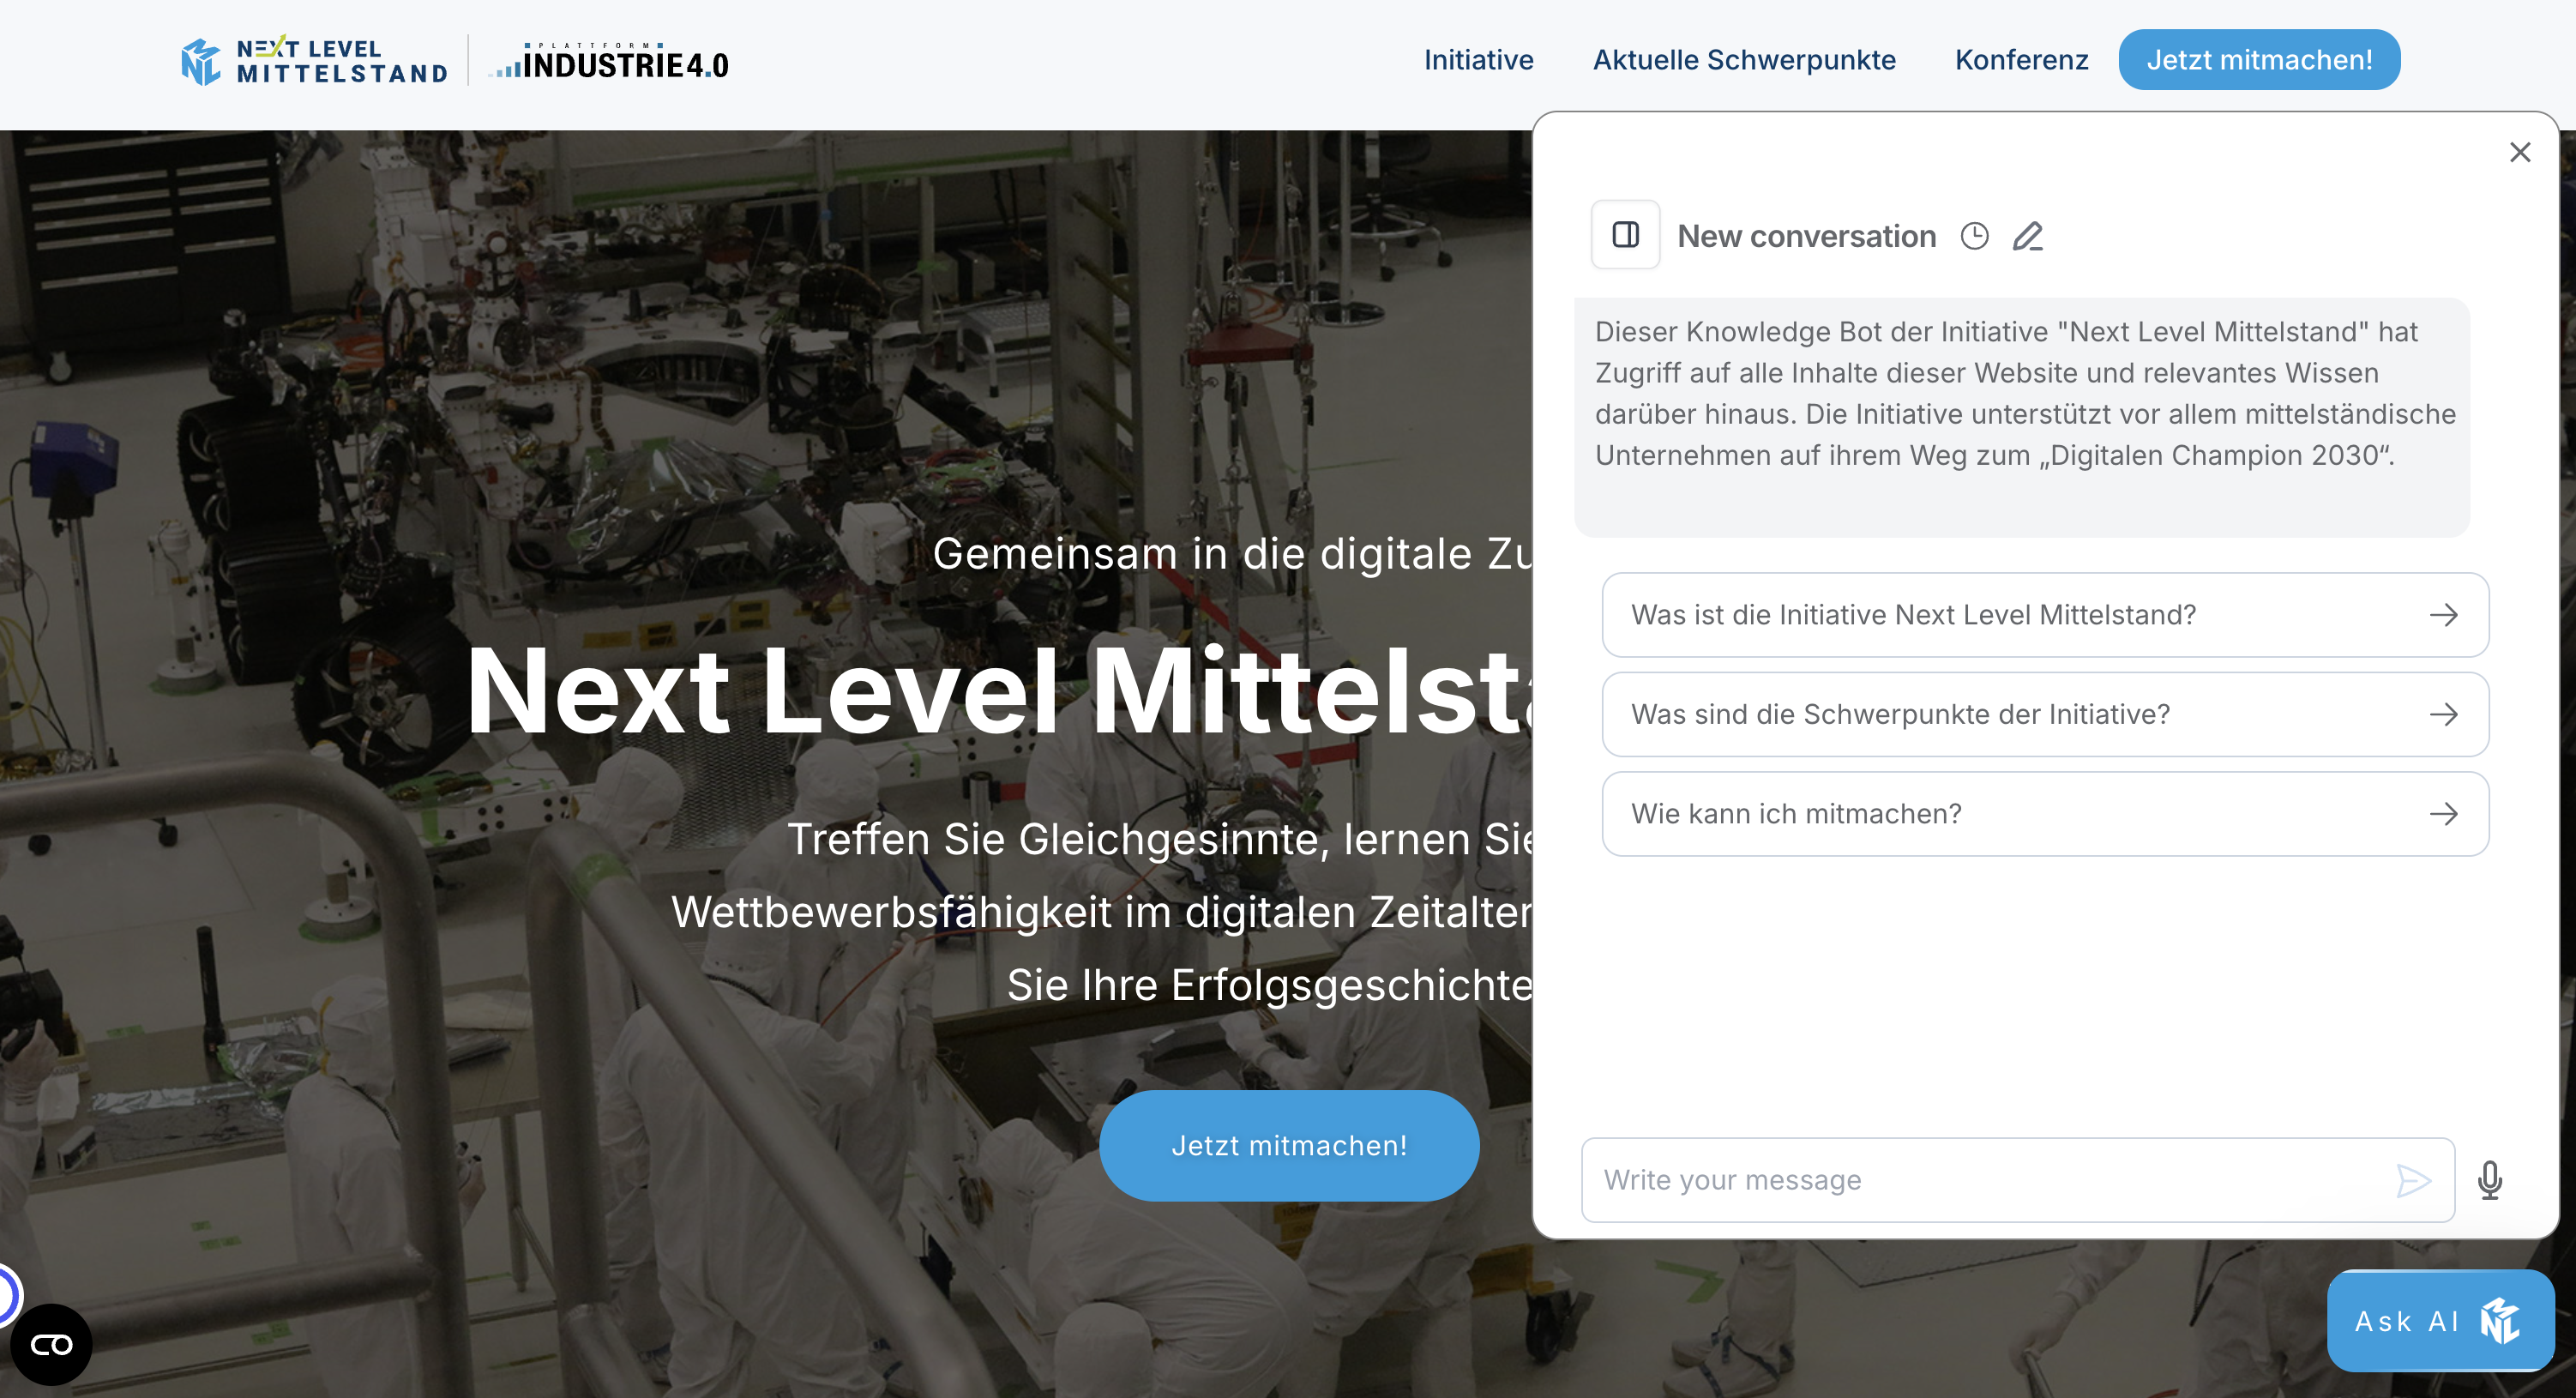

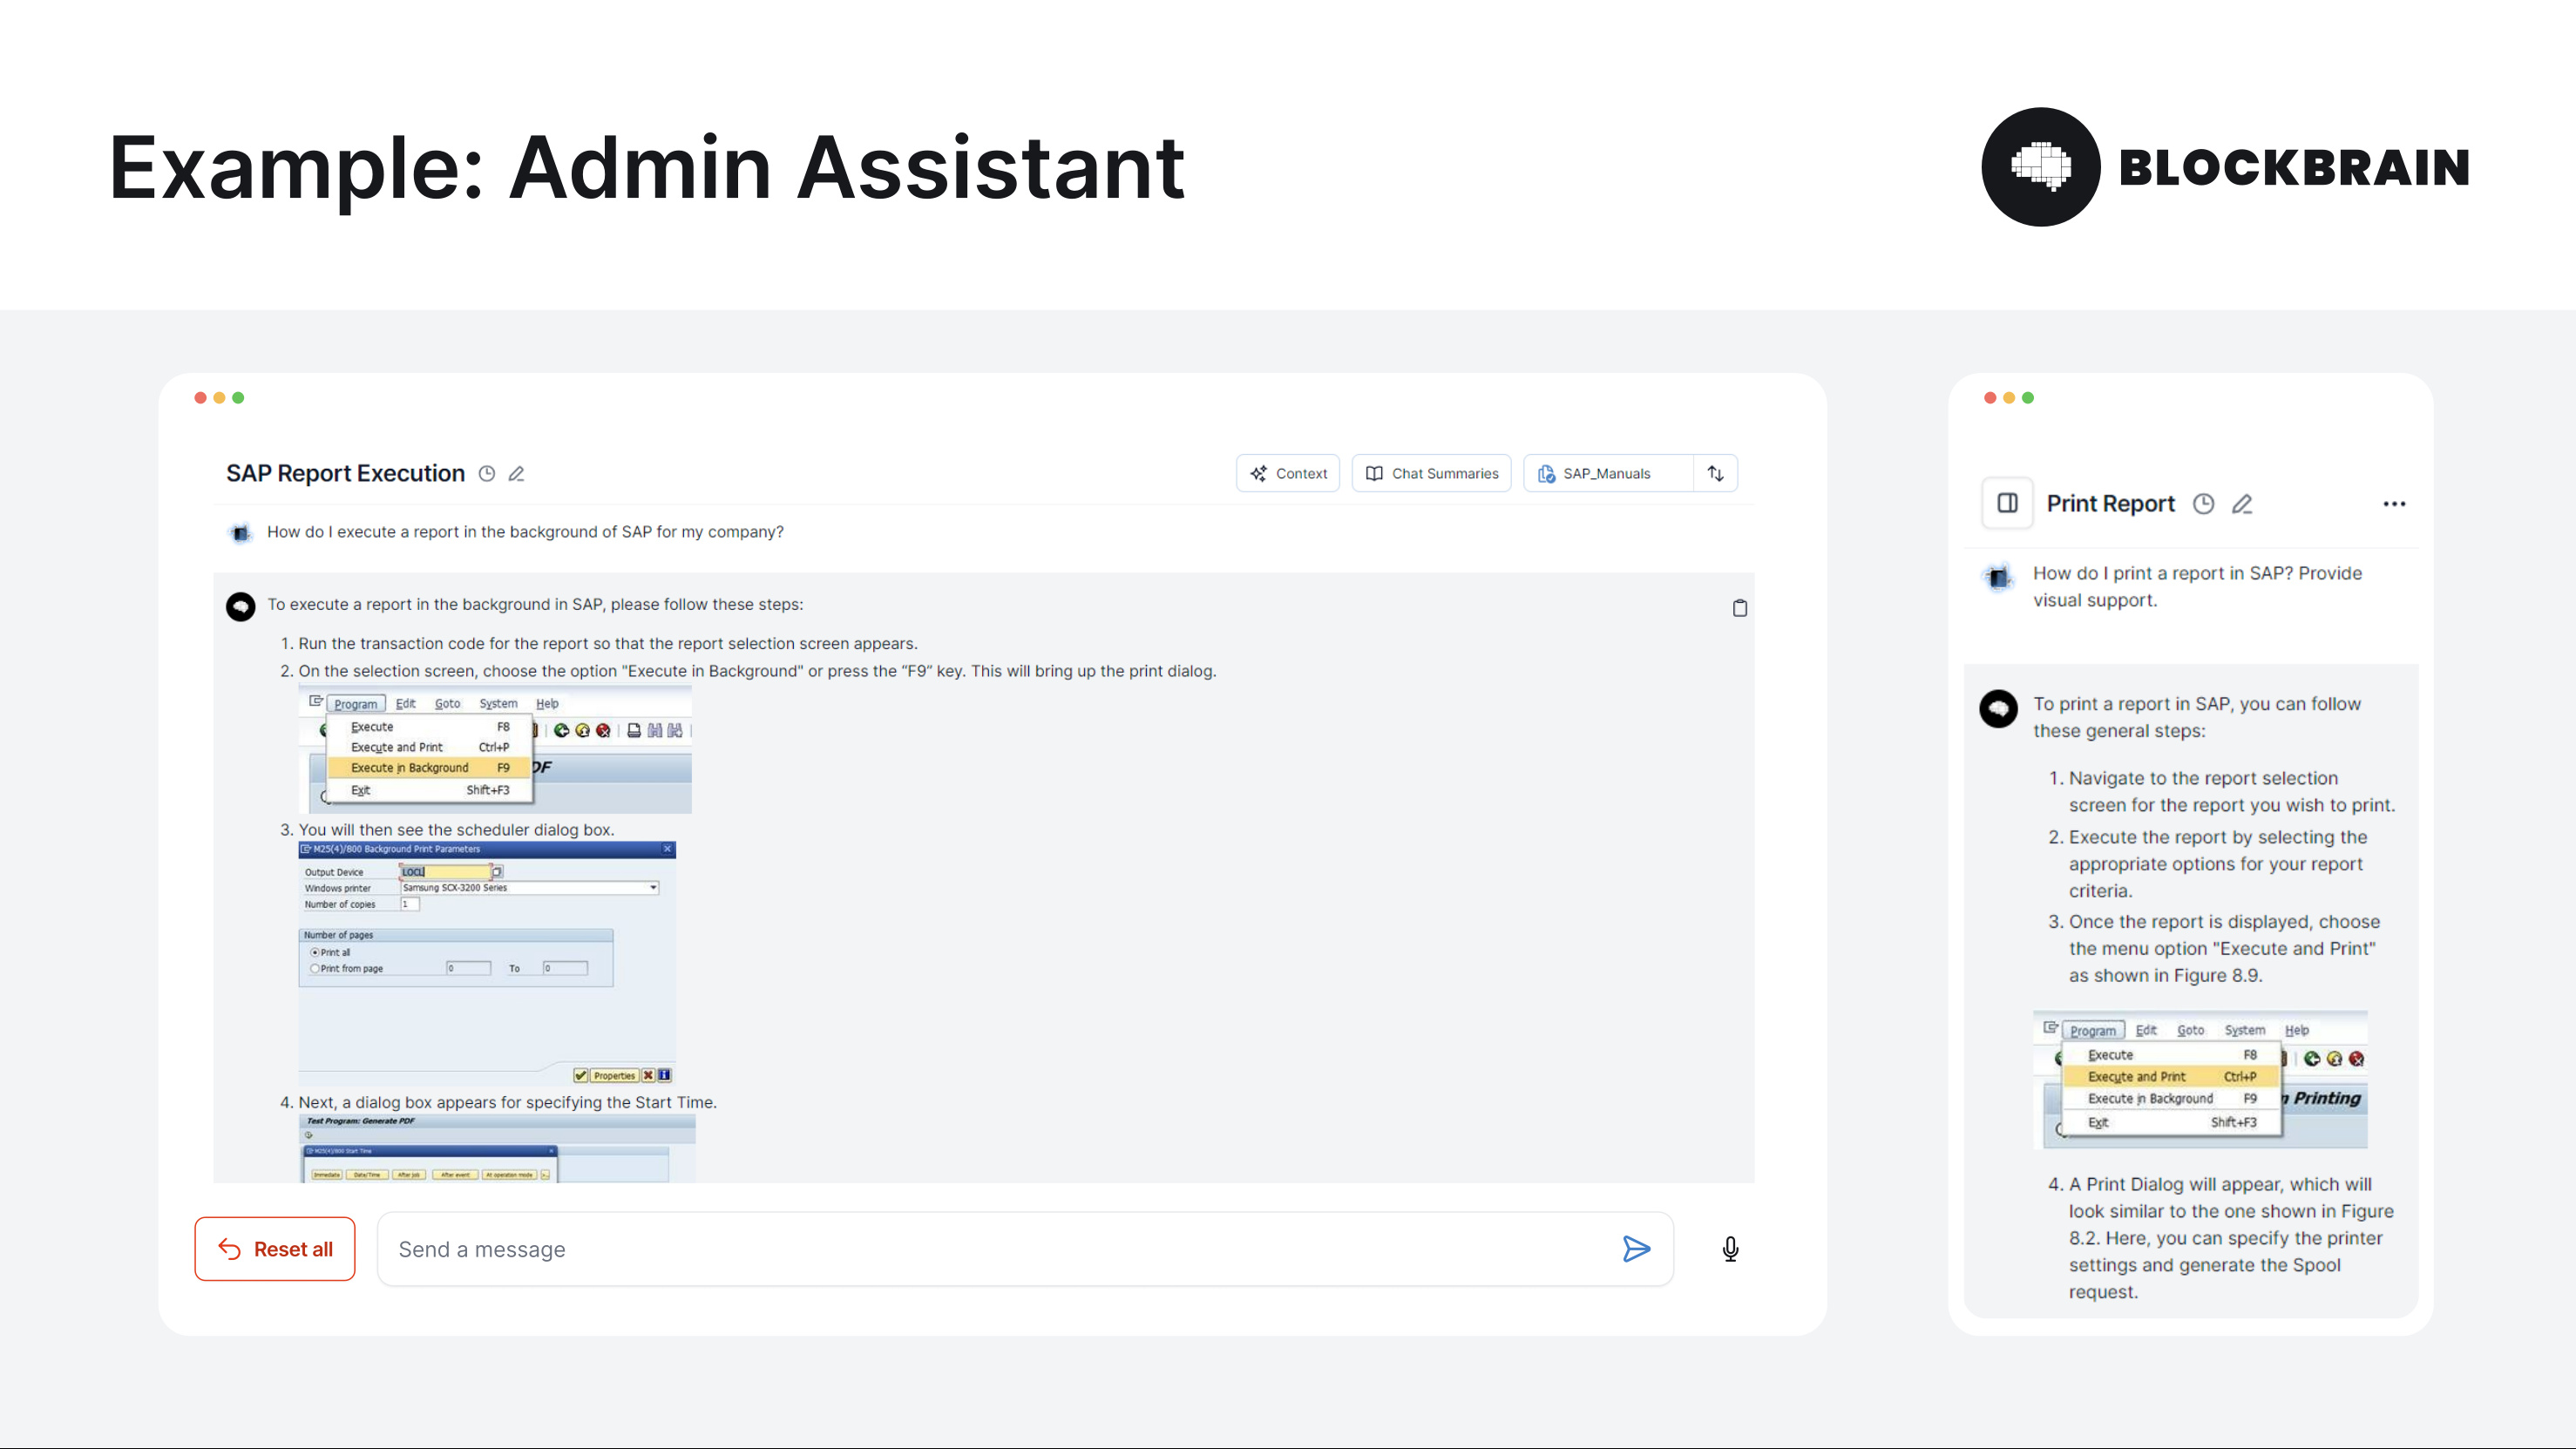
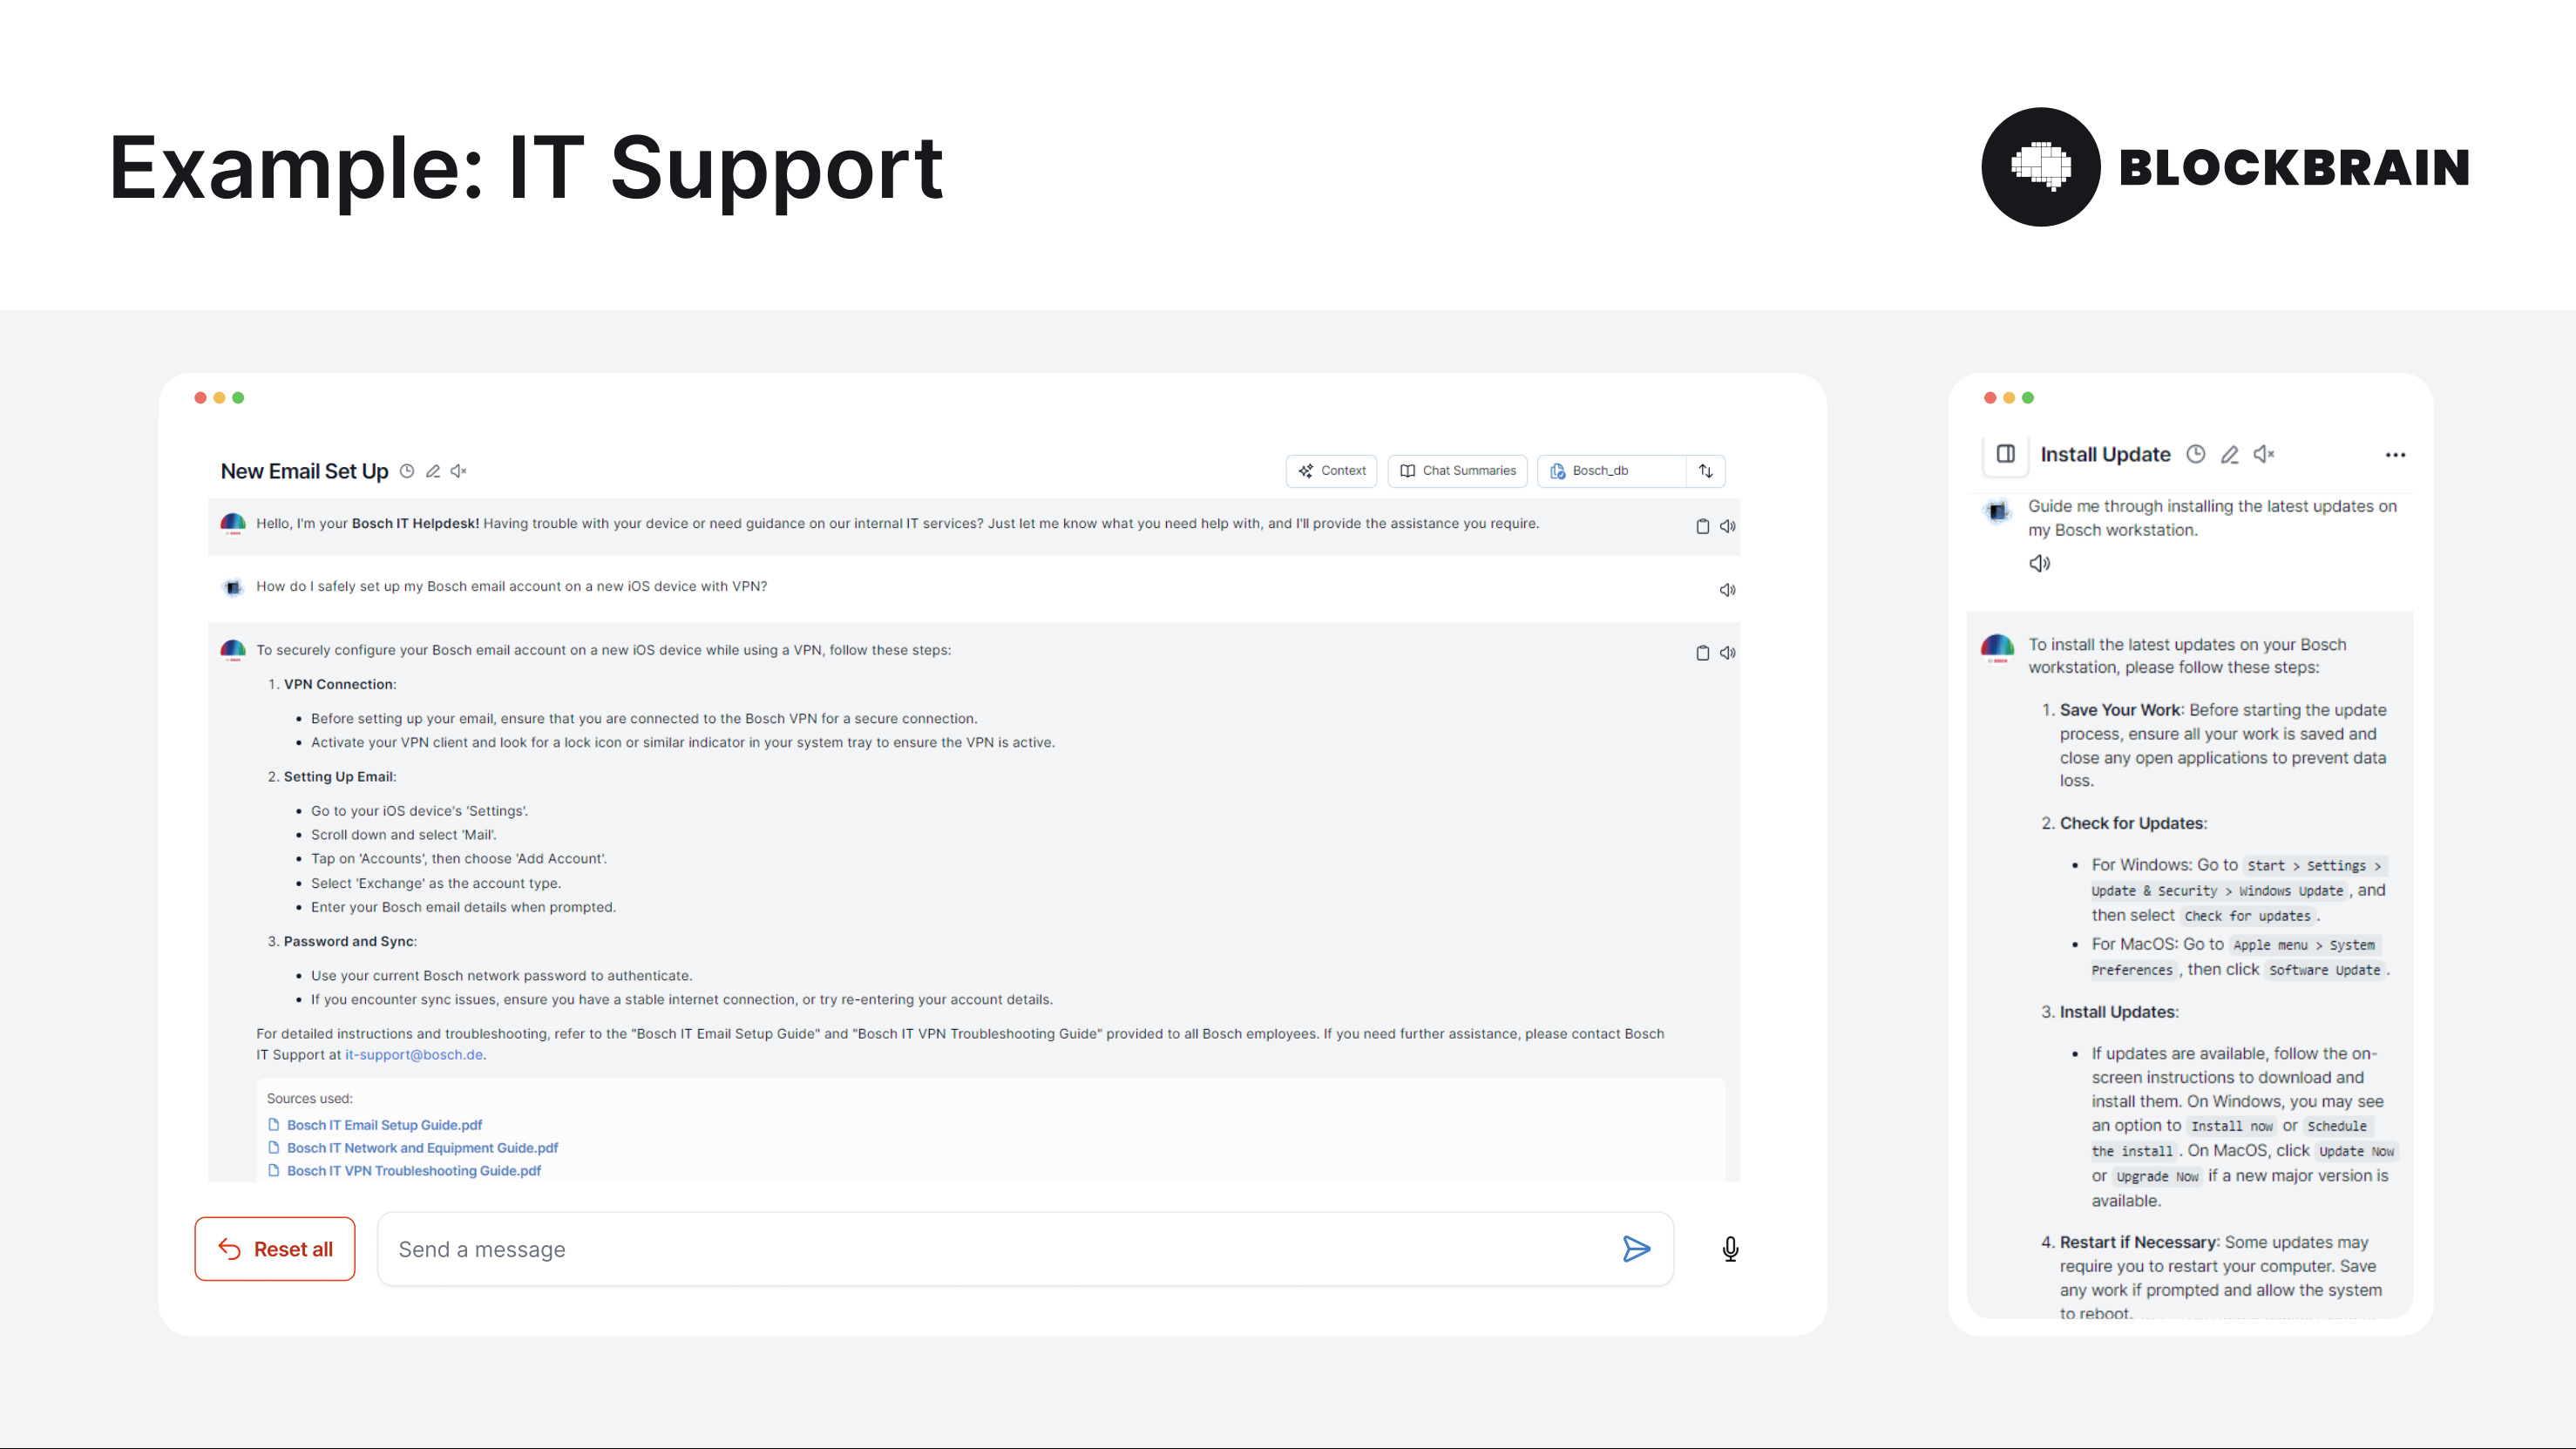
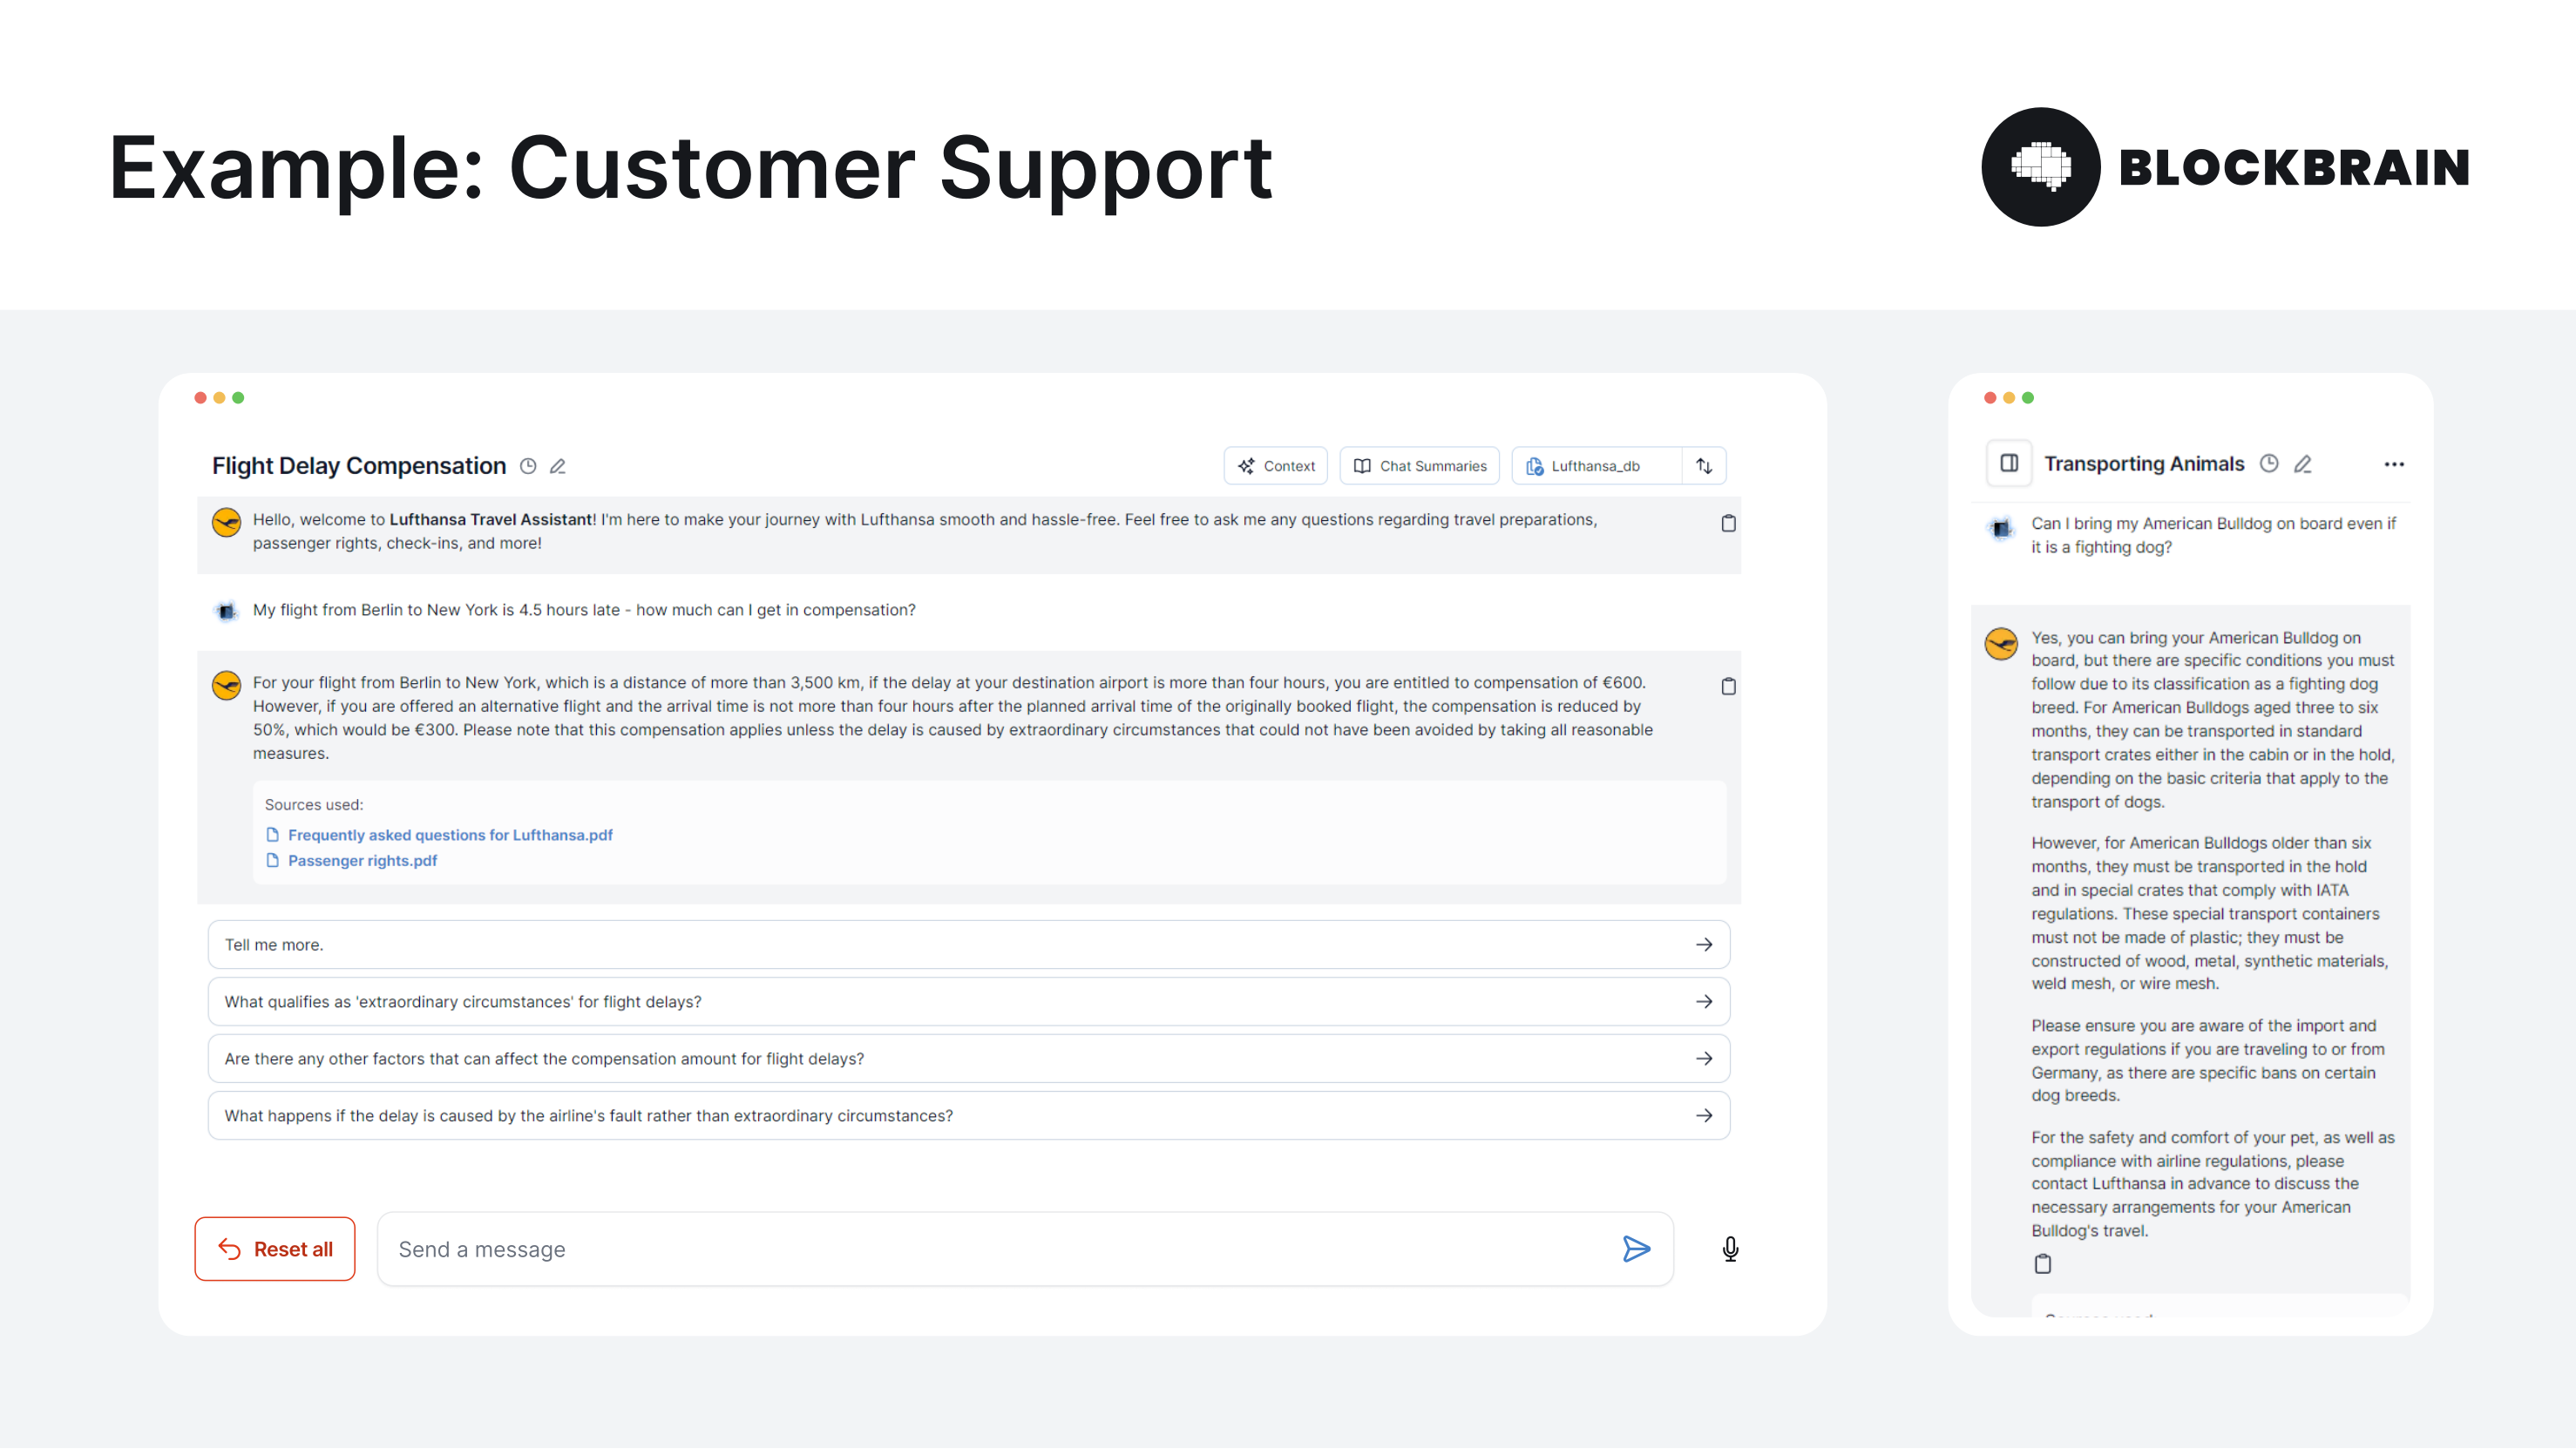
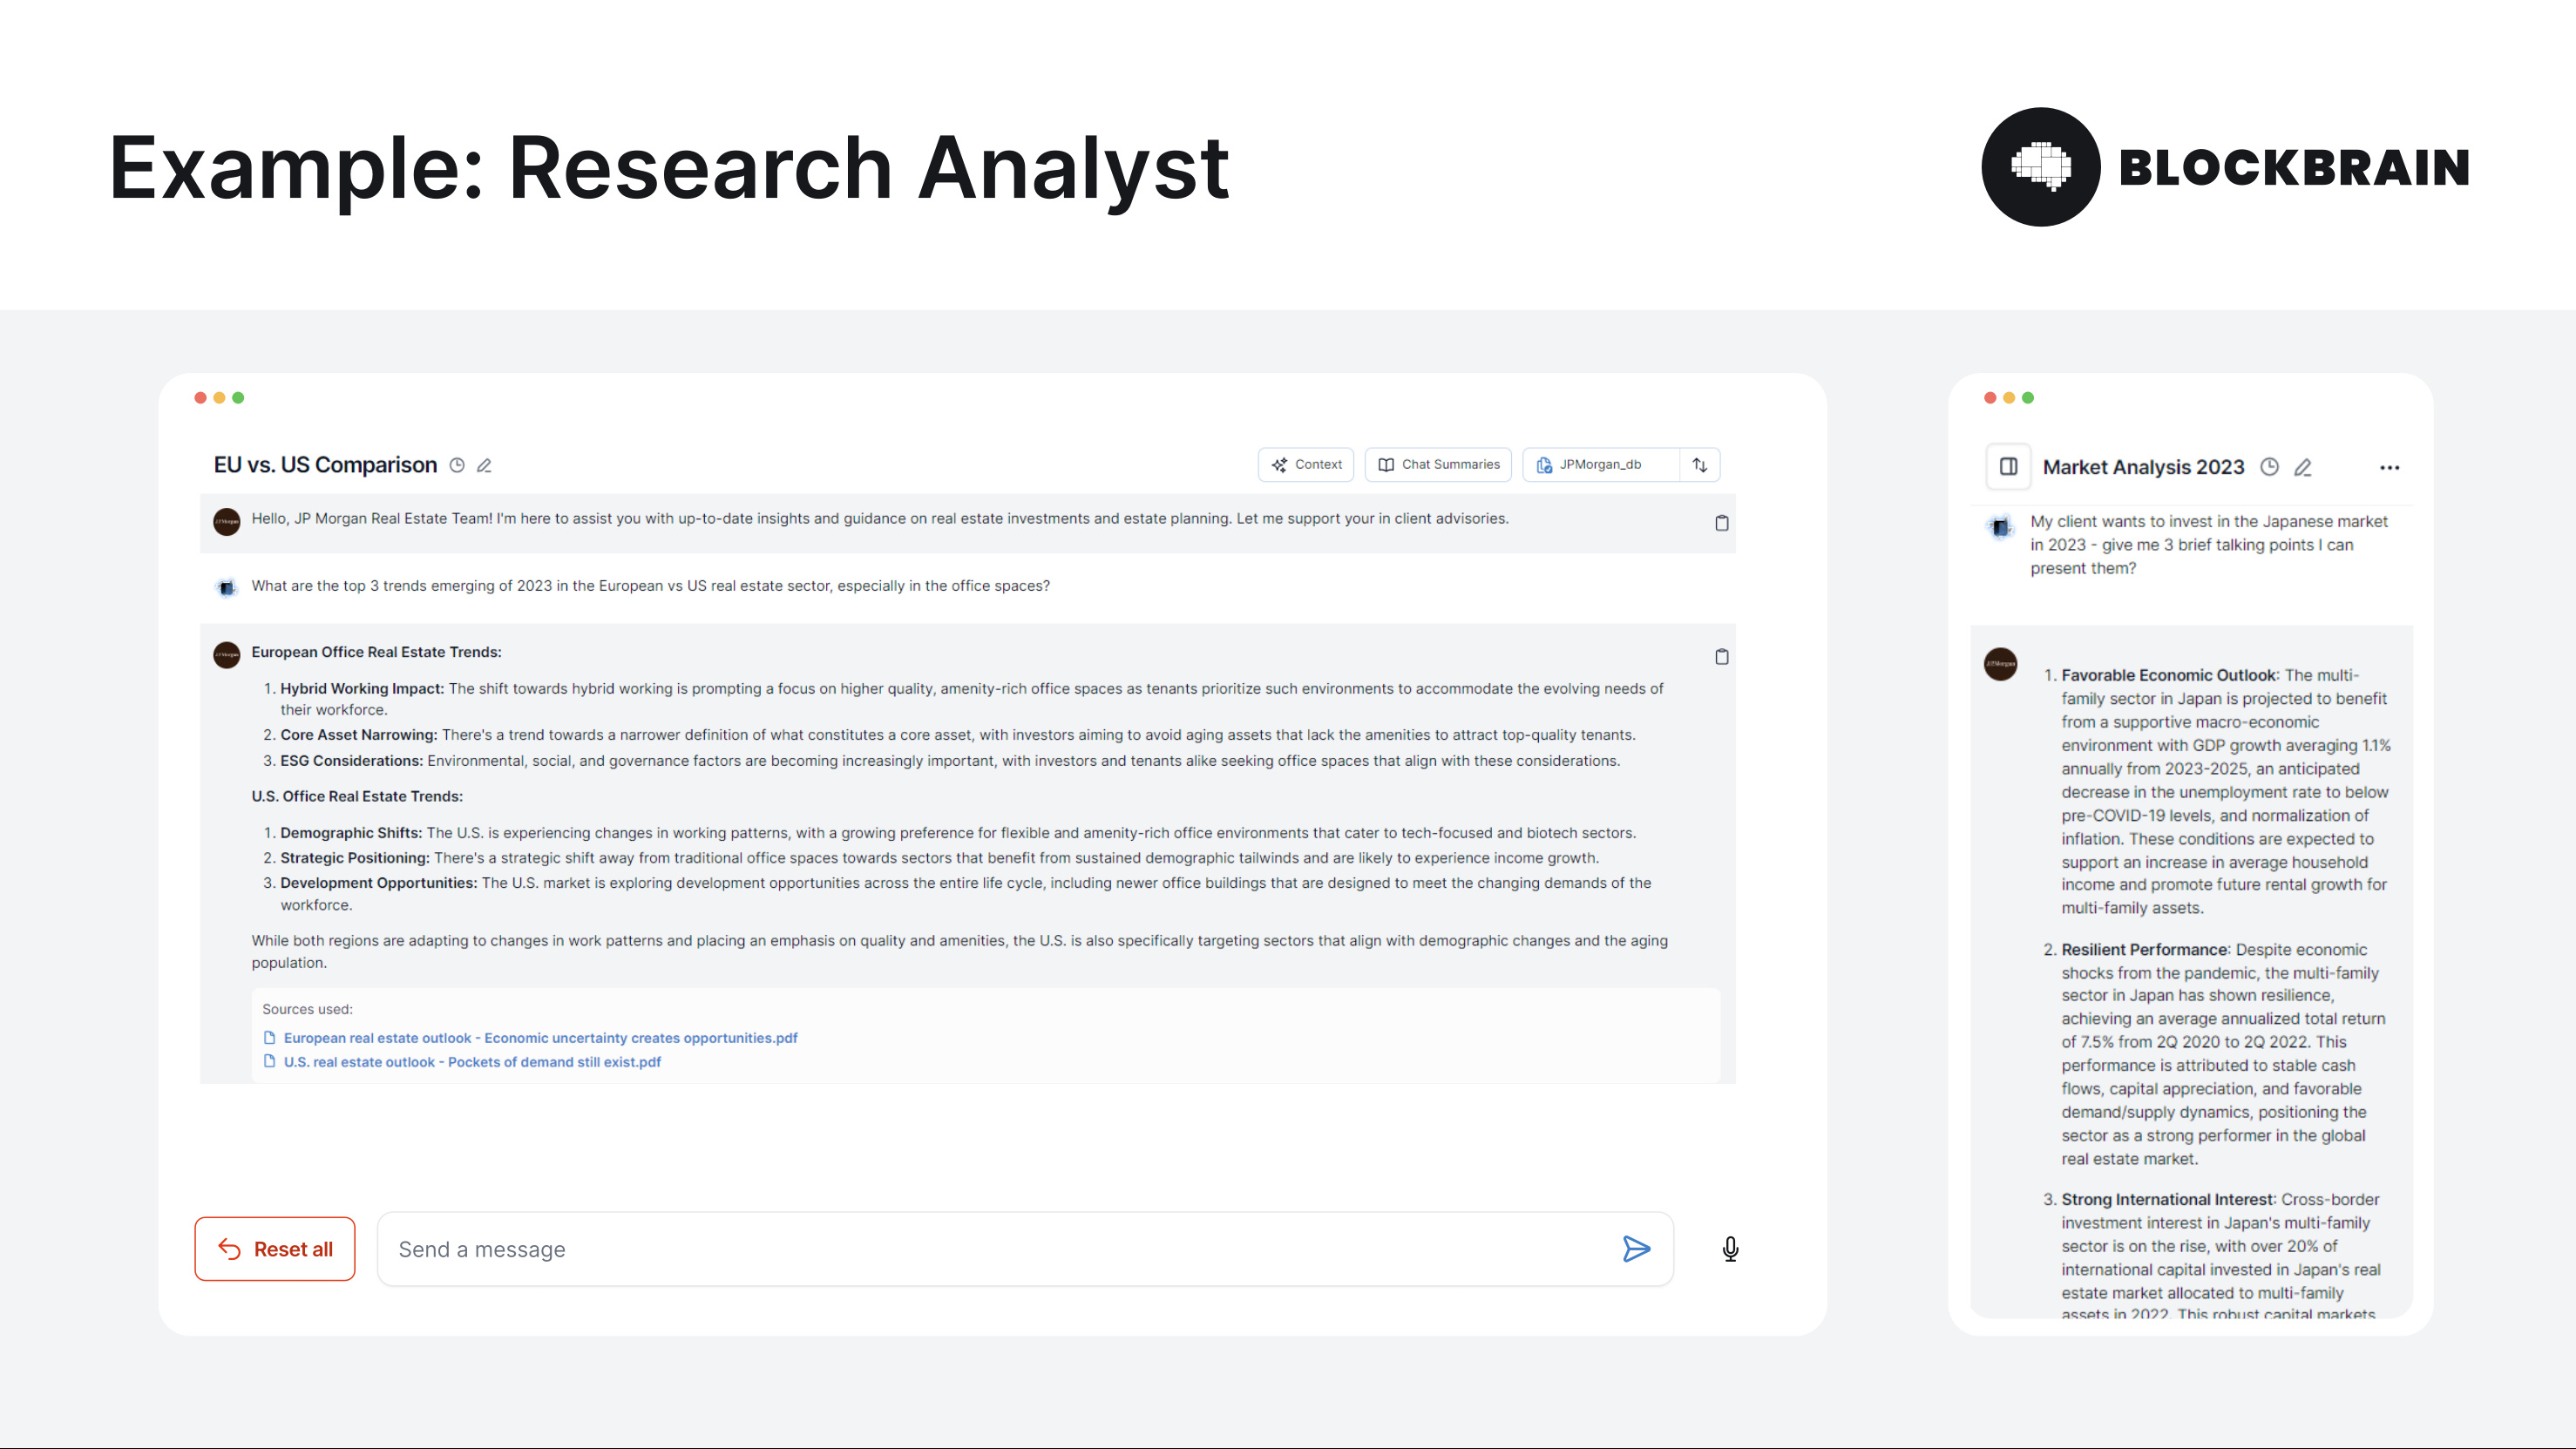
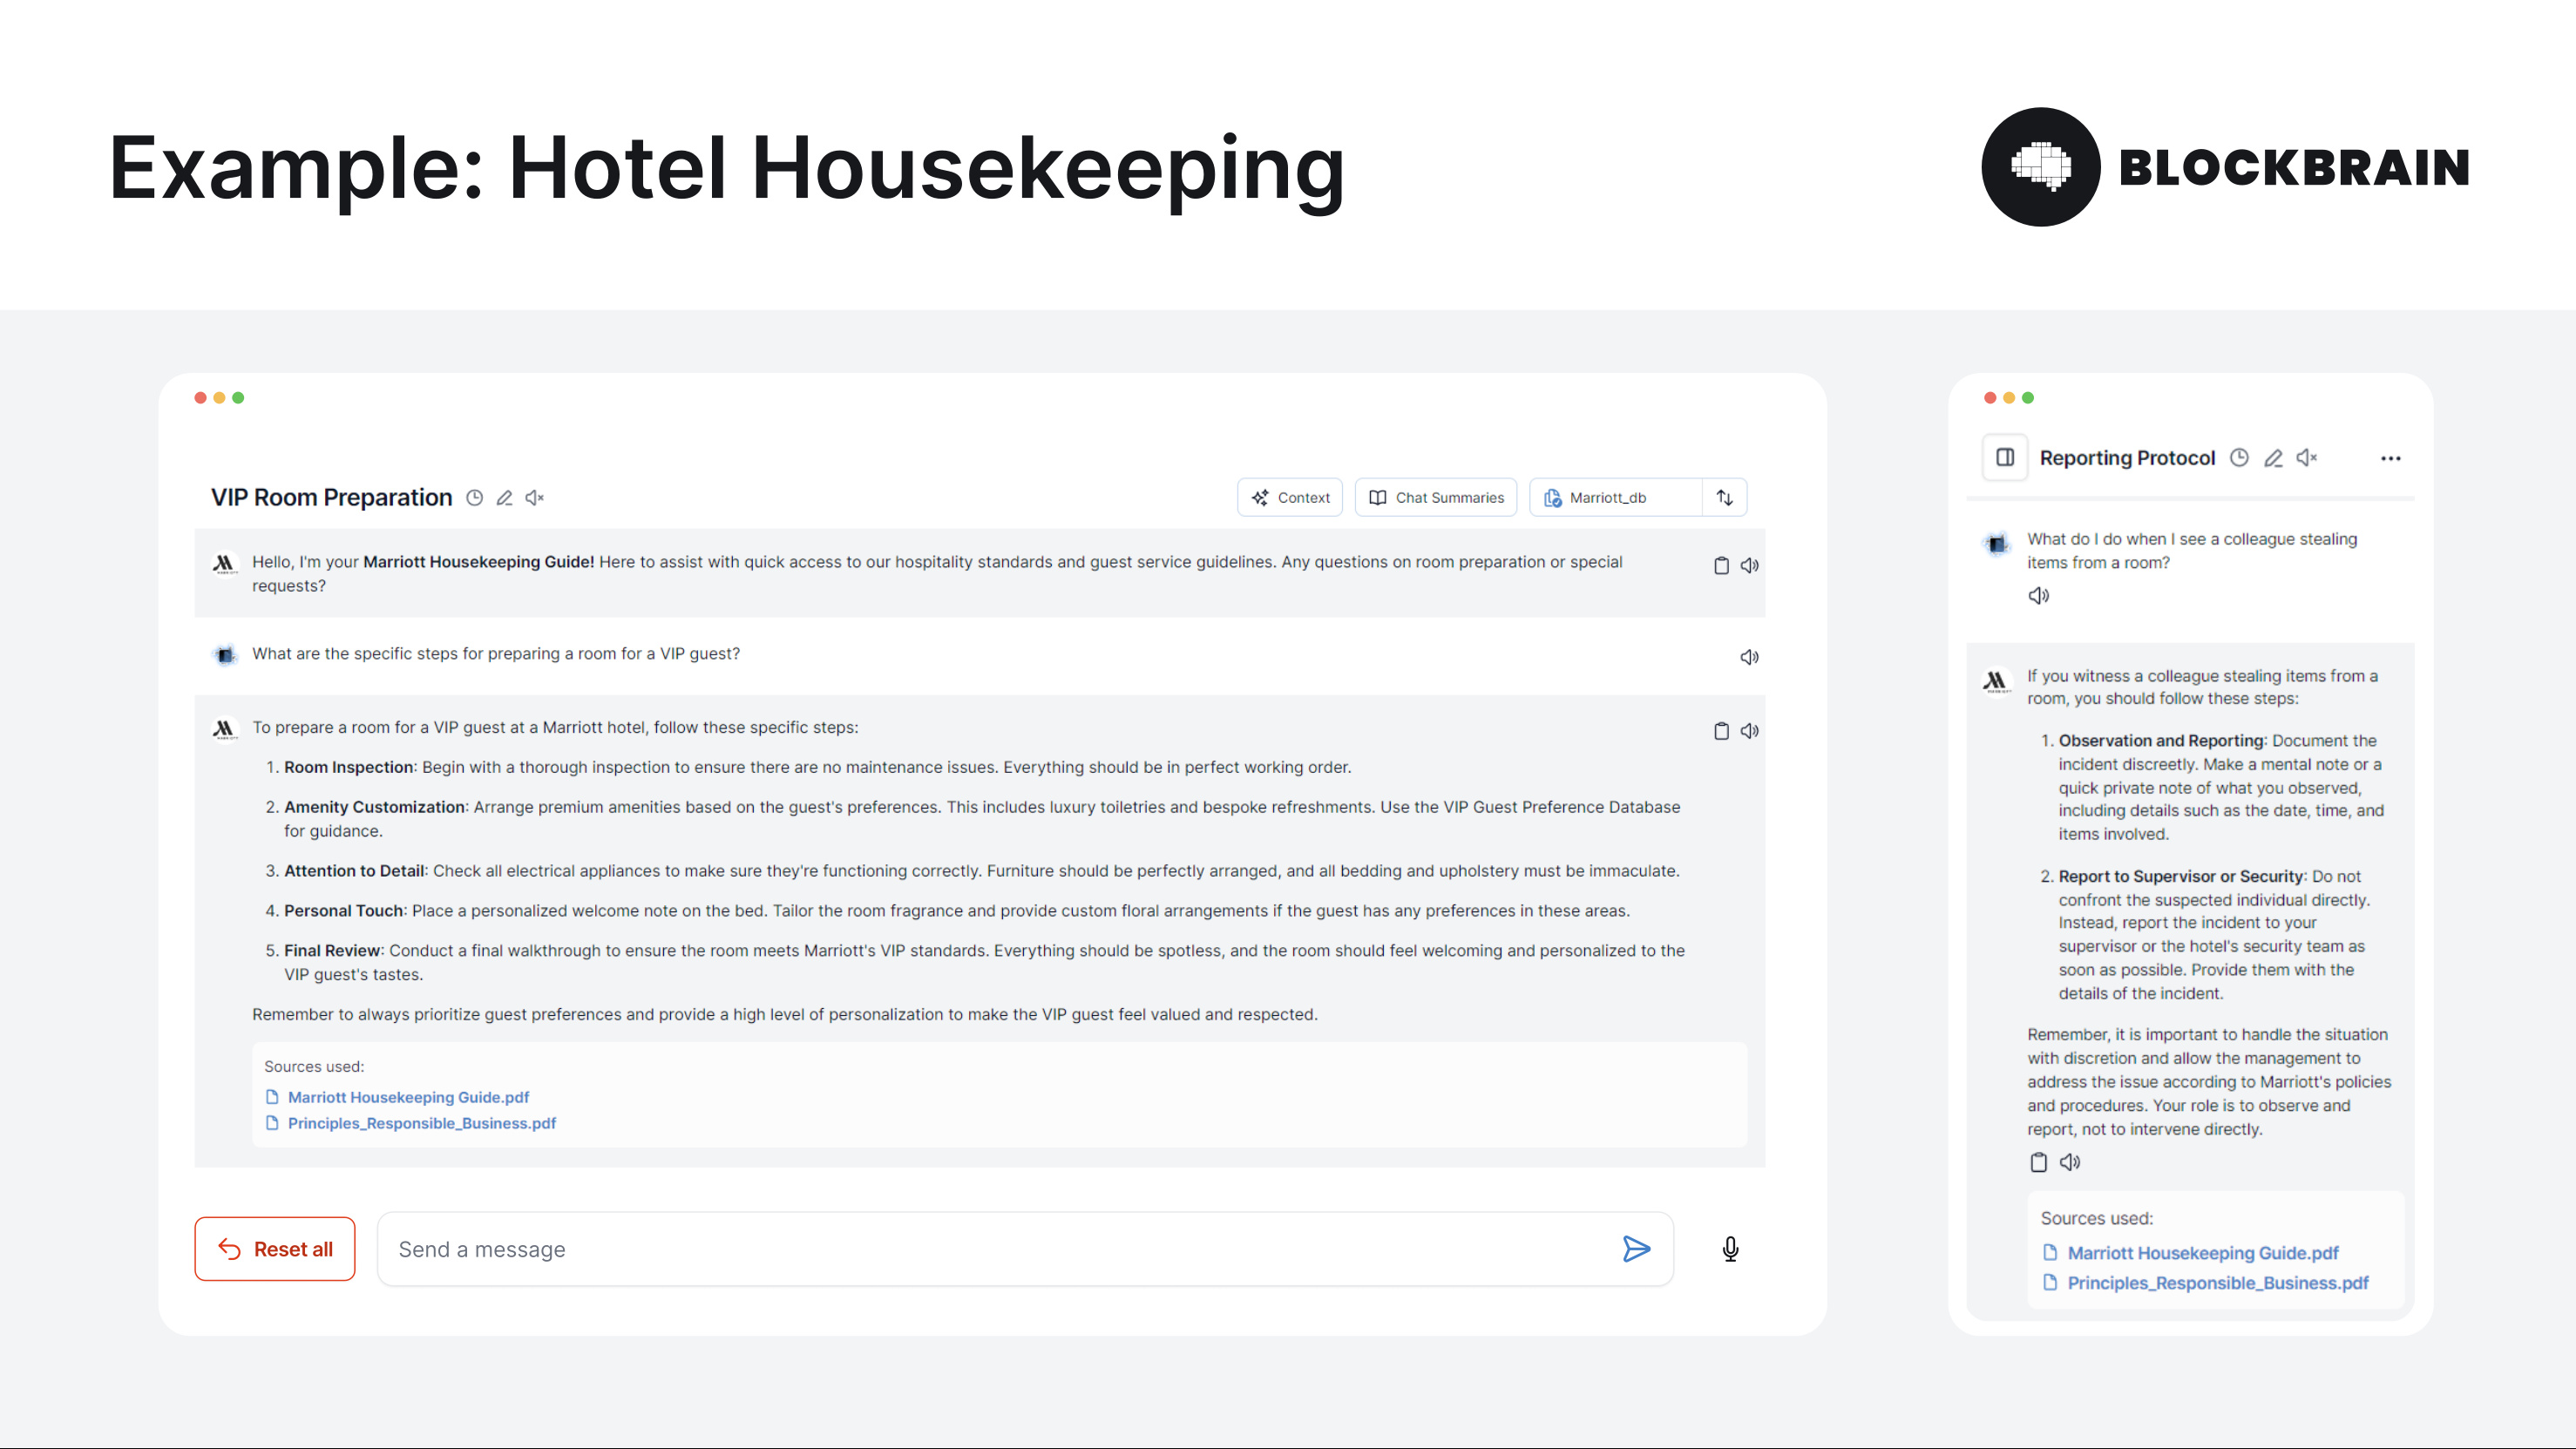
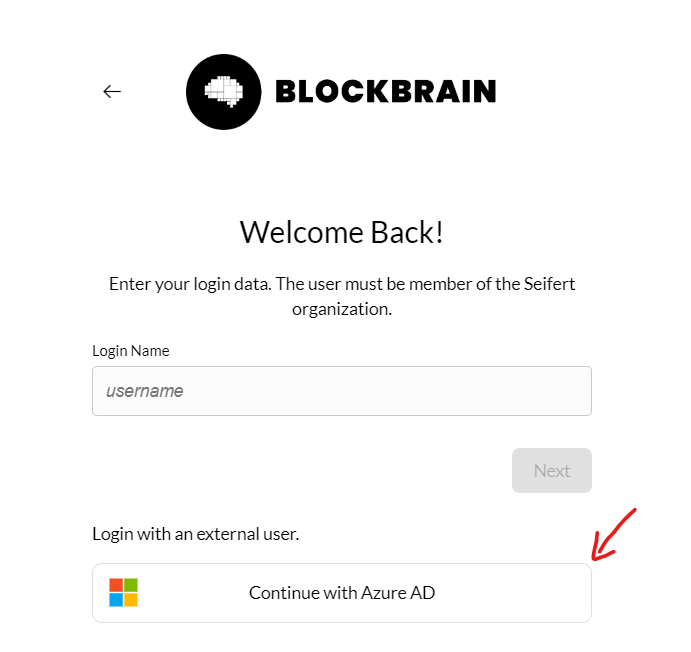
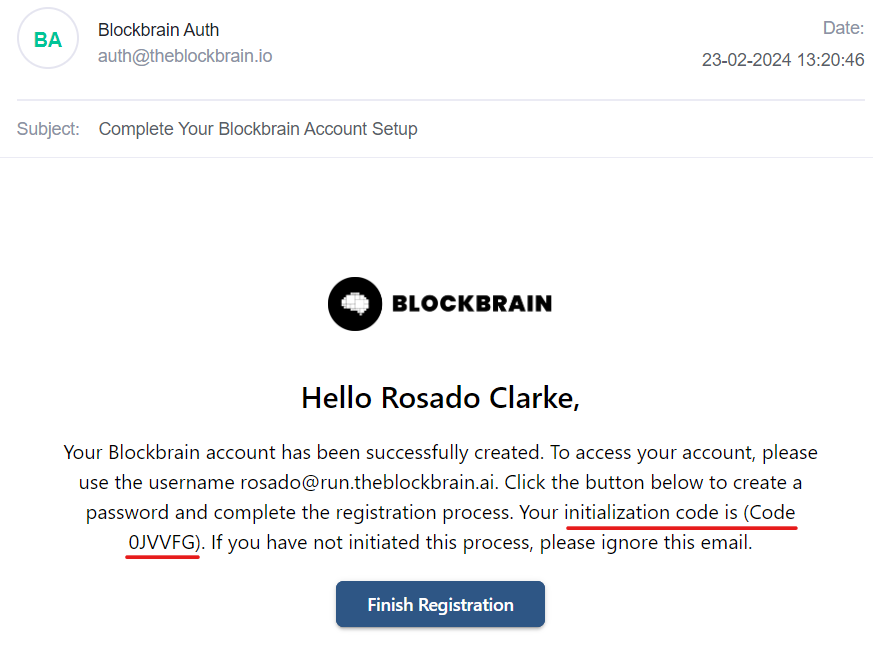
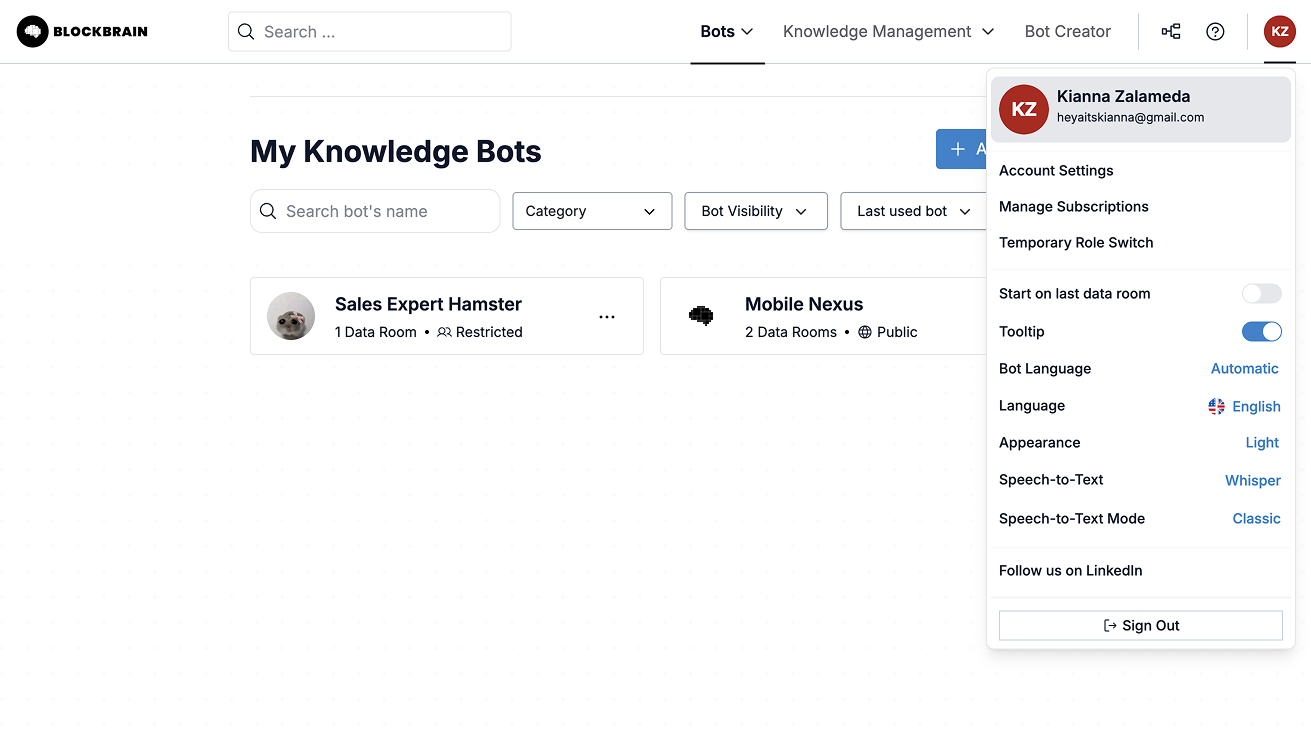
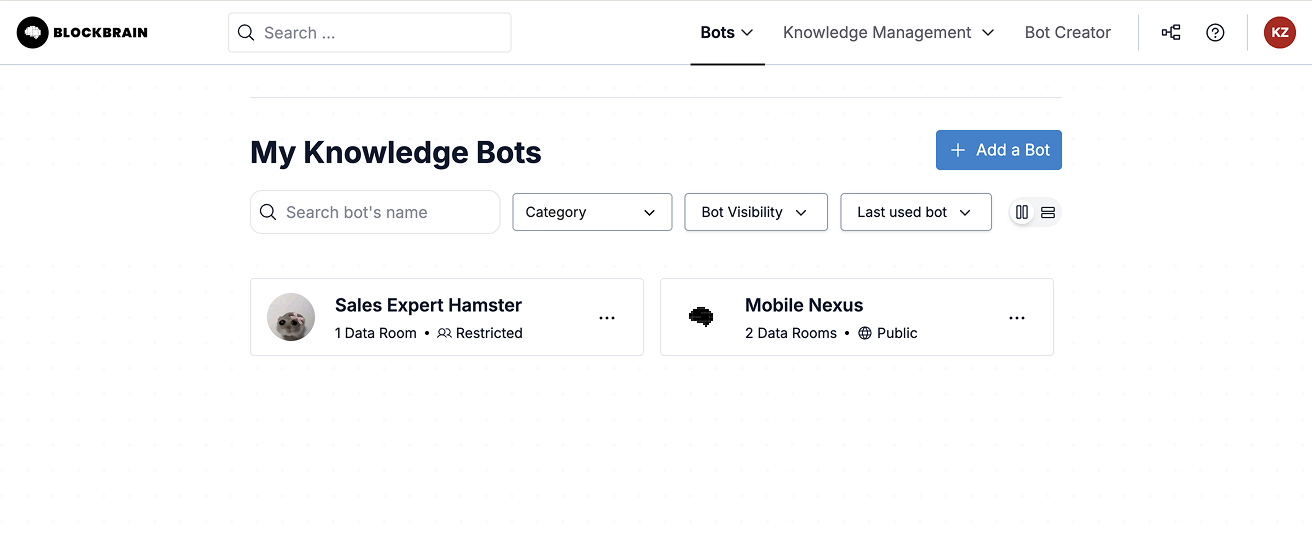
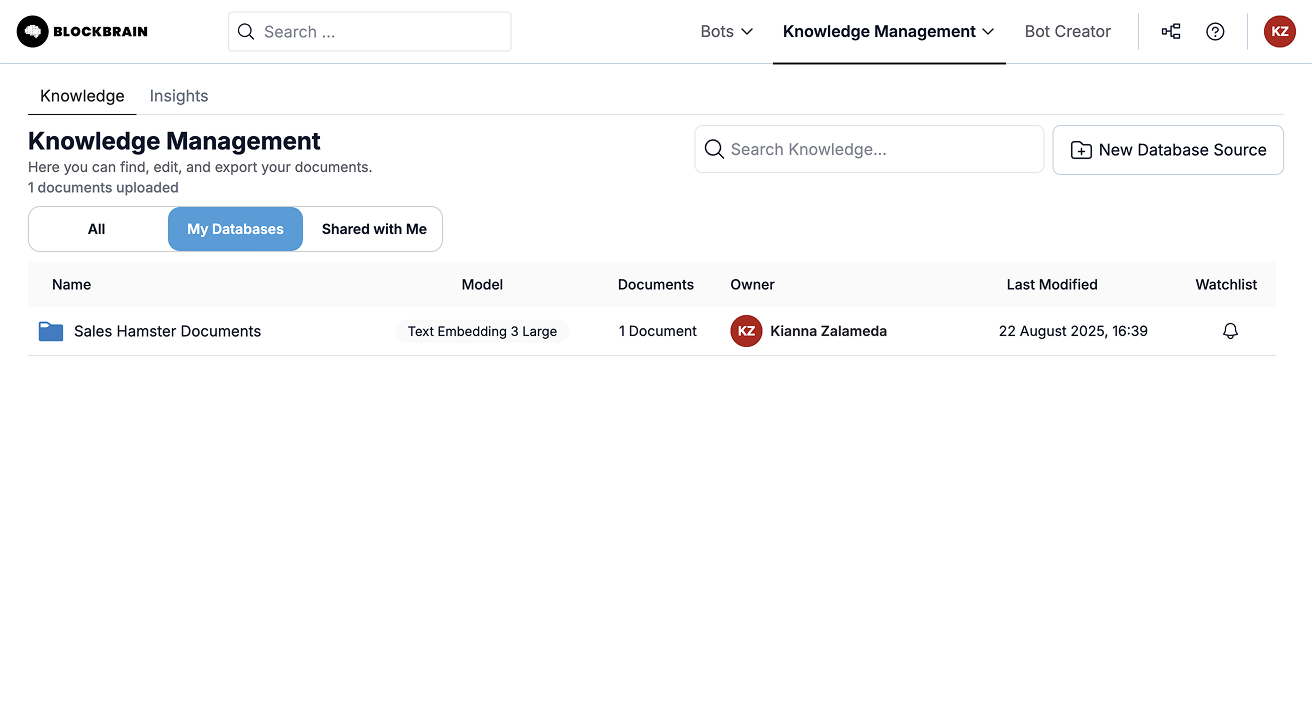

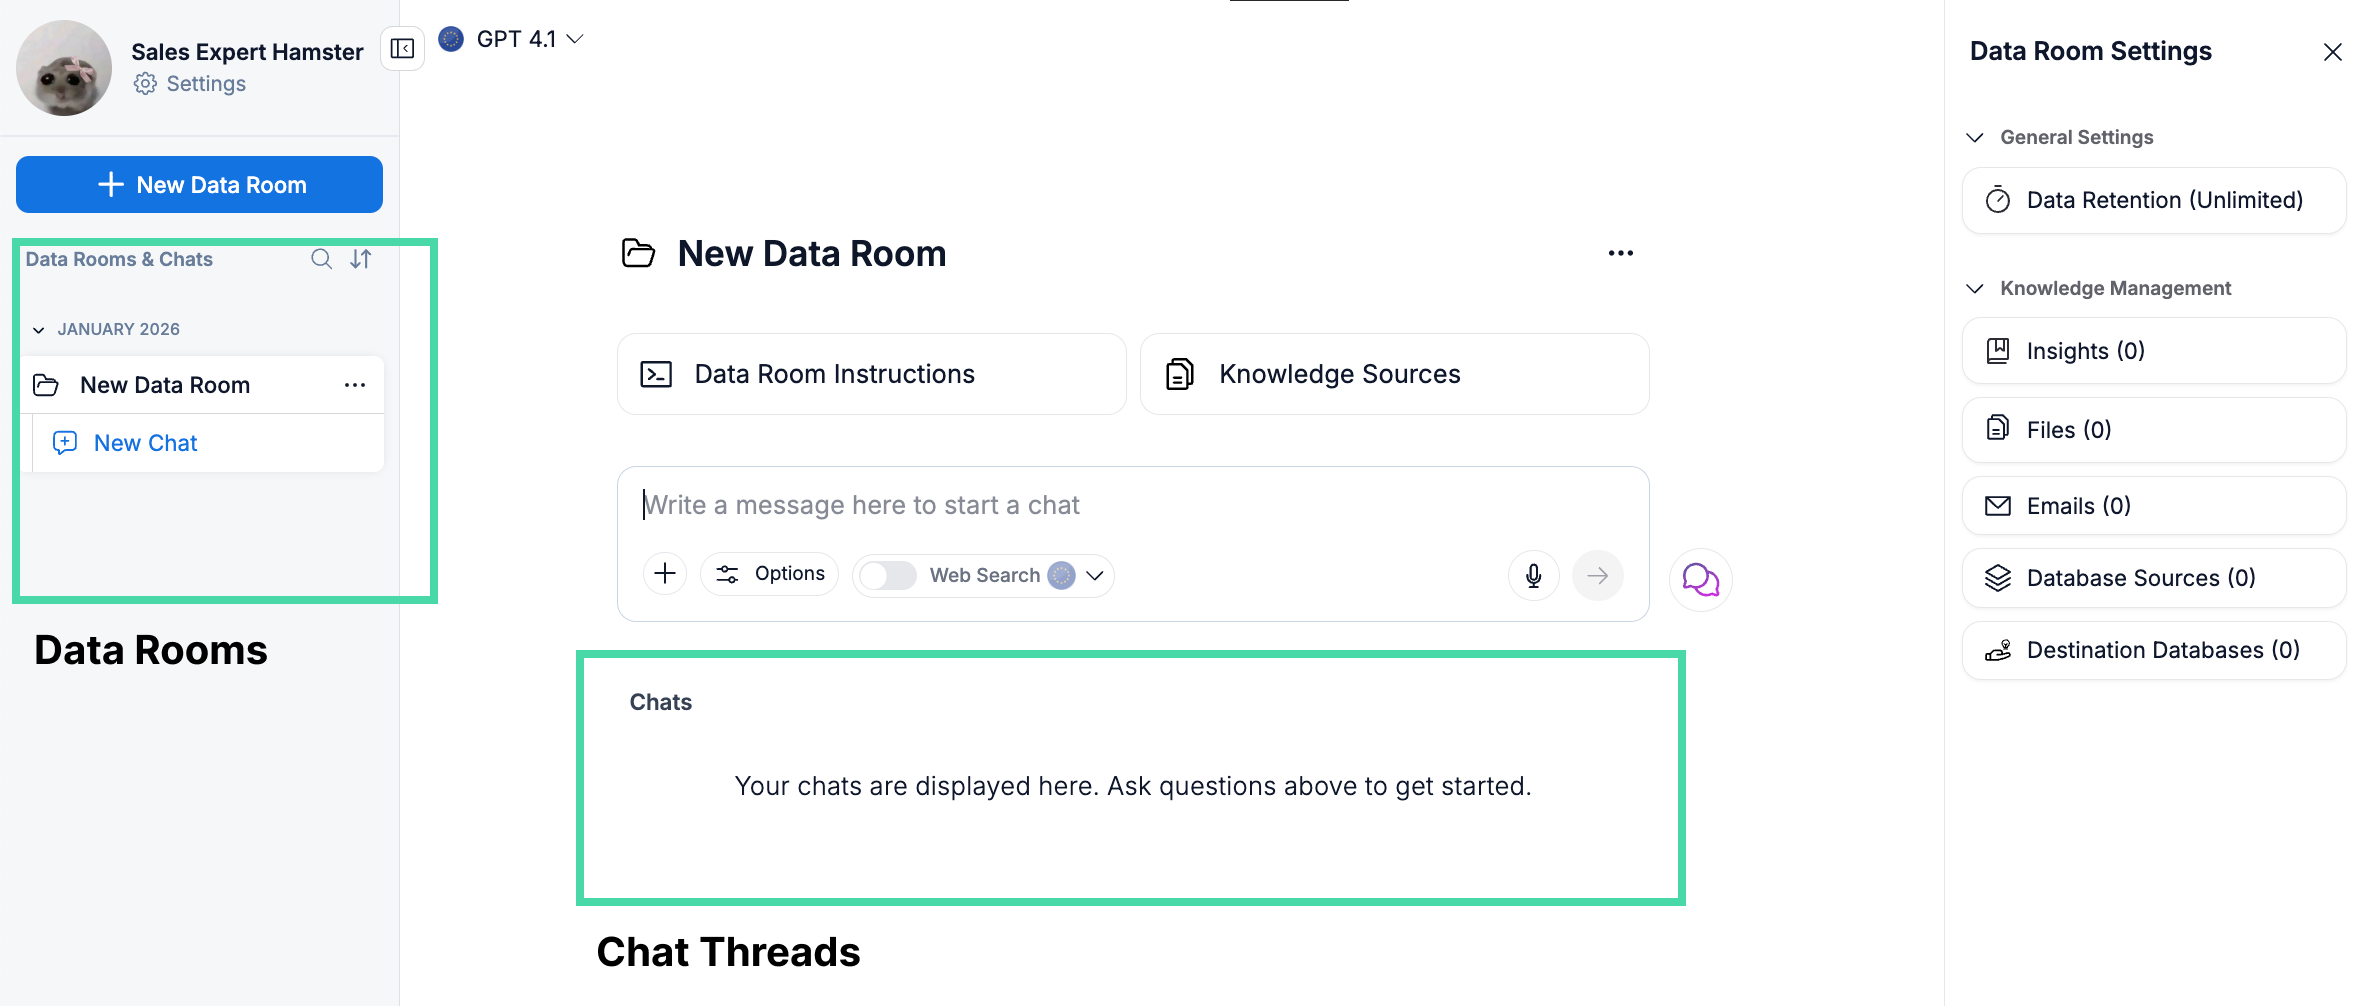


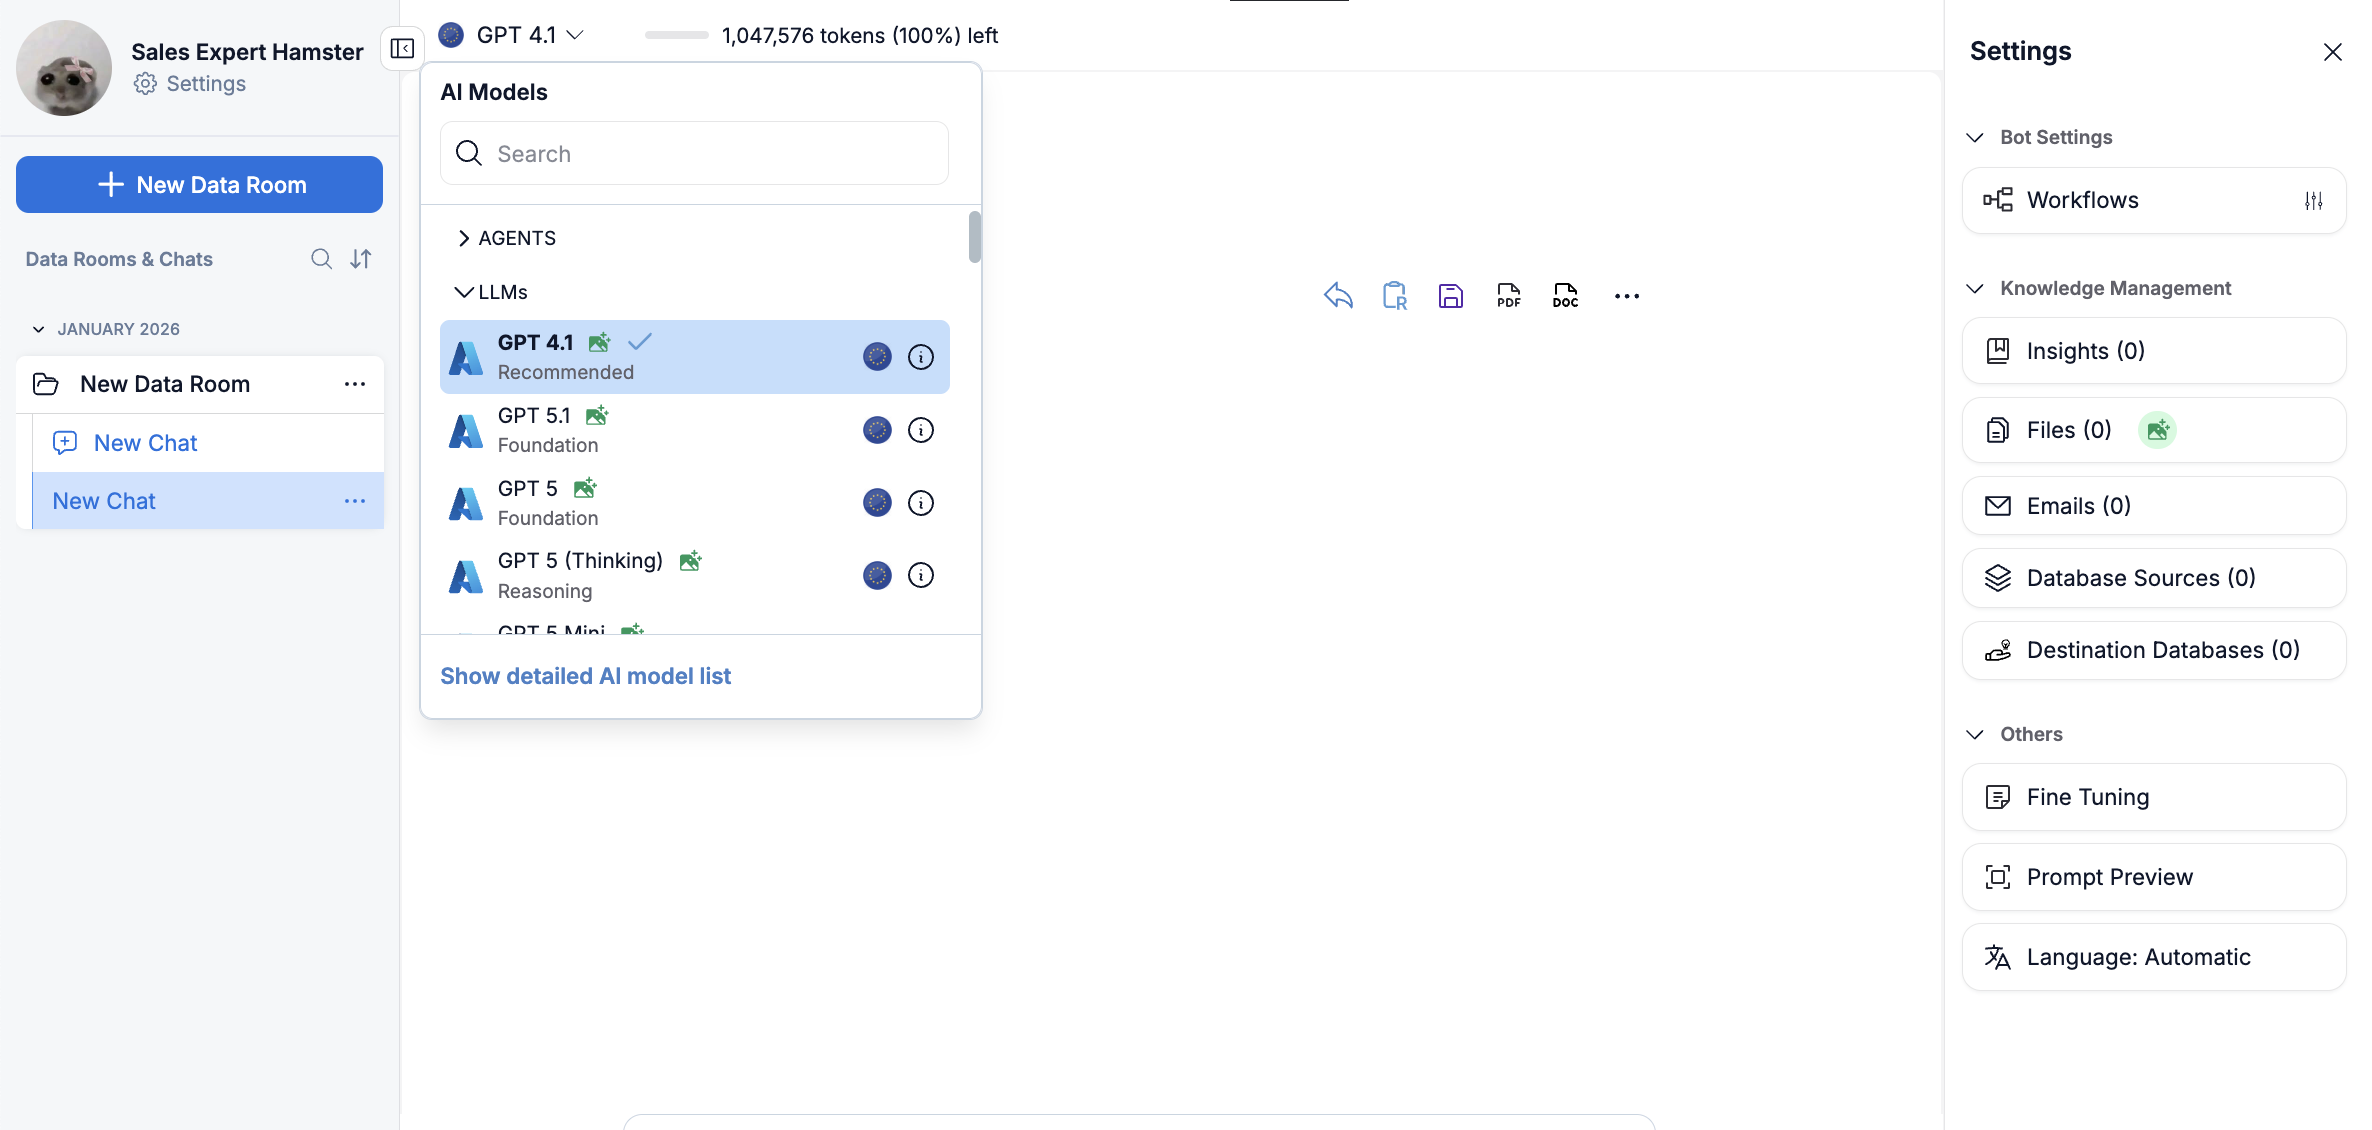
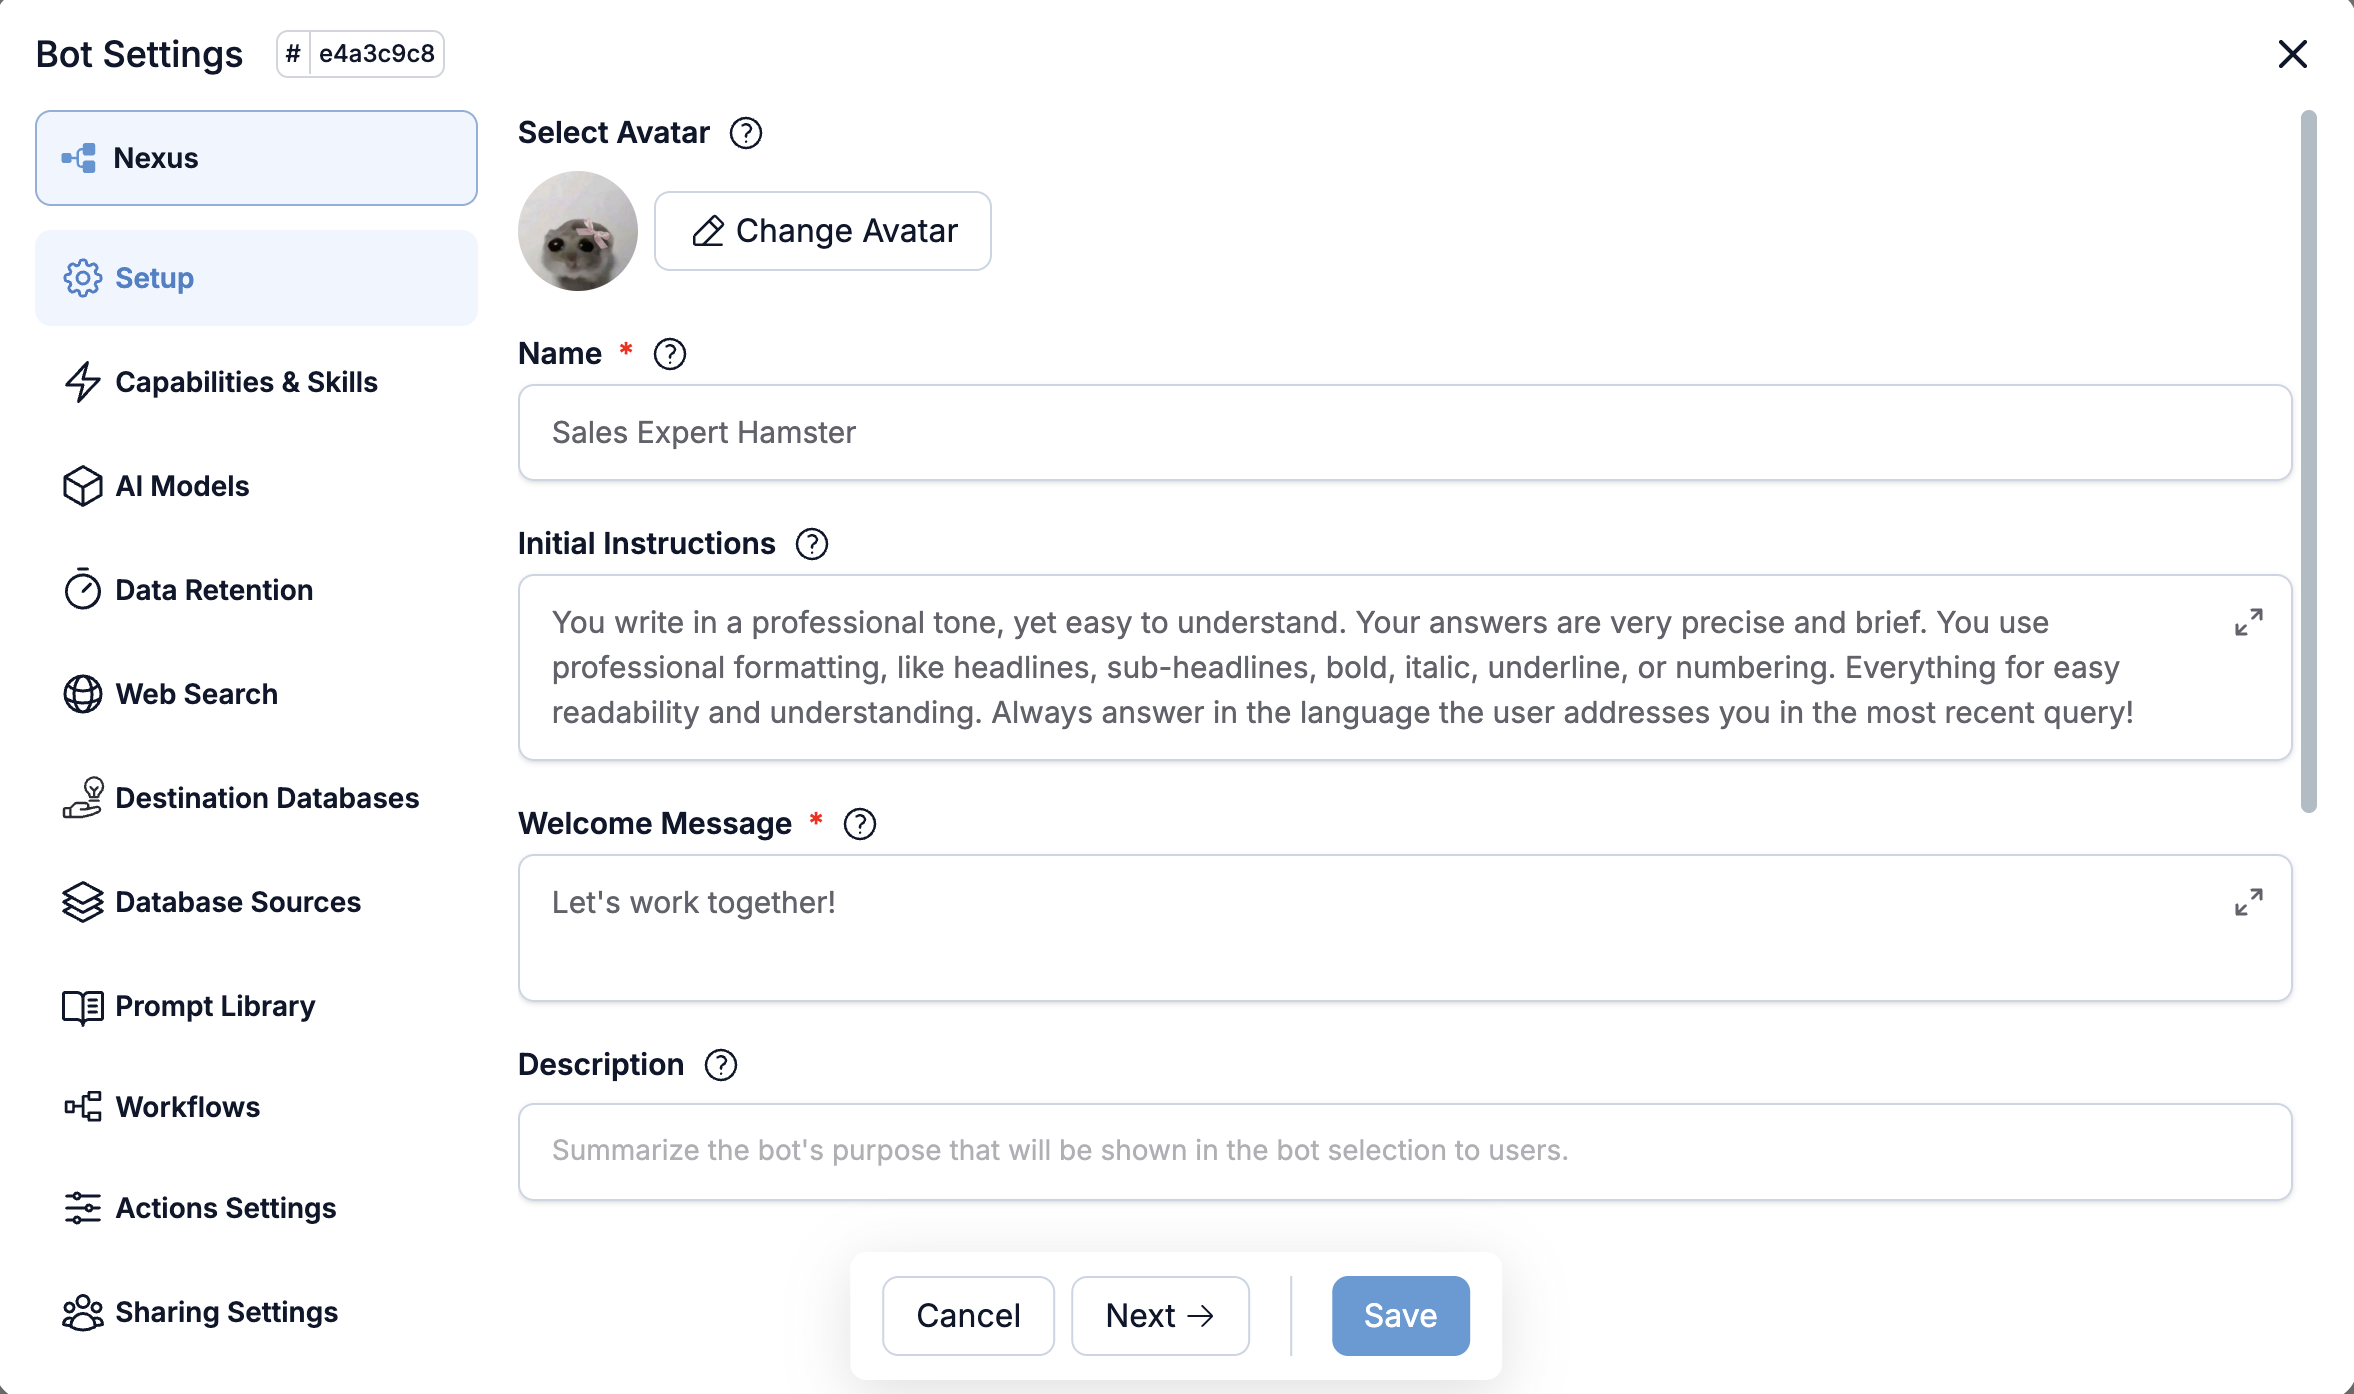

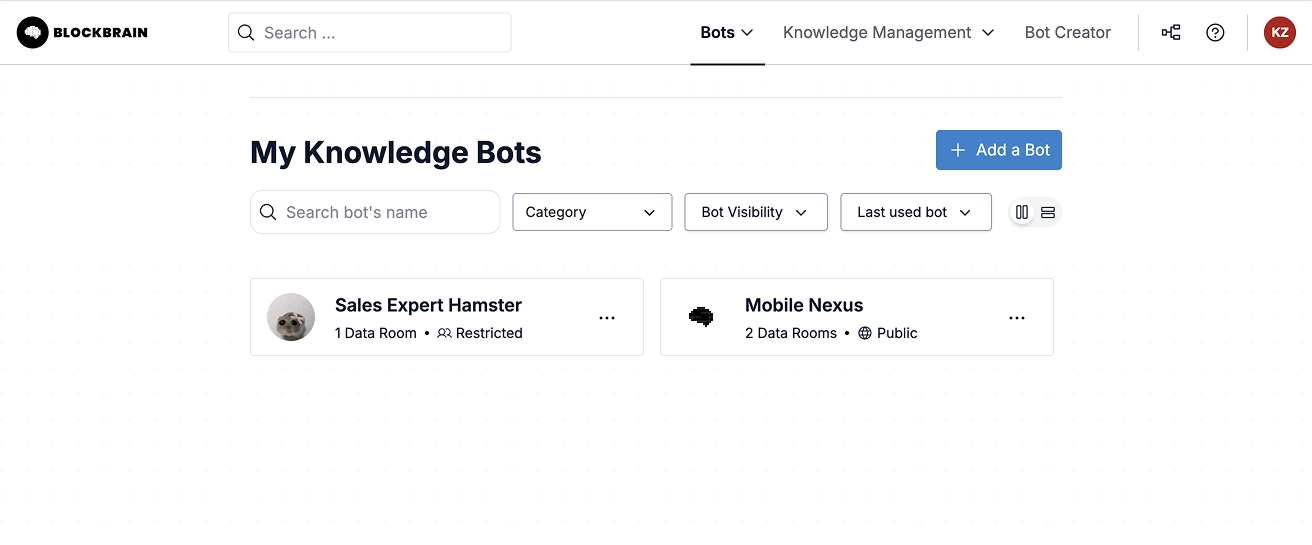
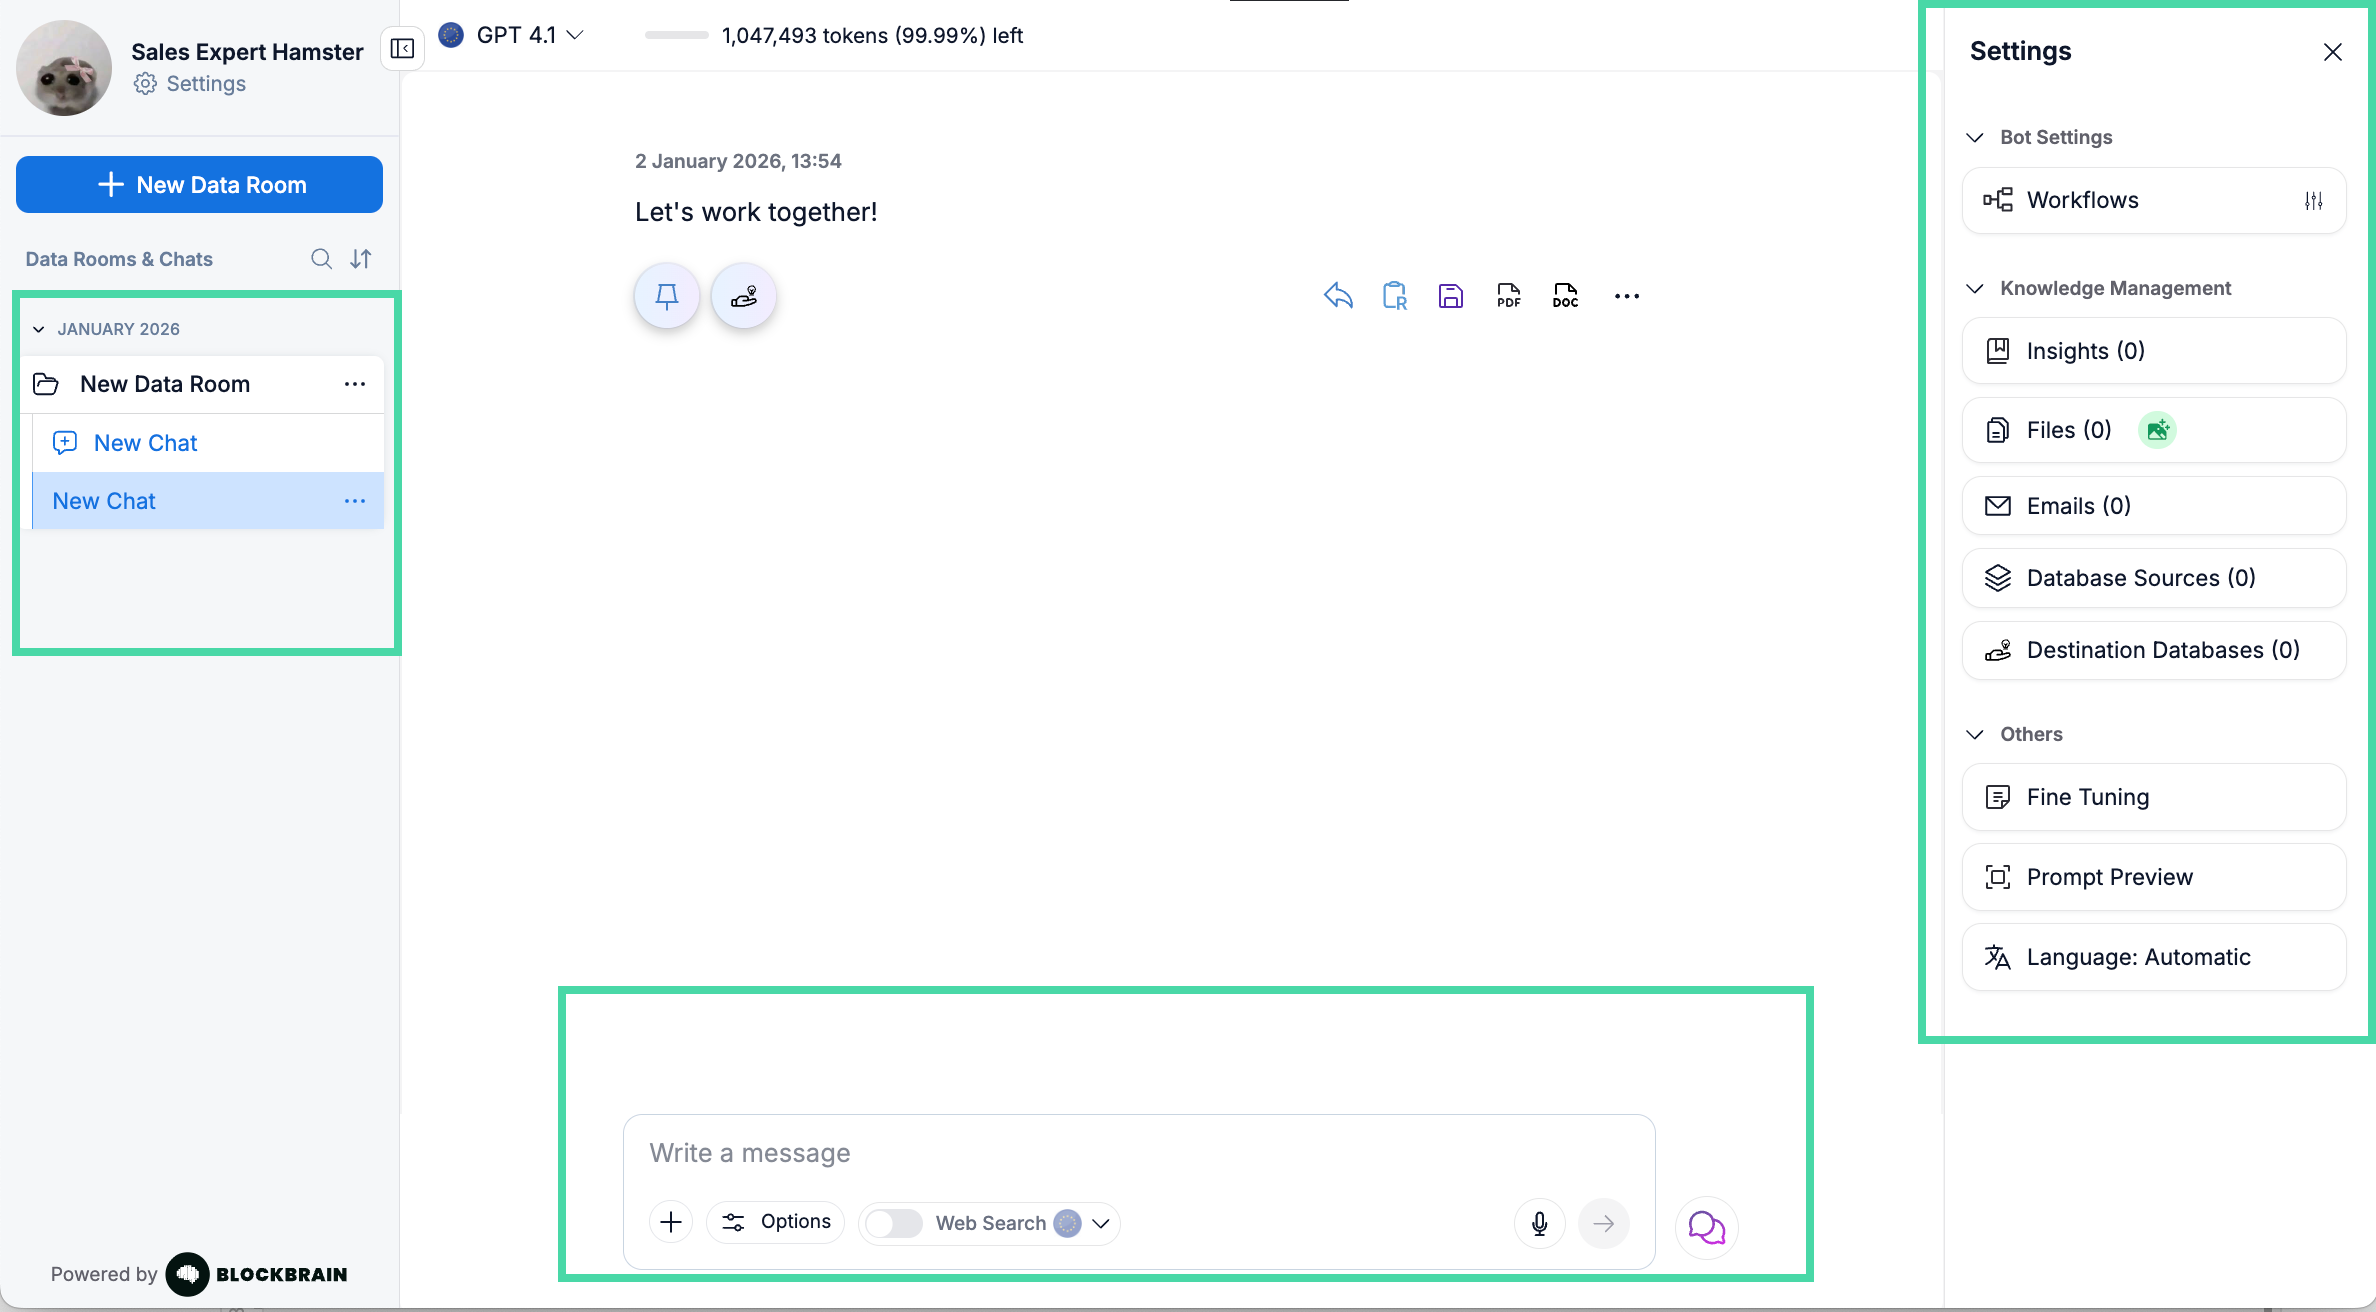
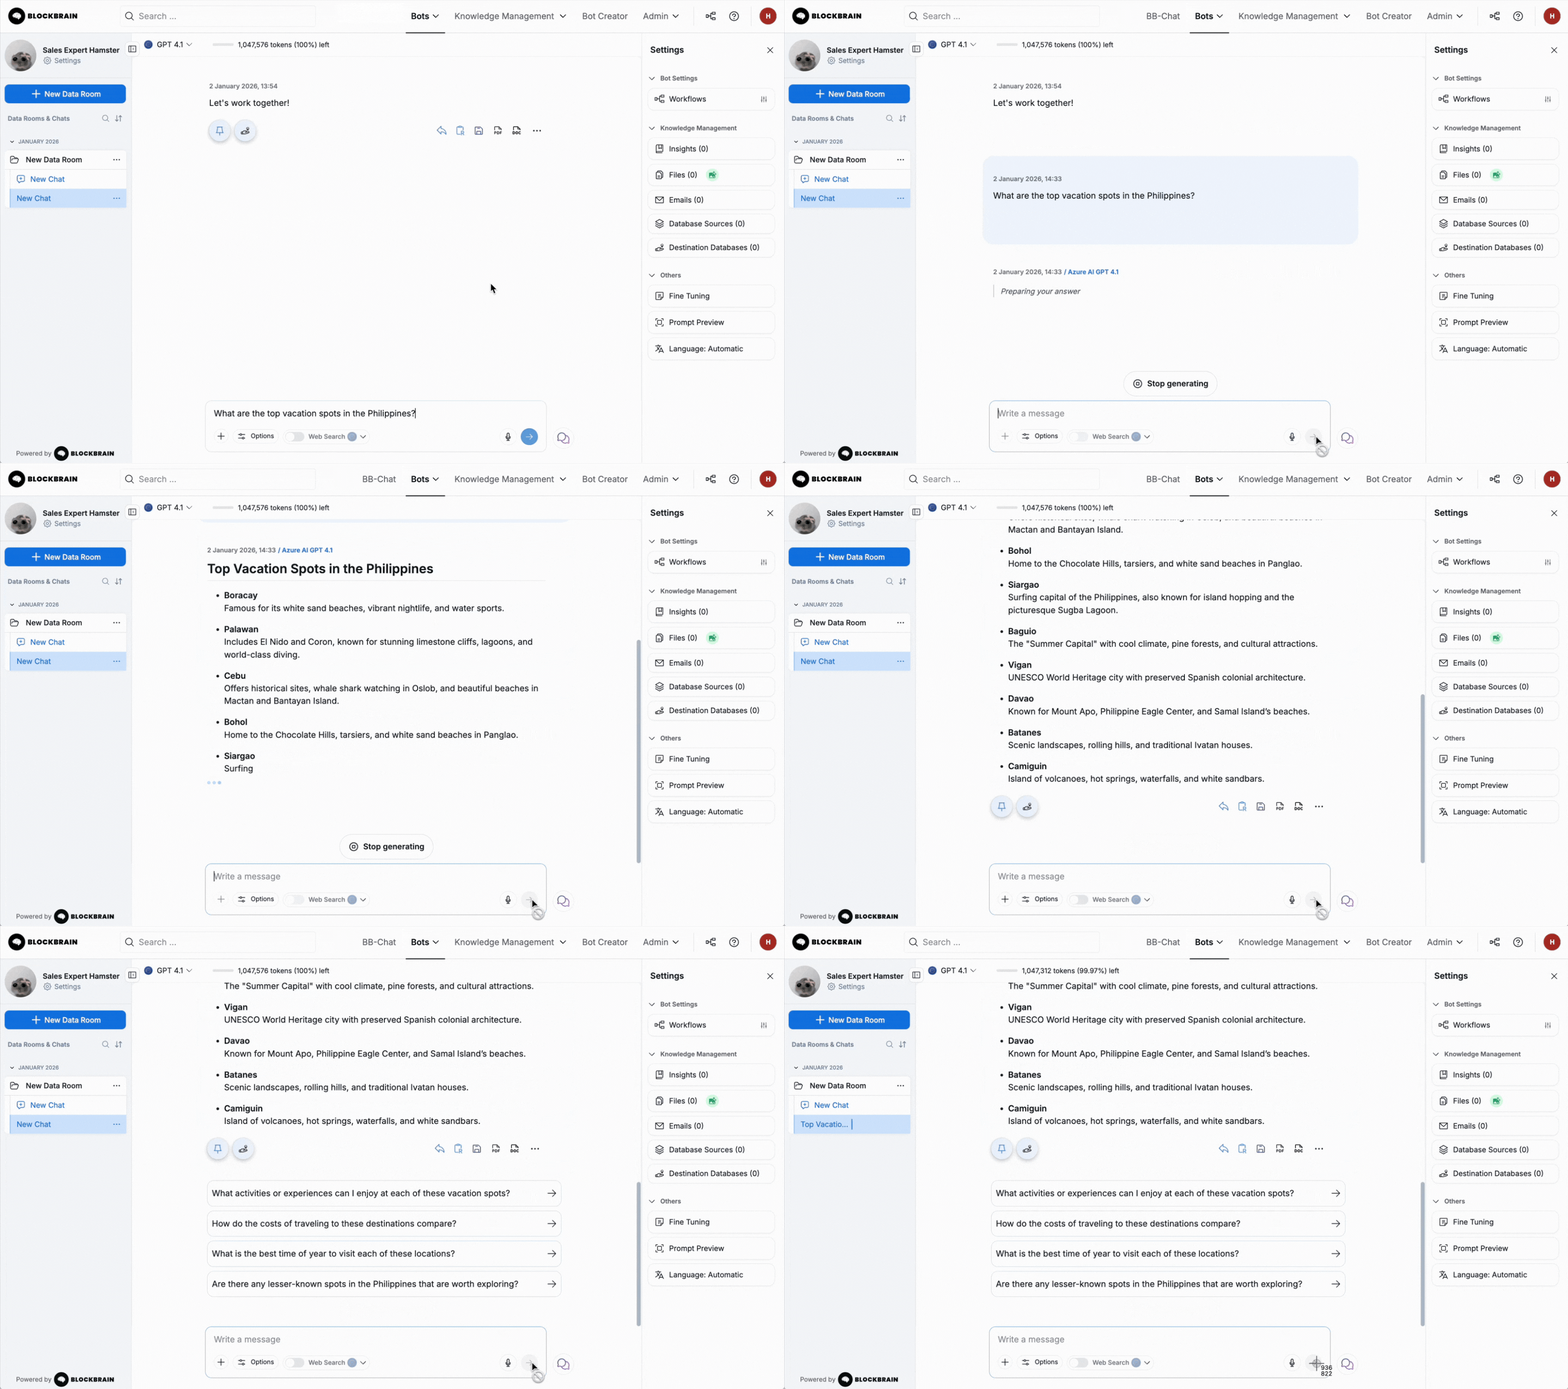
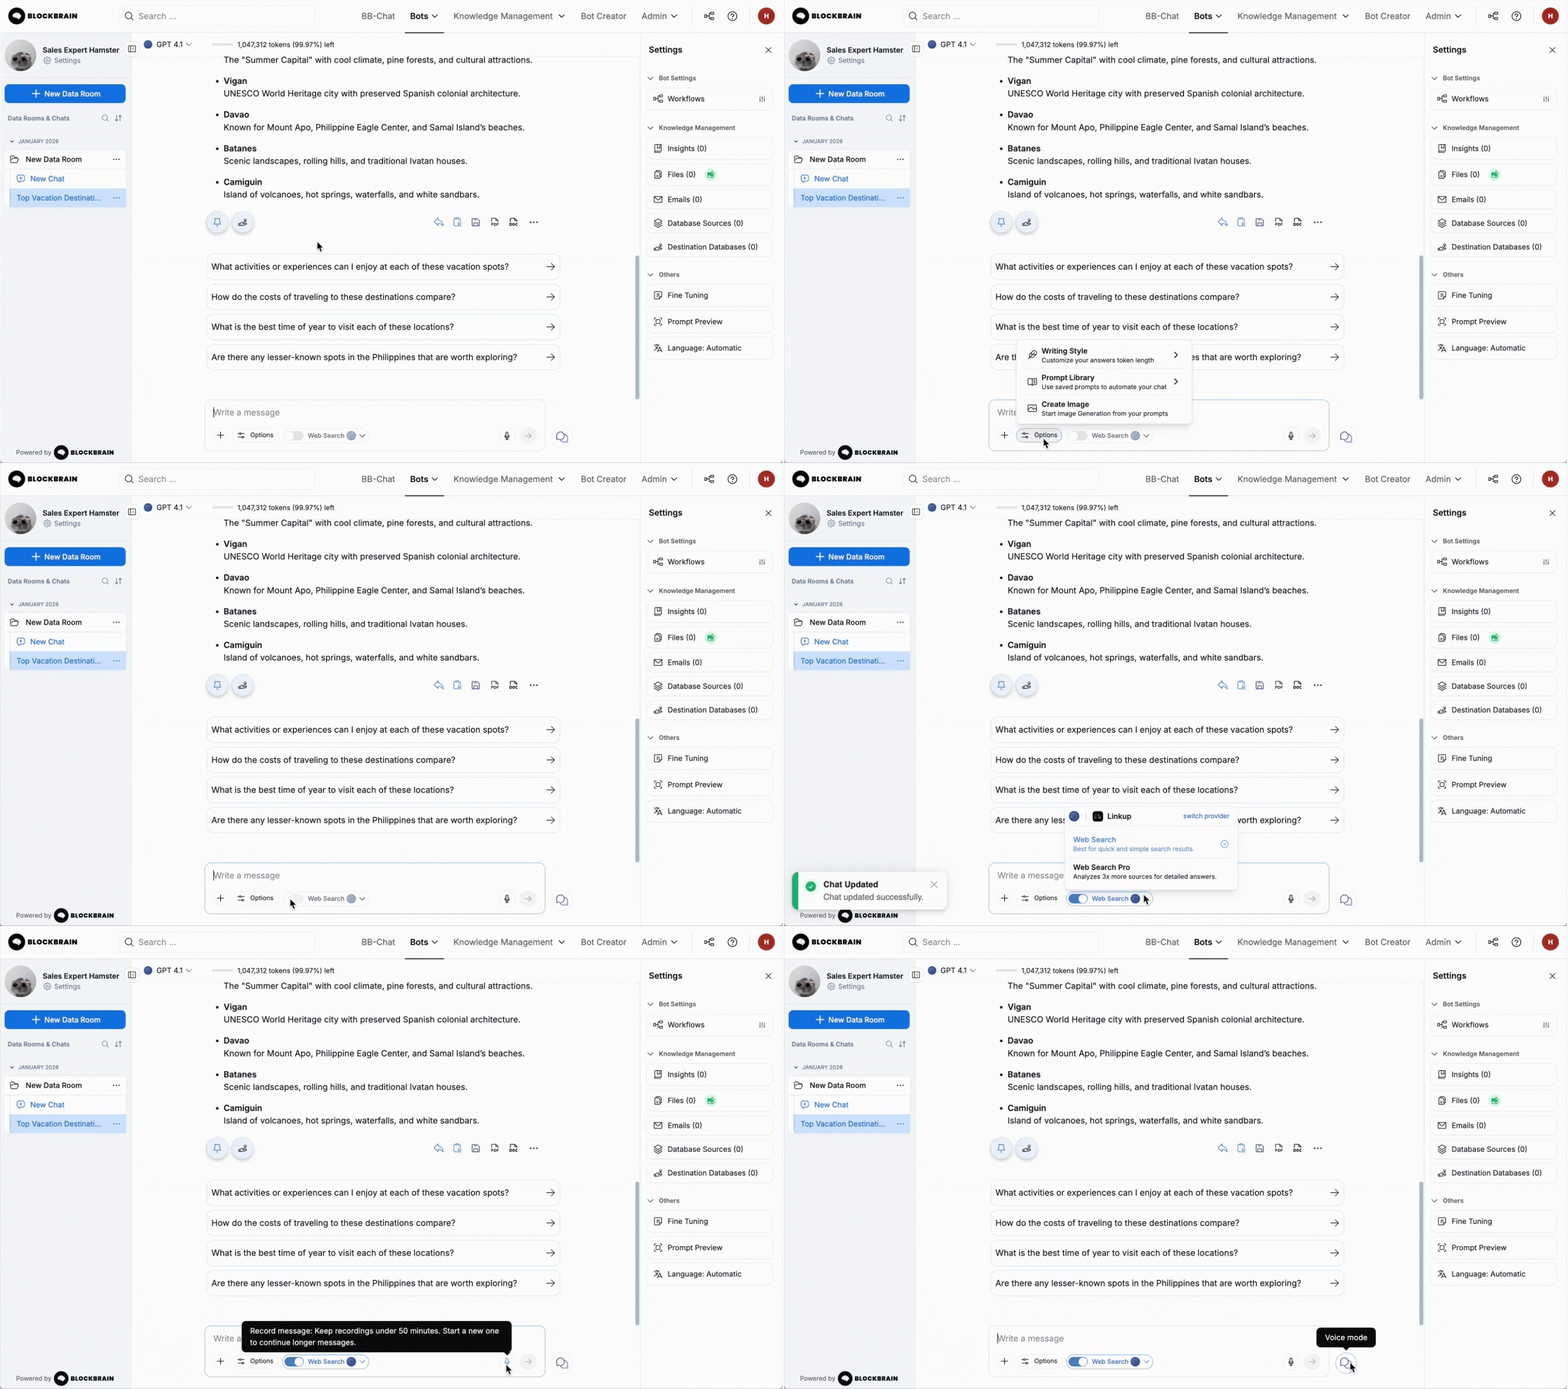
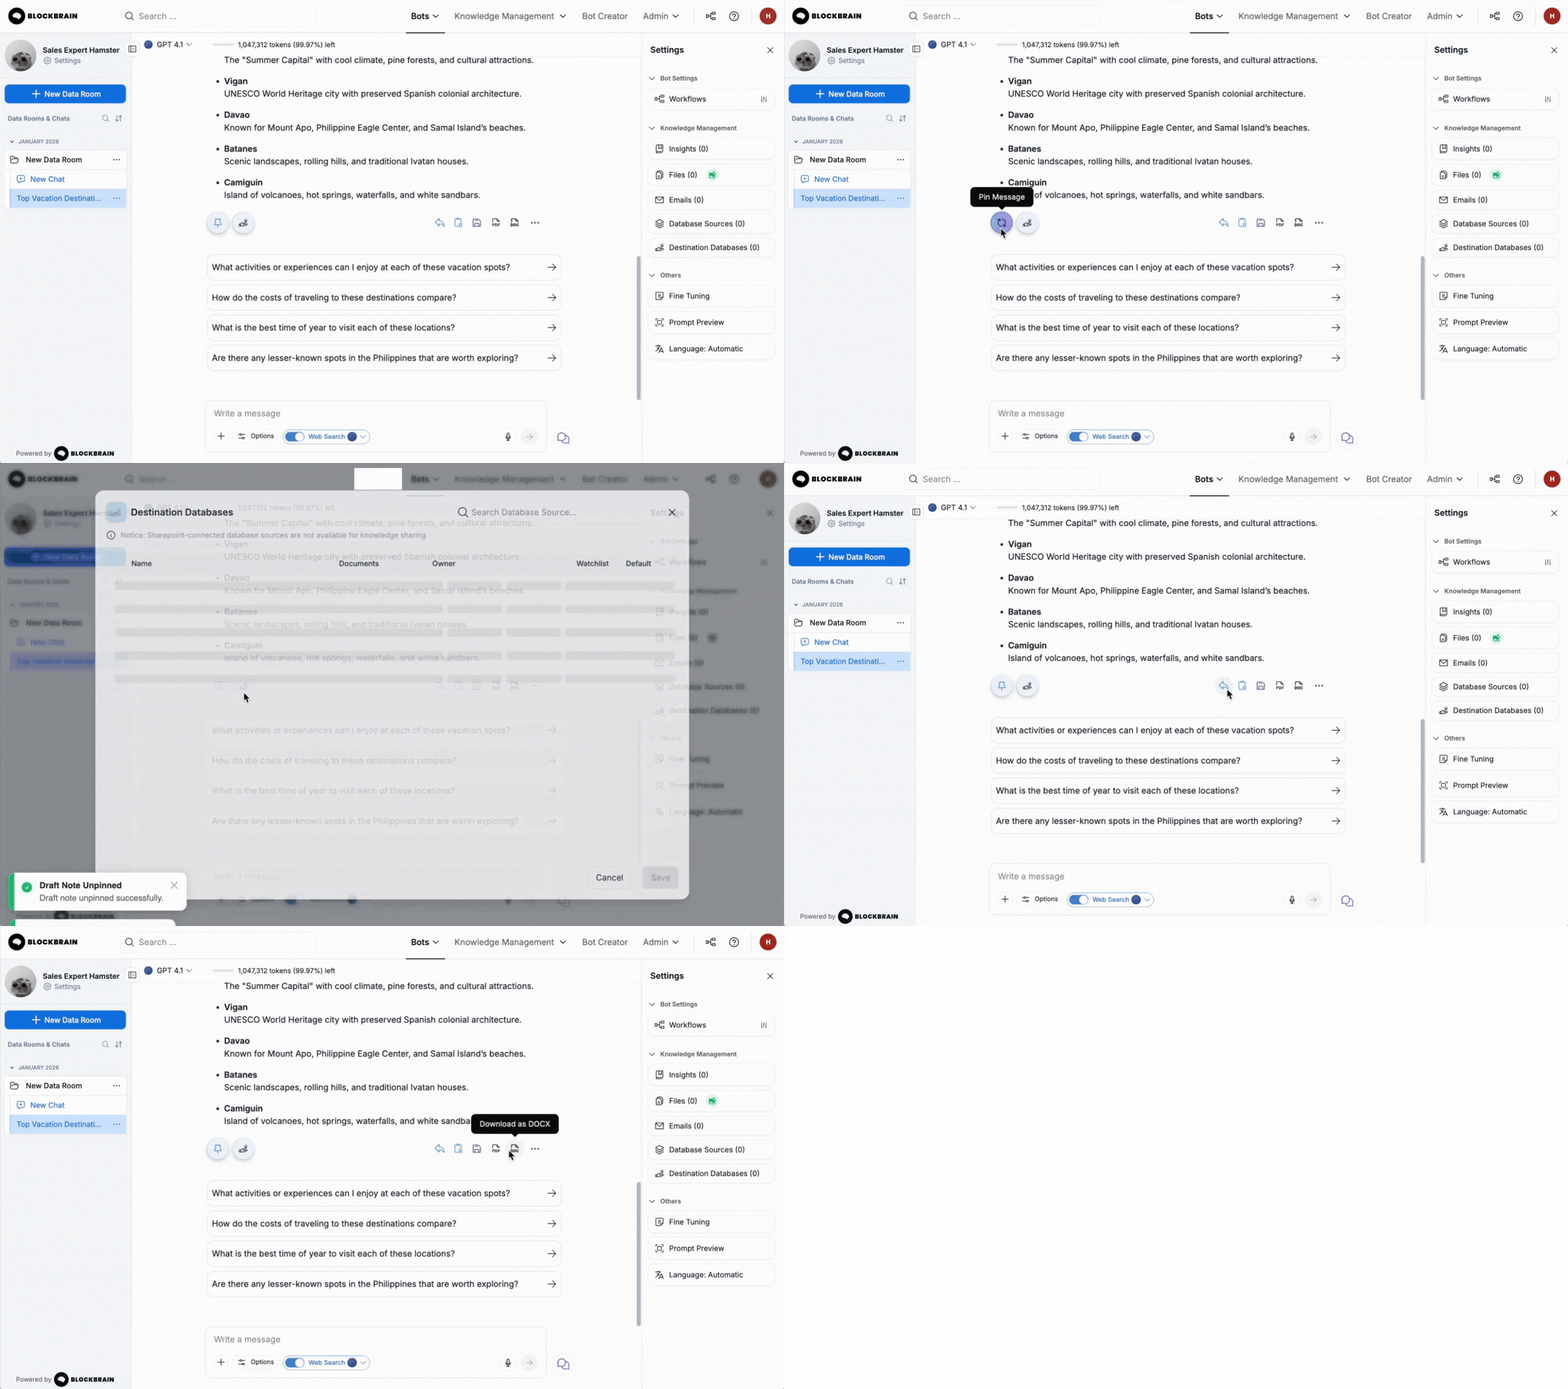


%20Accessing%20Database%20Content.gif?alt=media&token=644146c8-43b0-4aa2-ab90-f278dca2c0a8)
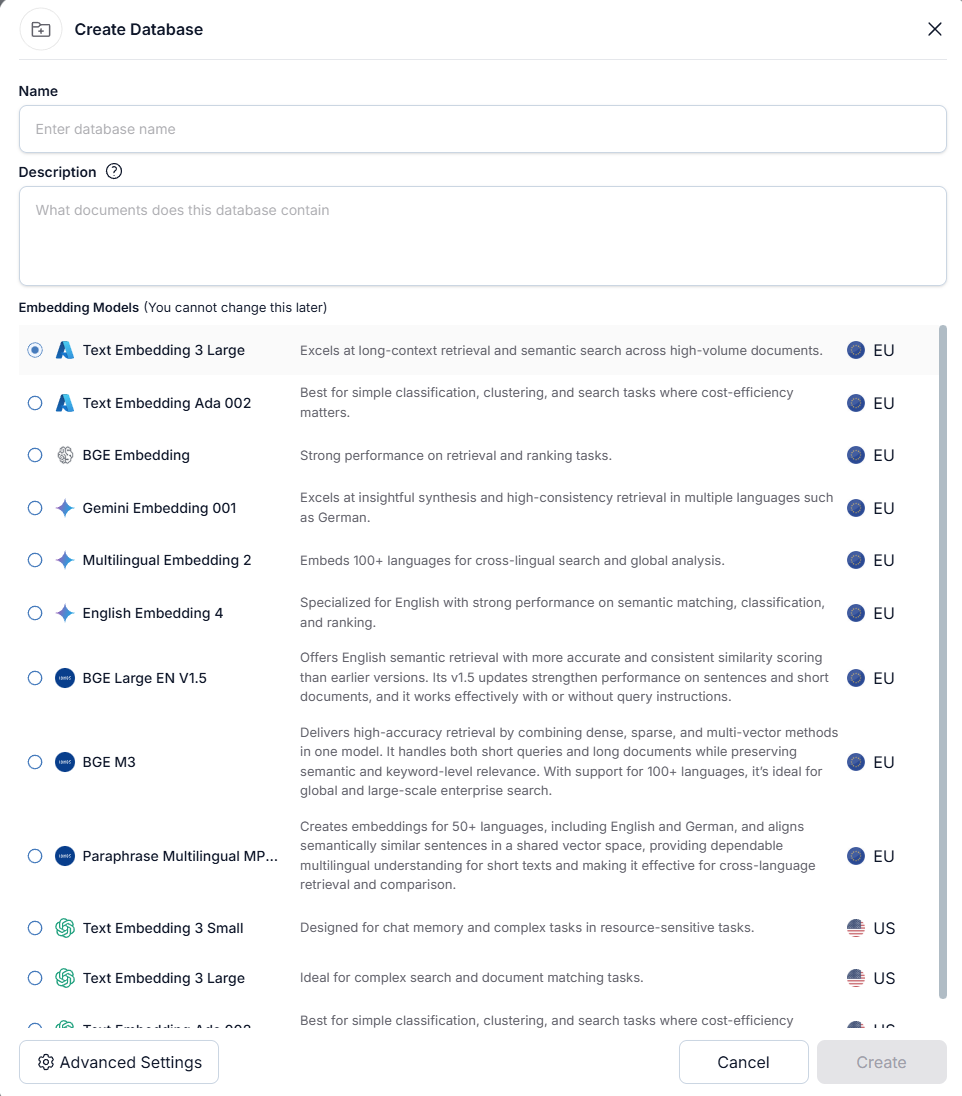

%20Adding%20Files.gif?alt=media&token=613fb40b-d8d3-4671-be85-ddc705a1af70)
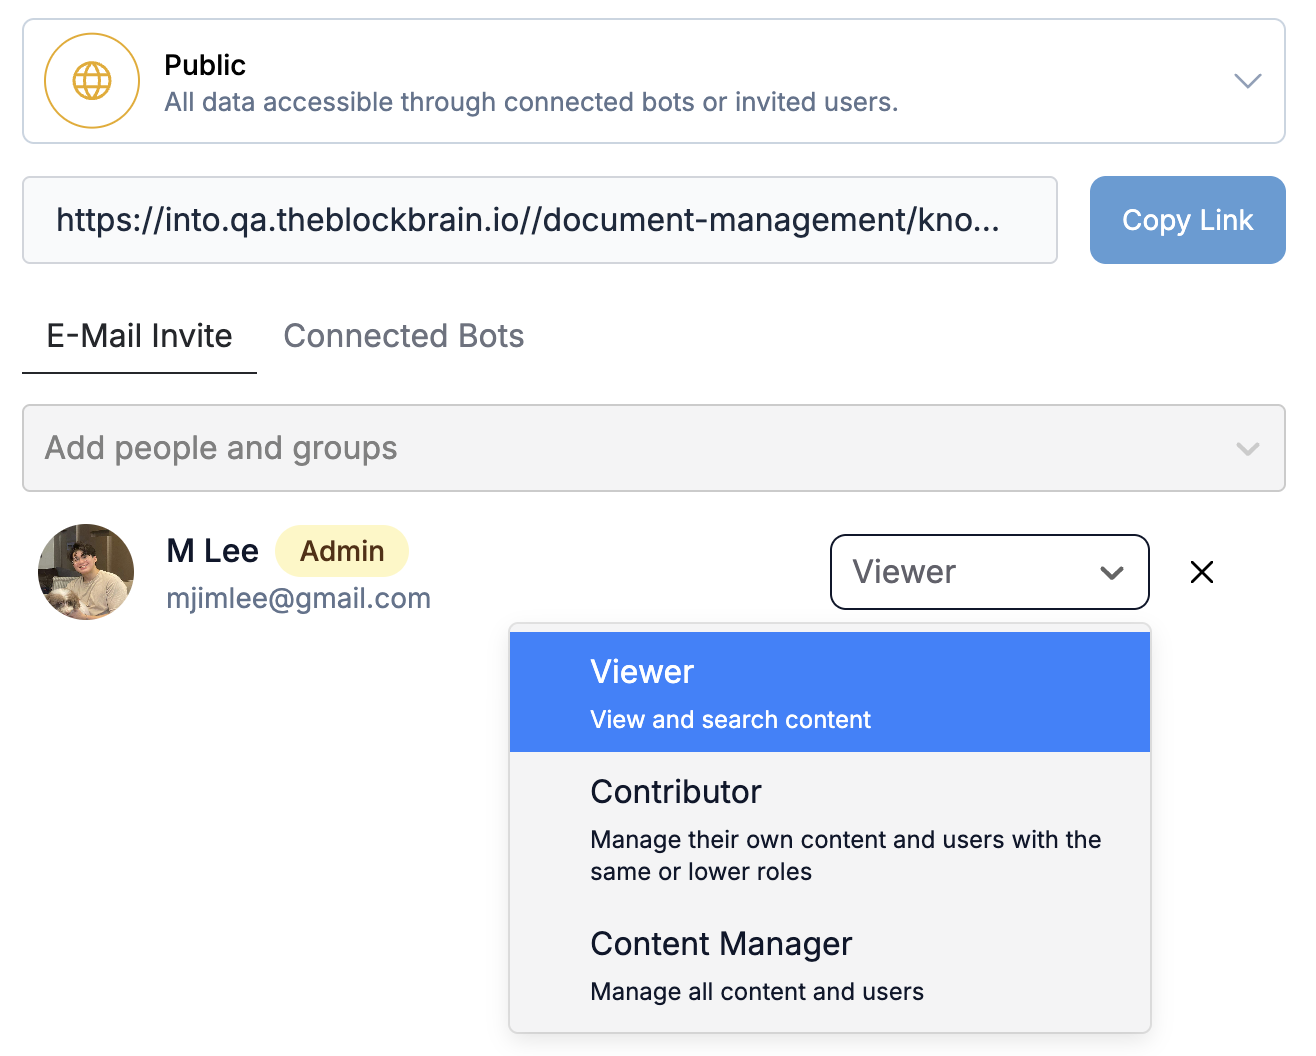


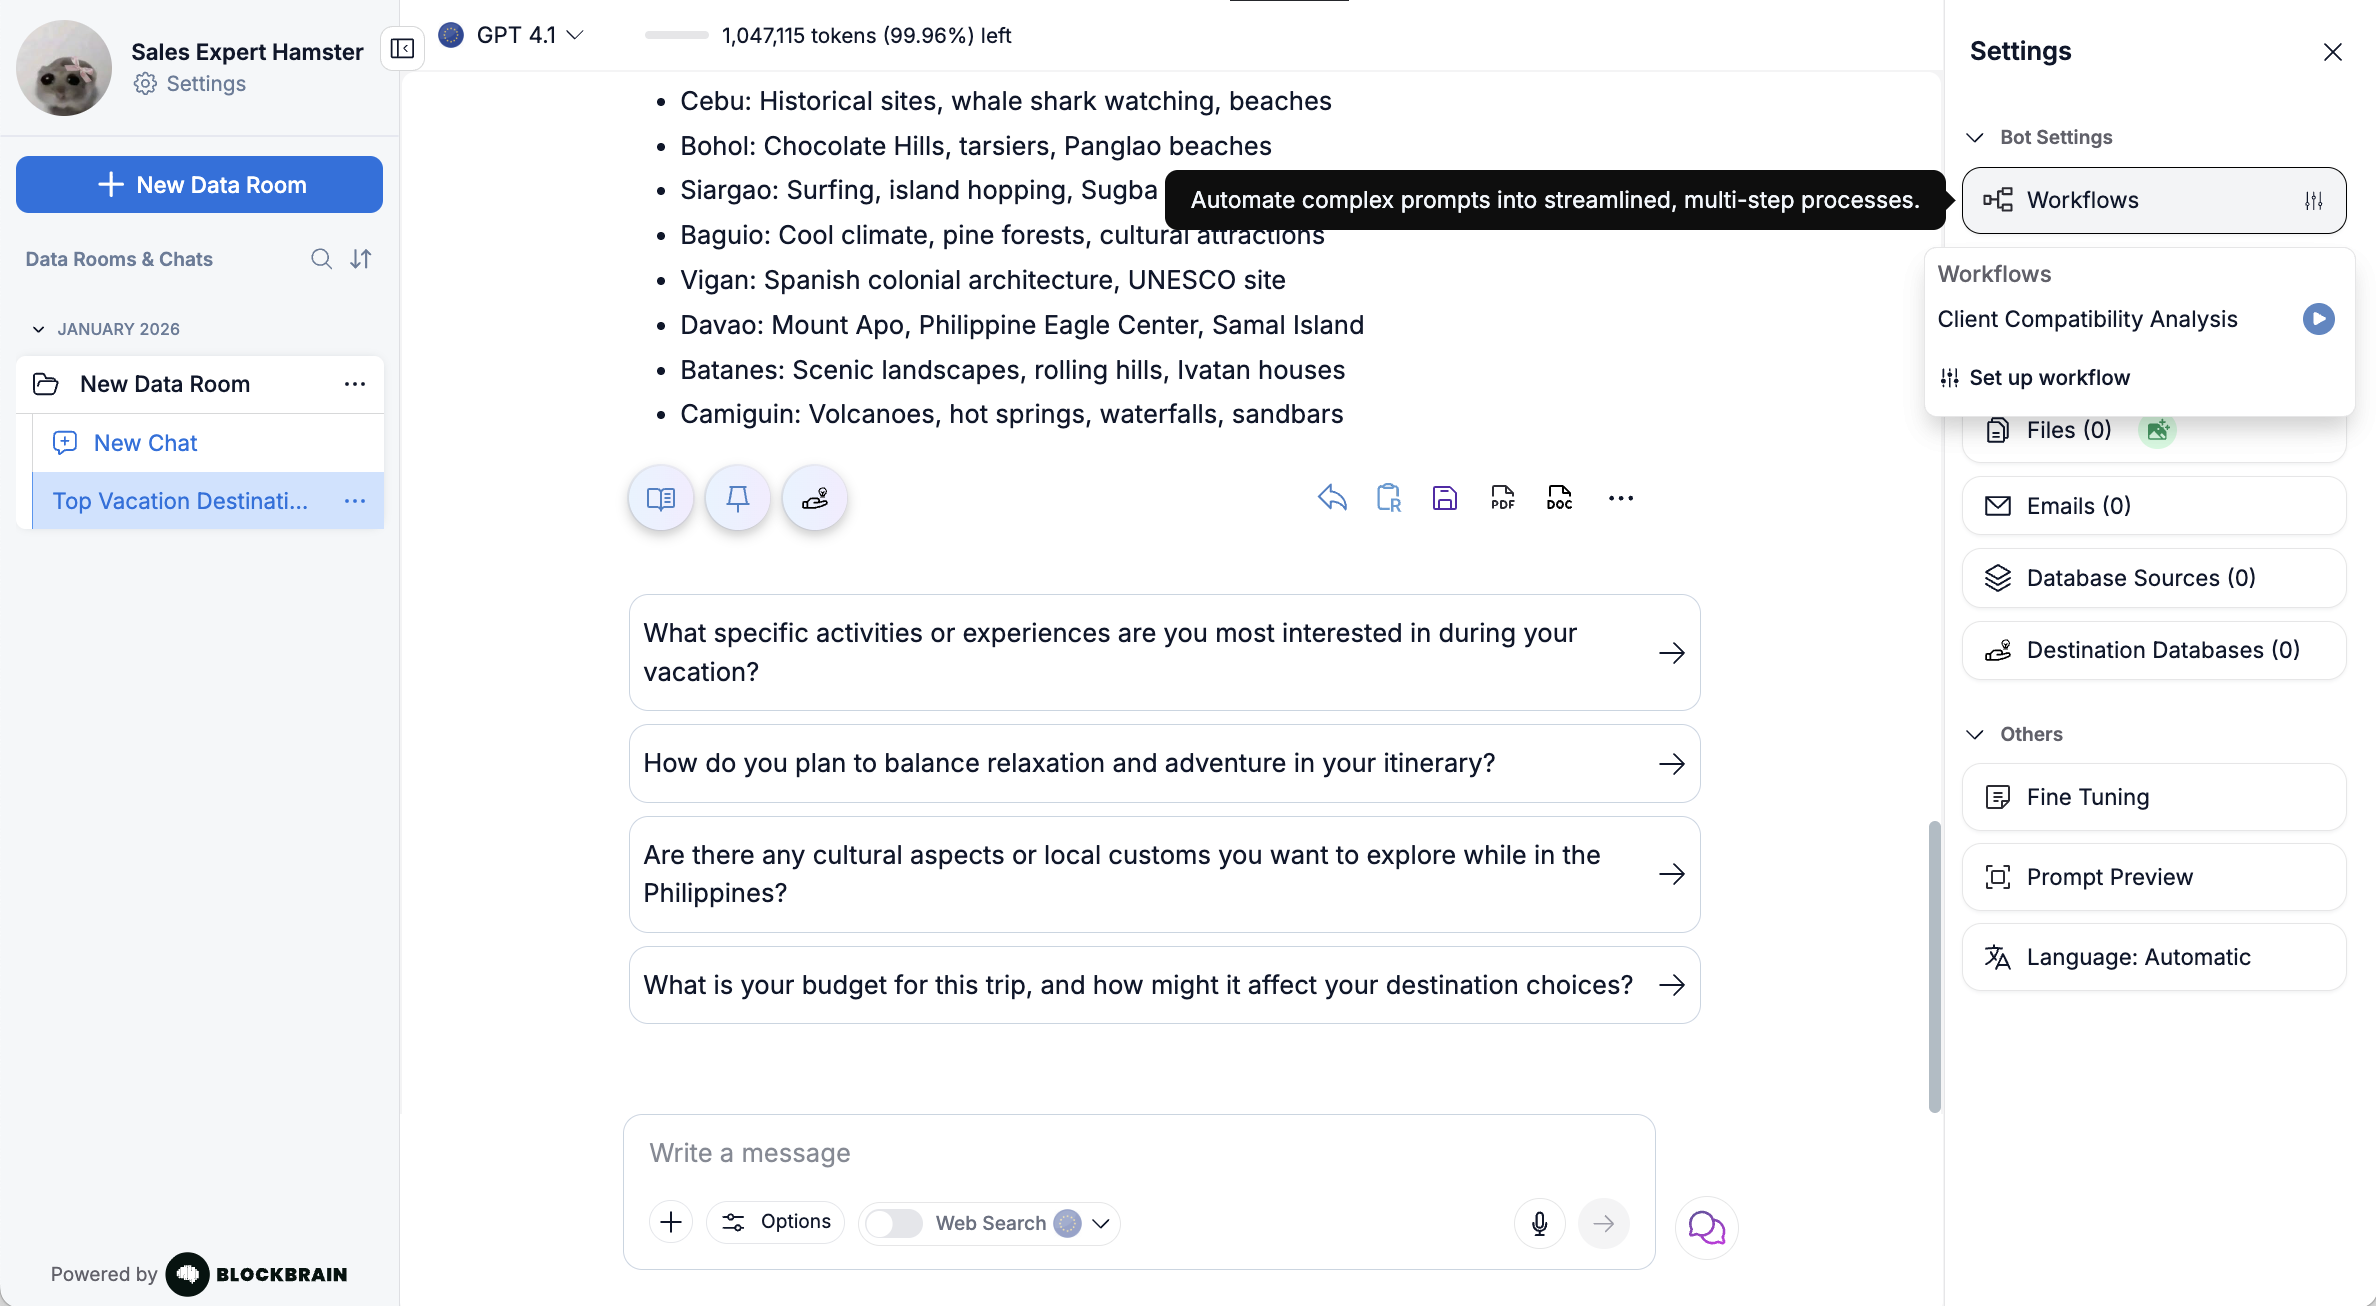
.png?alt=media&token=30b830c1-9a99-40ed-a644-e3c82f6149c4)
%20Adding%20Chat%20Insight.gif?alt=media&token=d6bfa622-779f-4752-a748-6badf2e78e39)
%20Manual%20Insight.gif?alt=media&token=5b4b2852-c0e0-4b60-95e4-4482e768fe2e)
%20Sharing%20Insights%20Chat.gif?alt=media&token=e676ead7-aef2-45a8-a09f-7b5eb1884502)
%20Sharing%20Insights%20from%20Management.gif?alt=media&token=e4c199bd-d49f-4bca-a401-8febff3db8c2)
%20Dynamic%20Insights.gif?alt=media&token=c85ed86c-65a2-4088-9cca-7f7538daf4a8)


 Jira Tools
| Tool | Description |
| --------------------------- | -------------------------------------------------------- |
| **Search Issues** | Query issues using JQL |
| **Get Issue** | Fetch detailed info on a specific issue (e.g., PROJ-123) |
| **Create Issue** | Create new issues or subtasks |
| **Edit Issue** | Update fields on existing issues |
| **Transition Issue** | Move issues through workflow statuses |
| **Assign Issue** | Assign issues to team members |
| **Get Transitions** | List available status transitions for an issue |
| **Get Workflow Statuses** | View all statuses in a project's workflow |
| **Get All Projects** | List all accessible Jira projects |
| **Get Agile Boards** | Find Scrum/Kanban boards |
| **Get Create Metadata** | Retrieve issue type fields before creation |
| **Search Fields** | Find custom or system fields |
| **Search Users** | Find users by name or email |
| **Search Assignable Users** | Find users assignable to a project/issue |
***
###
Jira Tools
| Tool | Description |
| --------------------------- | -------------------------------------------------------- |
| **Search Issues** | Query issues using JQL |
| **Get Issue** | Fetch detailed info on a specific issue (e.g., PROJ-123) |
| **Create Issue** | Create new issues or subtasks |
| **Edit Issue** | Update fields on existing issues |
| **Transition Issue** | Move issues through workflow statuses |
| **Assign Issue** | Assign issues to team members |
| **Get Transitions** | List available status transitions for an issue |
| **Get Workflow Statuses** | View all statuses in a project's workflow |
| **Get All Projects** | List all accessible Jira projects |
| **Get Agile Boards** | Find Scrum/Kanban boards |
| **Get Create Metadata** | Retrieve issue type fields before creation |
| **Search Fields** | Find custom or system fields |
| **Search Users** | Find users by name or email |
| **Search Assignable Users** | Find users assignable to a project/issue |
***
###  Confluence Tools
| Tool | Description |
| --------------------- | ---------------------------------------------- |
| **Search Confluence** | Find pages, blogs, or spaces by keyword or CQL |
***
### 📊 Data & Analysis Tools
| Tool | Description |
| -------------------- | ------------------------------------------- |
| **Code Interpreter** | Run Python for data analysis & calculations |
| **Process File** | Read & extract content from files |
| **Vector Search** | Semantic search through knowledge bases |
| **List Attachments** | View attached files in the data room |
| **List Emails** | Access connected emails |
***
### 📈 Chart Tools
* **Bar, Line, Pie, Doughnut, Radar, Scatter, Bubble, Polar Area** charts
***
### 🧠 Knowledge & Insight Tools
| Tool | Description |
| -------------------------------------------- | --------------------------------- |
| **Read / Create / Update / Delete Insights** | Manage notes & insights |
| **List / Create / Update / Delete Skills** | Manage reusable workflows |
| **Folder Structure** | Browse knowledge base documents |
| **Image Generation** | Generate images from text prompts |
***
### ⏰ Scheduler Tools
| Tool | Description |
| --------------- | ------------------------------------ |
| **Create Task** | Schedule recurring or one-time tasks |
| **List Tasks** | View all scheduled tasks |
| **Update Task** | Modify an existing task |
| **Delete Task** | Remove a scheduled task |
***
### Common Use Cases
**Project & Issue Management**
* Quickly list all your Jira projects and issues
* Find out who is assigned to an issue or project
* Get user details for collaboration
**Content & Workflow Analysis**
* Summarize long Confluence pages or Jira issue discussions
* Extract action items or decisions from project documentation
* Search for specific issues, comments, or Confluence content
**Resource & Documentation Access**
* Locate project documentation in Confluence
* Get details or links for important Jira issues
* Browse Confluence spaces for project resources
### Example Conversation
**You:** "List all issues assigned to me in the Product project"
**Blockbrain:** "Here are your issues in the Product project:
* PROD-101: Update user onboarding flow
* PROD-115: Fix login bug
* PROD-120: Review Q3 roadmap
Which issue would you like to view or update?"
**You:** "Show me the details for PROD-115"
### Next Steps
Want to connect more services? Try the [Excel Agent](/for-users/agents/excel-agent) to access your workbooks and analyze data through Blockbrain.
# Excel Agent
Connect the Excel Agent to access your workbooks, reports, and manage data directly through Blockbrain's AI assistant
#### What Can You Do?
Once connected, the Excel Agent lets you:
* **Find Workbooks & Worksheets**: Search for Excel files, list all worksheets, and navigate your workbook structure
* **Read & Analyze Data**: Ask questions about specific tables, ranges, or cells—get summaries, extract numbers, or analyze content
* **Edit & Update**: Add, update, or delete rows, tables, and worksheets; update cell values and formatting
* **Automate Calculations**: Recalculate formulas, clear ranges, and apply formatting changes automatically
* **File Upload:** The Excel Agent works exclusively with **.xlsx** files. **CSV** files are **not supported** and must be converted to **.xlsx** format.
#### Quick Setup
**Step 1: Select Excel Agent**
1. In any Blockbrain conversation, click the **AI Model selection** dropdown
2. Click **"Show detailed AI model list"**
3. Find and click **"Excel Agent"**
4. Look for **"Configure"** under the Status column
**Step 2: Connect to Excel**
1. Click **"Configure"**
2. Click the **"Connect"** button
3. Sign in with your Microsoft 365 account when prompted
4. Click **"Accept"** to allow Blockbrain to access your Excel files
**Step 3: Start Using Excel**
That's it! You can now ask Blockbrain about your Excel workbooks and data.
#### What You Can Ask
**Finding Workbooks & Worksheets**
```
"Find my sales report workbook"
"List all worksheets in the Q1 Financials file"
"Show me all tables in the Marketing Analysis sheet"
```
**Reading & Analyzing Data**
```
"Summarize the data in the Revenue table"
"What are the key numbers in the Budget worksheet?"
"Extract all email addresses from the Contacts table"
```
**Editing & Updating**
```
"Add a new row to the Expenses table"
"Update the value in cell B5 of the Forecast sheet"
"Delete the 'Archive' worksheet from the Operations workbook"
```
**Automating Calculations & Formatting**
```
"Recalculate all formulas in the Annual Report workbook"
"Clear the contents of range A1:D10 in the Inventory sheet"
"Make the header row bold in the Employees table"
```
#### How It Works
**Your Access = Blockbrain's Access**
* Blockbrain can only see Excel files you can access
* If you can't open a workbook, neither can Blockbrain
* Your permissions stay exactly the same
**Safe and Secure**
* Your files remain in Excel/OneDrive/SharePoint
* Blockbrain reads and updates only as instructed—no unauthorized changes
* All access is logged in your organization's audit trail
#### Tips for Better Results
**Be Specific**
**False:** "Find my file"\
**Correct:** "Find my budget spreadsheet from Q3 in the folder customers 2024"
**Use File Types**
**False:** "Show me documents"\
**Correct:** "Show me all Excel workbooks from last month"
**Mention Locations**
**False:** "Find the proposal"\
**Correct:** "Find the proposal worksheet in the Finance workbook"
#### Troubleshooting
**"I can't find my worksheet"**
* Check if you can see the worksheet in Excel Online or OneDrive directly
* If the file has been recently created/uploaded, it takes a couple of minutes to show up due to OneDrive synchronization
* Try using different search terms (e.g., part of the filename, worksheet name)
* The file might be in a location you don't have access to
**"Permission denied" errors**
* Your Excel/OneDrive/SharePoint permissions may have changed
* Contact your IT team to verify your access
* Reconnect your agent — reconfigure the Excel Agent again like in Step 2
**"No Excel files found"**
* You might not have any Excel files in your connected account
* Check with your administrator about file access or licensing
**"Unintended content was deleted/added"**
* Reverting back to an older version of the Excel File is possible via OneDrive -> version history
#### Privacy and Security
* **Read/Write Access**: Blockbrain can only read or edit files as instructed—no unauthorized changes, deletions, or sharing.
> **Important:** When working with Excel Files, any changes made via the Excel Agent are applied directly to the file and saved automatically. Always double-check that you've selected the correct file. Consider saving a backup before editing.
* **Your Permissions**: Access is limited to what you can normally see and do in Excel/OneDrive/SharePoint
* **No Storage**: Blockbrain doesn't store copies of your files
#### Common Use Cases
**Data Research**
* Quickly find information across multiple workbooks and sheets
* Compare data between different tables or files
* Extract specific data points from large spreadsheets
**Content Analysis**
* Summarize complex tables or worksheets
* Identify key trends in financial or operational data
* Extract action items or KPIs from project trackers
#### Example Conversation
**You:** "Find my 2023 budget workbook"
**Blockbrain:** "I found several workbooks named '2023 Budget' in your Excel files:
* 2023\_Budget.xlsx (in Finance)
* Budget\_2023\_Final.xlsx (in Shared Documents)
* Q1\_2023\_Budget.xlsx (in Projects)
Which one would you like me to open?"
**You:** "Open 2023\_Budget.xlsx and summarize the Expenses worksheet"
#### Next Steps
Want to connect more services? Try the MS Teams Agent to access your MS Teams channels, chats, and groups through Blockbrain.
### Next Steps
Want to connect more services? Try the [MS Teams Agent](/for-users/agents/ms-teams-agent) to access your MS Teams channels, chats, and groups through Blockbrain.
# MS Teams Agent
Connect Blockbrain to your Microsoft Teams and let AI help you find messages, summarize meetings, manage channels, and access shared files — all in plain language, no technical knowledge needed.
### What Can You Do?
Once connected, just type what you need — no special commands required.
| Feature | What it does |
| ---------------------------------------- | --------------------------------------------------------------- |
| 🔍 **Find Teams, Channels & Chats** | Search for teams, list channels, and locate recent messages |
| 💬 **Read & Analyze Conversations** | Summarize chats, extract key points, or find specific messages |
| 👥 **Manage Teams & Members** | See who's in a team, get user details, update your status |
| 📨 **Send Messages & Schedule Meetings** | Post to channels, start new chats, and organize online meetings |
| 📁 **Access Shared Files** | Find and browse files shared in Teams channels |
***
### Quick Setup — 3 Easy Steps
#### Step 1: Select the MS Teams Agent
1. Open any Blockbrain conversation
2. Click the **AI Models** dropdown (top left)
3. Click **"Show detailed AI model list"**
4. Find and click **"MS Teams Agent"**
#### Step 2: Connect to Your MS Teams Account
1. Click **"Configure"** in the Status column
2. Click **"Connect"**
3. Sign in with your **Microsoft 365 account**
4. Click **"Accept"** — this gives Blockbrain permission to access your Teams
#### Step 3: Start Using It!
That's it — you're ready to go! Just type what you need in plain language \[2].
***
### What Can You Ask?
Write naturally \[3], like you'd ask a colleague. Here are some examples:
#### 🔍 Finding Teams, Channels & Chats
* *"List all teams I am a member of"*
* *"Show me all channels in the Marketing team"*
* *"Find my recent chats with John Doe"*
#### 💬 Reading & Analyzing Conversations
* *"Summarize the last 10 messages in the Project Updates channel"*
* *"What are the key points from my last meeting with the Finance team?"*
* *"Extract all action items from the Q2 Planning chat"*
#### 👥 Managing Teams & Members
* *"List all members of the HR team"*
* *"Get details for user
Confluence Tools
| Tool | Description |
| --------------------- | ---------------------------------------------- |
| **Search Confluence** | Find pages, blogs, or spaces by keyword or CQL |
***
### 📊 Data & Analysis Tools
| Tool | Description |
| -------------------- | ------------------------------------------- |
| **Code Interpreter** | Run Python for data analysis & calculations |
| **Process File** | Read & extract content from files |
| **Vector Search** | Semantic search through knowledge bases |
| **List Attachments** | View attached files in the data room |
| **List Emails** | Access connected emails |
***
### 📈 Chart Tools
* **Bar, Line, Pie, Doughnut, Radar, Scatter, Bubble, Polar Area** charts
***
### 🧠 Knowledge & Insight Tools
| Tool | Description |
| -------------------------------------------- | --------------------------------- |
| **Read / Create / Update / Delete Insights** | Manage notes & insights |
| **List / Create / Update / Delete Skills** | Manage reusable workflows |
| **Folder Structure** | Browse knowledge base documents |
| **Image Generation** | Generate images from text prompts |
***
### ⏰ Scheduler Tools
| Tool | Description |
| --------------- | ------------------------------------ |
| **Create Task** | Schedule recurring or one-time tasks |
| **List Tasks** | View all scheduled tasks |
| **Update Task** | Modify an existing task |
| **Delete Task** | Remove a scheduled task |
***
### Common Use Cases
**Project & Issue Management**
* Quickly list all your Jira projects and issues
* Find out who is assigned to an issue or project
* Get user details for collaboration
**Content & Workflow Analysis**
* Summarize long Confluence pages or Jira issue discussions
* Extract action items or decisions from project documentation
* Search for specific issues, comments, or Confluence content
**Resource & Documentation Access**
* Locate project documentation in Confluence
* Get details or links for important Jira issues
* Browse Confluence spaces for project resources
### Example Conversation
**You:** "List all issues assigned to me in the Product project"
**Blockbrain:** "Here are your issues in the Product project:
* PROD-101: Update user onboarding flow
* PROD-115: Fix login bug
* PROD-120: Review Q3 roadmap
Which issue would you like to view or update?"
**You:** "Show me the details for PROD-115"
### Next Steps
Want to connect more services? Try the [Excel Agent](/for-users/agents/excel-agent) to access your workbooks and analyze data through Blockbrain.
# Excel Agent
Connect the Excel Agent to access your workbooks, reports, and manage data directly through Blockbrain's AI assistant
#### What Can You Do?
Once connected, the Excel Agent lets you:
* **Find Workbooks & Worksheets**: Search for Excel files, list all worksheets, and navigate your workbook structure
* **Read & Analyze Data**: Ask questions about specific tables, ranges, or cells—get summaries, extract numbers, or analyze content
* **Edit & Update**: Add, update, or delete rows, tables, and worksheets; update cell values and formatting
* **Automate Calculations**: Recalculate formulas, clear ranges, and apply formatting changes automatically
* **File Upload:** The Excel Agent works exclusively with **.xlsx** files. **CSV** files are **not supported** and must be converted to **.xlsx** format.
#### Quick Setup
**Step 1: Select Excel Agent**
1. In any Blockbrain conversation, click the **AI Model selection** dropdown
2. Click **"Show detailed AI model list"**
3. Find and click **"Excel Agent"**
4. Look for **"Configure"** under the Status column
**Step 2: Connect to Excel**
1. Click **"Configure"**
2. Click the **"Connect"** button
3. Sign in with your Microsoft 365 account when prompted
4. Click **"Accept"** to allow Blockbrain to access your Excel files
**Step 3: Start Using Excel**
That's it! You can now ask Blockbrain about your Excel workbooks and data.
#### What You Can Ask
**Finding Workbooks & Worksheets**
```
"Find my sales report workbook"
"List all worksheets in the Q1 Financials file"
"Show me all tables in the Marketing Analysis sheet"
```
**Reading & Analyzing Data**
```
"Summarize the data in the Revenue table"
"What are the key numbers in the Budget worksheet?"
"Extract all email addresses from the Contacts table"
```
**Editing & Updating**
```
"Add a new row to the Expenses table"
"Update the value in cell B5 of the Forecast sheet"
"Delete the 'Archive' worksheet from the Operations workbook"
```
**Automating Calculations & Formatting**
```
"Recalculate all formulas in the Annual Report workbook"
"Clear the contents of range A1:D10 in the Inventory sheet"
"Make the header row bold in the Employees table"
```
#### How It Works
**Your Access = Blockbrain's Access**
* Blockbrain can only see Excel files you can access
* If you can't open a workbook, neither can Blockbrain
* Your permissions stay exactly the same
**Safe and Secure**
* Your files remain in Excel/OneDrive/SharePoint
* Blockbrain reads and updates only as instructed—no unauthorized changes
* All access is logged in your organization's audit trail
#### Tips for Better Results
**Be Specific**
**False:** "Find my file"\
**Correct:** "Find my budget spreadsheet from Q3 in the folder customers 2024"
**Use File Types**
**False:** "Show me documents"\
**Correct:** "Show me all Excel workbooks from last month"
**Mention Locations**
**False:** "Find the proposal"\
**Correct:** "Find the proposal worksheet in the Finance workbook"
#### Troubleshooting
**"I can't find my worksheet"**
* Check if you can see the worksheet in Excel Online or OneDrive directly
* If the file has been recently created/uploaded, it takes a couple of minutes to show up due to OneDrive synchronization
* Try using different search terms (e.g., part of the filename, worksheet name)
* The file might be in a location you don't have access to
**"Permission denied" errors**
* Your Excel/OneDrive/SharePoint permissions may have changed
* Contact your IT team to verify your access
* Reconnect your agent — reconfigure the Excel Agent again like in Step 2
**"No Excel files found"**
* You might not have any Excel files in your connected account
* Check with your administrator about file access or licensing
**"Unintended content was deleted/added"**
* Reverting back to an older version of the Excel File is possible via OneDrive -> version history
#### Privacy and Security
* **Read/Write Access**: Blockbrain can only read or edit files as instructed—no unauthorized changes, deletions, or sharing.
> **Important:** When working with Excel Files, any changes made via the Excel Agent are applied directly to the file and saved automatically. Always double-check that you've selected the correct file. Consider saving a backup before editing.
* **Your Permissions**: Access is limited to what you can normally see and do in Excel/OneDrive/SharePoint
* **No Storage**: Blockbrain doesn't store copies of your files
#### Common Use Cases
**Data Research**
* Quickly find information across multiple workbooks and sheets
* Compare data between different tables or files
* Extract specific data points from large spreadsheets
**Content Analysis**
* Summarize complex tables or worksheets
* Identify key trends in financial or operational data
* Extract action items or KPIs from project trackers
#### Example Conversation
**You:** "Find my 2023 budget workbook"
**Blockbrain:** "I found several workbooks named '2023 Budget' in your Excel files:
* 2023\_Budget.xlsx (in Finance)
* Budget\_2023\_Final.xlsx (in Shared Documents)
* Q1\_2023\_Budget.xlsx (in Projects)
Which one would you like me to open?"
**You:** "Open 2023\_Budget.xlsx and summarize the Expenses worksheet"
#### Next Steps
Want to connect more services? Try the MS Teams Agent to access your MS Teams channels, chats, and groups through Blockbrain.
### Next Steps
Want to connect more services? Try the [MS Teams Agent](/for-users/agents/ms-teams-agent) to access your MS Teams channels, chats, and groups through Blockbrain.
# MS Teams Agent
Connect Blockbrain to your Microsoft Teams and let AI help you find messages, summarize meetings, manage channels, and access shared files — all in plain language, no technical knowledge needed.
### What Can You Do?
Once connected, just type what you need — no special commands required.
| Feature | What it does |
| ---------------------------------------- | --------------------------------------------------------------- |
| 🔍 **Find Teams, Channels & Chats** | Search for teams, list channels, and locate recent messages |
| 💬 **Read & Analyze Conversations** | Summarize chats, extract key points, or find specific messages |
| 👥 **Manage Teams & Members** | See who's in a team, get user details, update your status |
| 📨 **Send Messages & Schedule Meetings** | Post to channels, start new chats, and organize online meetings |
| 📁 **Access Shared Files** | Find and browse files shared in Teams channels |
***
### Quick Setup — 3 Easy Steps
#### Step 1: Select the MS Teams Agent
1. Open any Blockbrain conversation
2. Click the **AI Models** dropdown (top left)
3. Click **"Show detailed AI model list"**
4. Find and click **"MS Teams Agent"**
#### Step 2: Connect to Your MS Teams Account
1. Click **"Configure"** in the Status column
2. Click **"Connect"**
3. Sign in with your **Microsoft 365 account**
4. Click **"Accept"** — this gives Blockbrain permission to access your Teams
#### Step 3: Start Using It!
That's it — you're ready to go! Just type what you need in plain language \[2].
***
### What Can You Ask?
Write naturally \[3], like you'd ask a colleague. Here are some examples:
#### 🔍 Finding Teams, Channels & Chats
* *"List all teams I am a member of"*
* *"Show me all channels in the Marketing team"*
* *"Find my recent chats with John Doe"*
#### 💬 Reading & Analyzing Conversations
* *"Summarize the last 10 messages in the Project Updates channel"*
* *"What are the key points from my last meeting with the Finance team?"*
* *"Extract all action items from the Q2 Planning chat"*
#### 👥 Managing Teams & Members
* *"List all members of the HR team"*
* *"Get details for user 


%20Files%20vs%20Database.gif?alt=media&token=d007dc19-dac2-4ab9-a362-13c949d29830)
%20Bot%20Creator.gif?alt=media&token=f608da54-cec7-44b9-a086-fa0f42f1c841)
%20Change%20Photo%20%26%20Name.gif?alt=media&token=551a5687-e4a4-4c70-9bf1-9afba542df76)
%20Action%20Settings.gif?alt=media&token=759ac85c-628f-445c-8b22-a5f55df3dacd)
%20Conversation%20Starters.gif?alt=media&token=8379caff-515a-4999-a688-d94fcb5bb0da)

%20Languages.gif?alt=media&token=de0e4c8c-1547-47e2-89cb-59f90bcc7f82)
%20LLM.gif?alt=media&token=a3b5fcc9-5acd-4618-ae37-35aaecdbfb64)
%20Sharing%20Bot.gif?alt=media&token=13f73e1c-c7d9-49e5-8b93-0dc80cb71641)
%20Bot%20Creator.gif?alt=media&token=5d0a1a5b-6579-4ecb-8a95-6bbd2e859e9e)


%20Conversation%20Starters.gif?alt=media&token=b9832762-8aed-4c58-bf7e-f7d1e11fbe40)


%20Sharing%20Bot.gif?alt=media&token=db4b3e24-897c-4afc-83fe-554cdd53215e)
%20Model%20Modifier%20Settings.gif?alt=media&token=d6776482-6b6c-481f-a3f5-b9414c6e8787)


%20Activate%20a%20Prompt.gif?alt=media&token=707fa4f1-056b-482e-a783-3f47e2ec3378)
%20Create%20a%20Prompt.gif?alt=media&token=7fedd840-248d-4c8b-9969-a885afd04dd6)
%20Workflow%20Show%20Off.gif?alt=media&token=6545164d-2e6c-4161-94c2-ef404c6b6590)
%20Action%20Settings.gif?alt=media&token=9d1ecef5-bd40-42f9-b388-f9d28105fa27)


.gif?alt=media&token=9532827e-d22c-448b-bee6-734b5c2e41cc)
%20Use%20Workflow.gif?alt=media&token=eb596693-55c8-49d5-a081-98f9a0149a7f)
%20Create%20a%20New%20Workflow.gif?alt=media&token=cc78849d-b41e-4605-a5cd-8a97061f5063)
%20Execution%20Settings.gif?alt=media&token=7ea3a82f-4b53-46b3-a483-007016100f1e)
%20Workflow%20Name.gif?alt=media&token=16bb2d9a-b398-4e9c-93df-1a3c85431f76)

%20Workflow%20AI%20Models.gif?alt=media&token=896f50bd-3299-4d5a-b418-1d2e7b9eec9e)
%20Websearch%20Workflow.gif?alt=media&token=a204e36b-ad78-4255-8aa4-fc9963df29a5)


%20HTTP%20Settings.gif?alt=media&token=7c08b275-e957-4dc4-80bd-bd338fe383da)

%20Scheduling.gif?alt=media&token=67644fba-5349-4a3d-a8fe-9cfd818153a8)


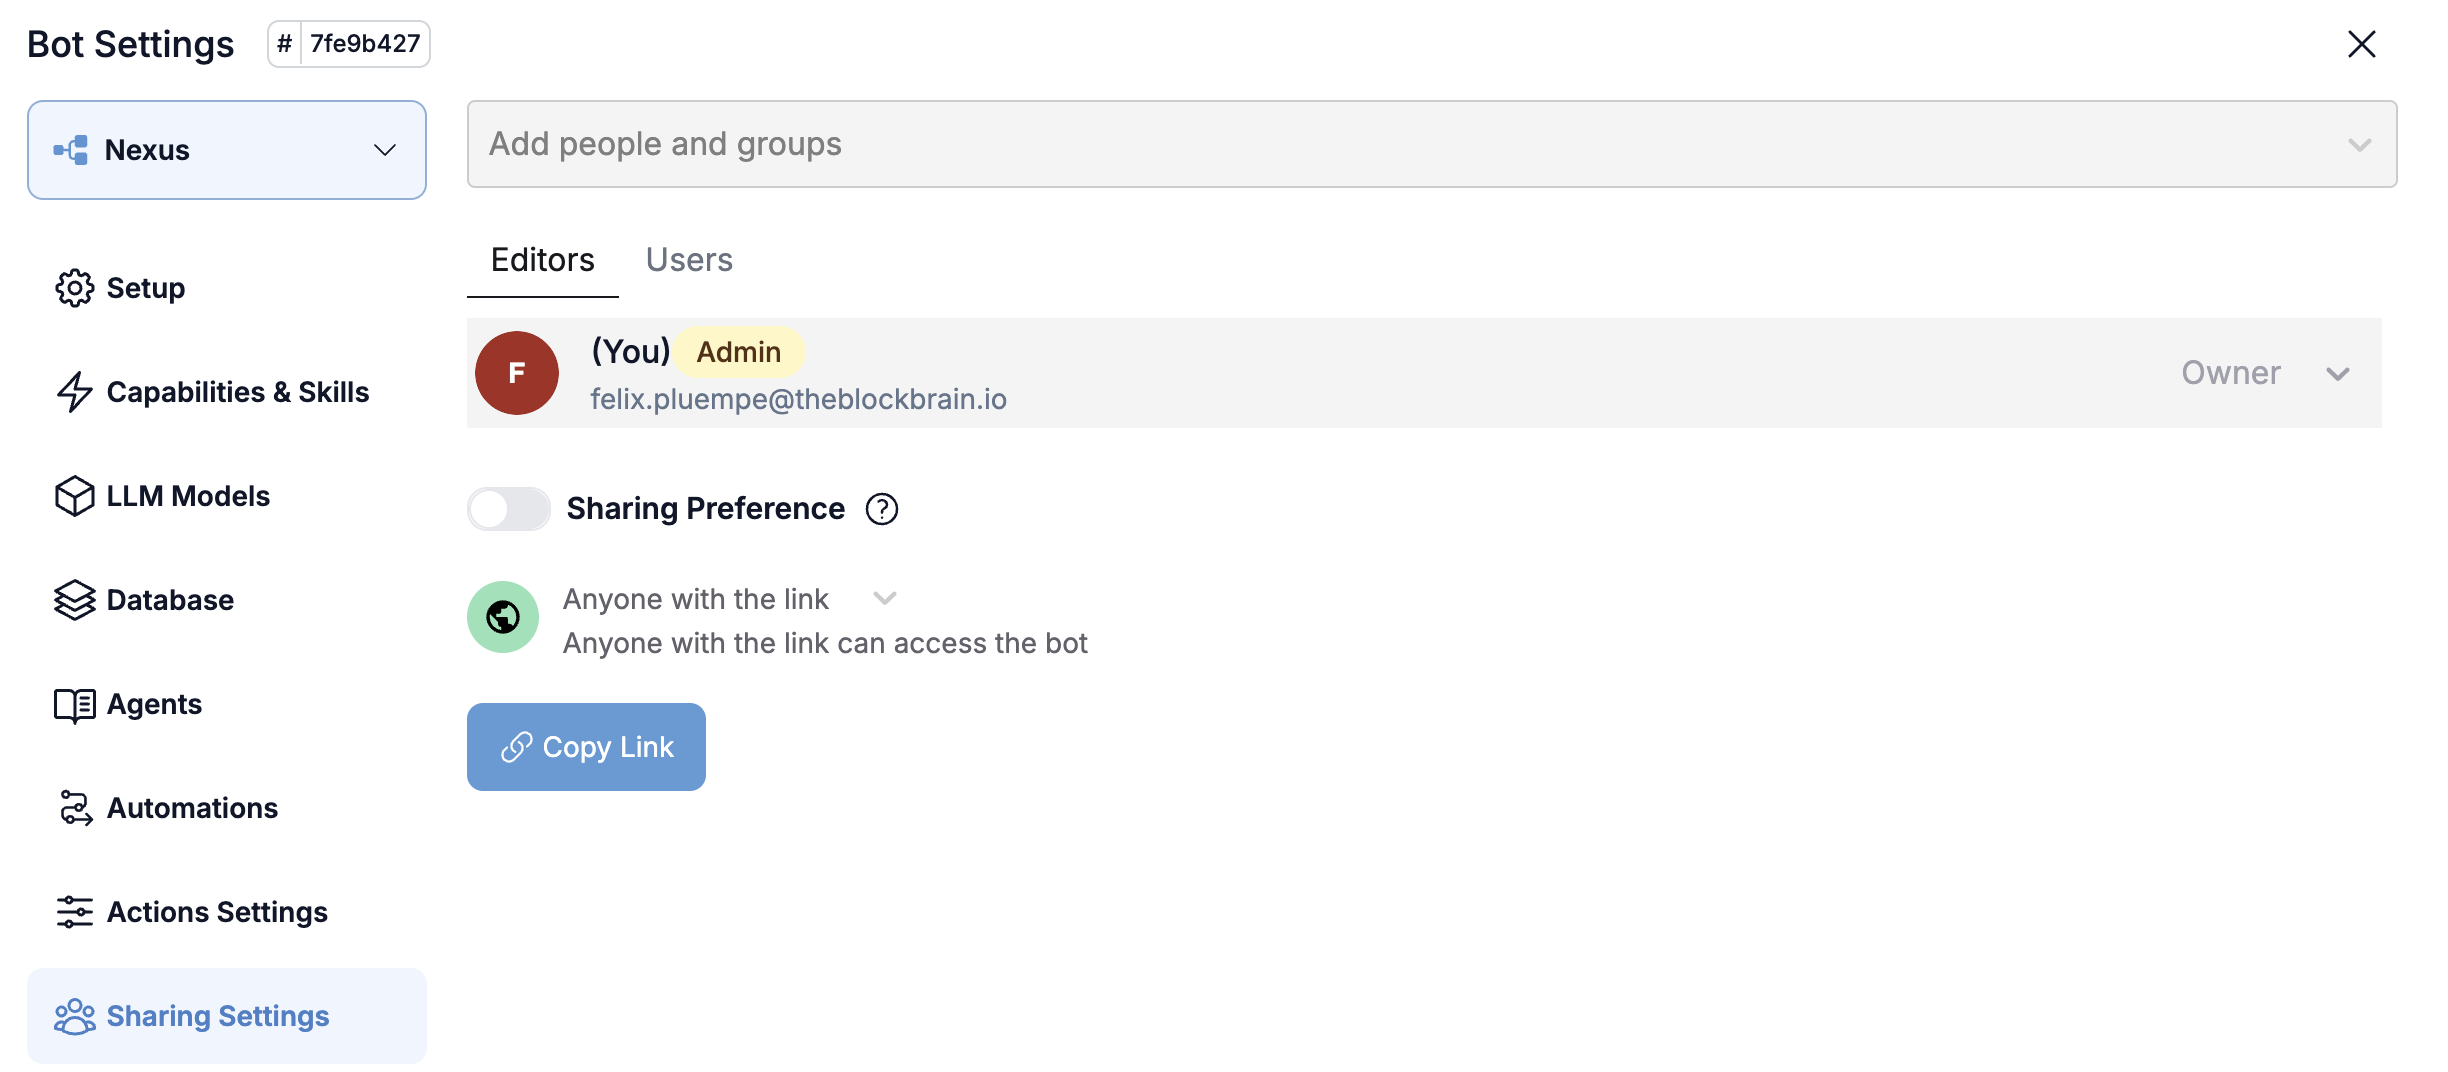


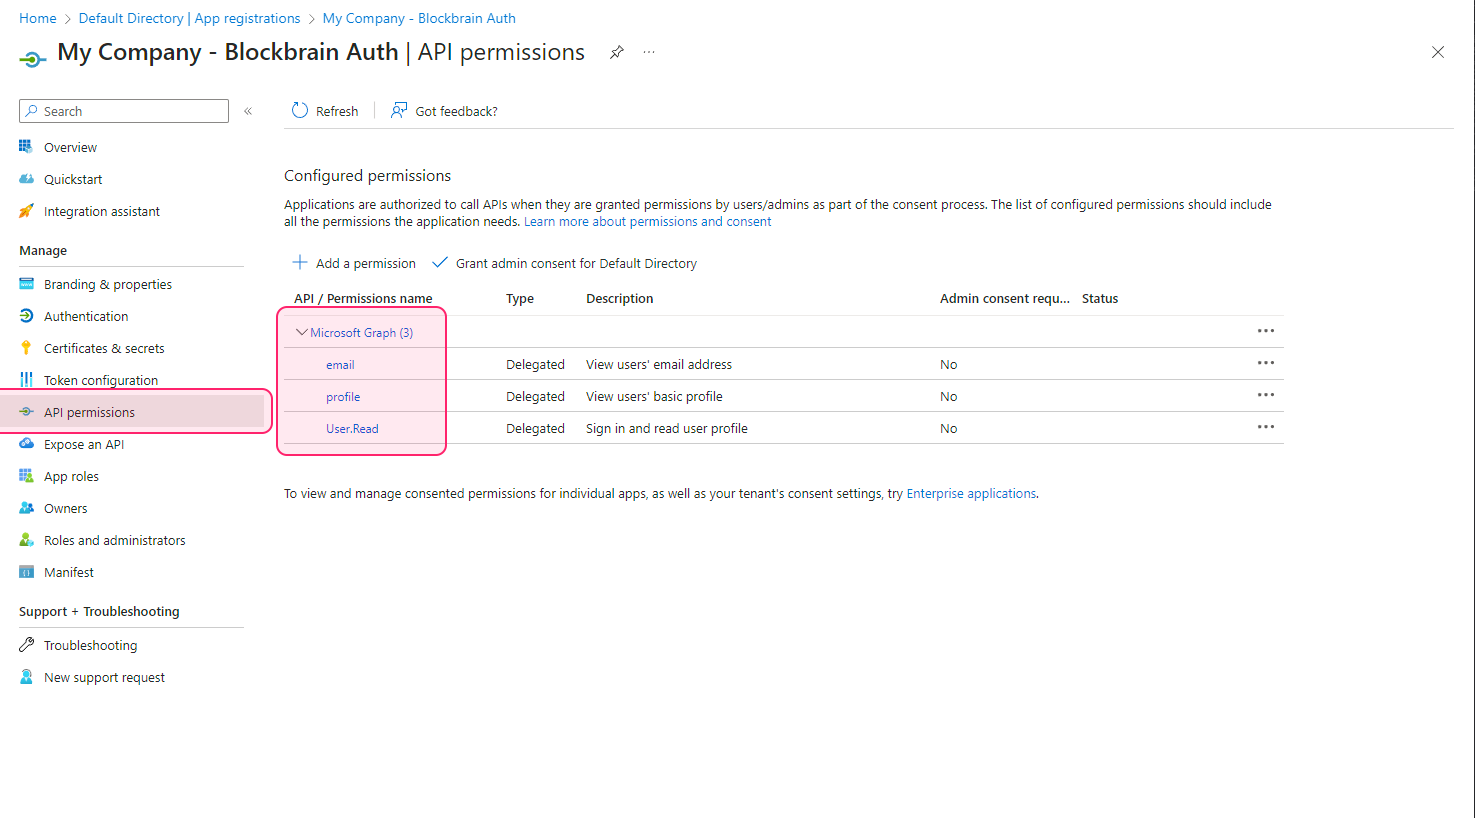


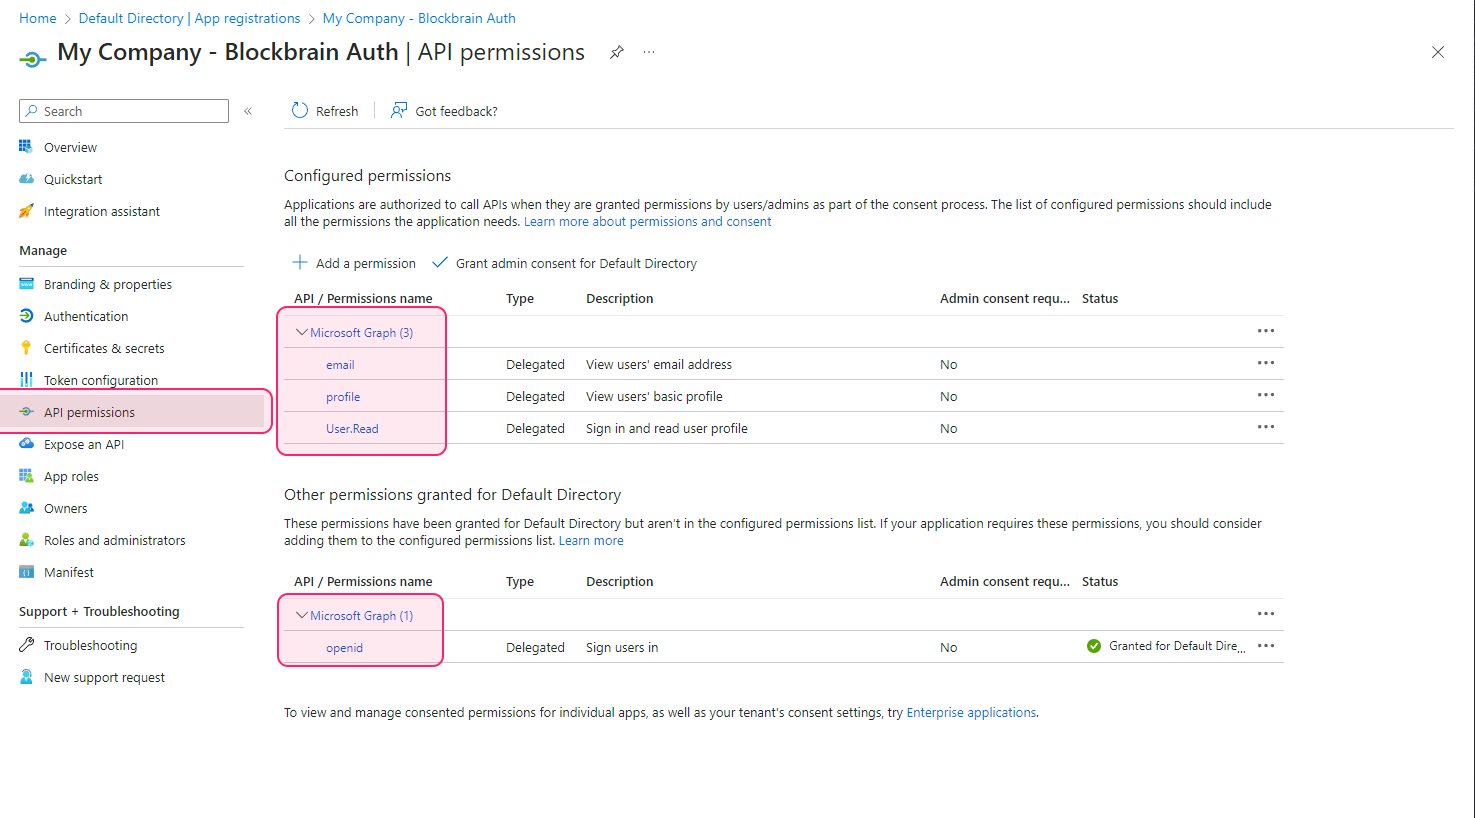
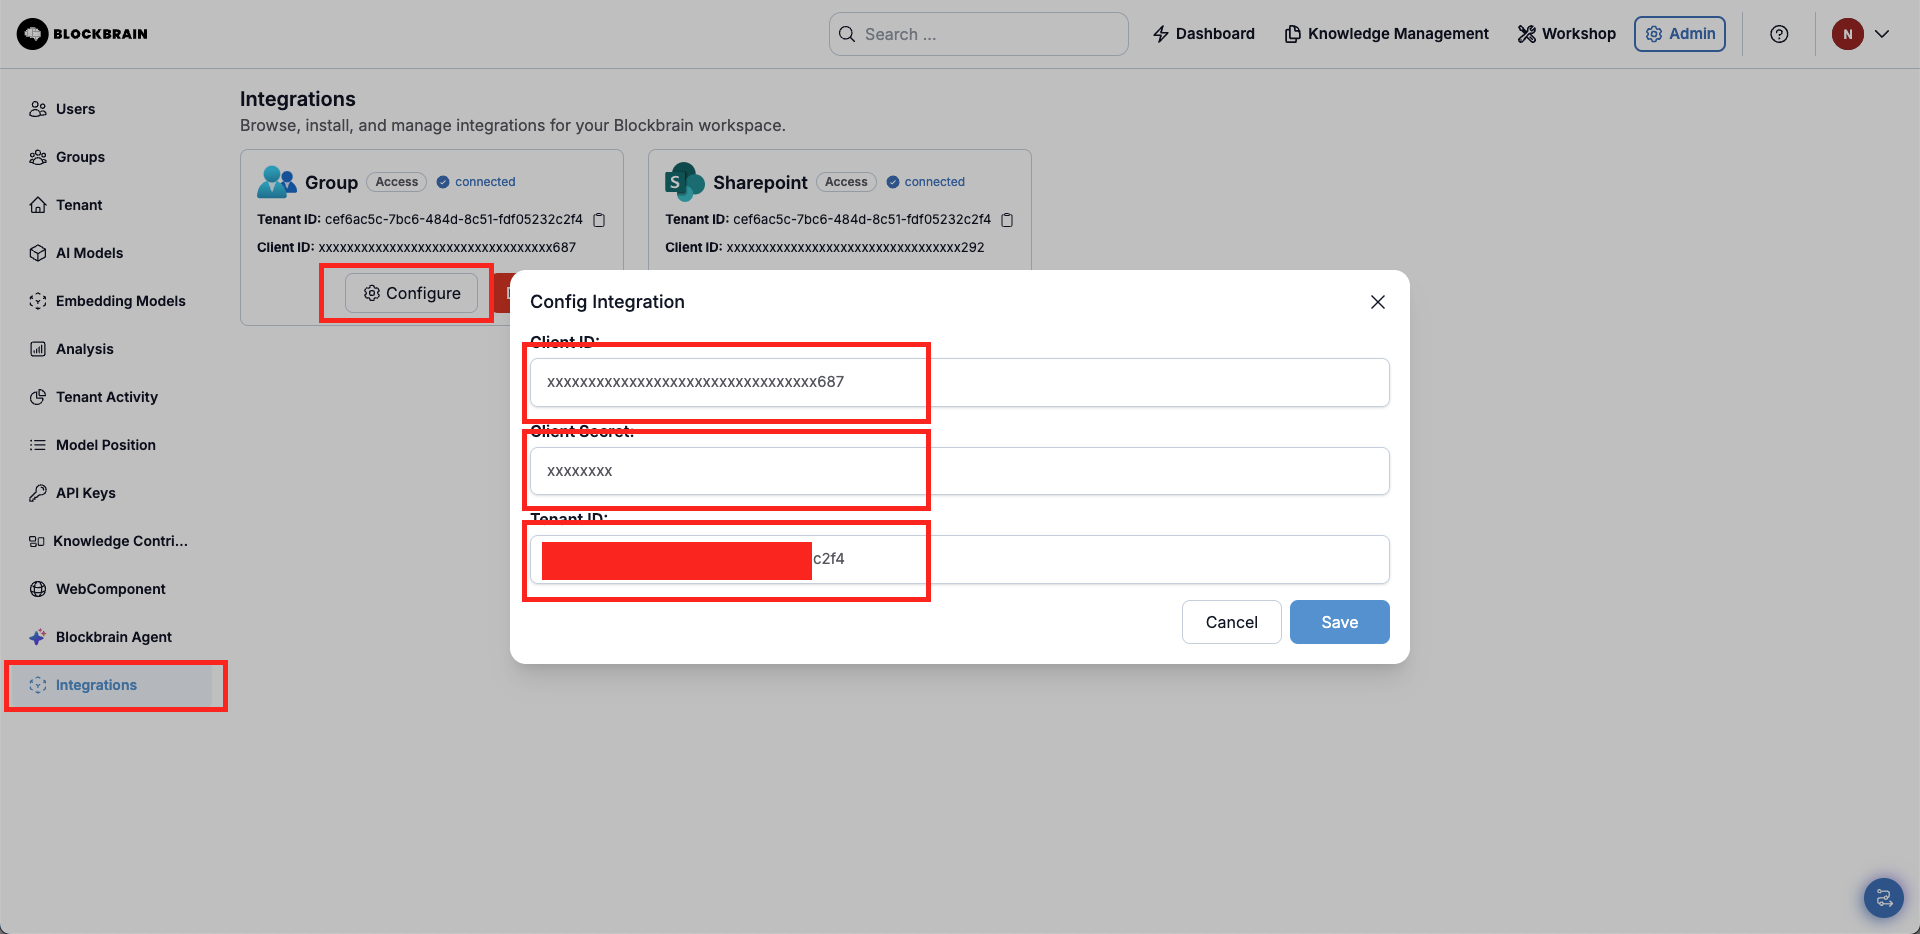


.png?alt=media&token=1301f471-95fa-4fb7-a007-6799e17b76be)

.png?alt=media&token=2e1c3e4b-dc62-43a1-b321-4e40b56515be)


.png?alt=media&token=0bcf7b05-a055-498b-9717-ea0691ebc92d)
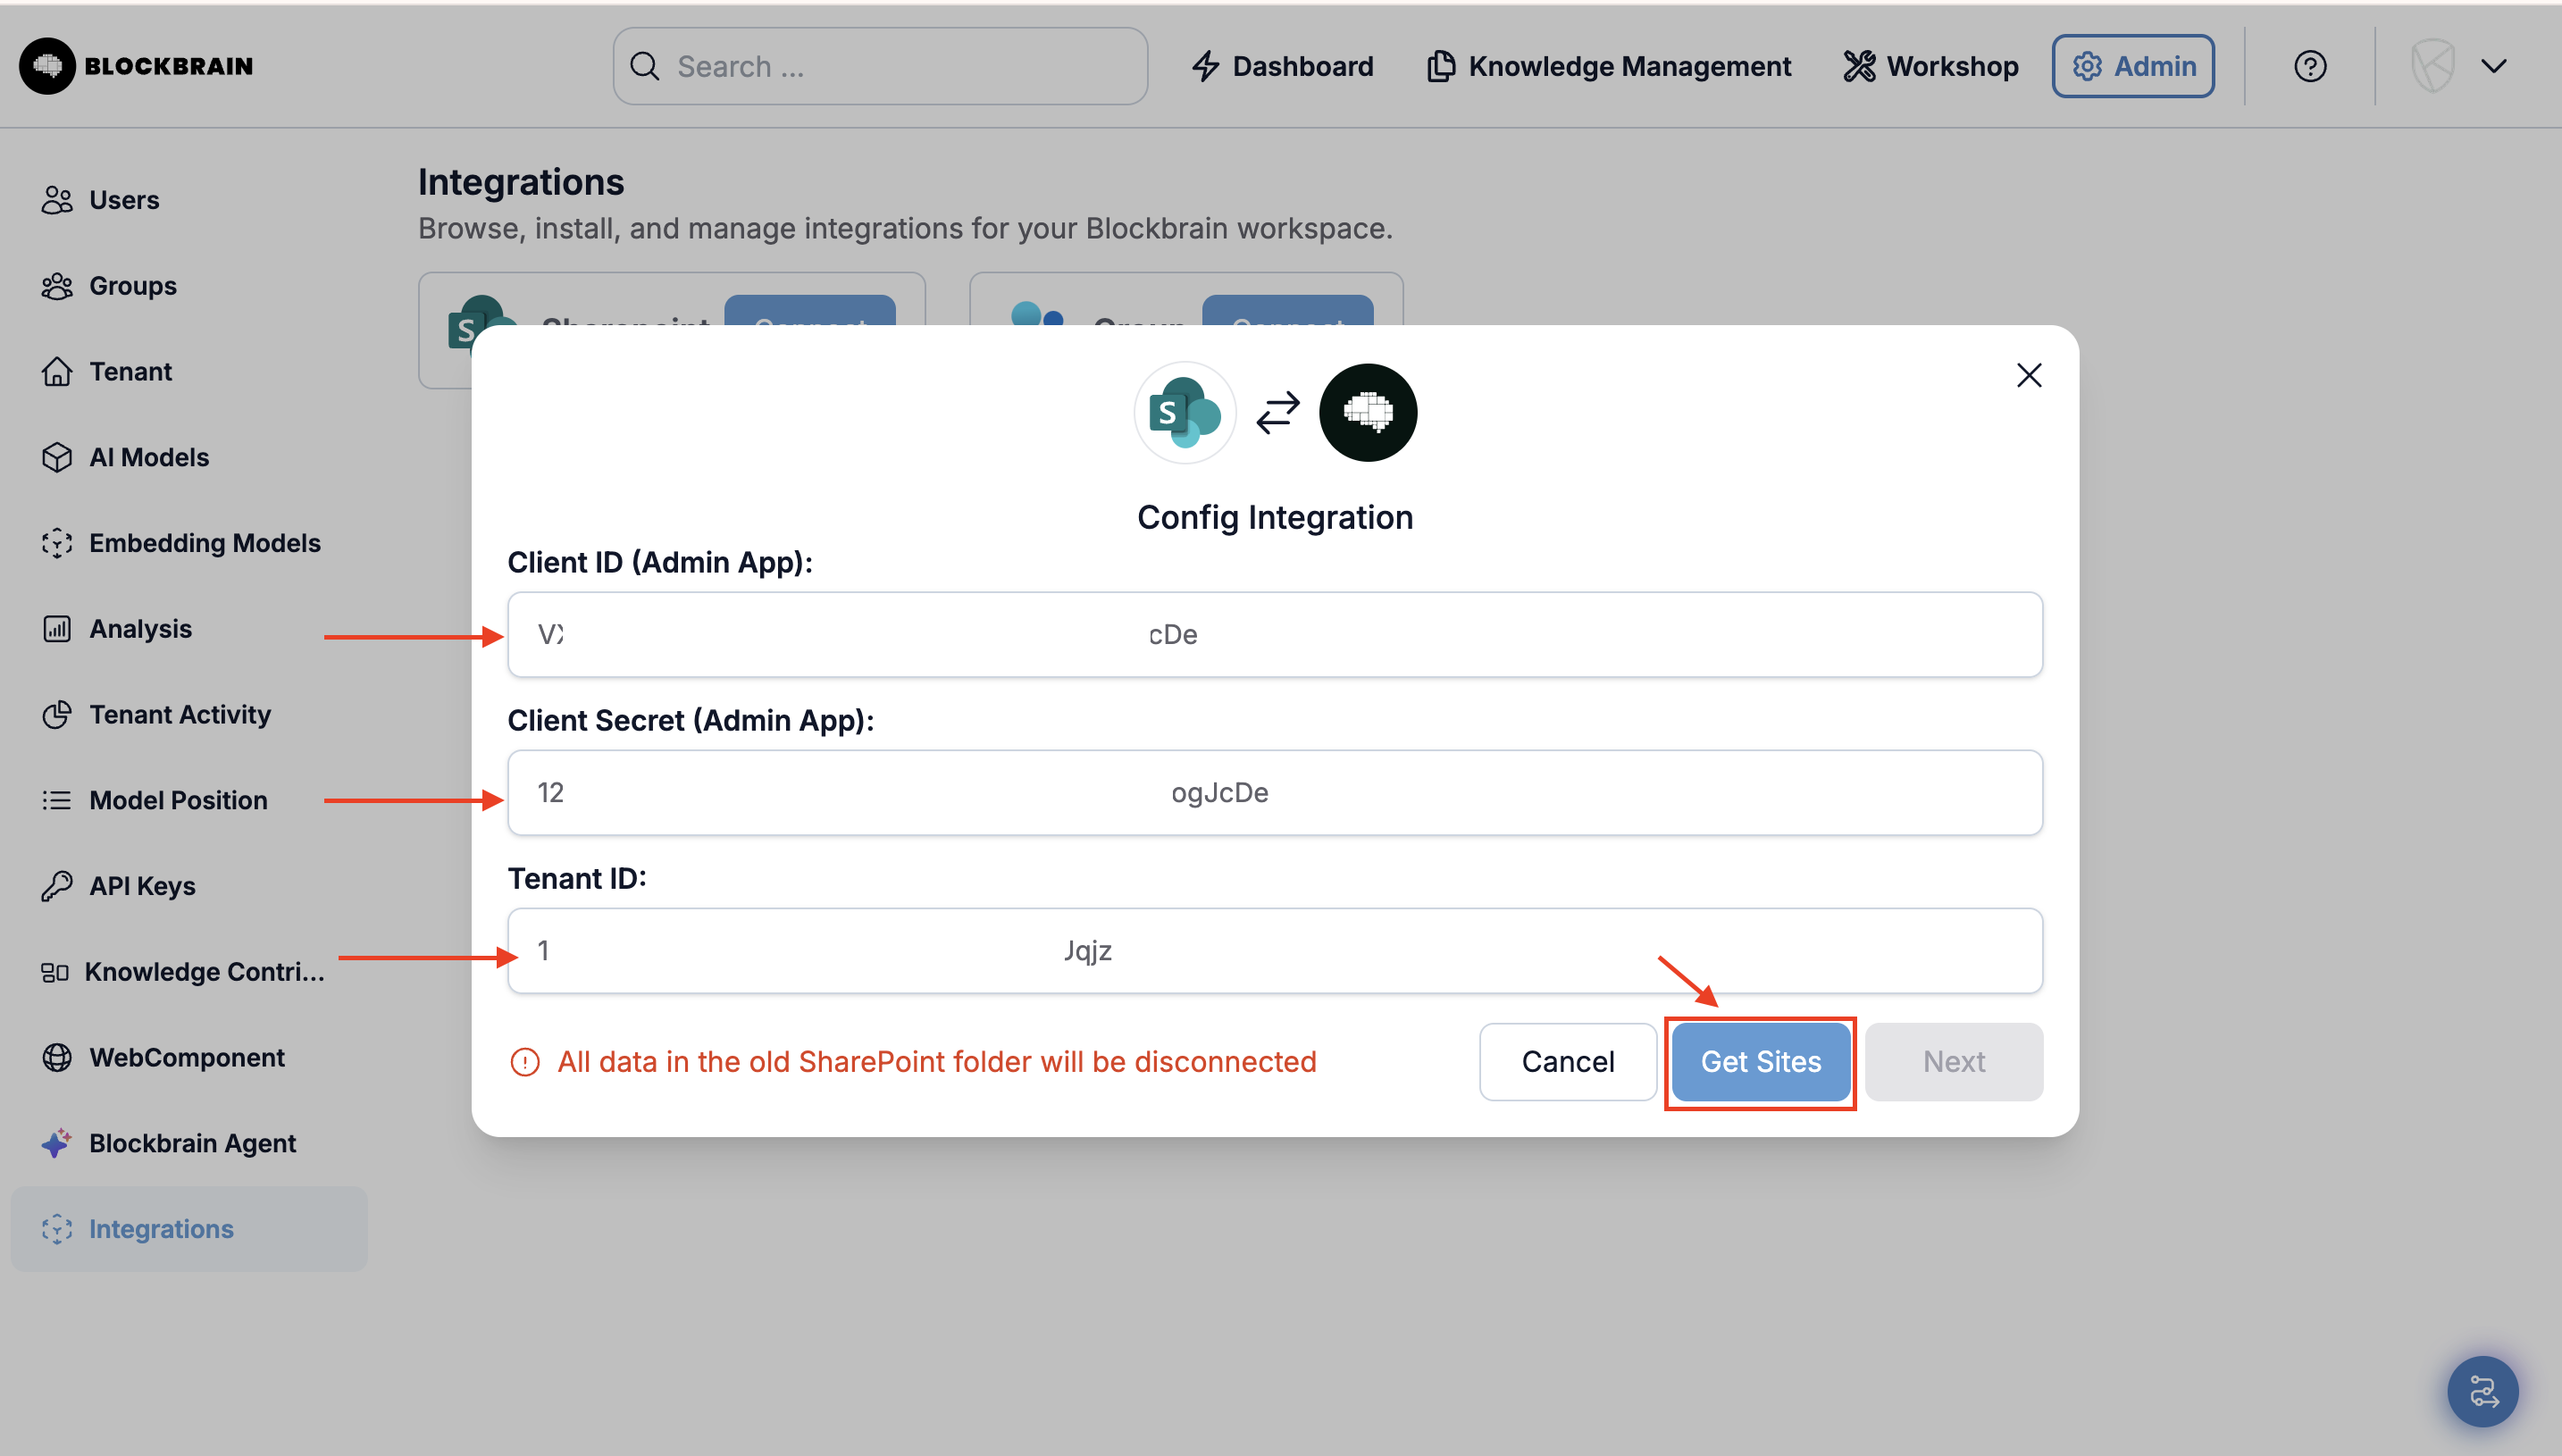

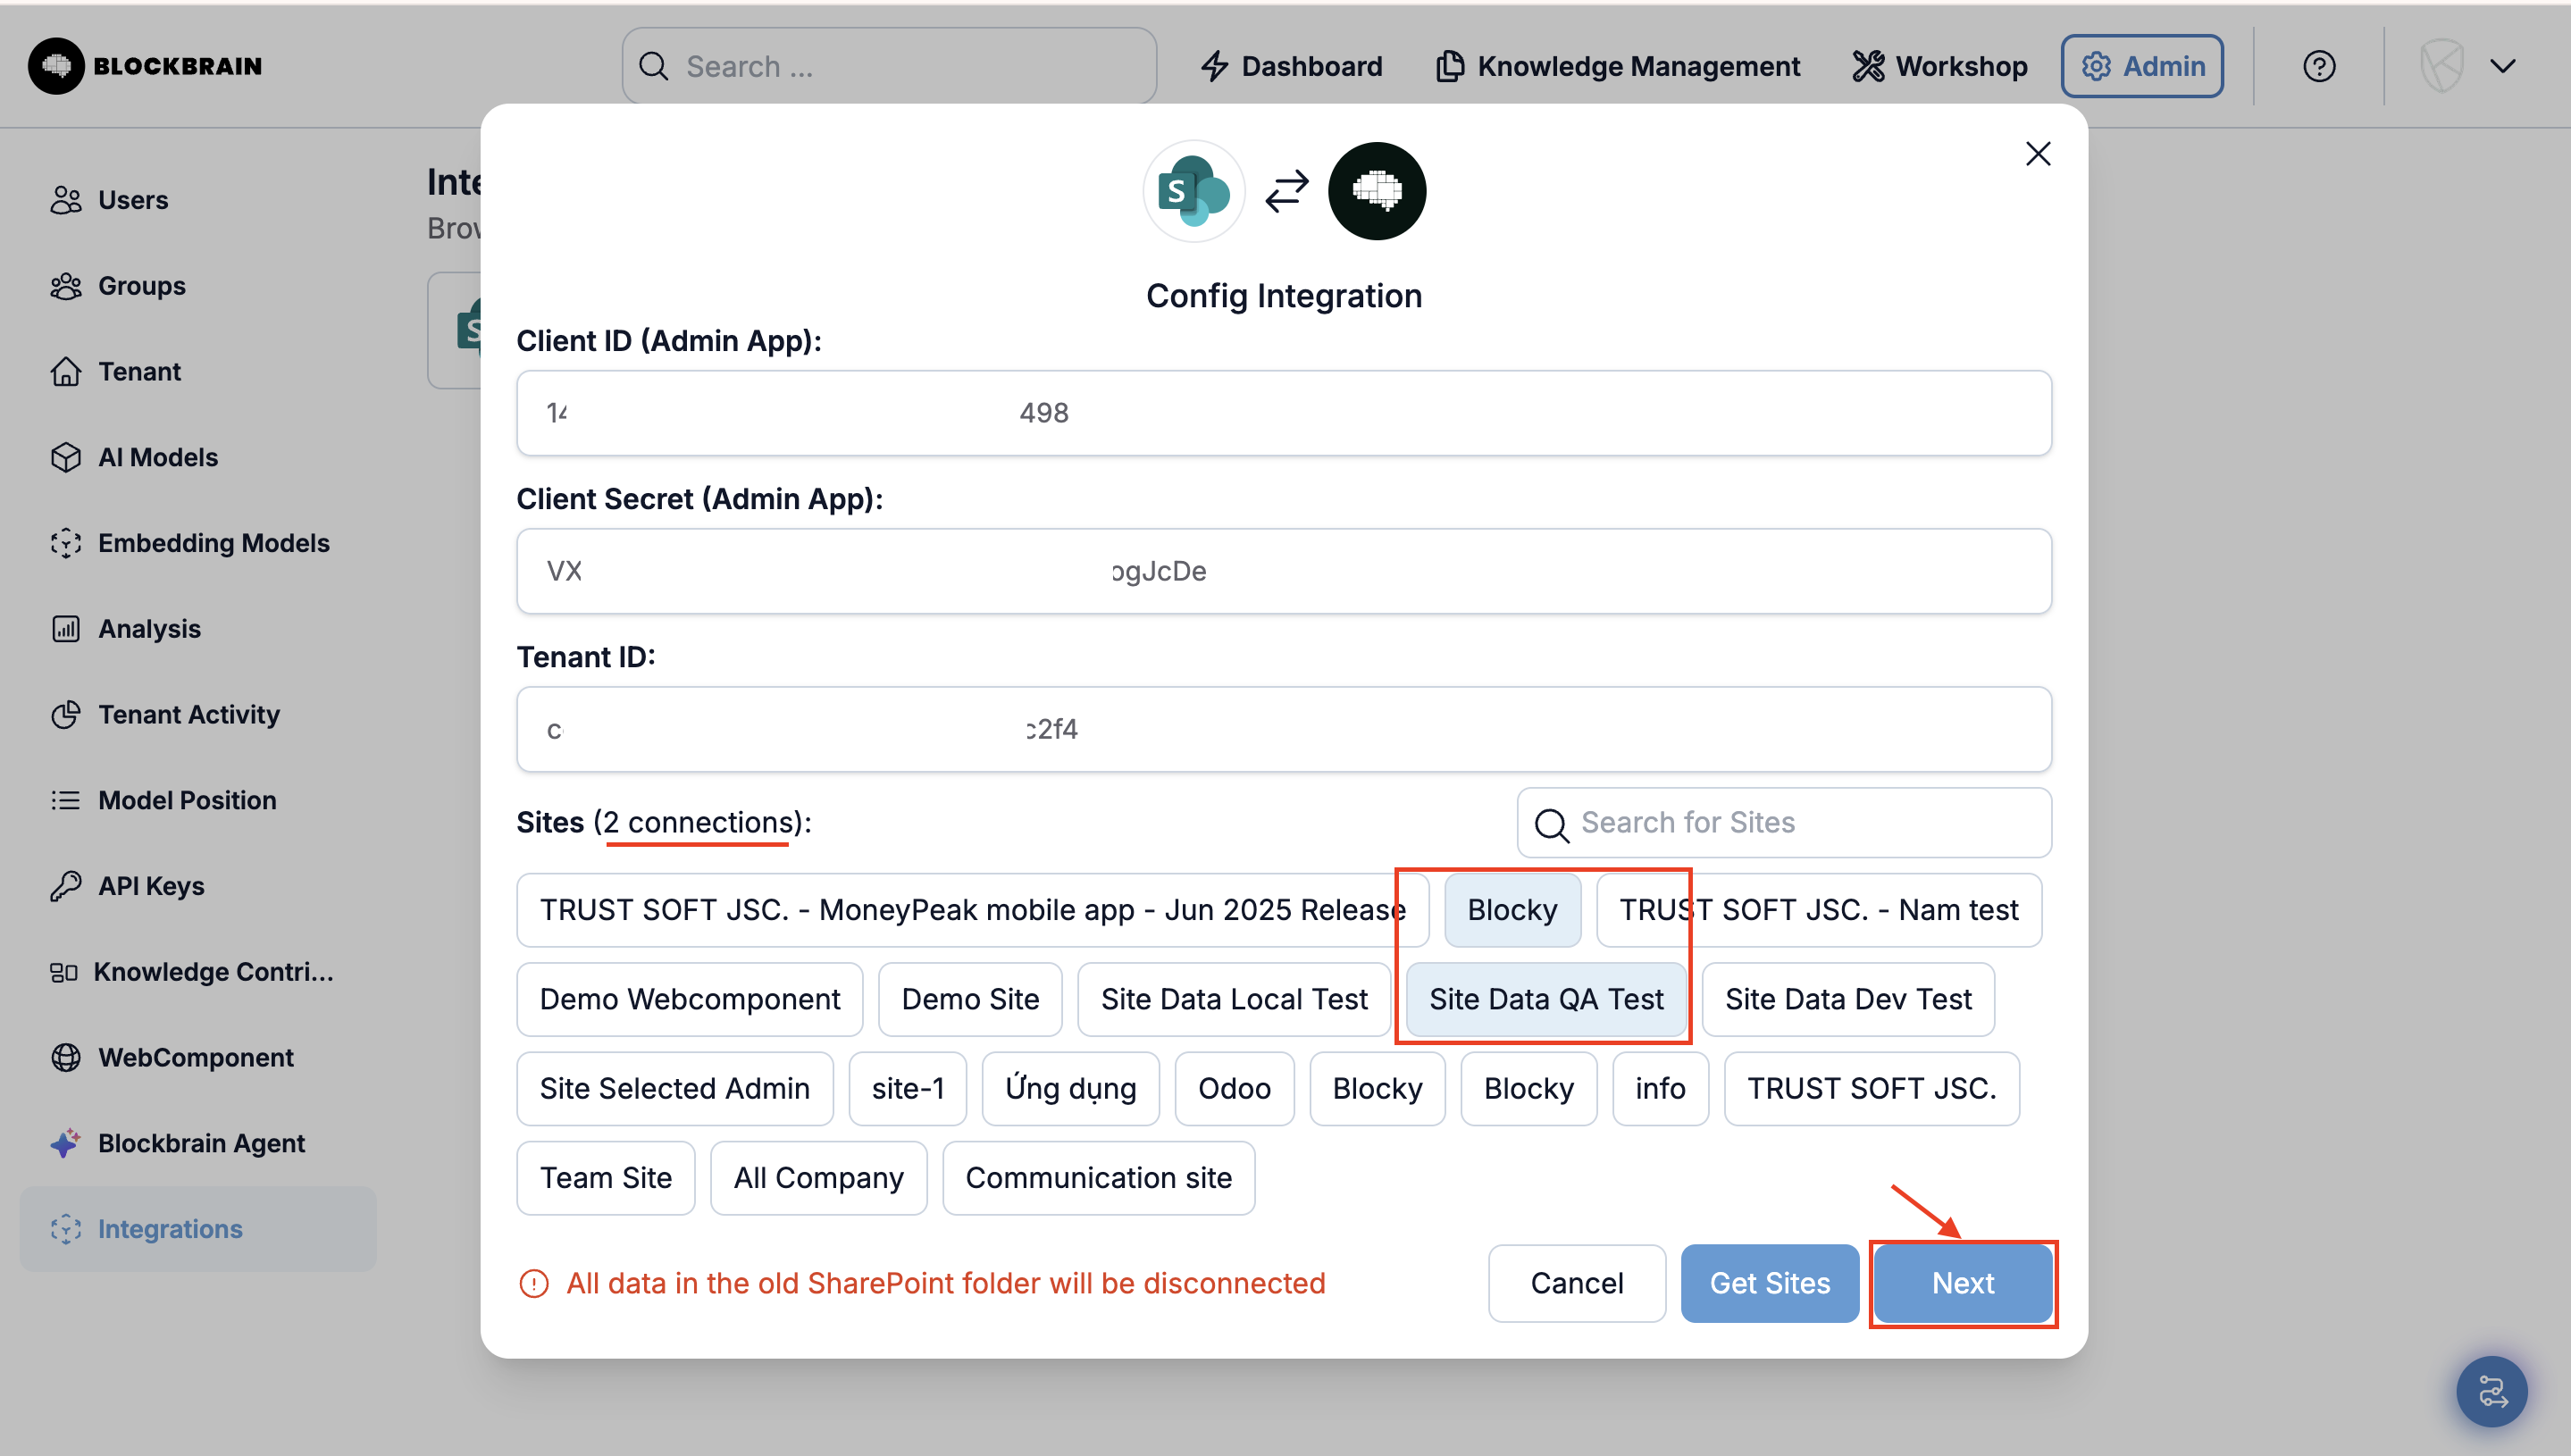

.png?alt=media&token=e8f1f9d9-08e8-4c53-8b0c-8e76a14073a5)


.png?alt=media&token=ef76b744-8d95-4a2a-b7c0-552f59ecb19e)






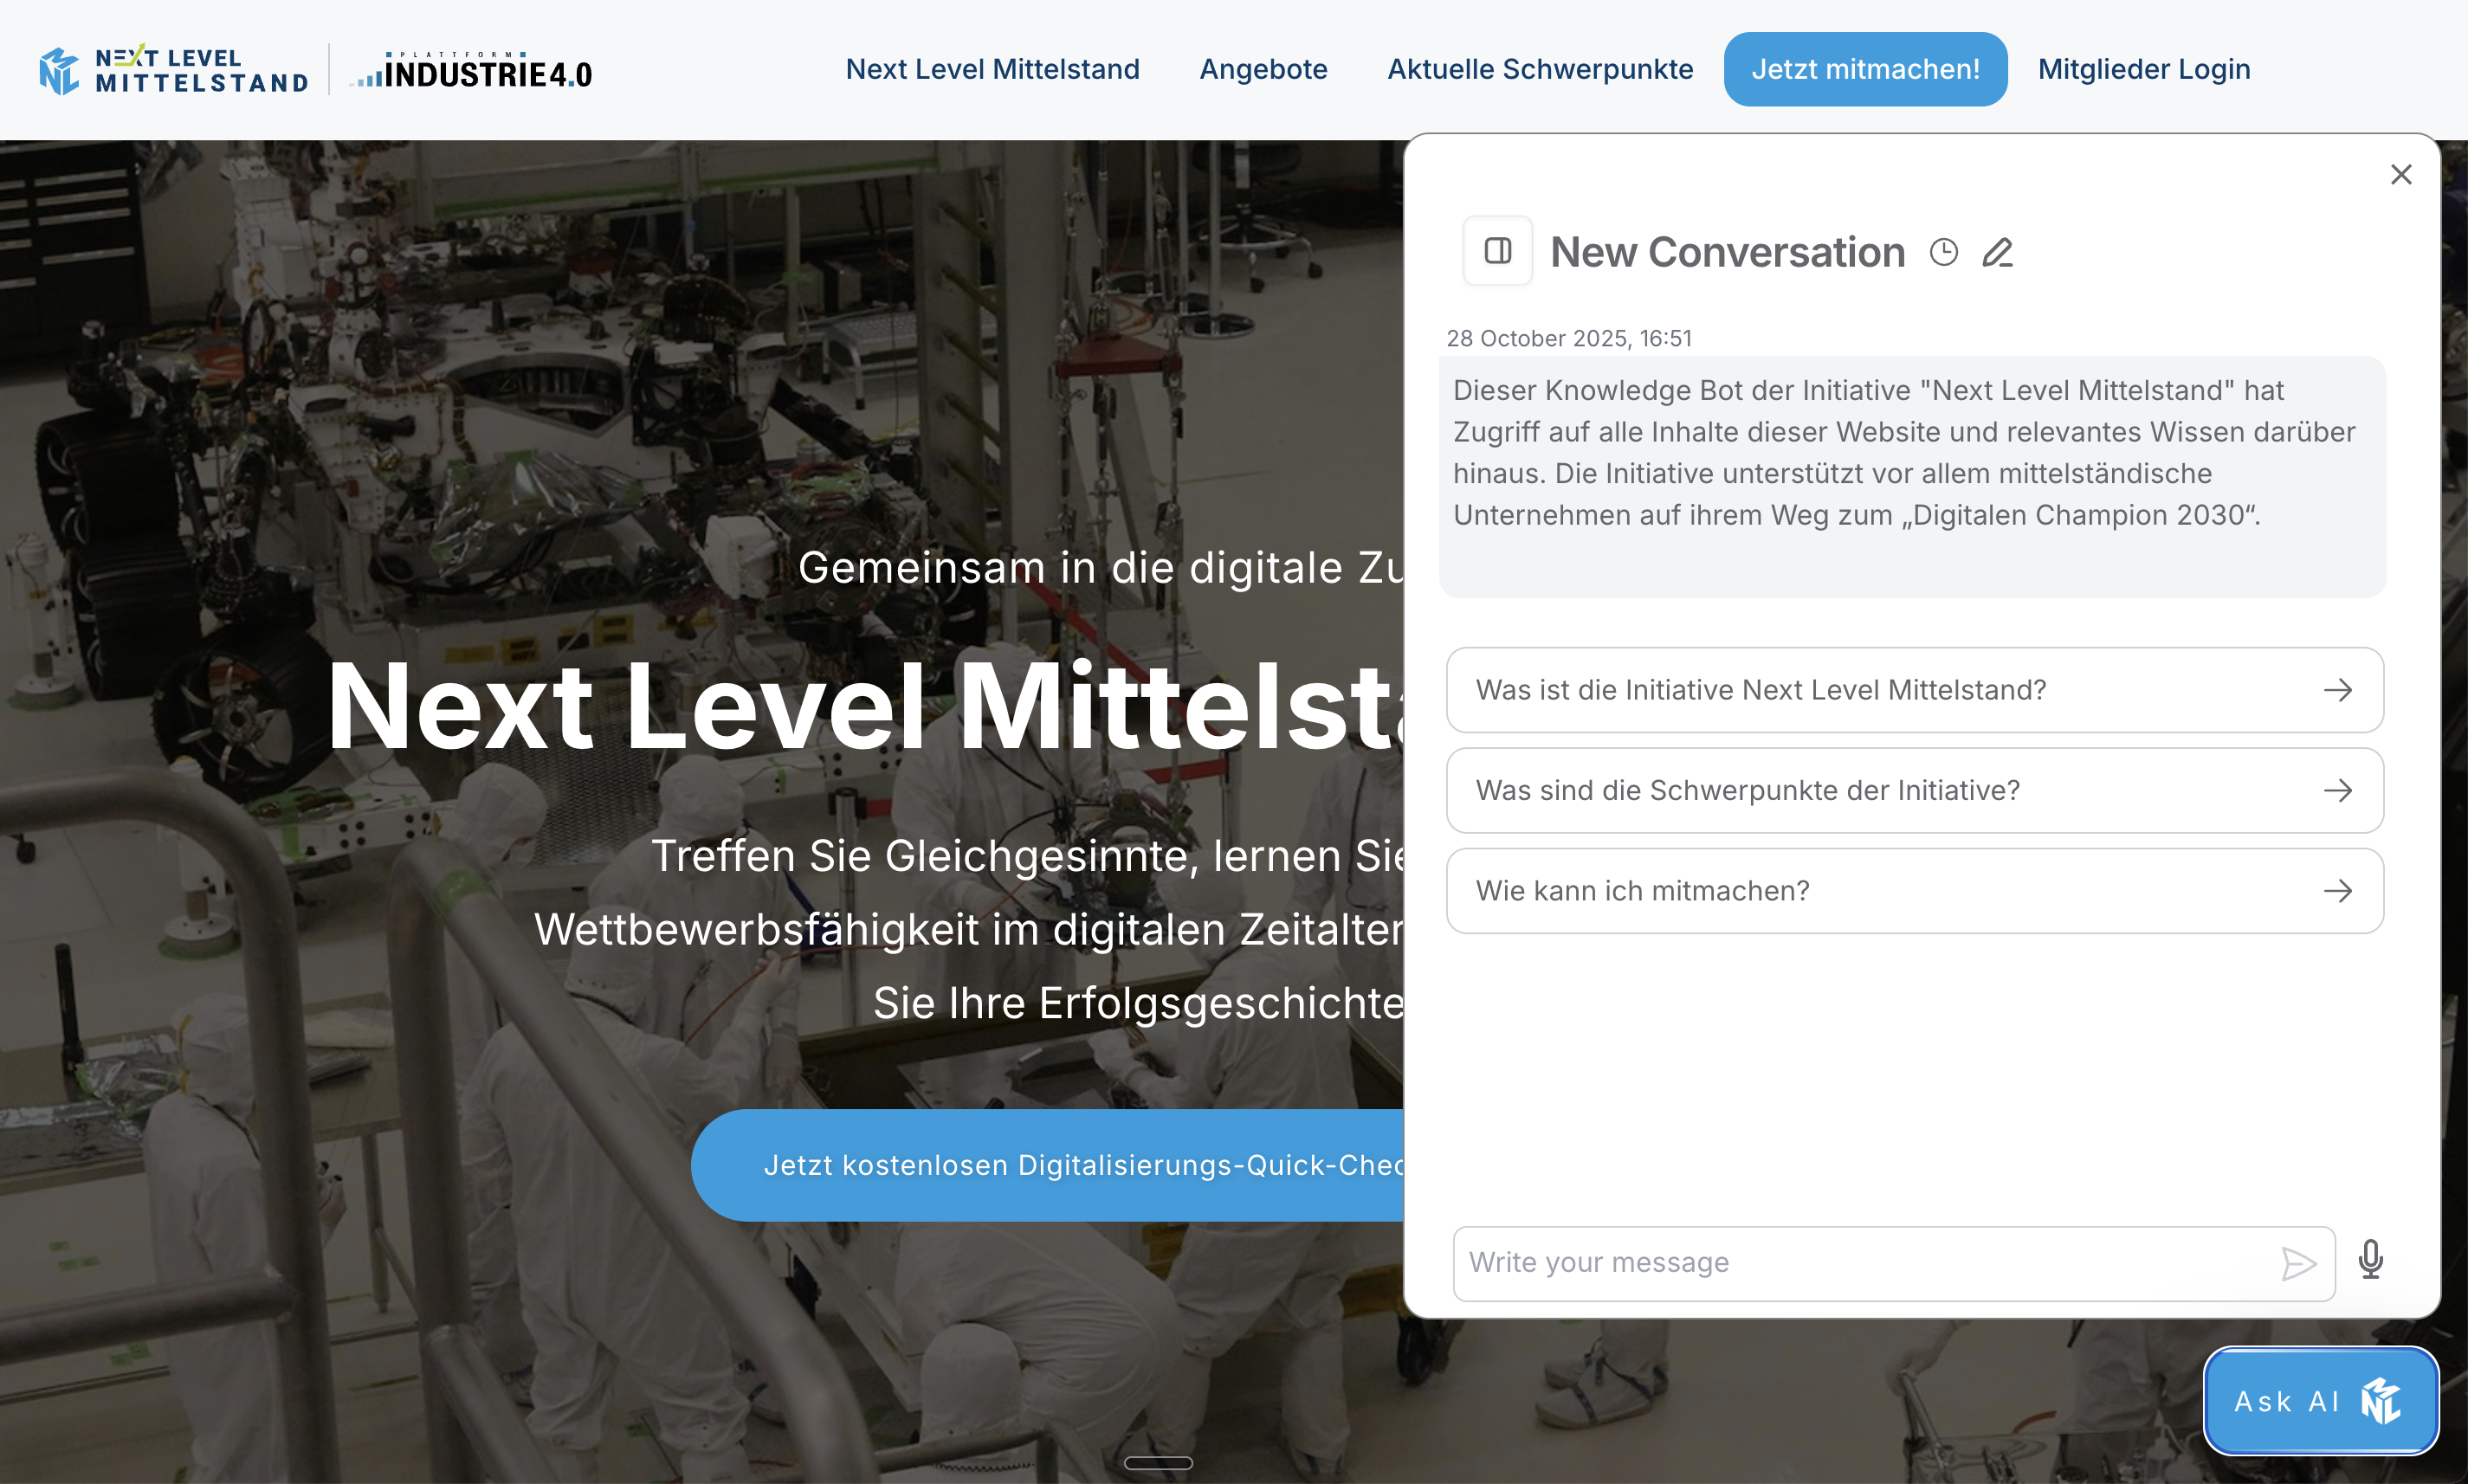
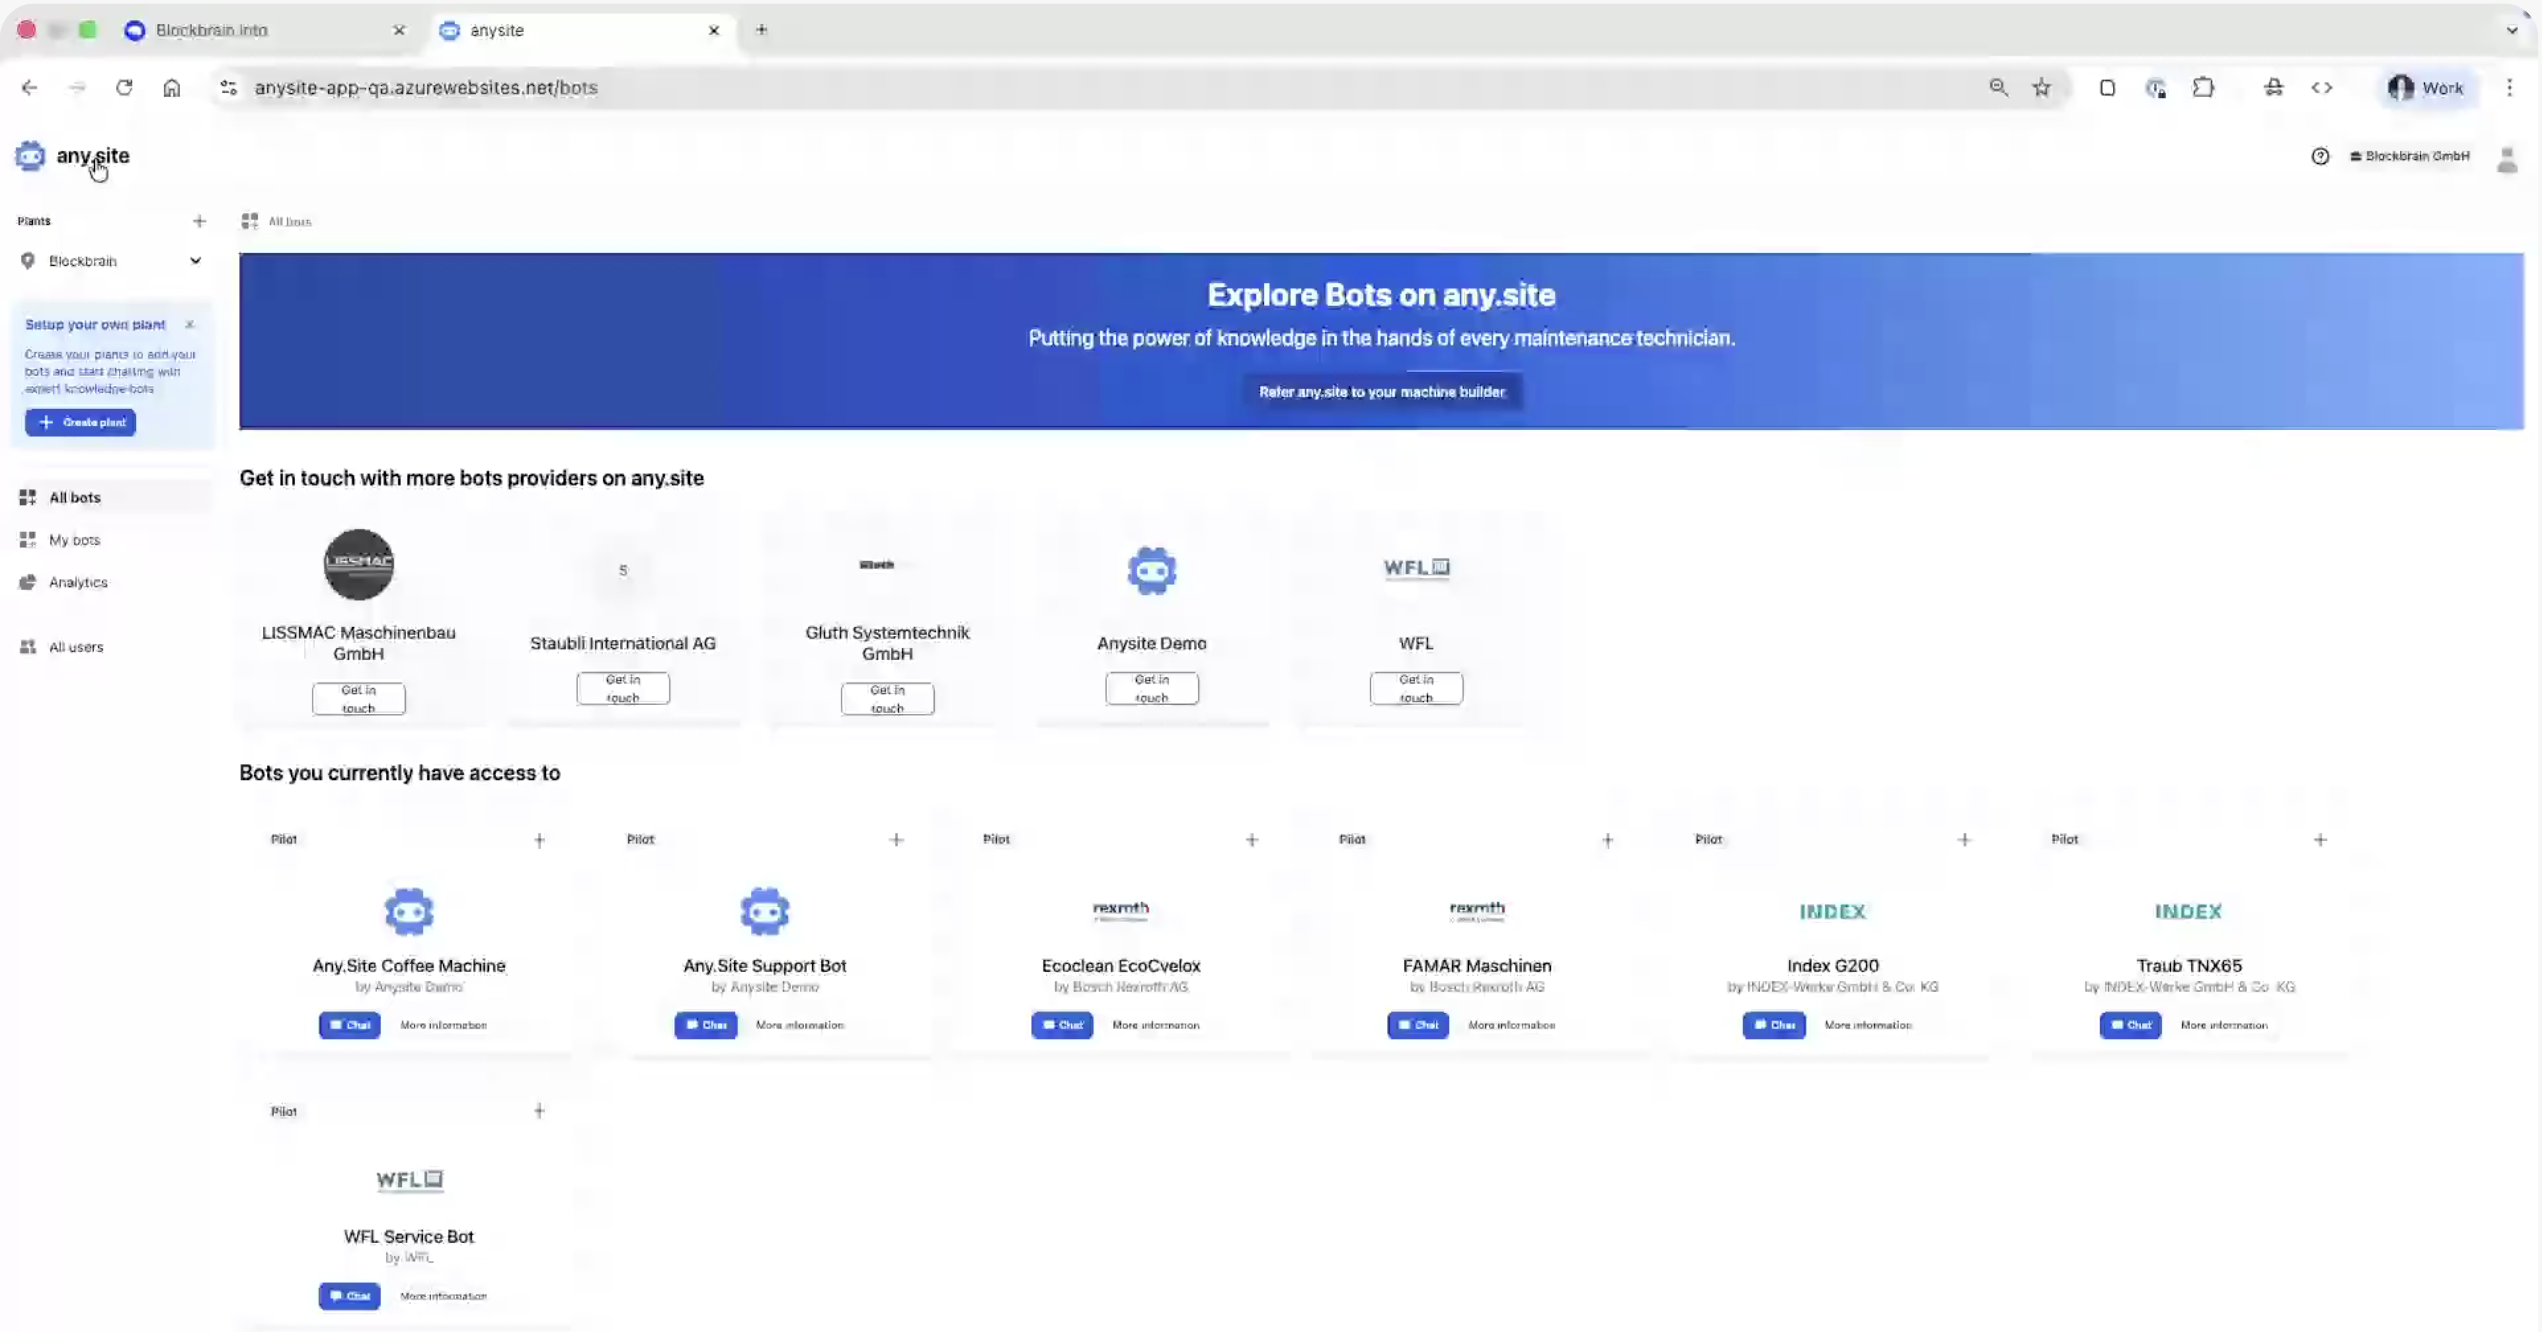
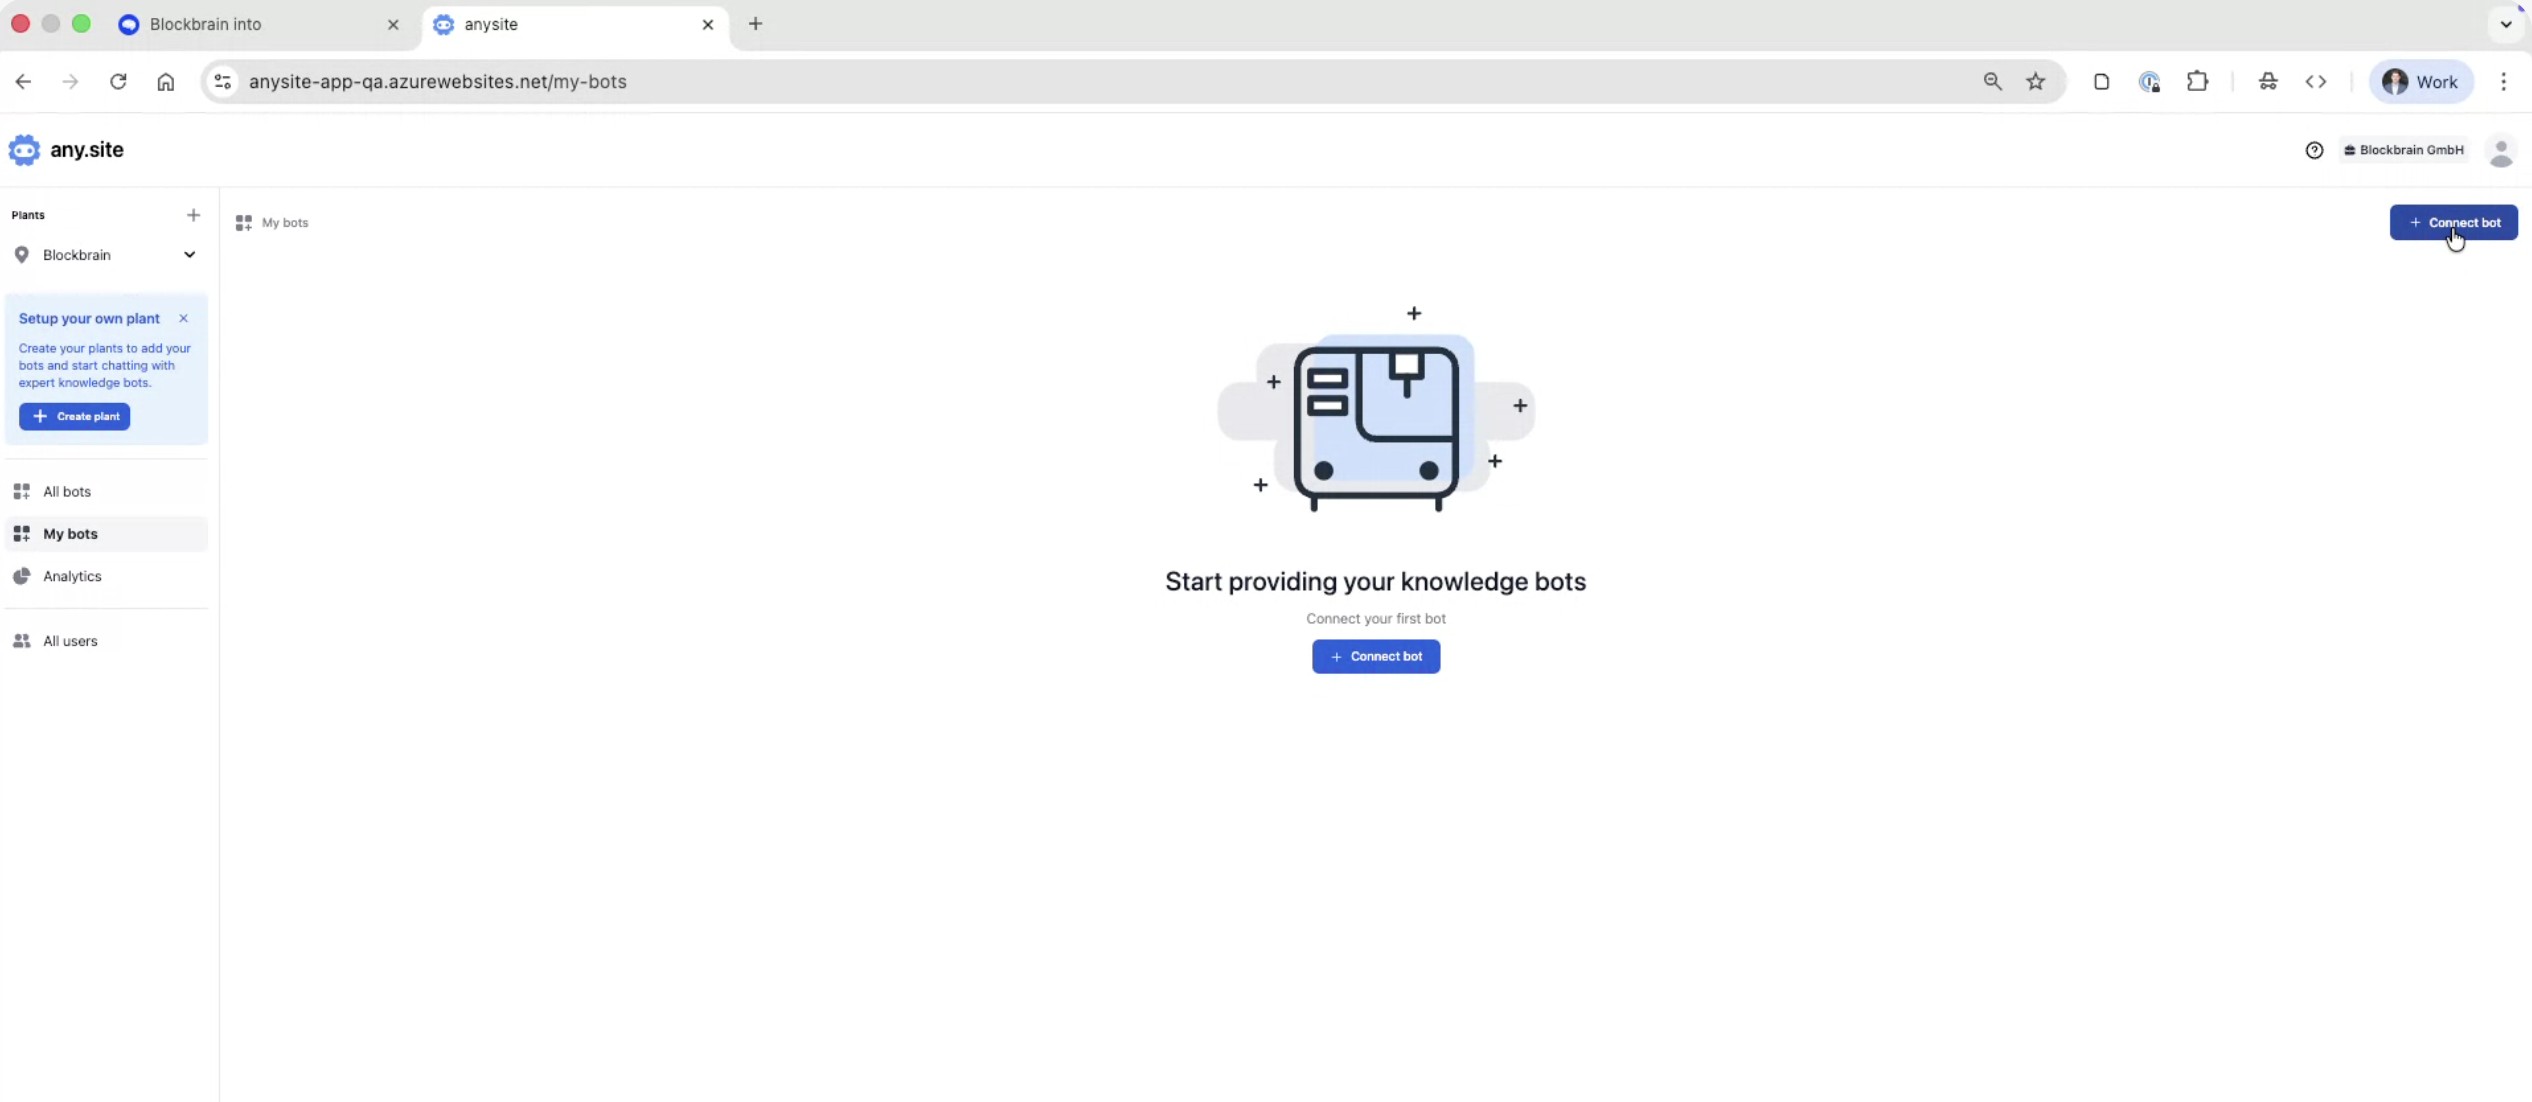
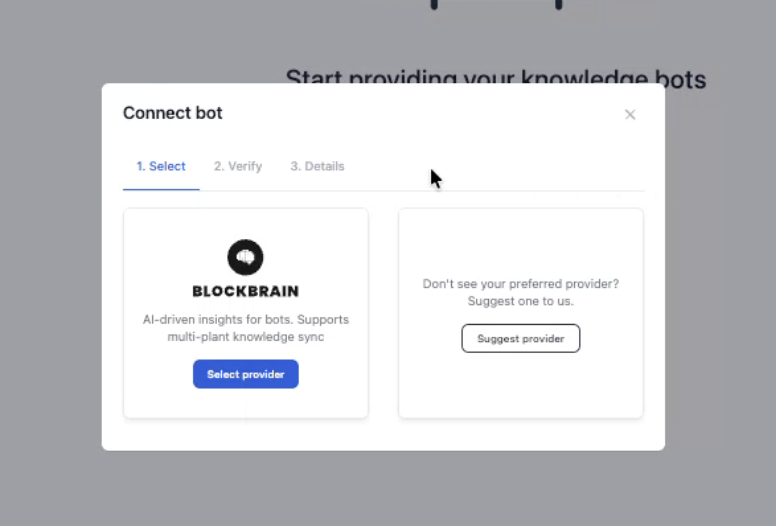
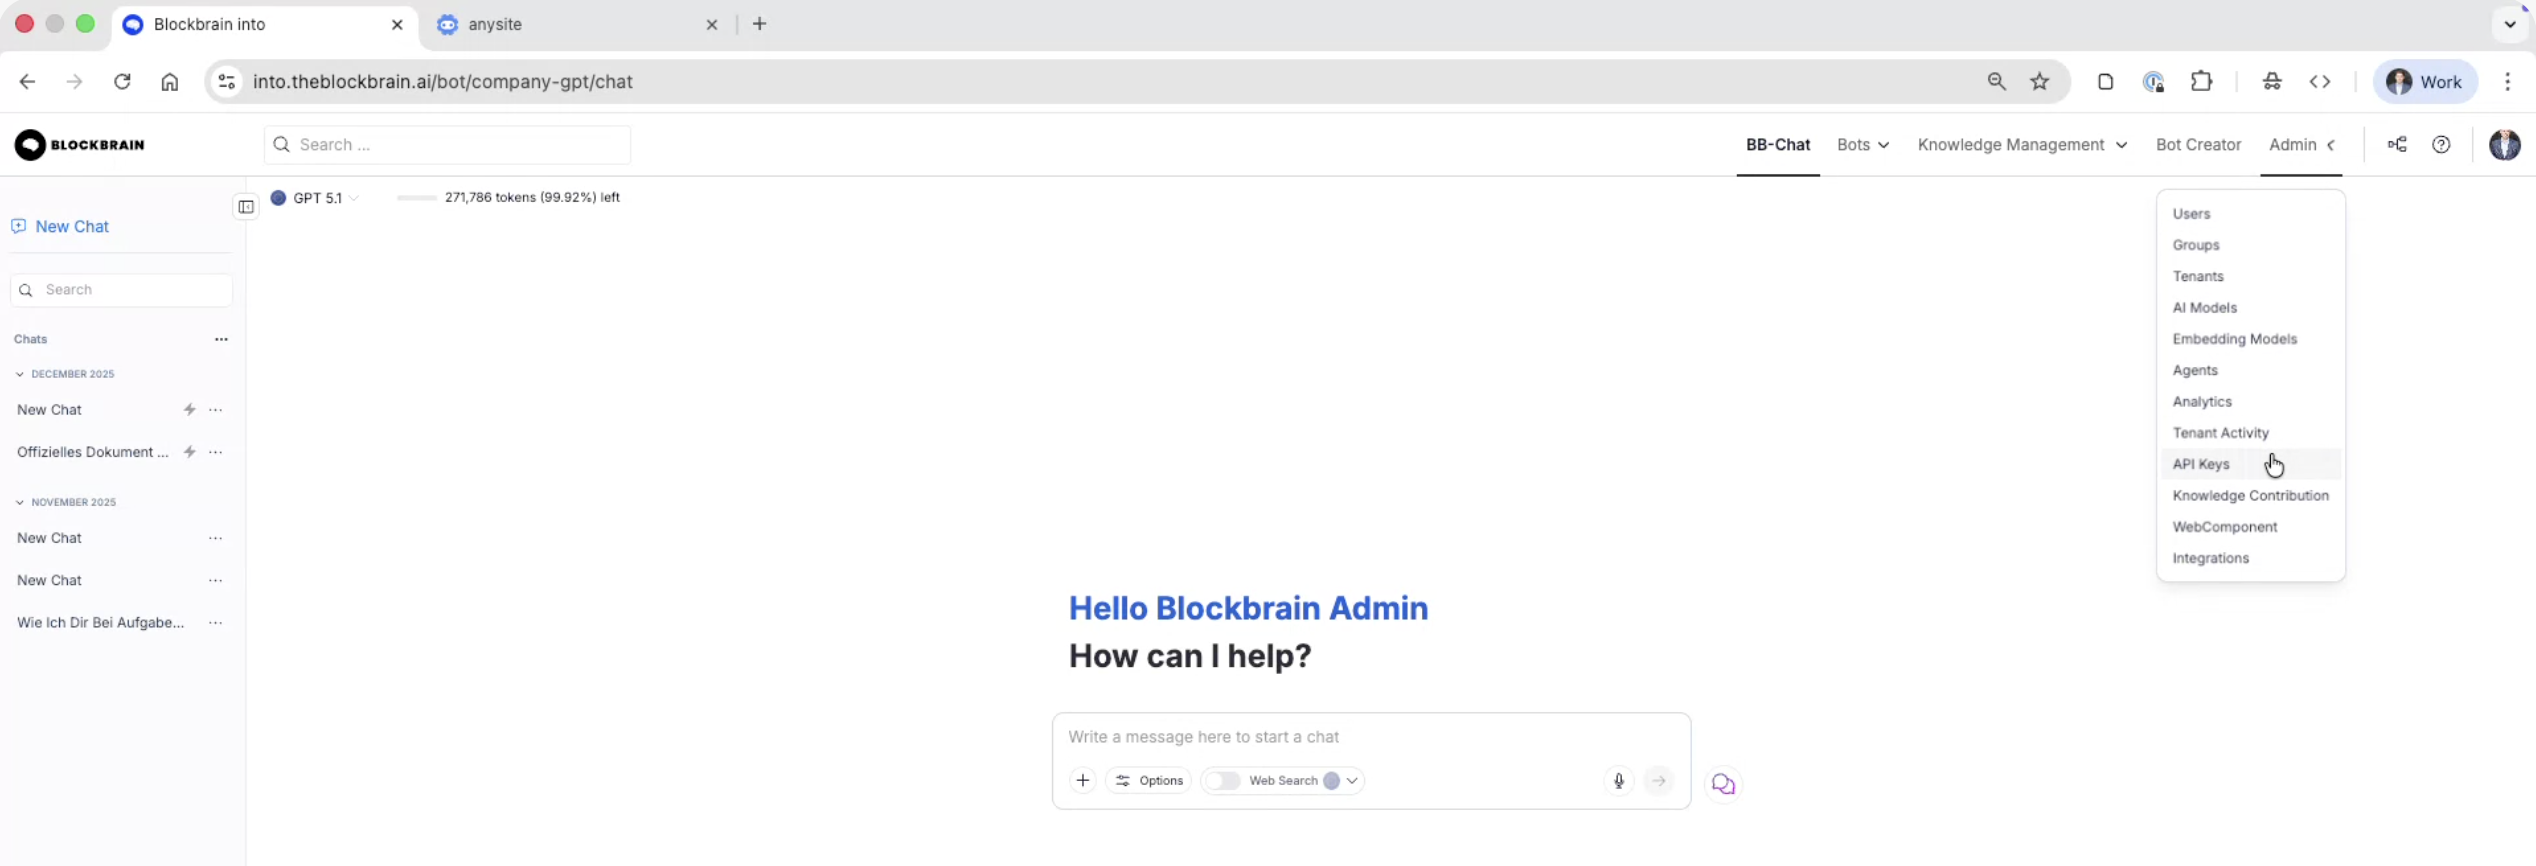
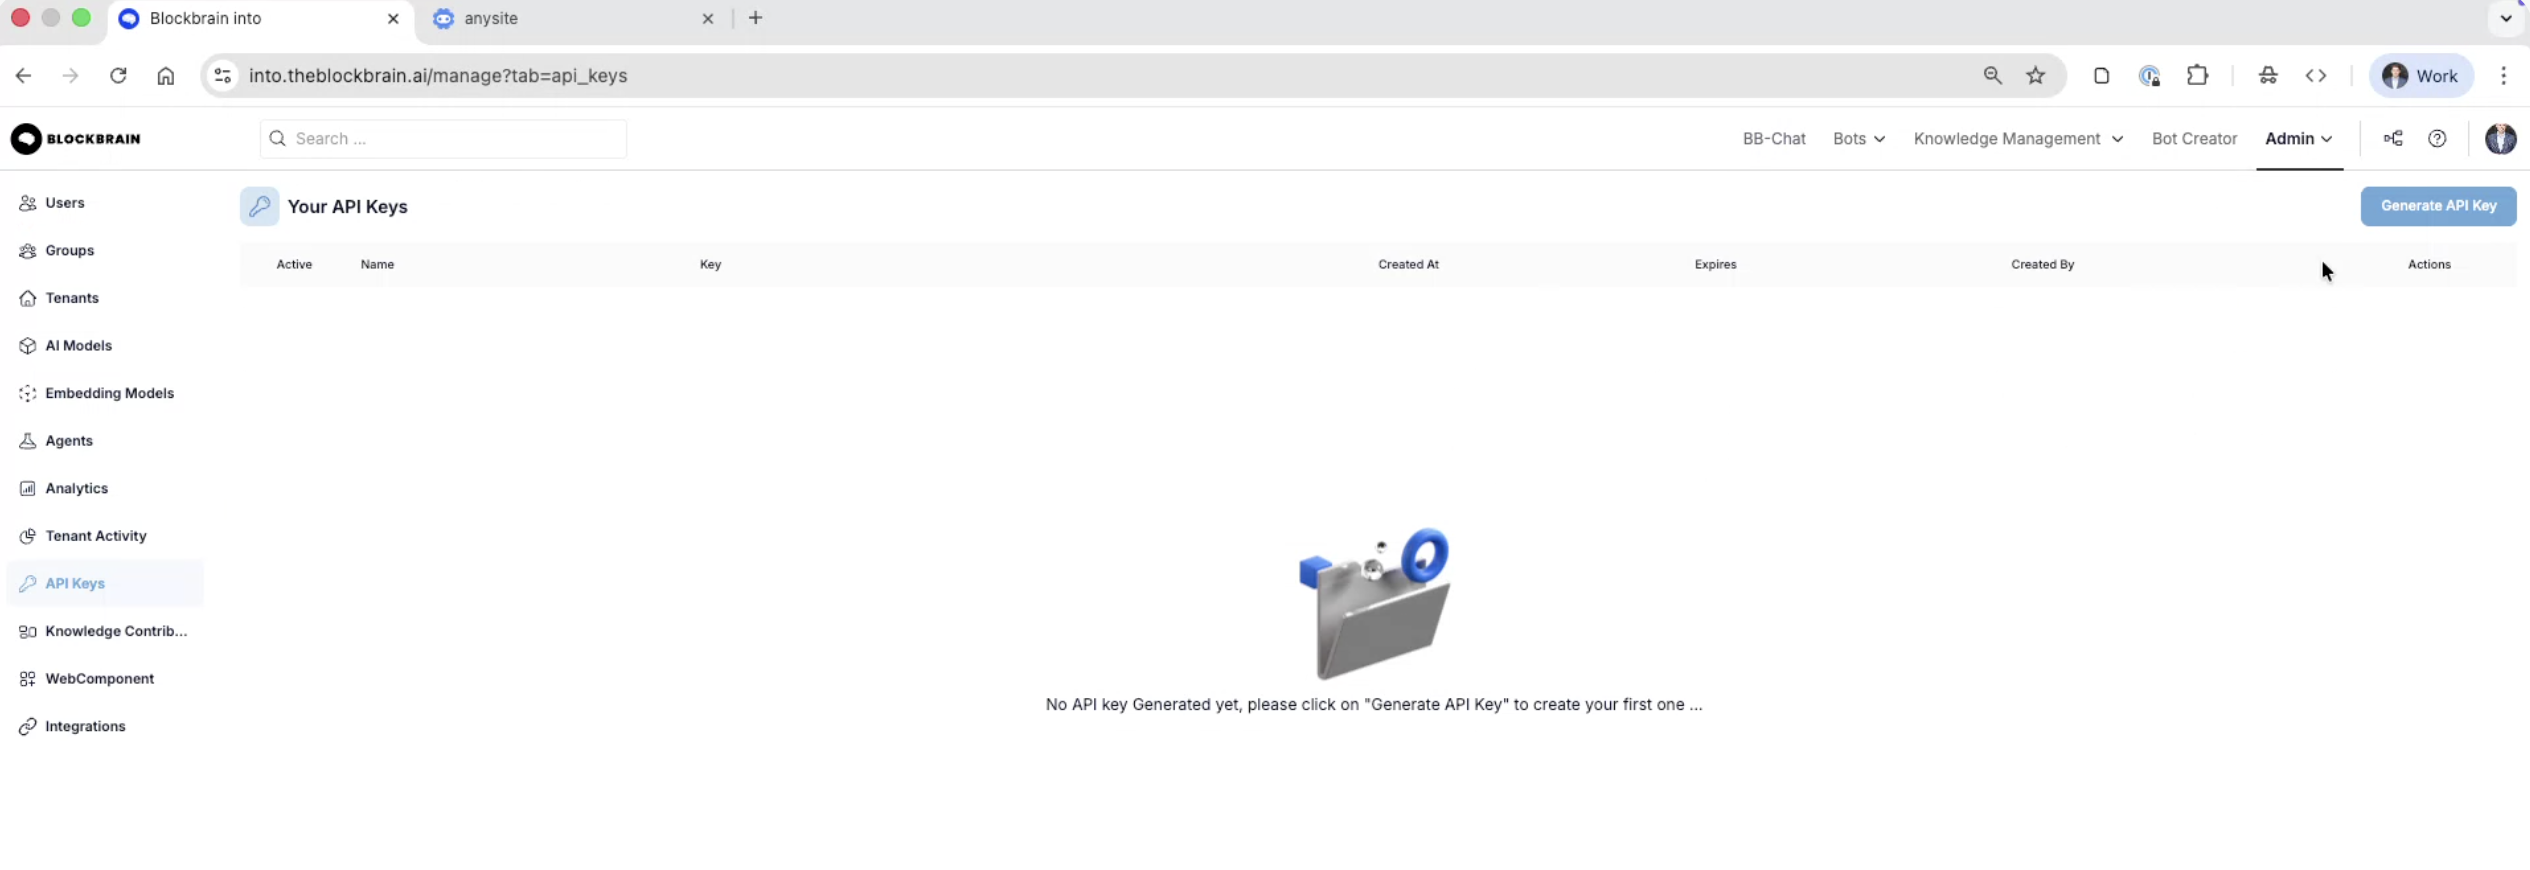
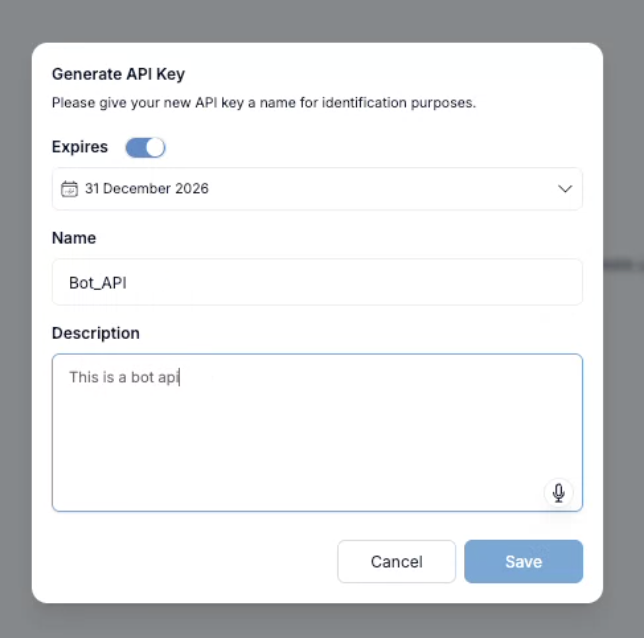

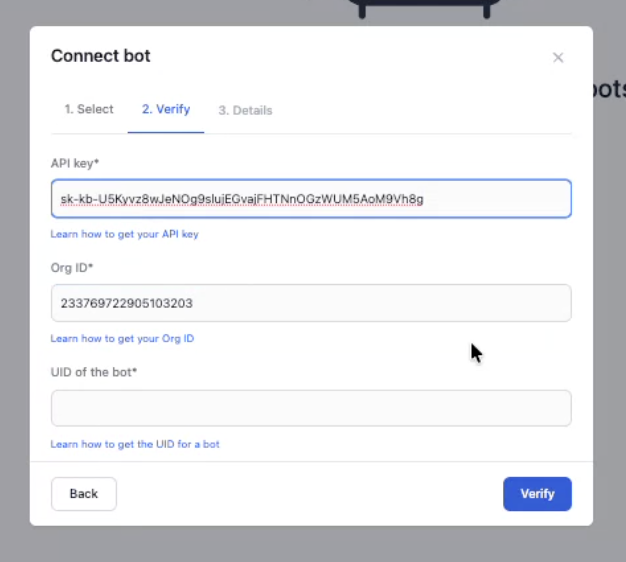
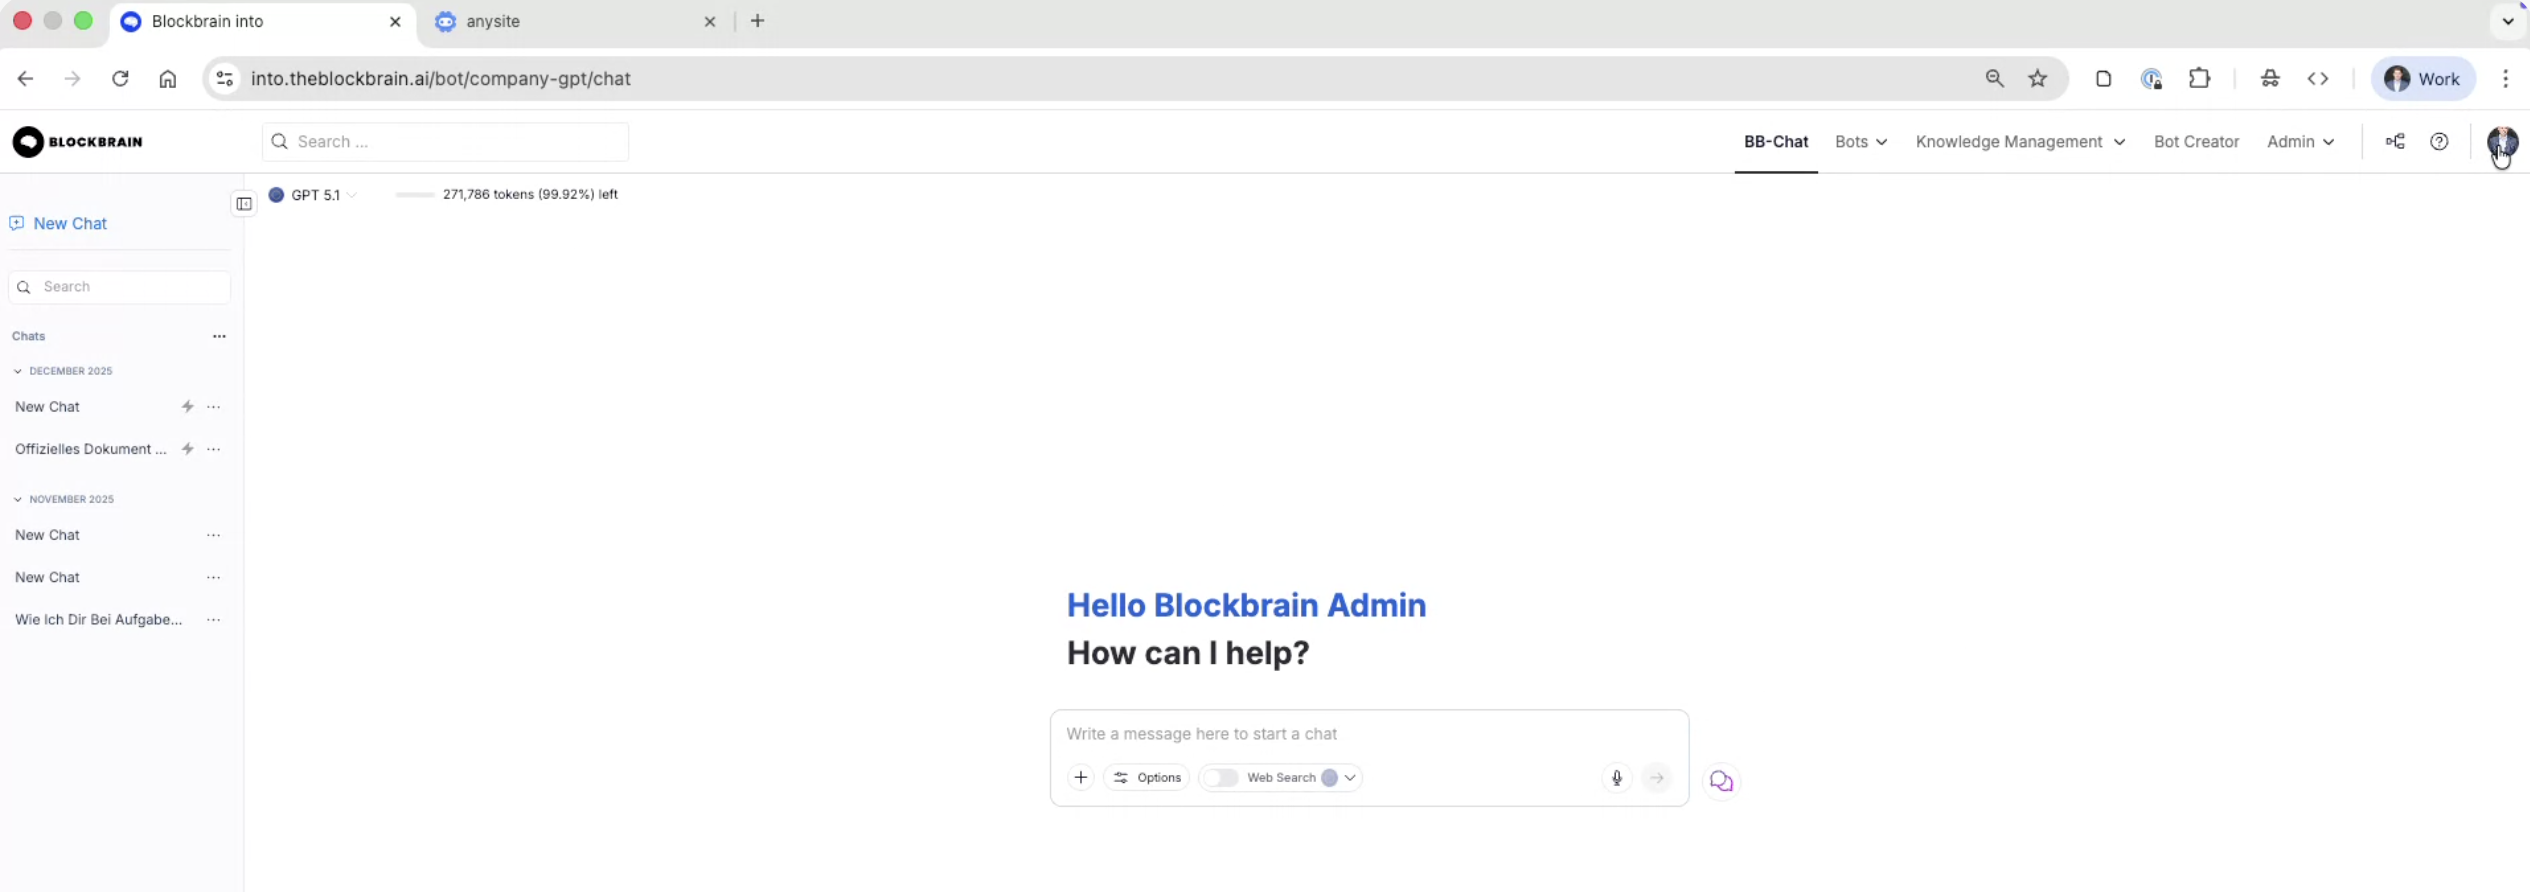
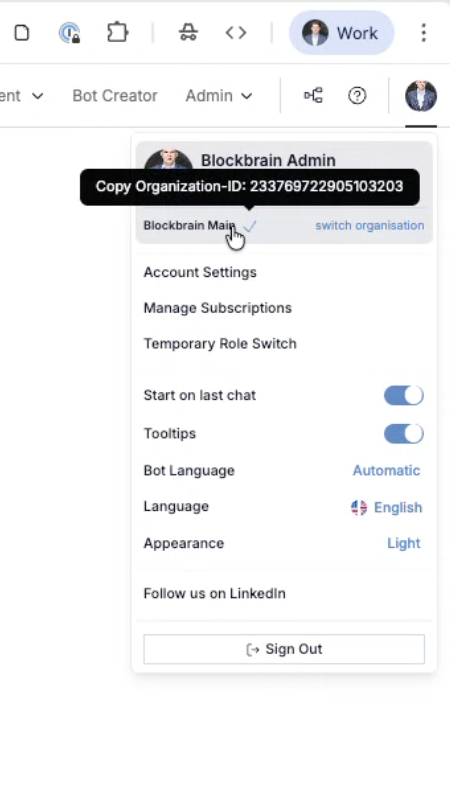
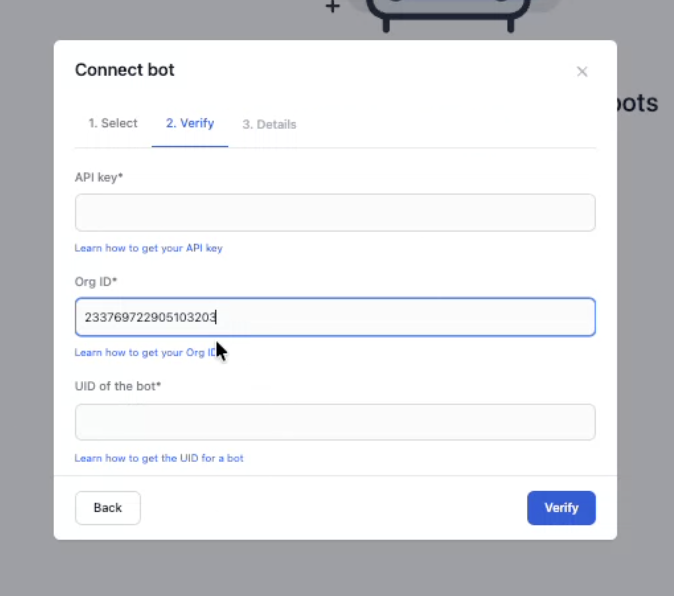
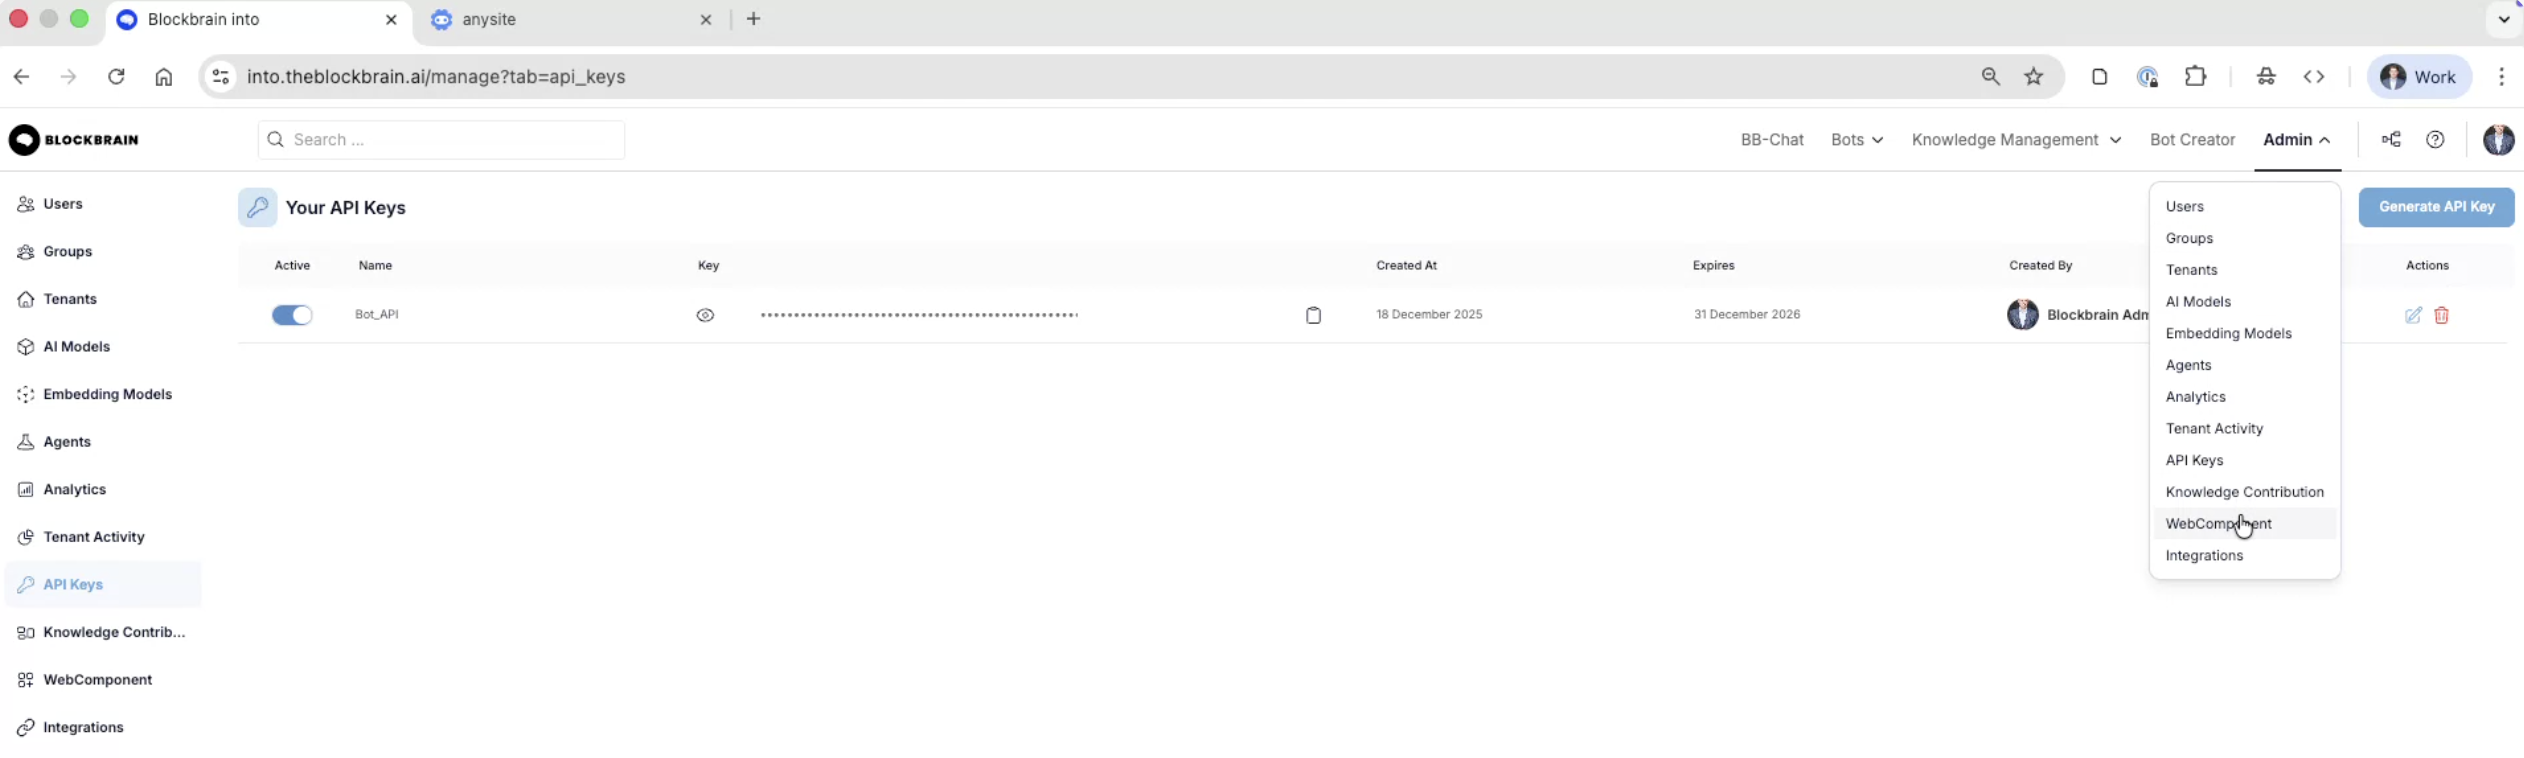
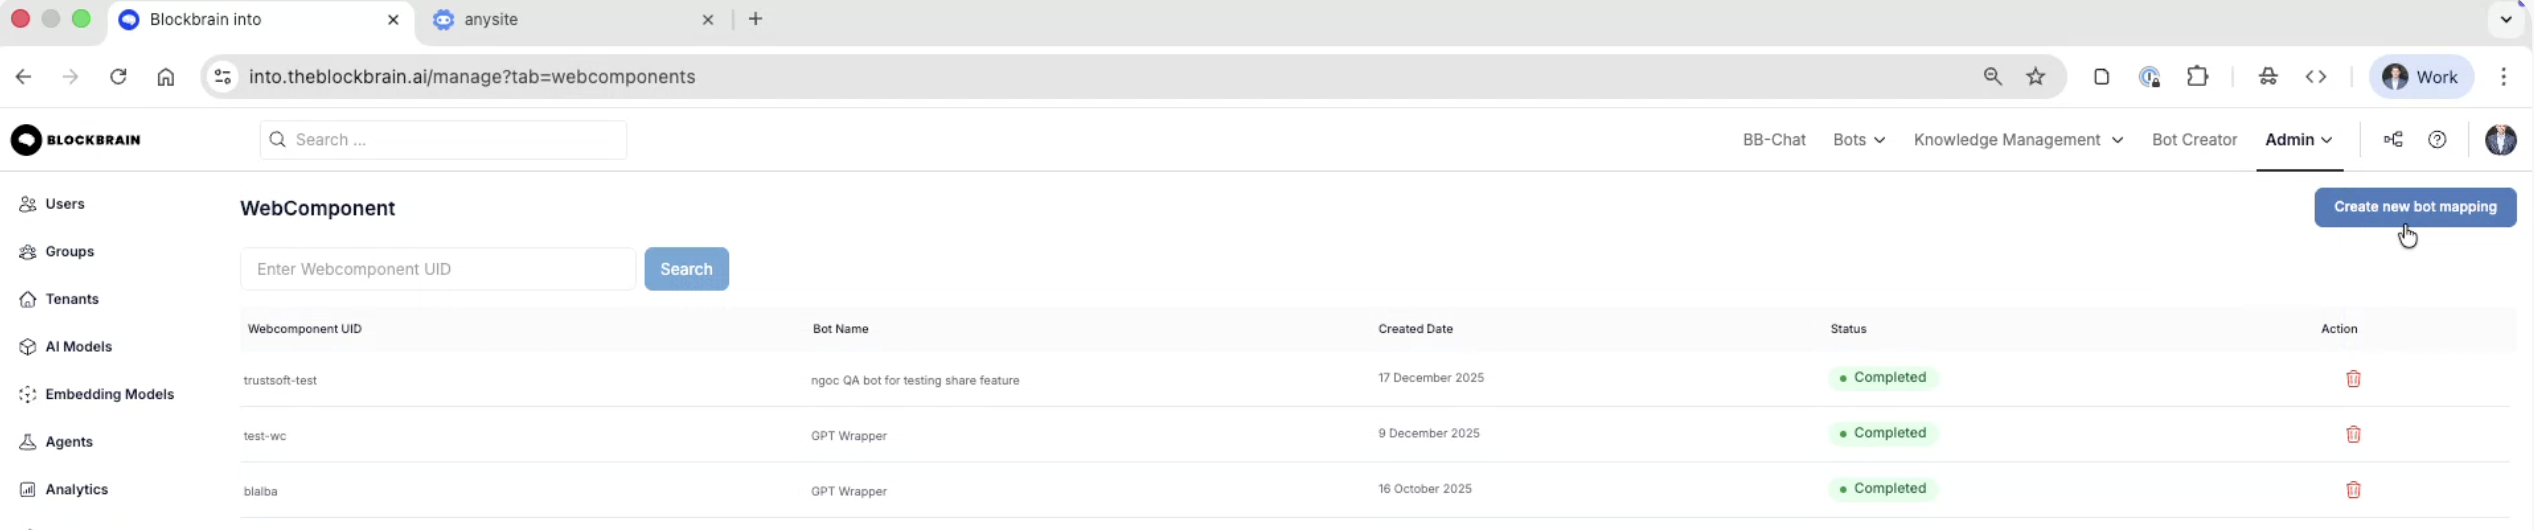
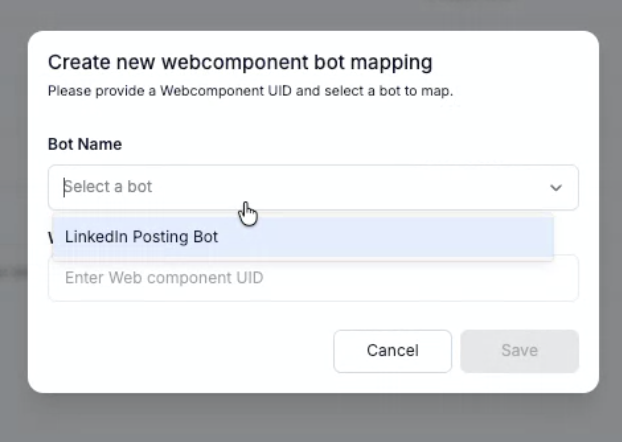
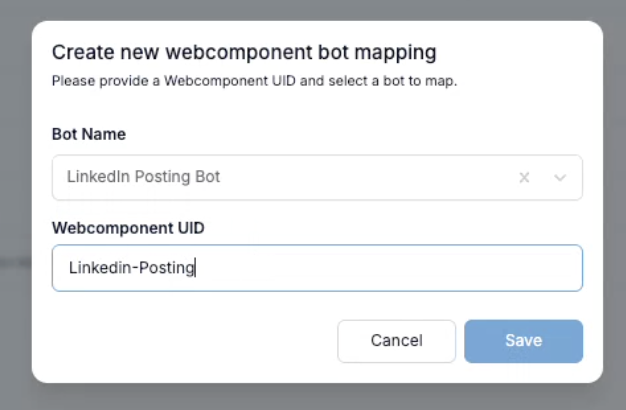

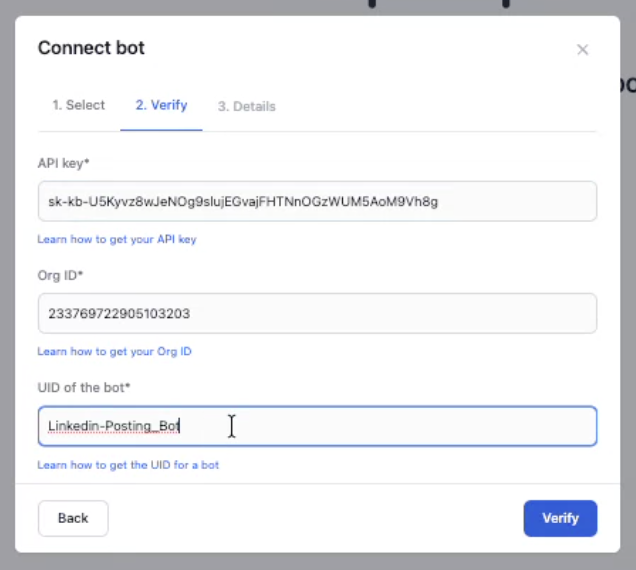
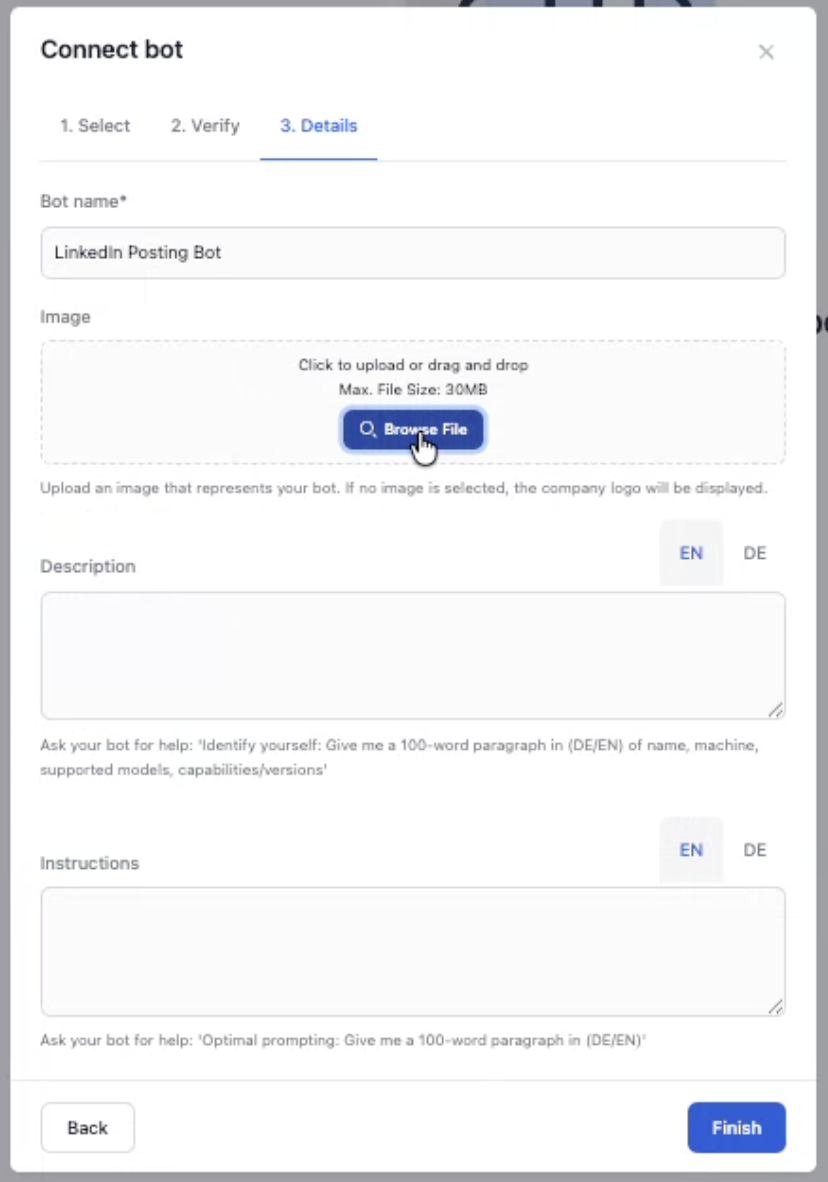
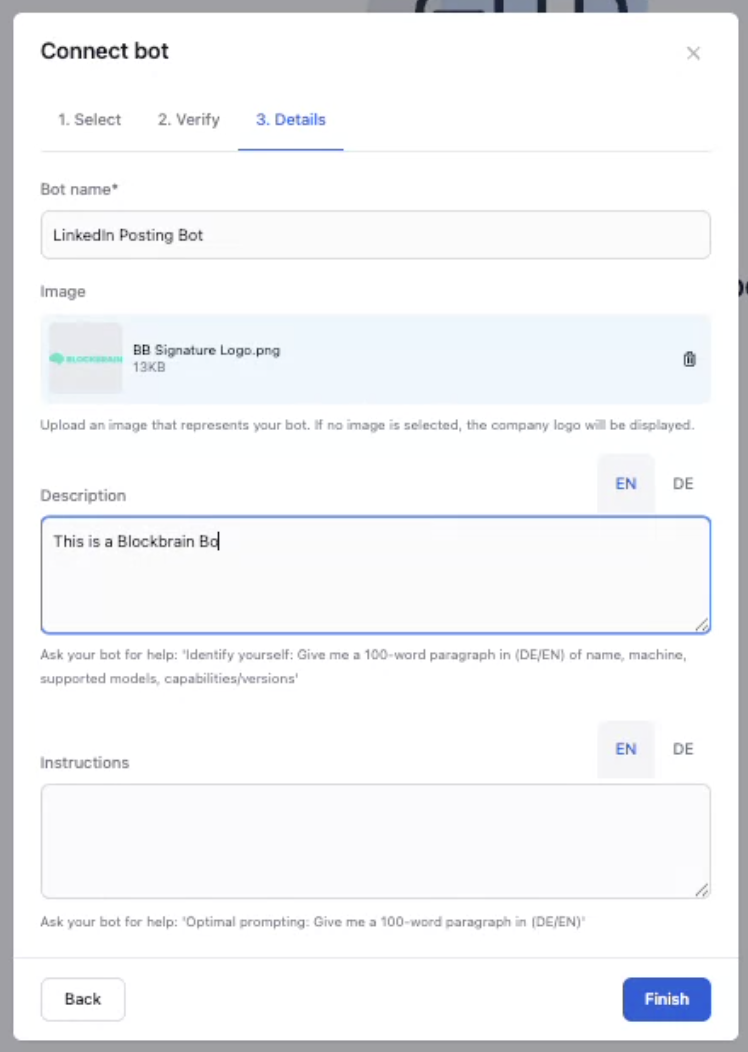
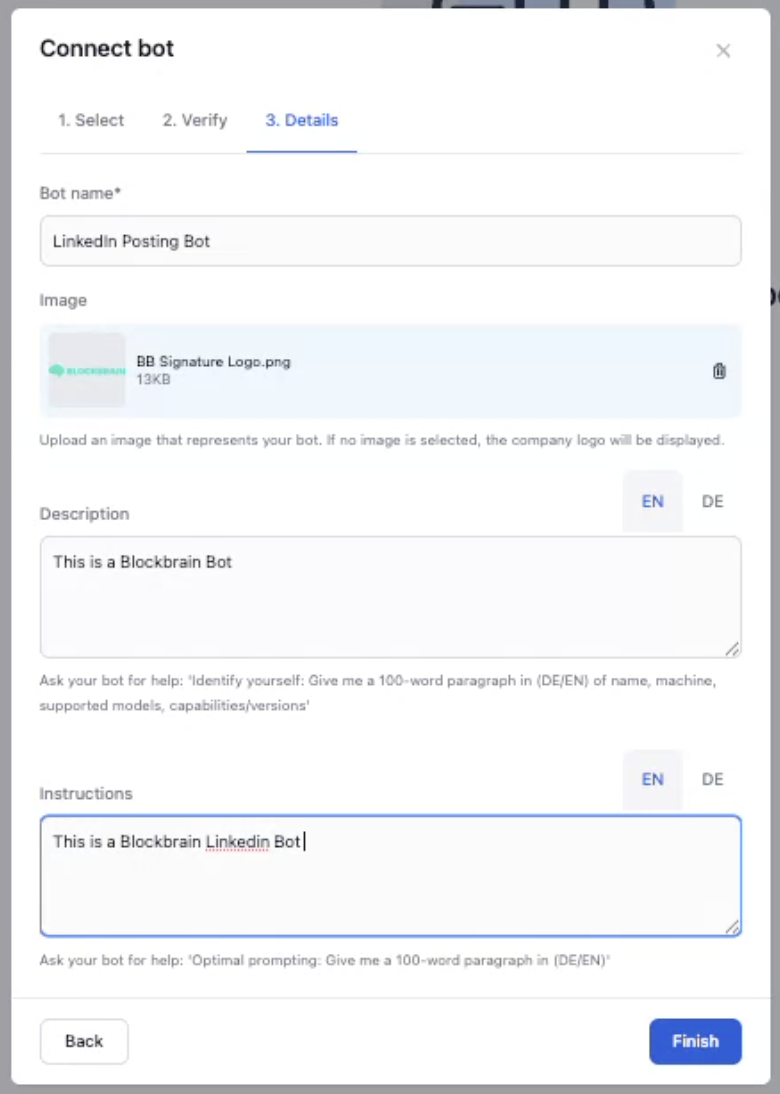
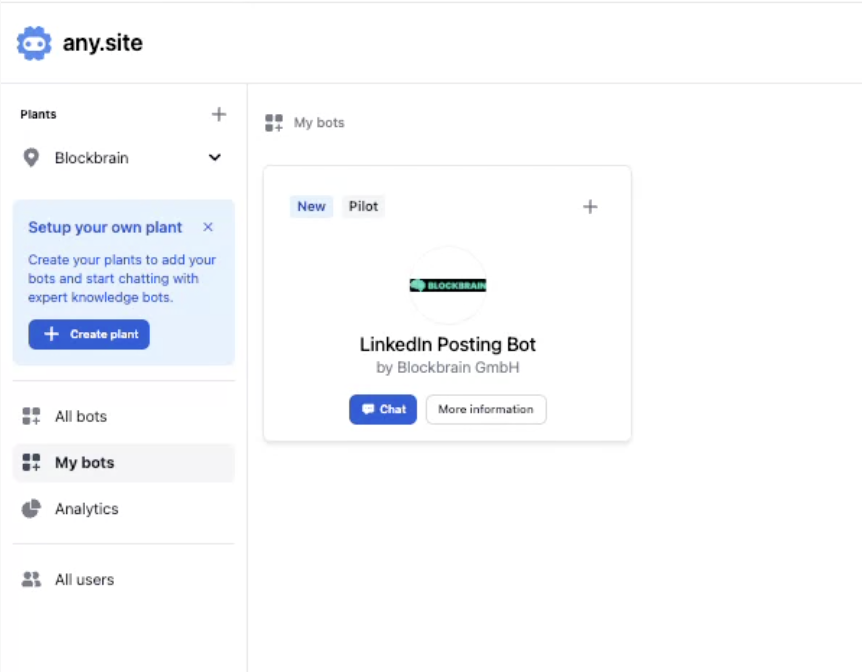
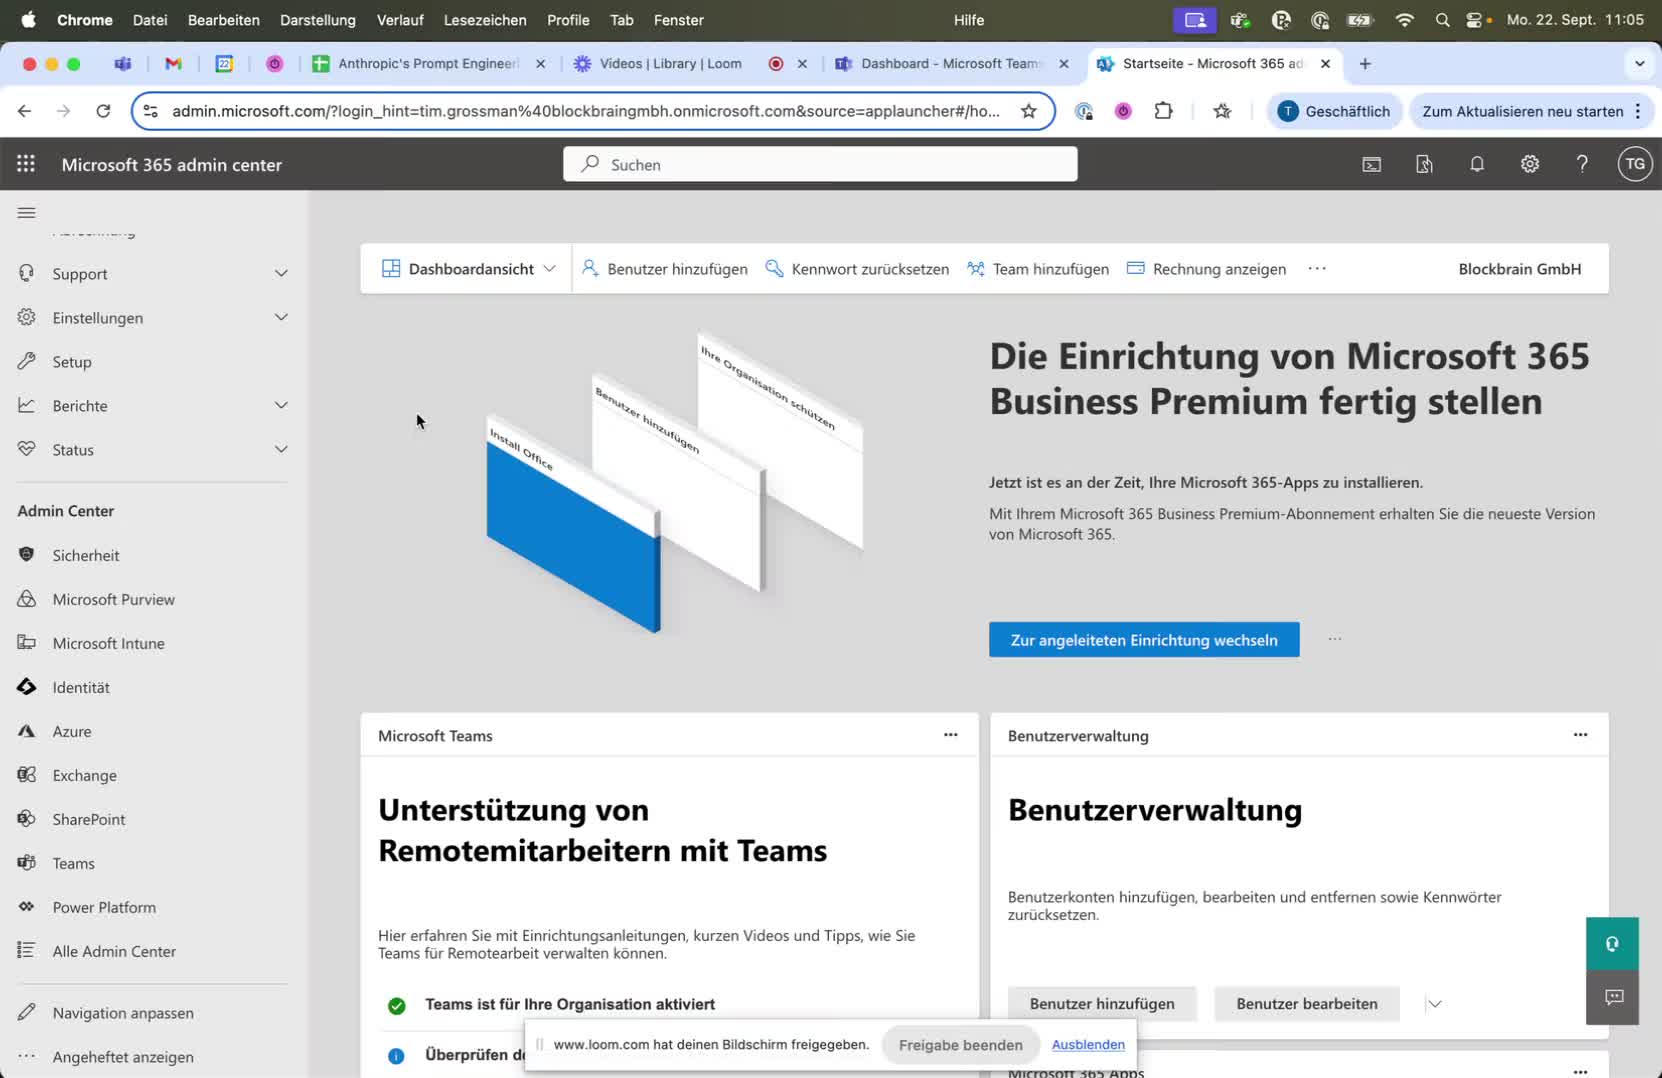
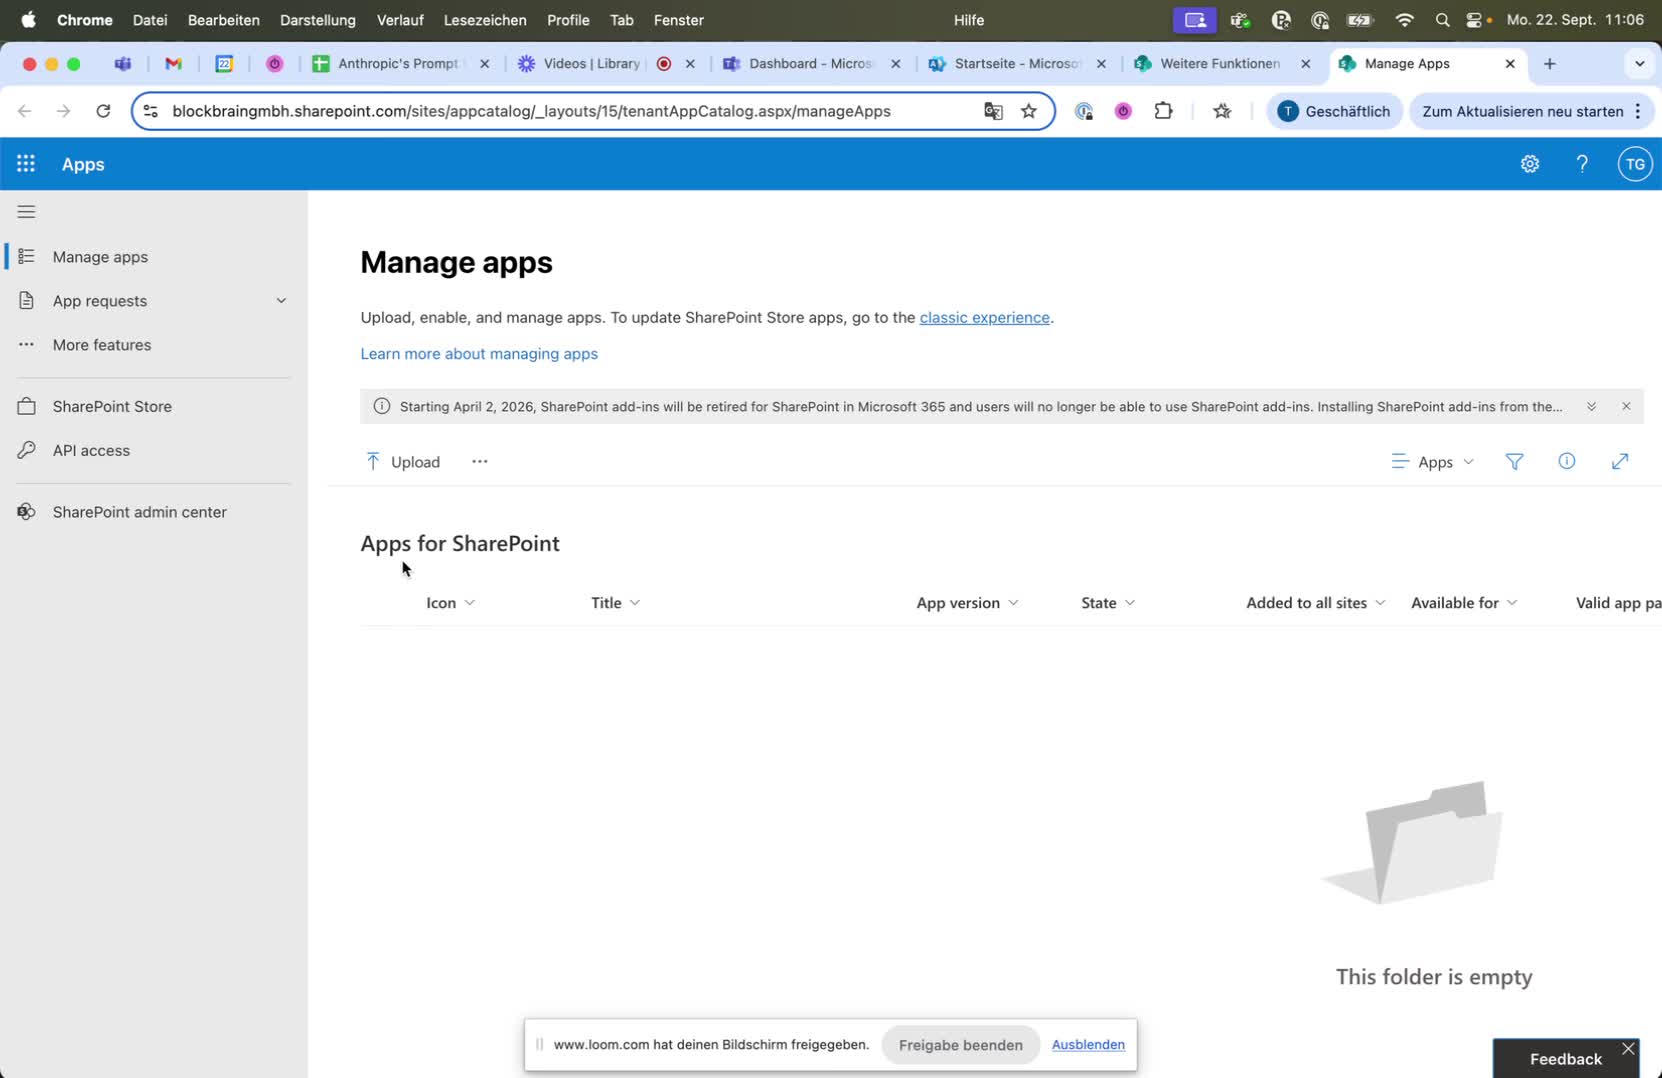
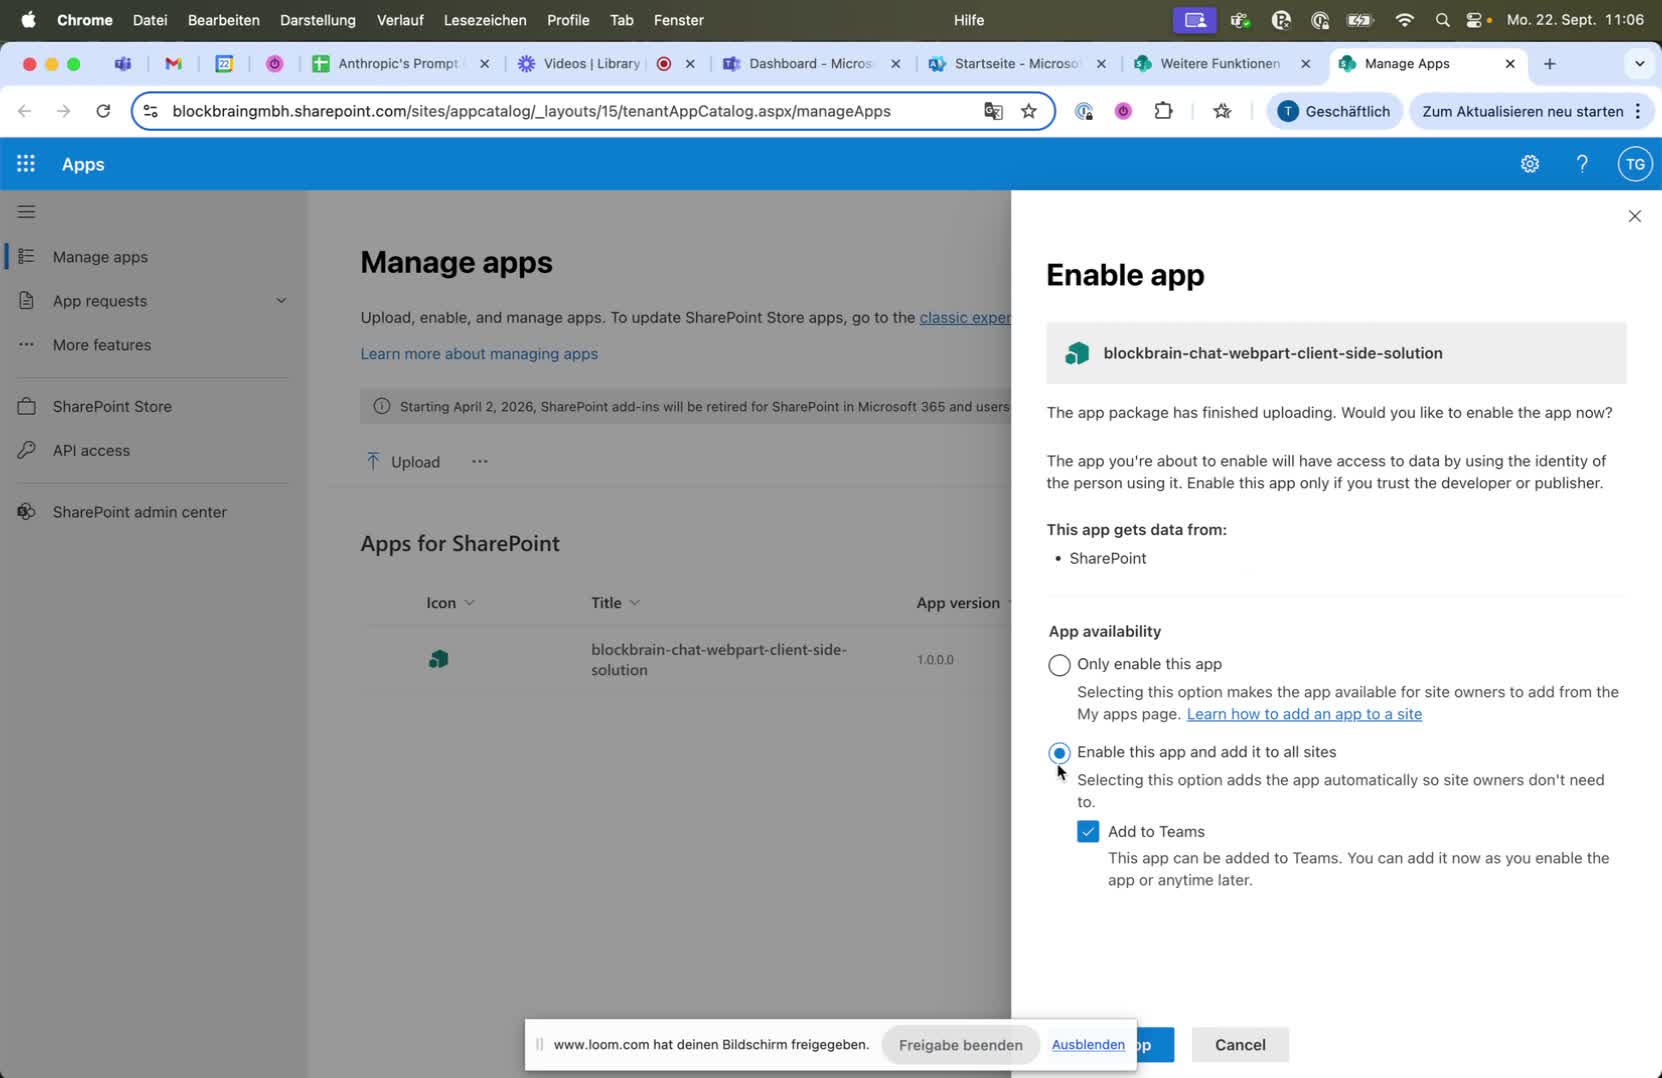

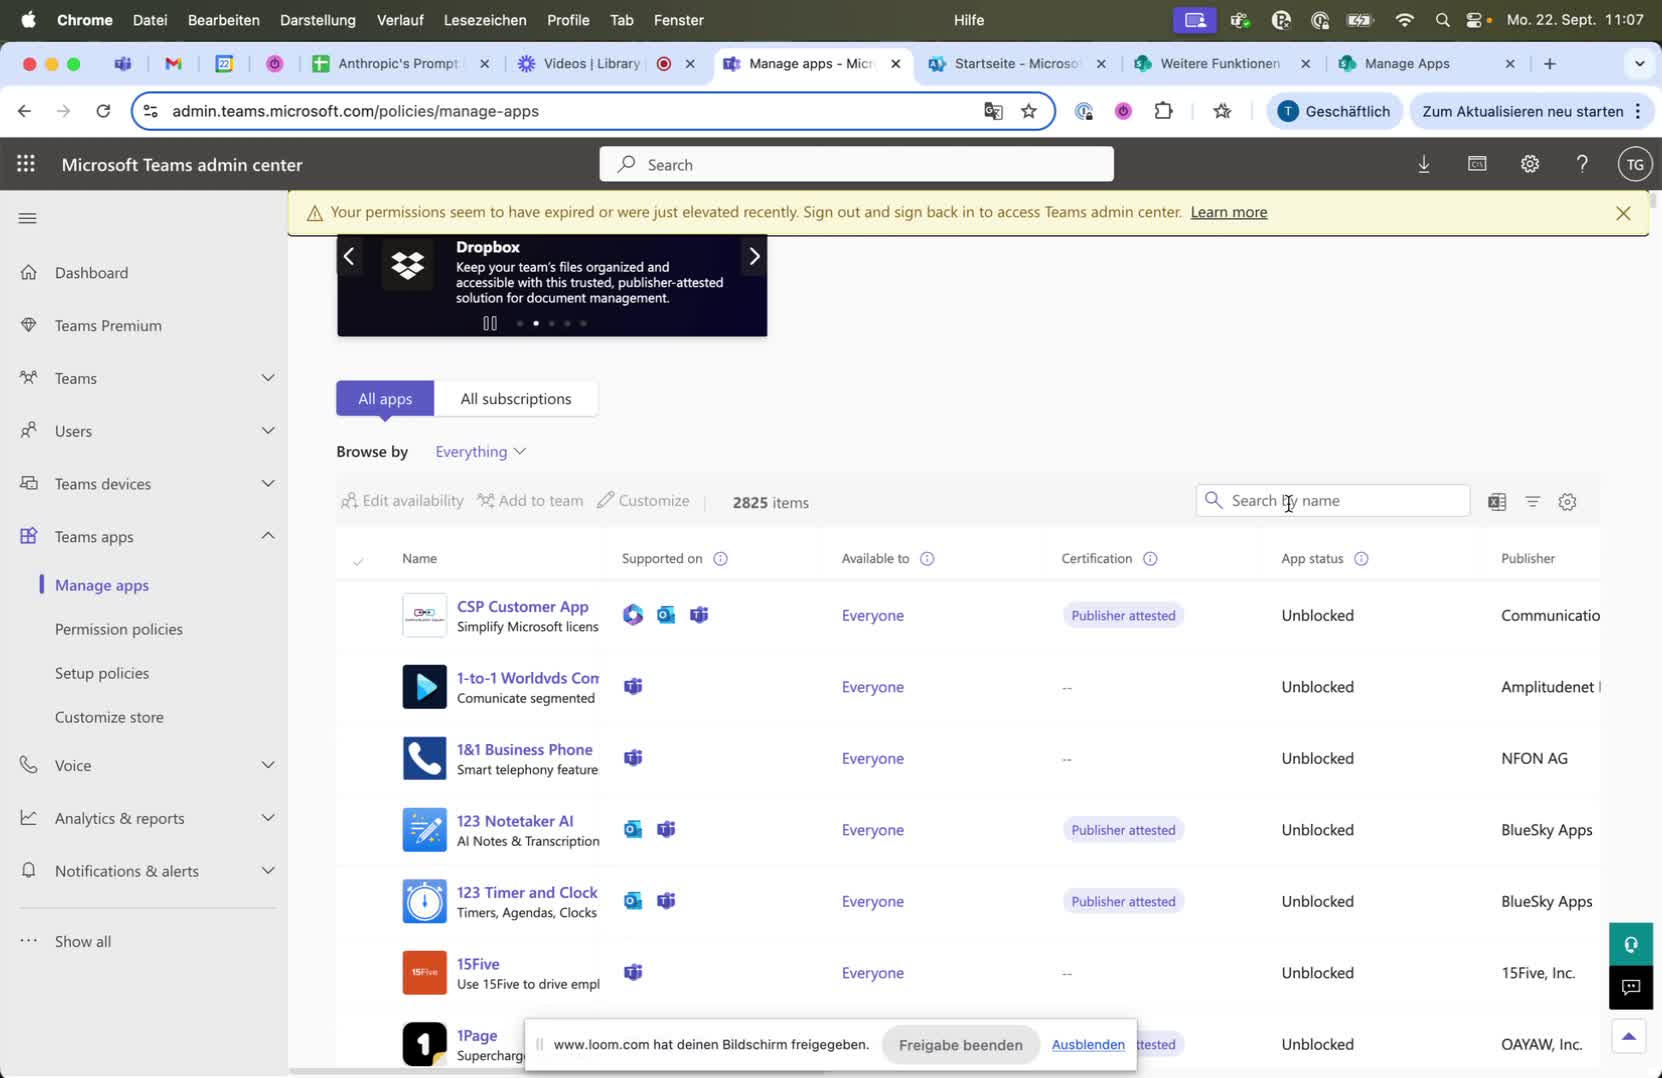
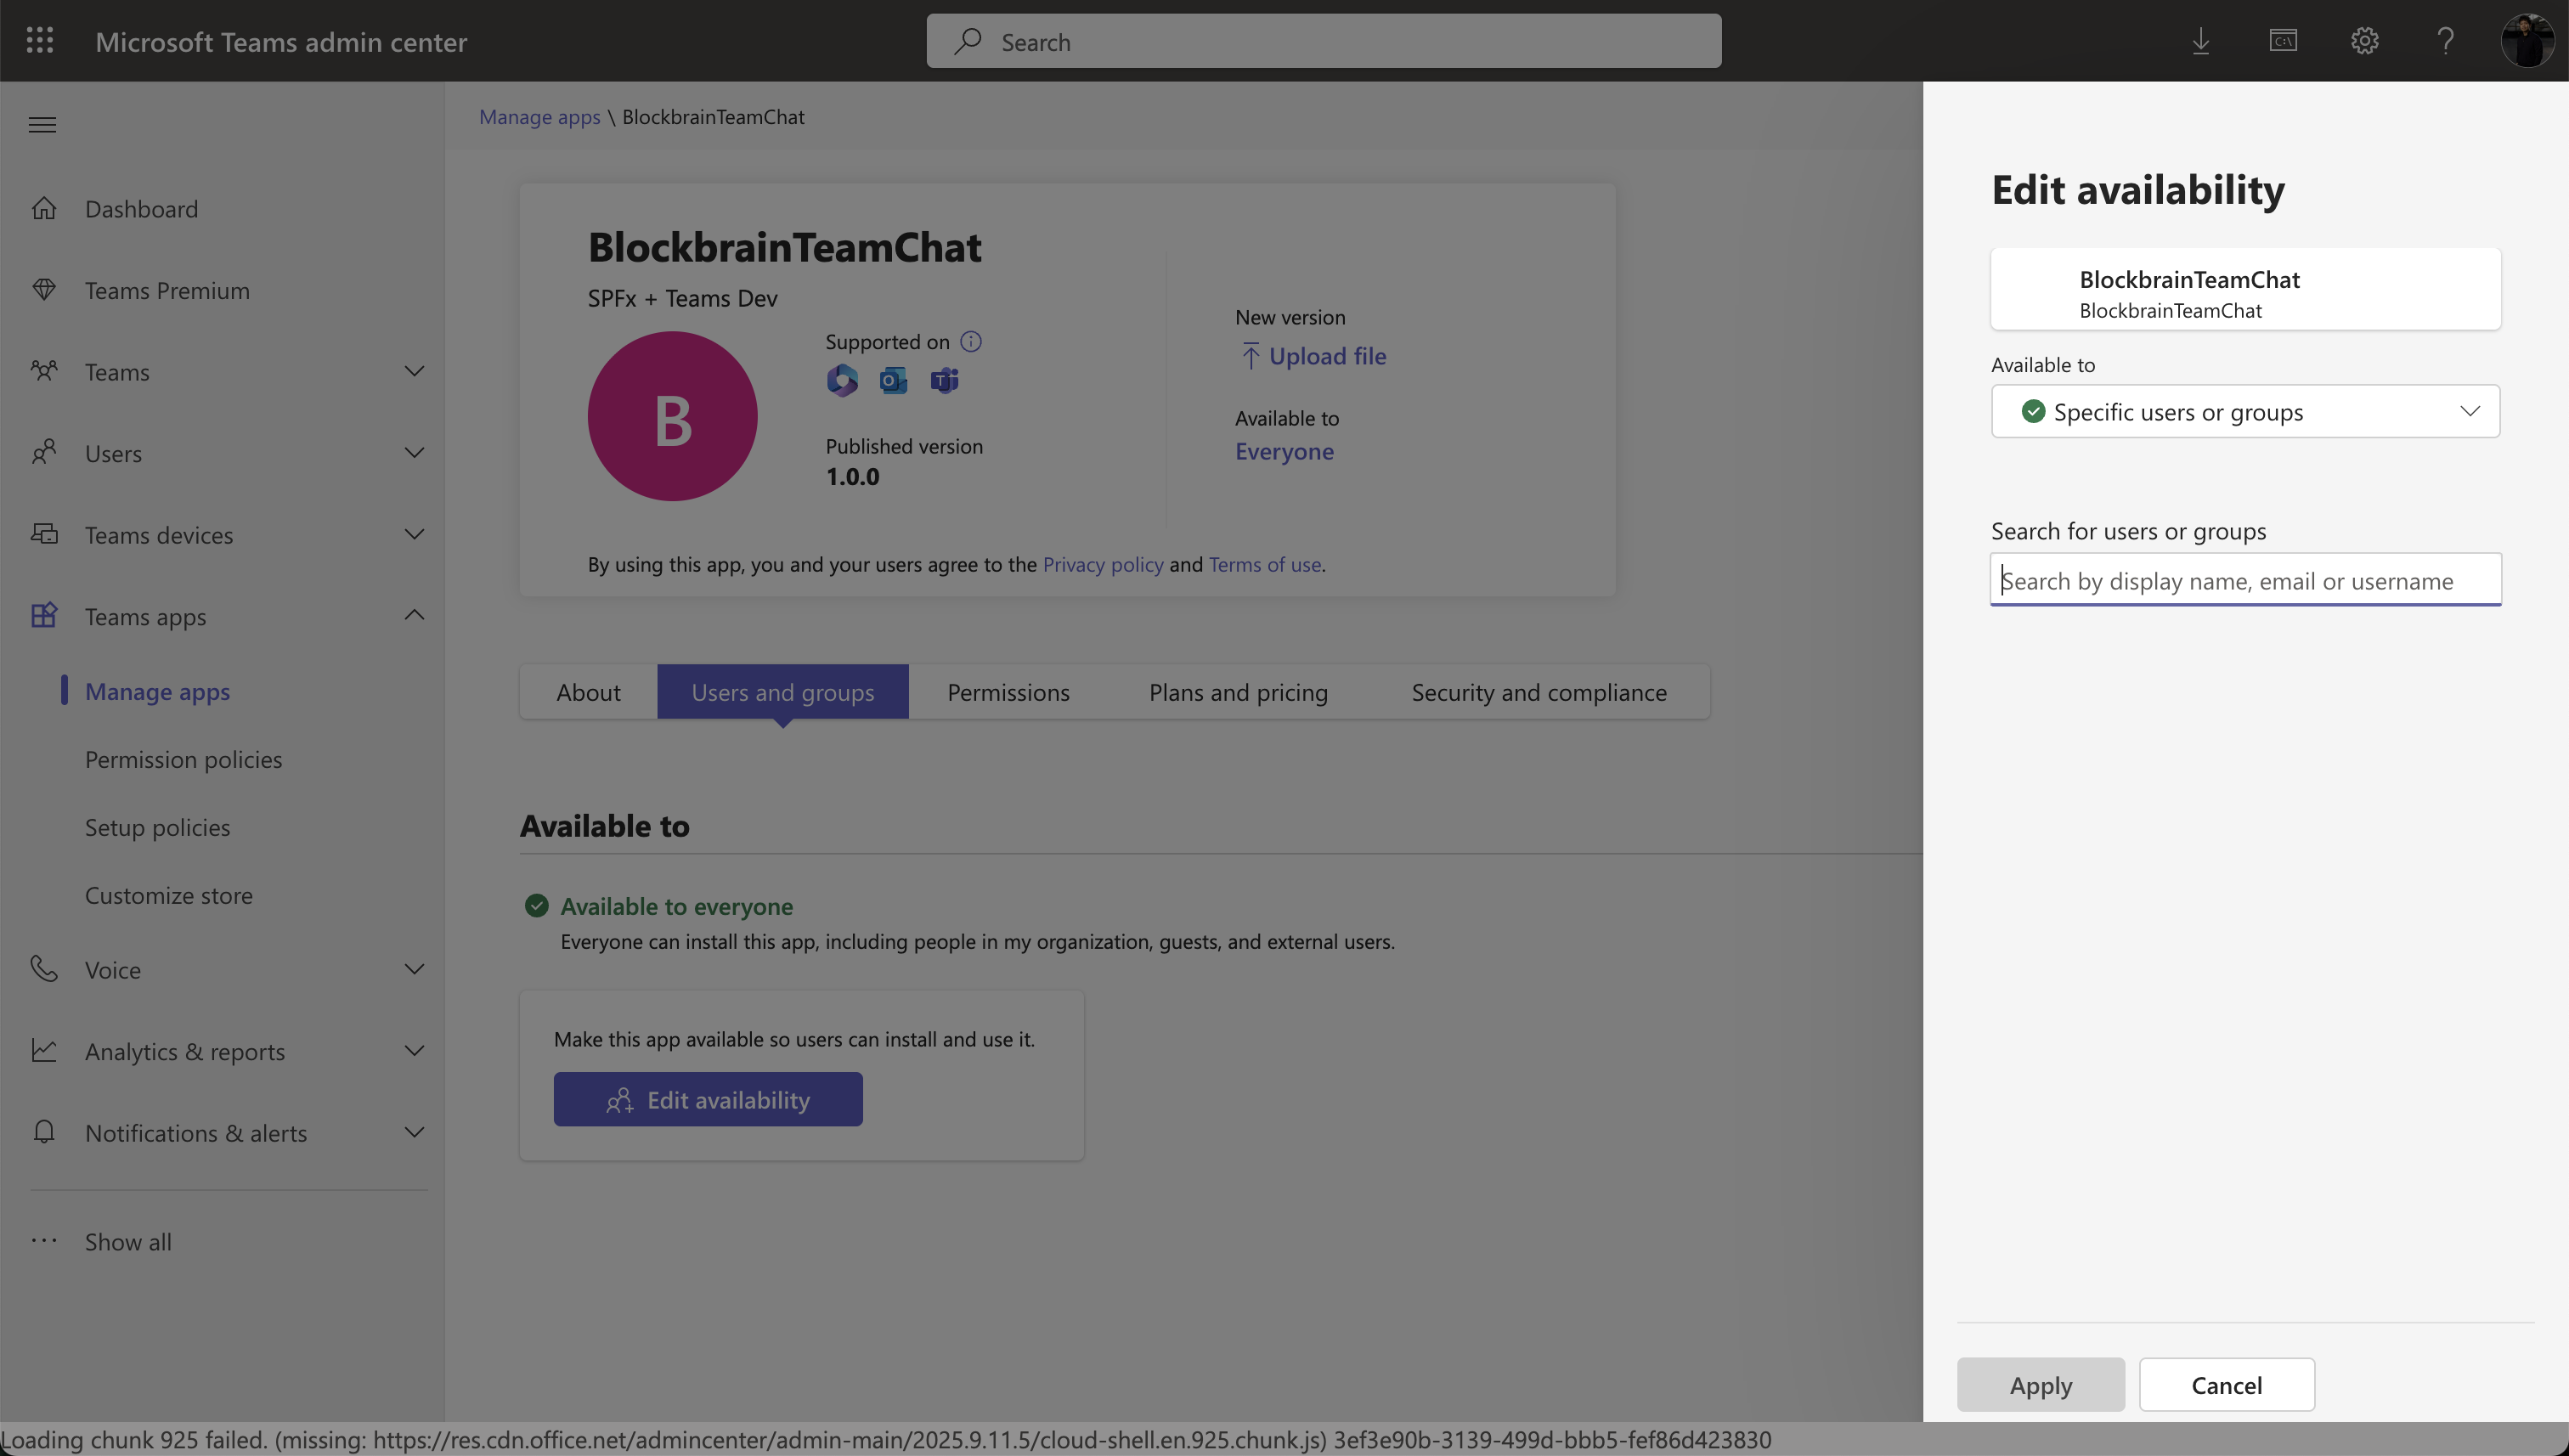
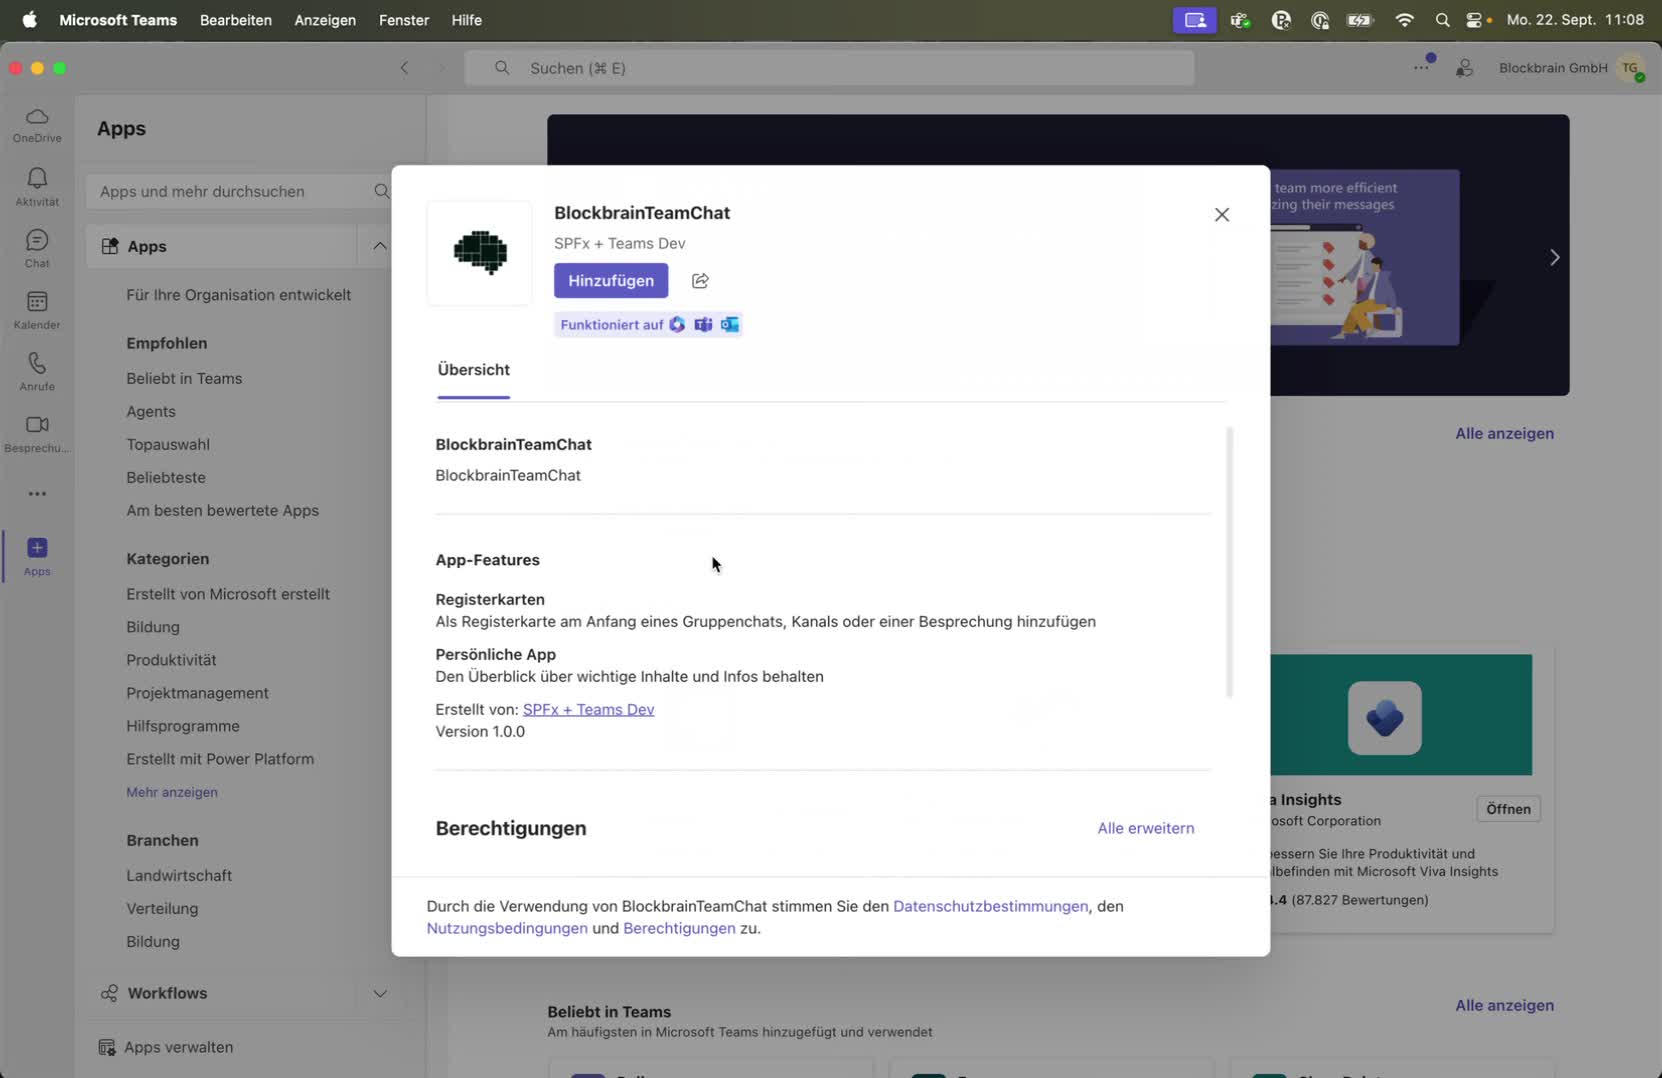

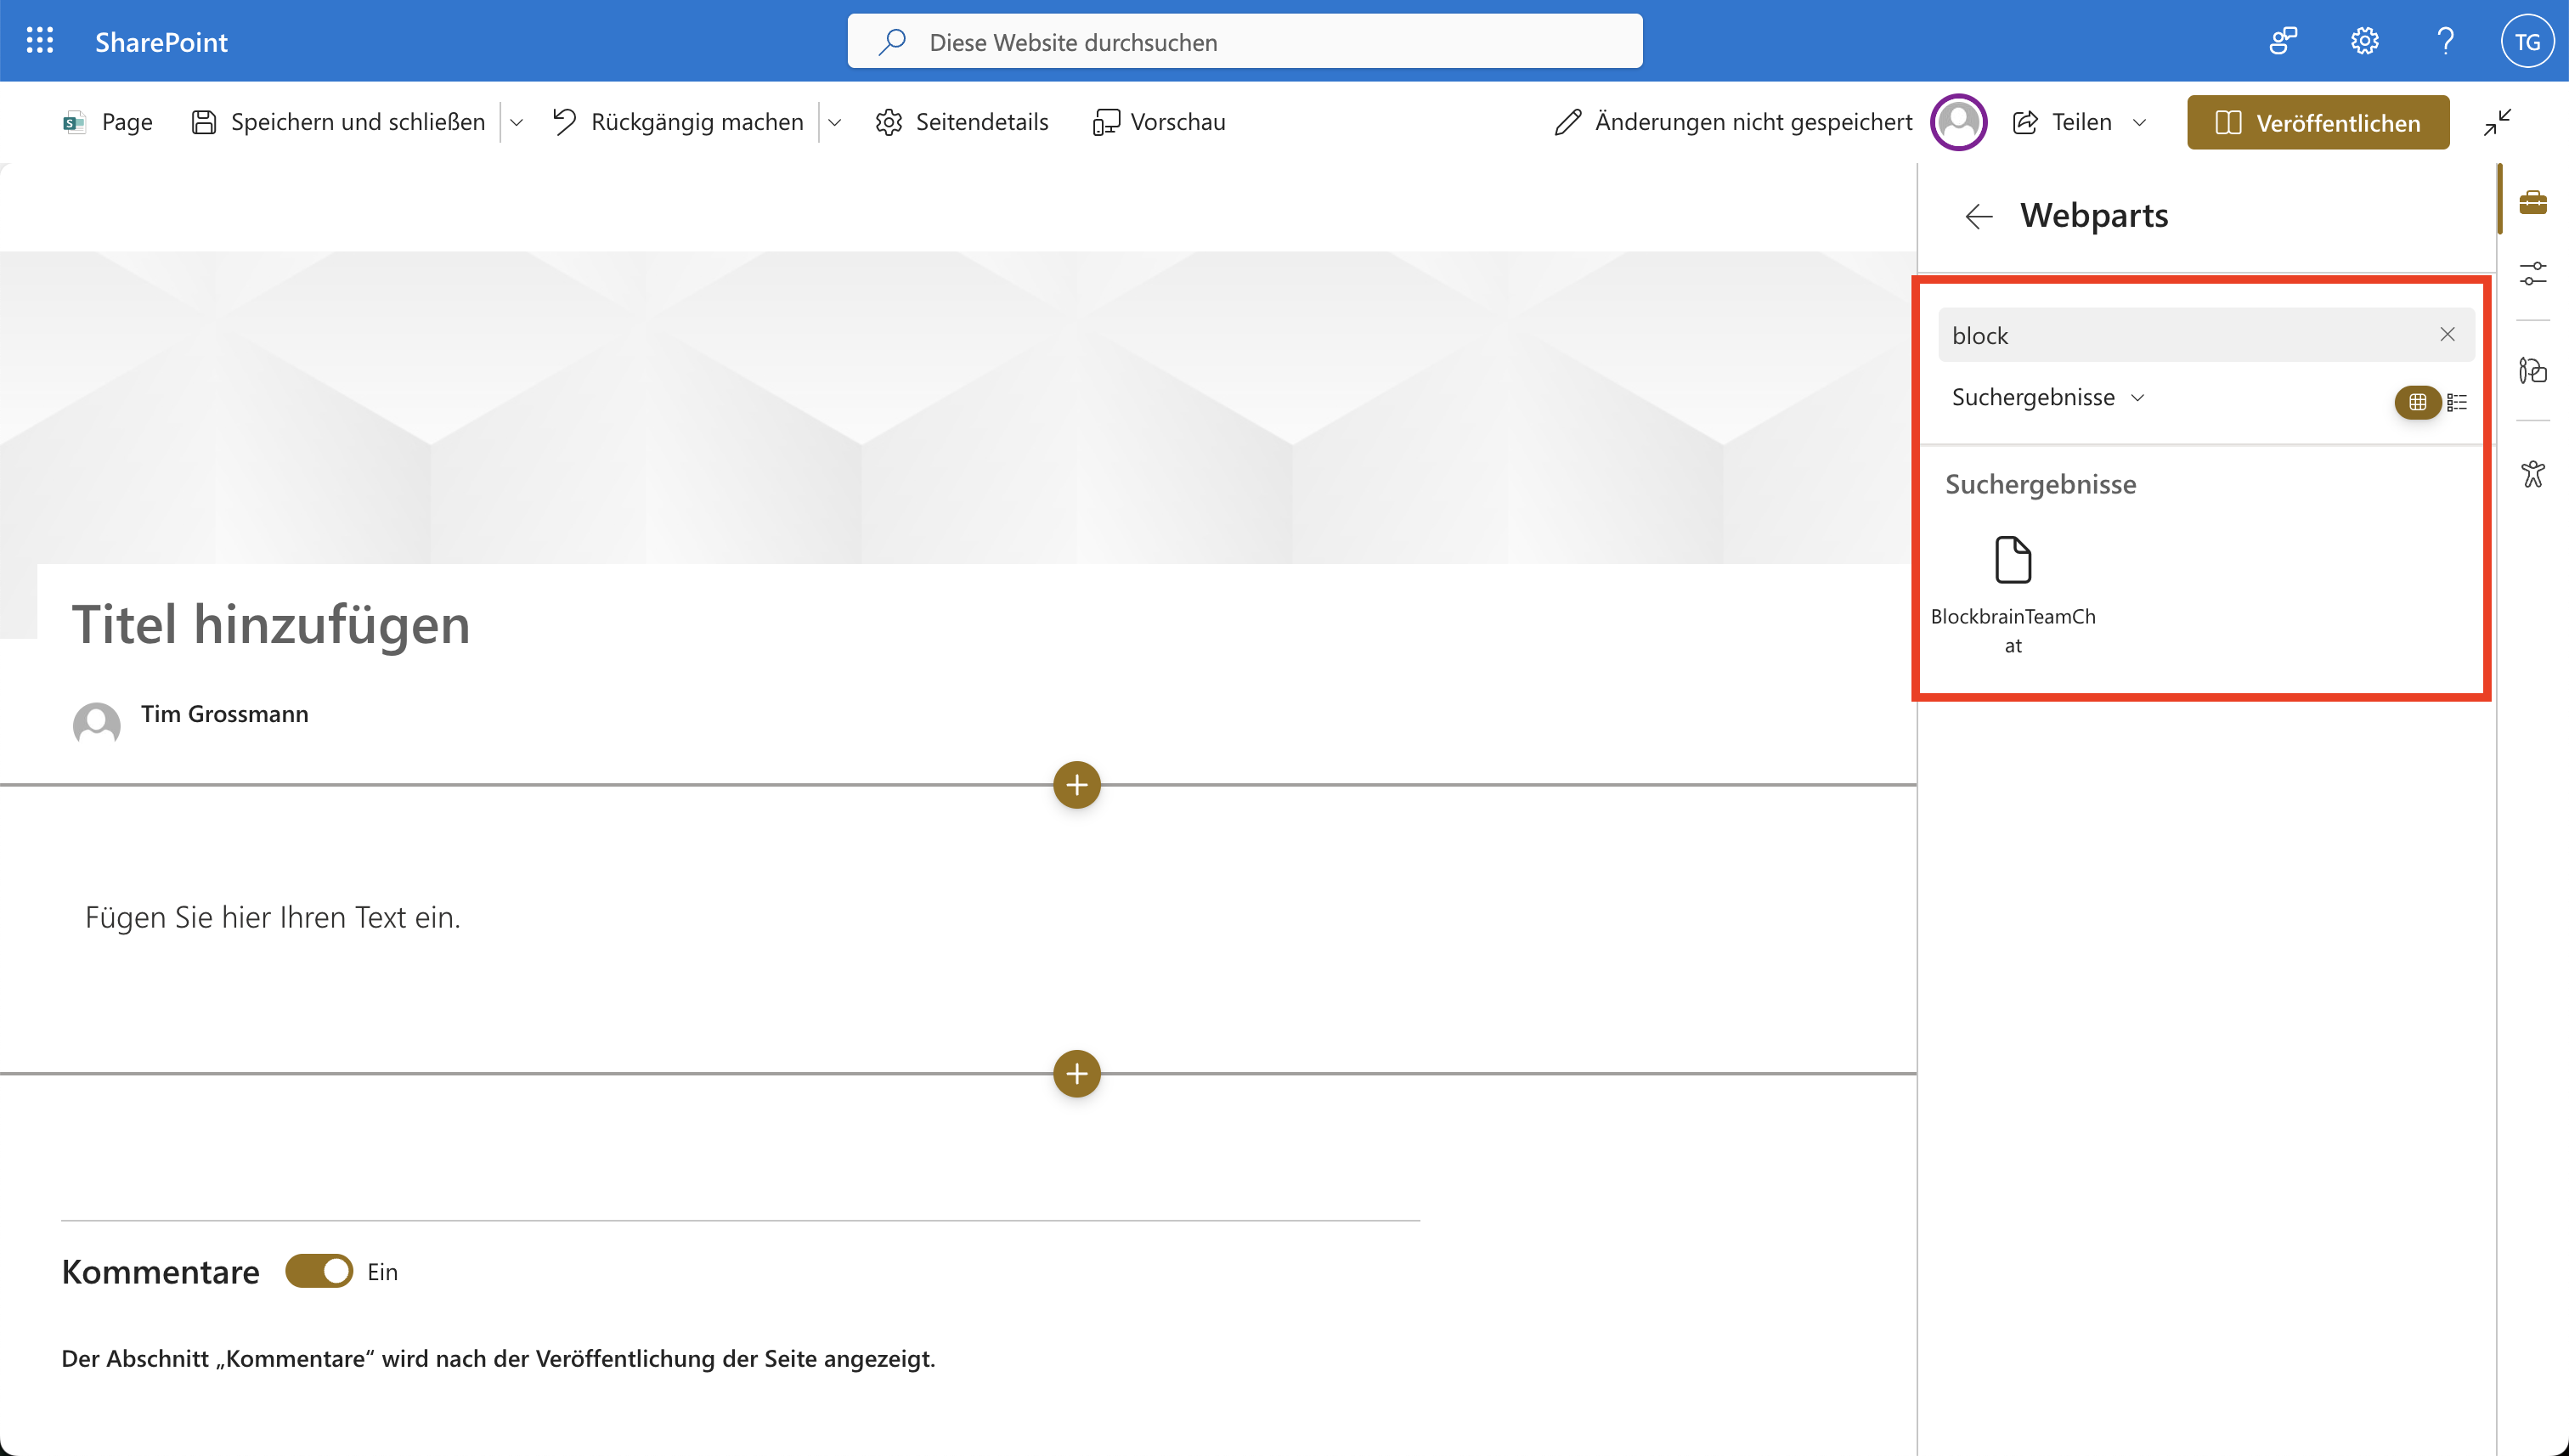

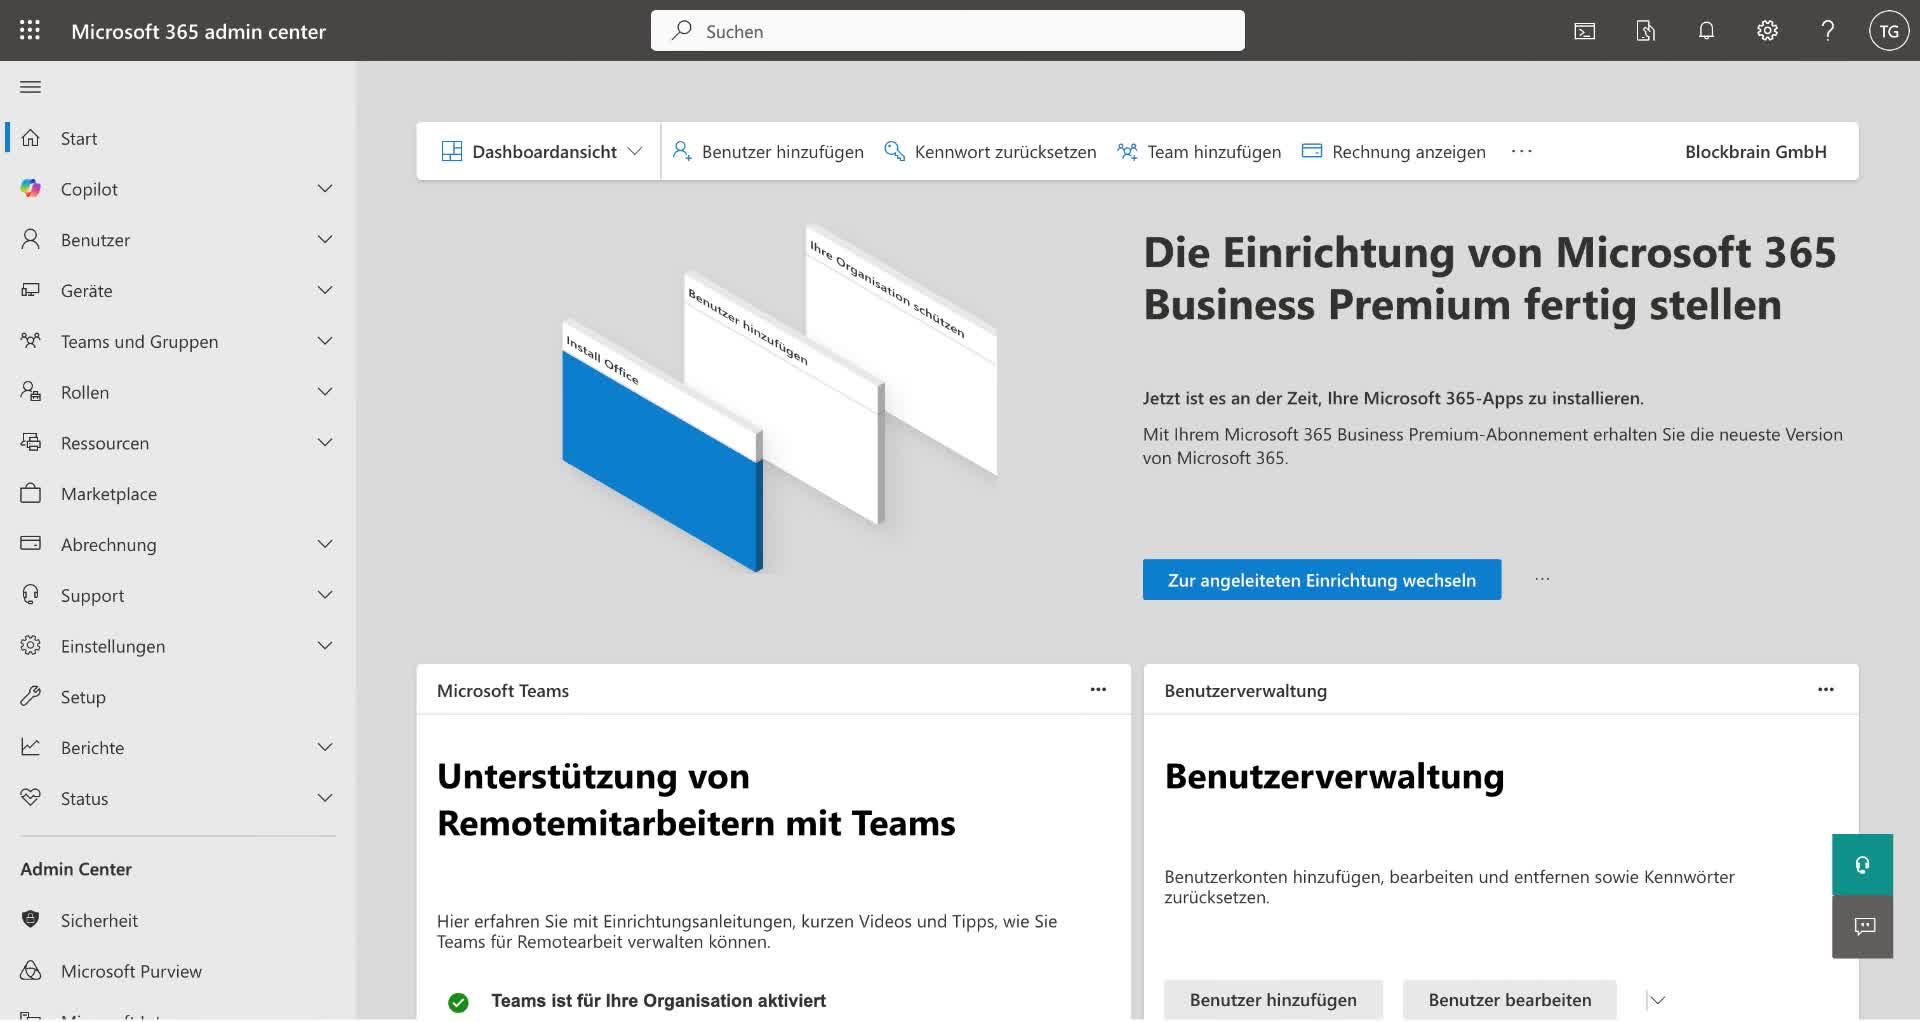

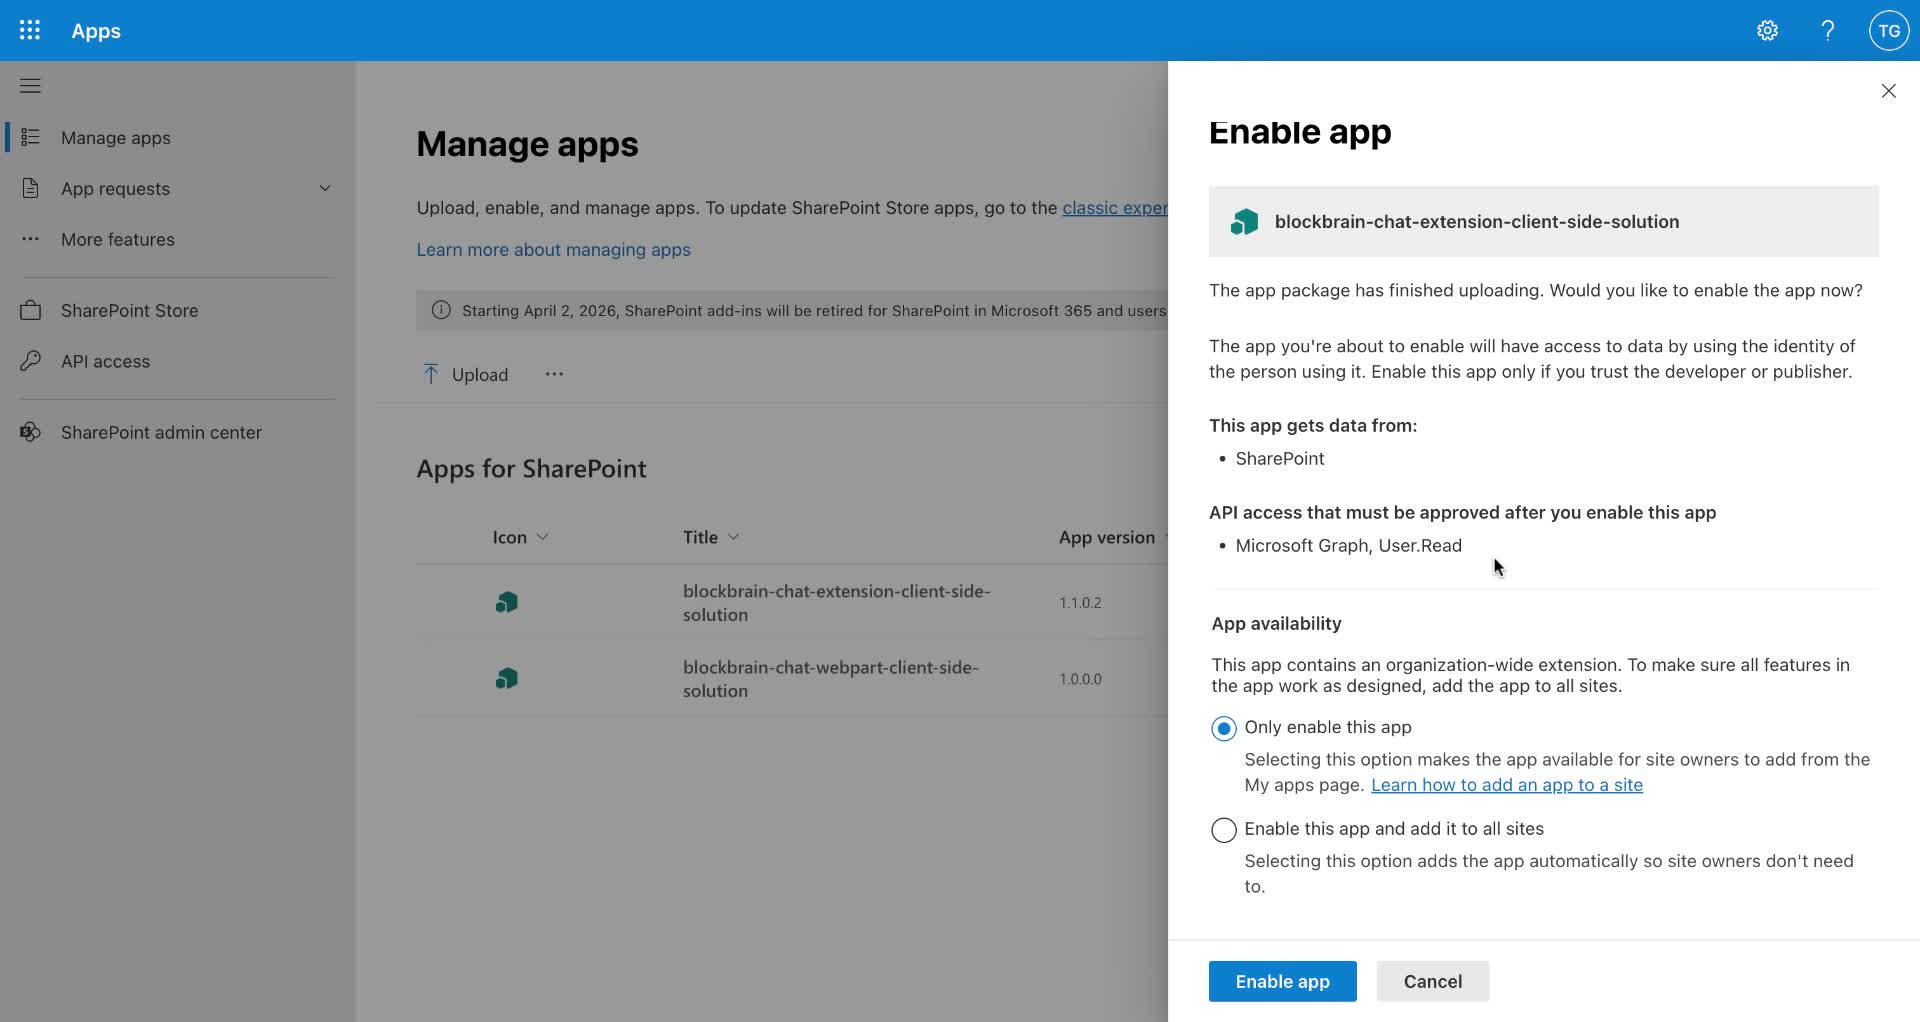


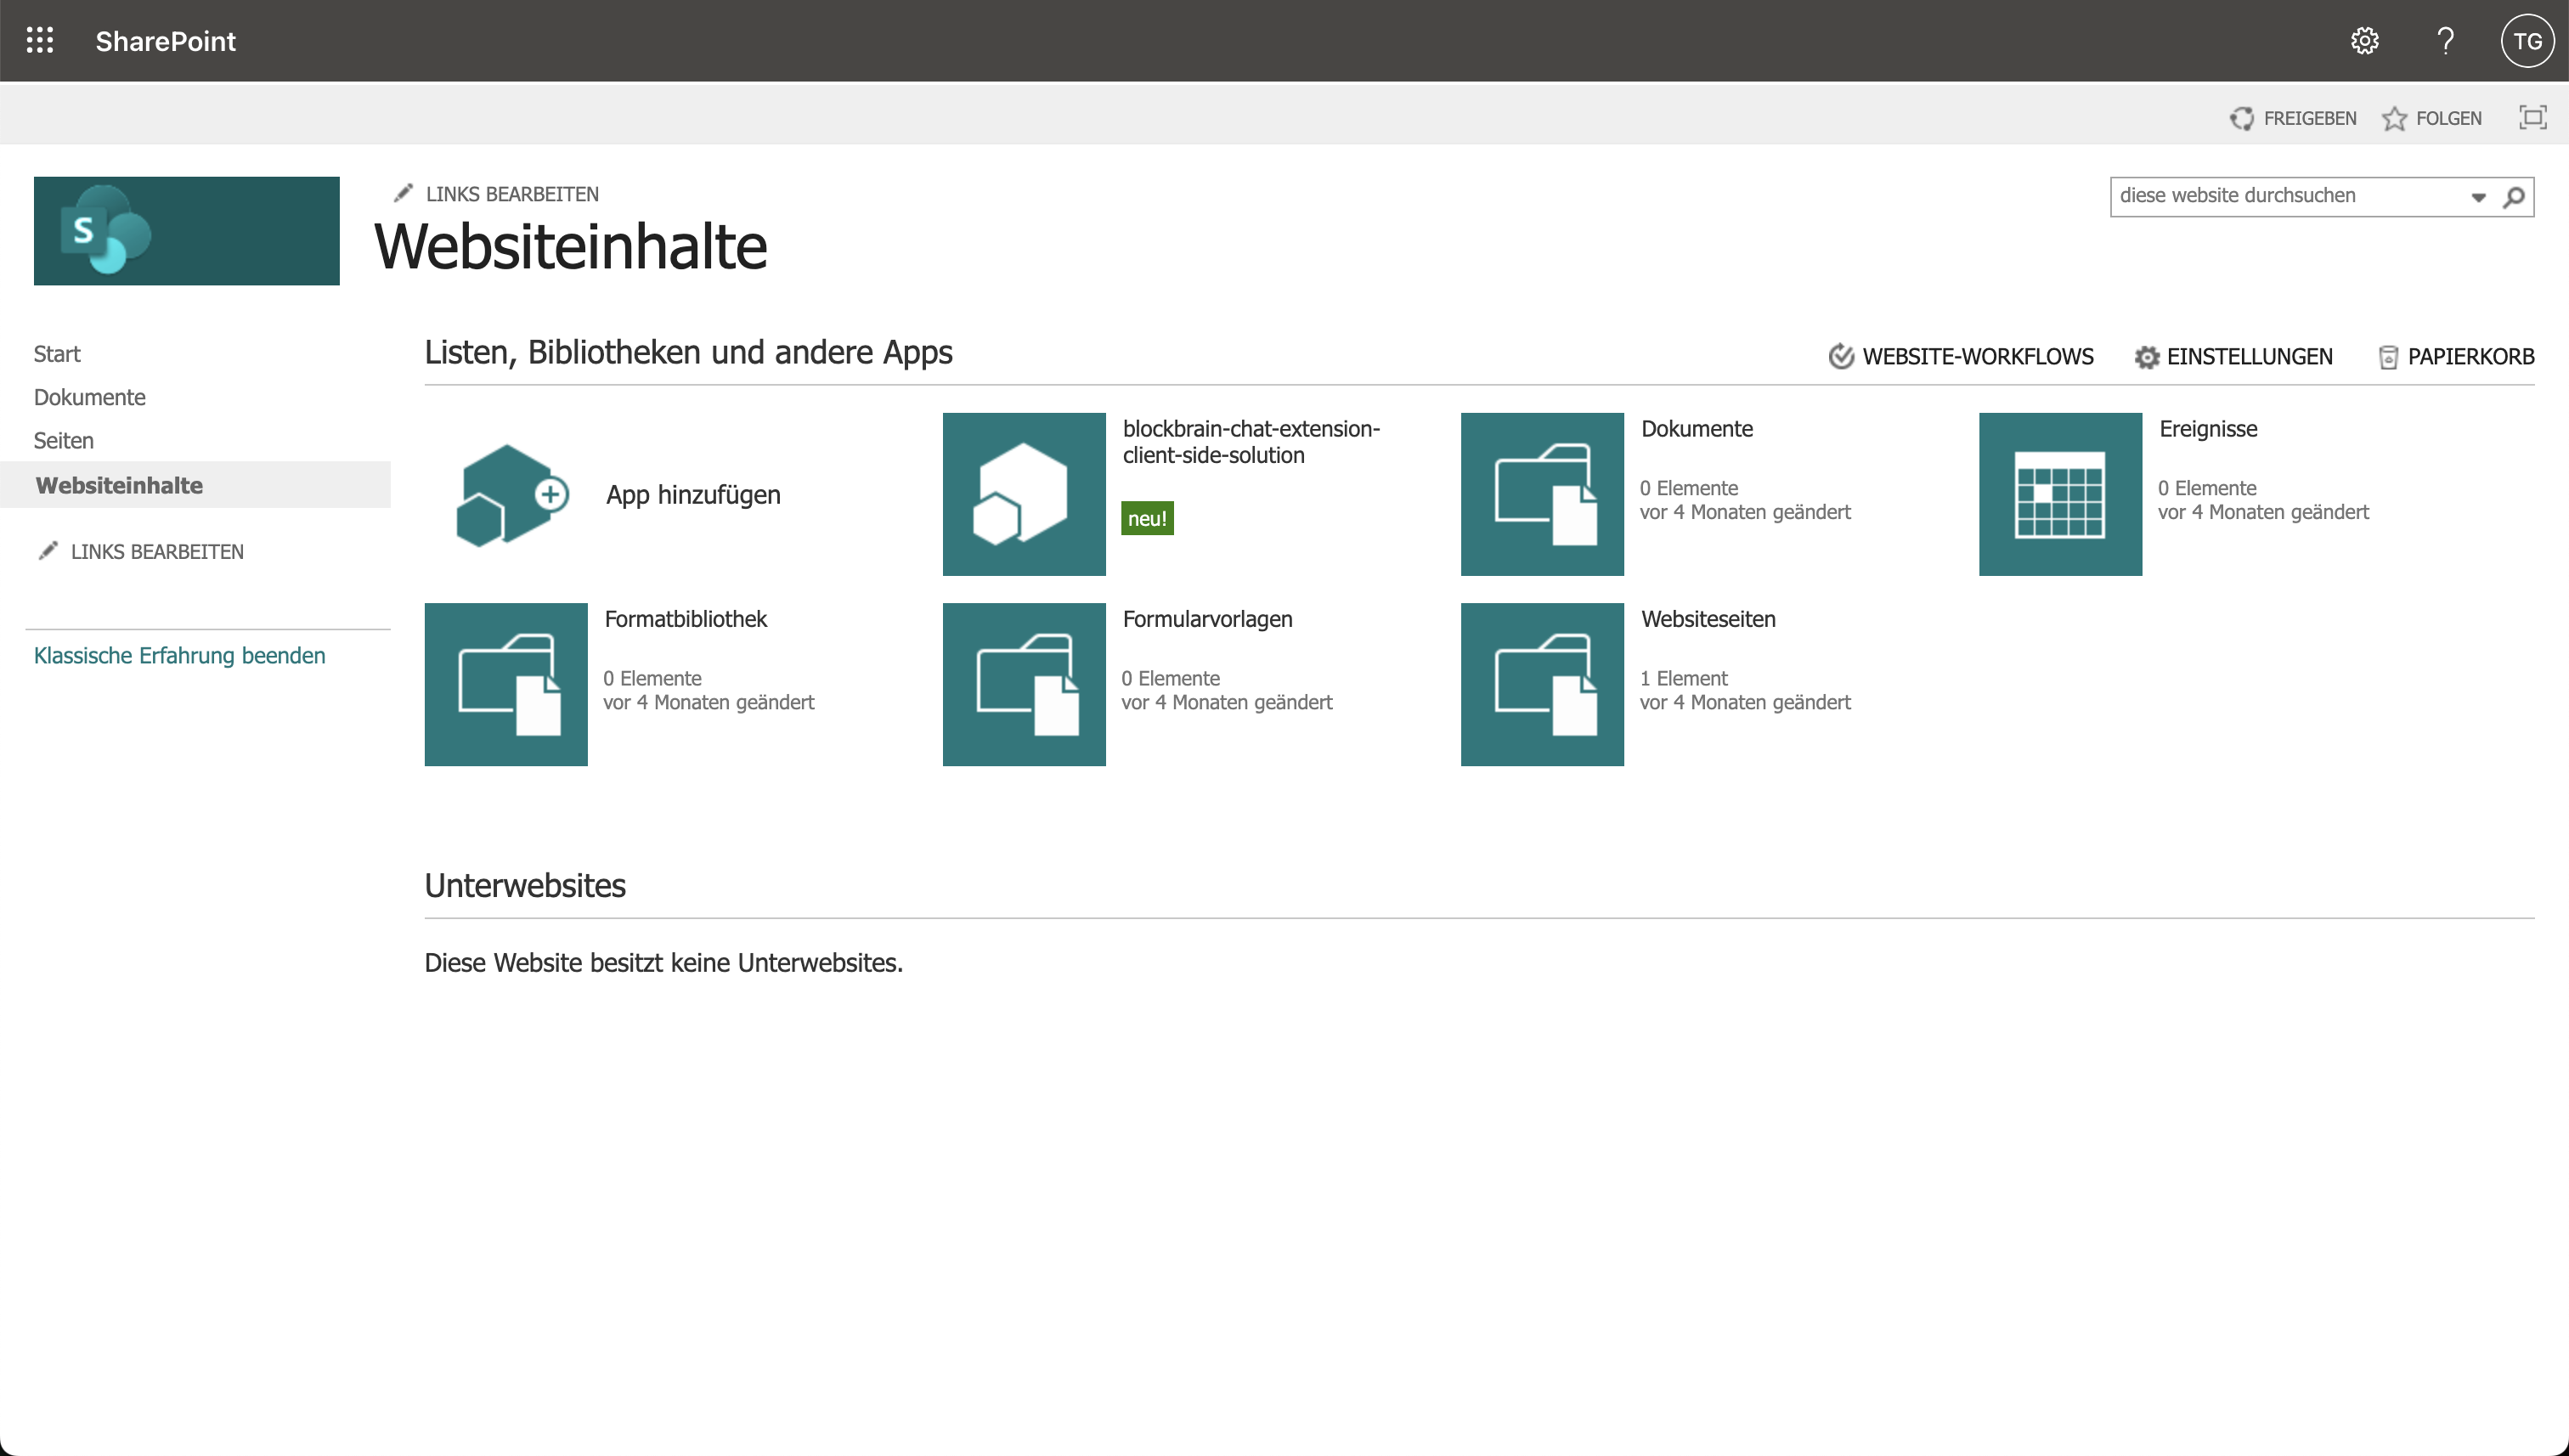
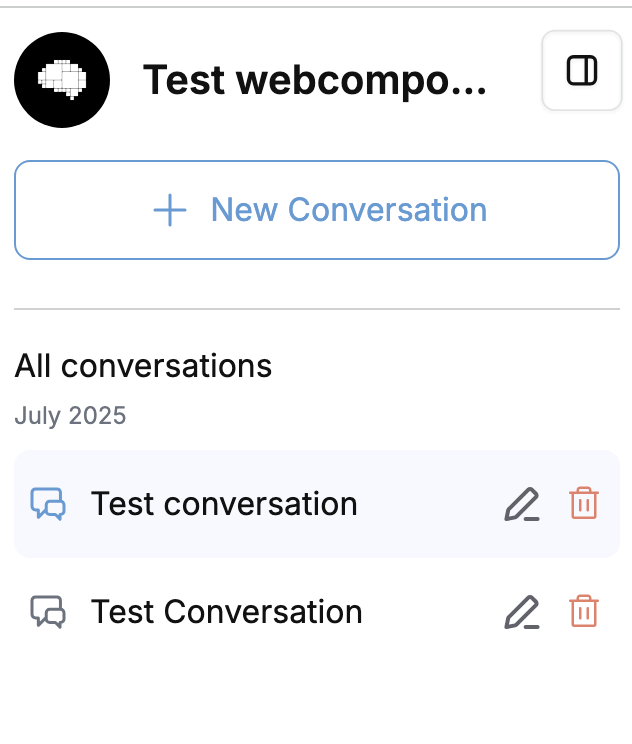



.png?alt=media&token=5a0c69f9-5c4e-459b-adff-0aee6fe48d6f)
.png?alt=media&token=267d16c7-9eab-45e4-a61b-f0ee922f77f5)